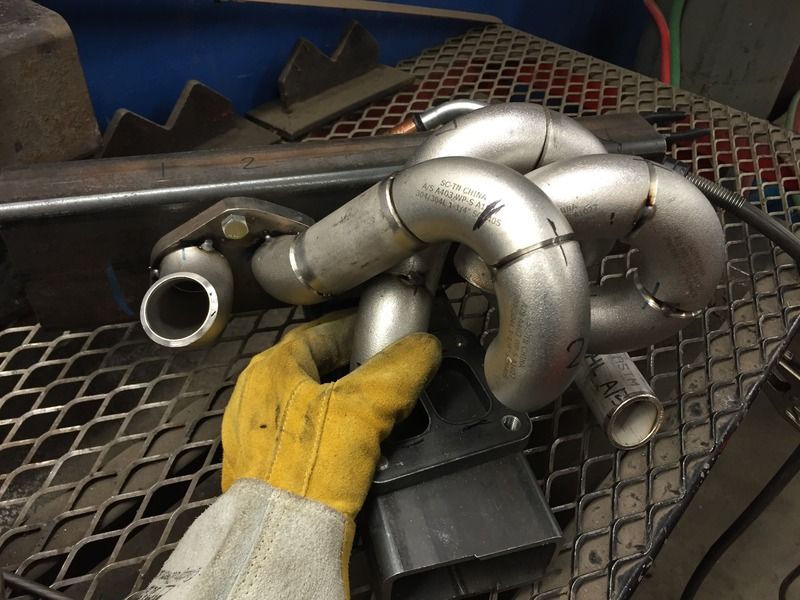
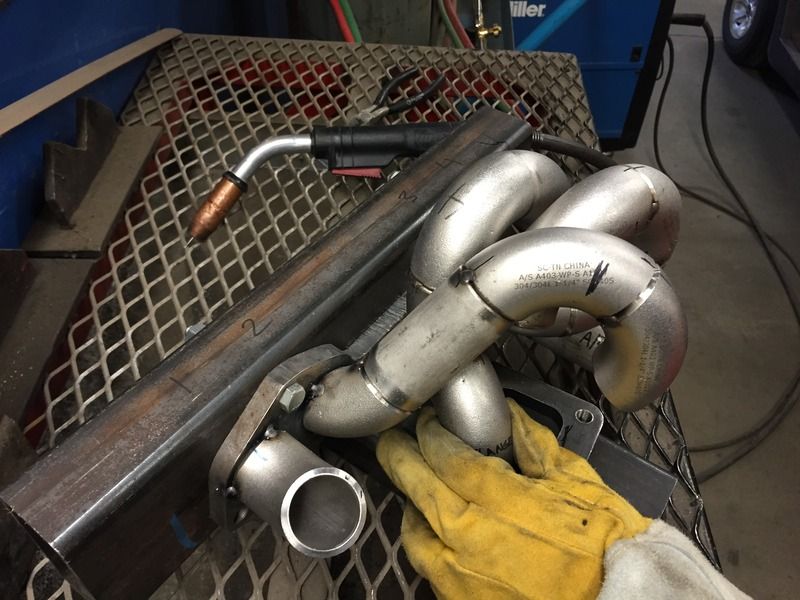
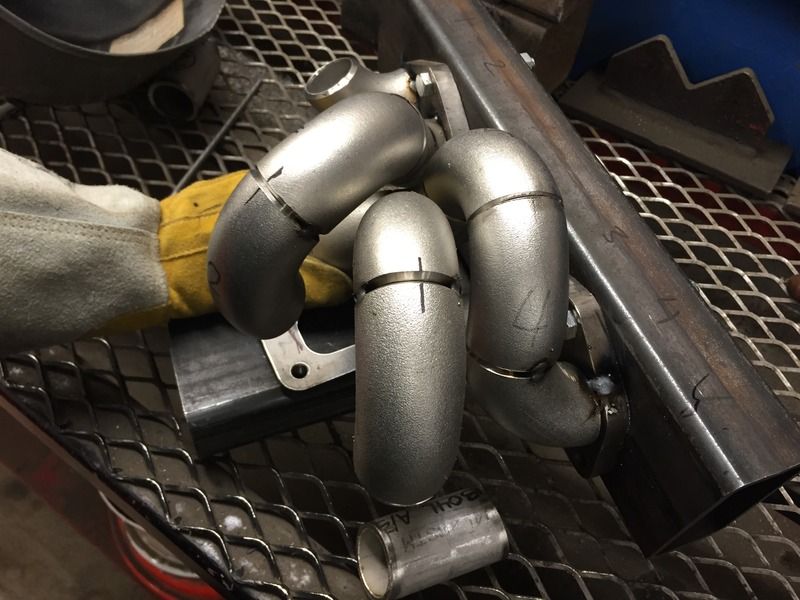
As I said, #4 was bugging me. I went to shorten it, but then I had an epiphany.
Instead of fighting the F2's unequal port spacing, why not just roll with it? I need to get #4 over #3 somehow, and I have a big gap between 3 and 2...
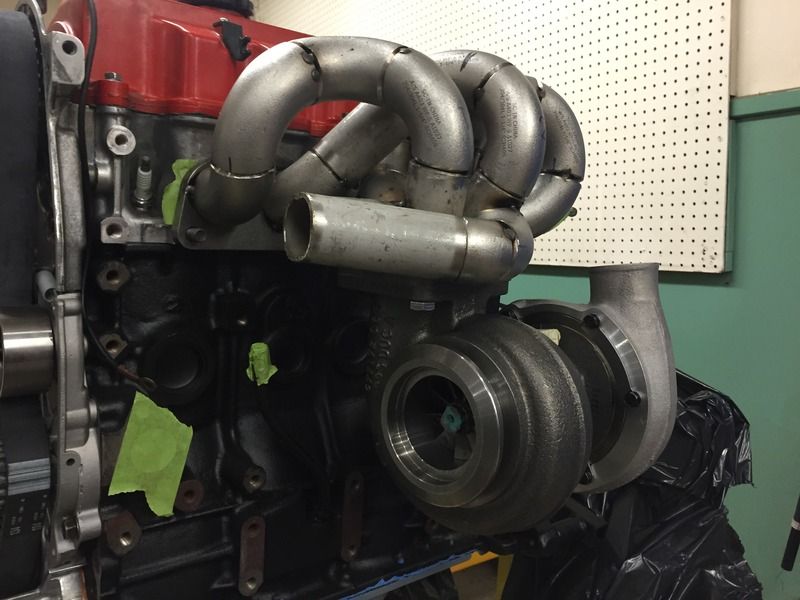
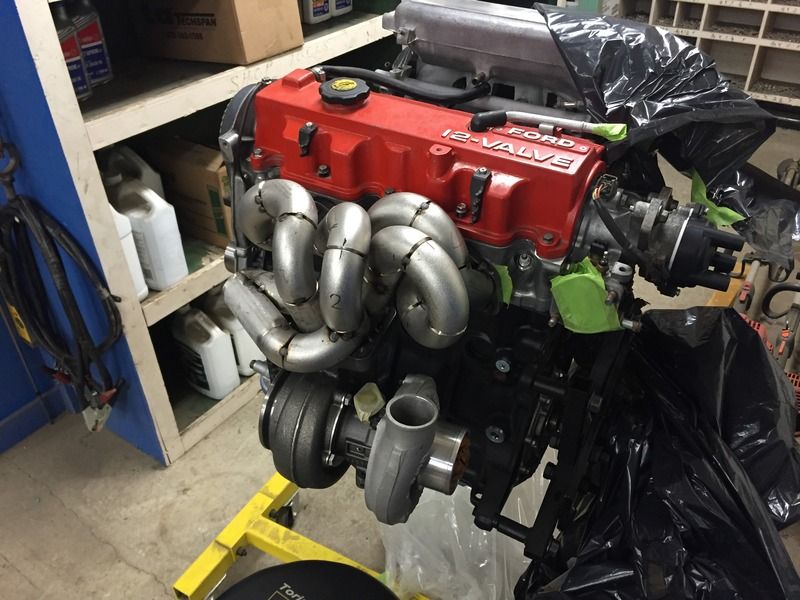
More spaghetti is always the answer. This design gives me a shorter runner, more hood clearance, and a much better angle in to the collector.
![]()
Looks like enough wall thickness to do away with any worries about it cracking. You could probably jack up the car using that header! ![]()
![]()
Snuck out to the shop for a few hours today.
Got #1 built, cut all the pieces to form the collectors, and got the 2-3 collector tacked together.
The idea behind building #1 the way that I did was that:
A) I have a nice space directly left of the collectors to put the wastegate, making wastegate piping very short/easy to build.
B) I keep the entire setup very compact so I have all the room in the world to play with for the DP and charge piping snaking through there.
Obligatory pictures:
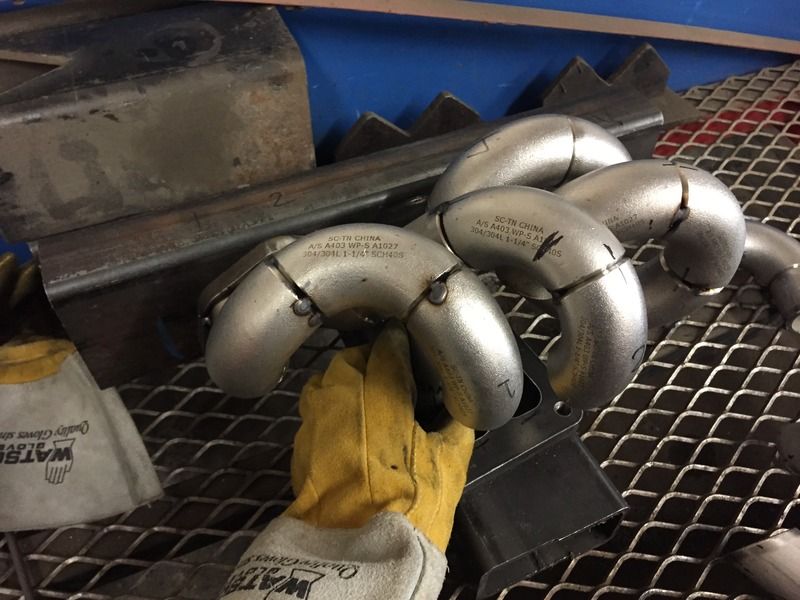
Cutting the collectors the most GRM way possible:
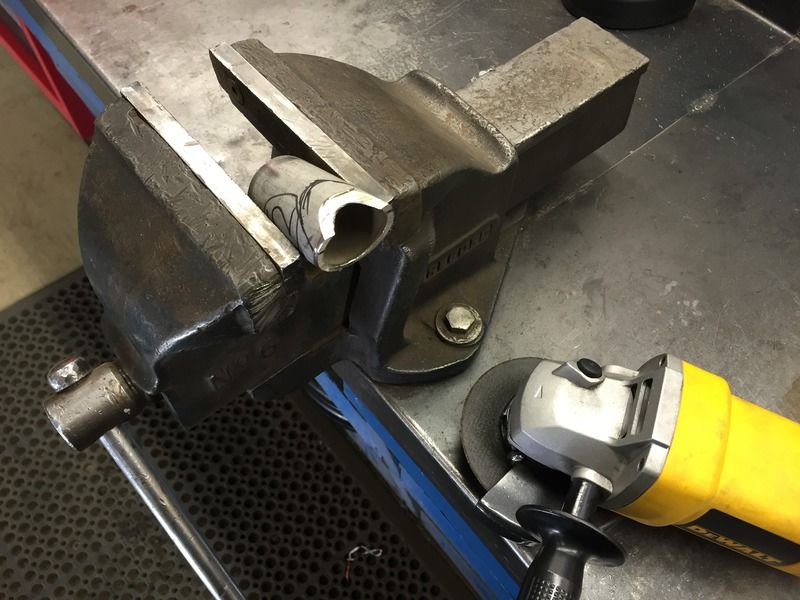
Wastegate goes roughly here:
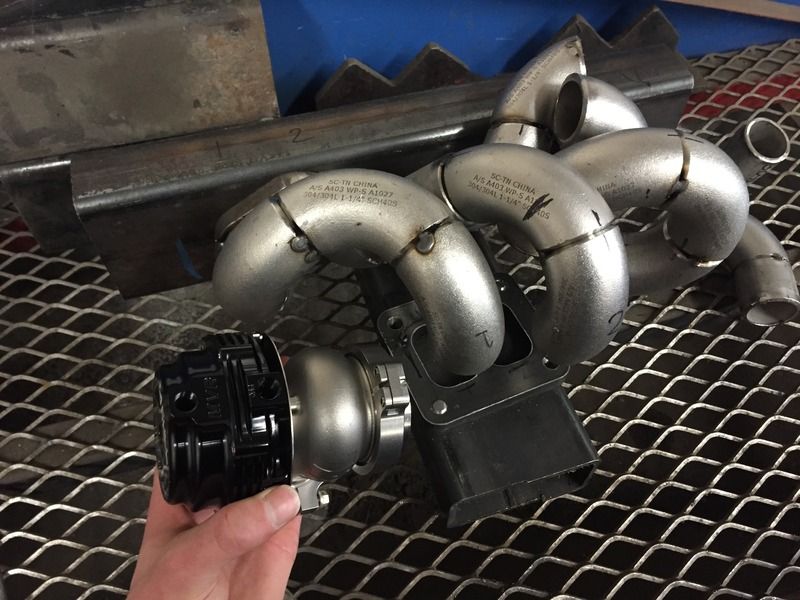
Glamour shot:
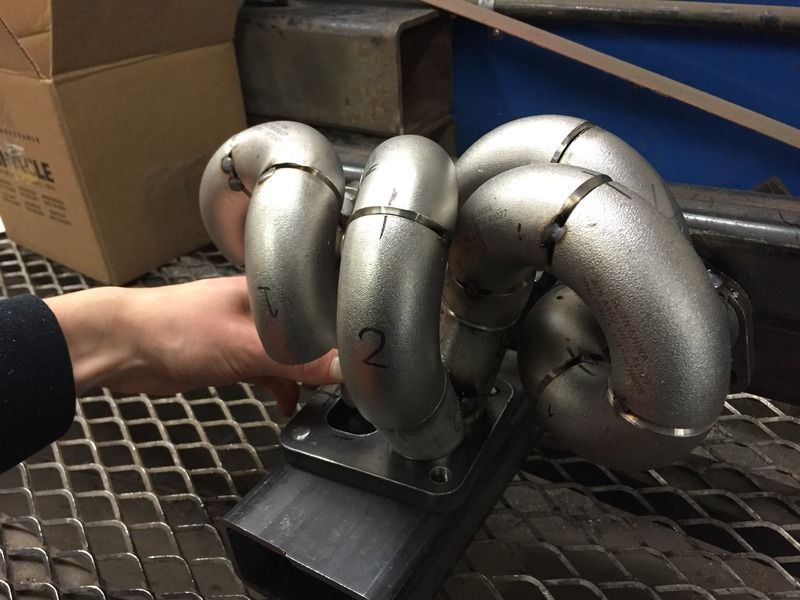
Should get it finished in the next few days.
How are you planning to pick up both sides for the wastegate with twin scroll? My buddy is just wrapping up a year-long adventure in building a twin scroll for his SAAB. Lots of great reading here: SAABRally
Note: his build is an engineering exercise and is about gathering data - lots of overkill and excess in there, but amazing to follow along.
Mezzanine wrote: How are you planning to pick up both sides for the wastegate with twin scroll? My buddy is just wrapping up a year-long adventure in building a twin scroll for his SAAB. Lots of great reading here: SAABRally Note: his build is an engineering exercise and is about gathering data - lots of overkill and excess in there, but amazing to follow along.
Wastegate details on the above thread happen on pages 13-15, if you want to cut to the chase.
Yeah, the cost of a build skyrockets when you have to have the best of everything. I do sympathize with him, though. I would have loved to build a manifold like that, but the cost to reward ratio on that kind of put me off. Some really nice work in that thread.
Think of the manifold as having two separate two cylinder collectors. You take off of each for a wastegate, but then join the two to a single flange for a single wastegate. Ideally leaving them separate for as long as possible, as well as including a divider in the collector to help keep the pulses from destructively interfering with each other.
Yes, the two pairs aren't 100% separate, but I don't have to try to synchronize two wastegates, I don't have to try to package two wastegates, I don't have to worry about getting both wastegates plumbed back in to the DP, and I save some weight with this method. For me, the advantages outweighed the disadvantages.
Finished tacking the manifold together, forgot the WG flange at home, and I still have to build a divider for the WG plumbing, but that's boring. This is the last big picture update until the manifold is fully welded together.
I threw it all on the engine to make sure I didn't have any clearance issues, and for once everything was exactly where I wanted it to be.
Eye candy:
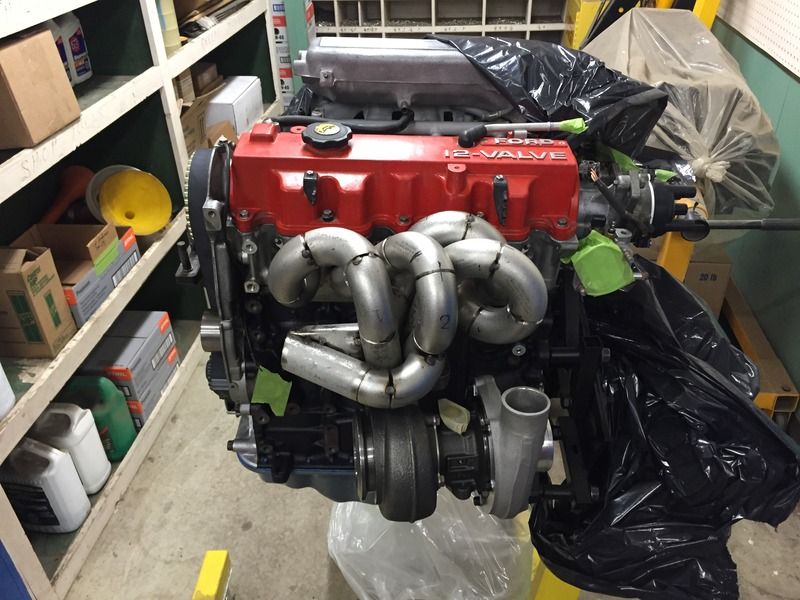
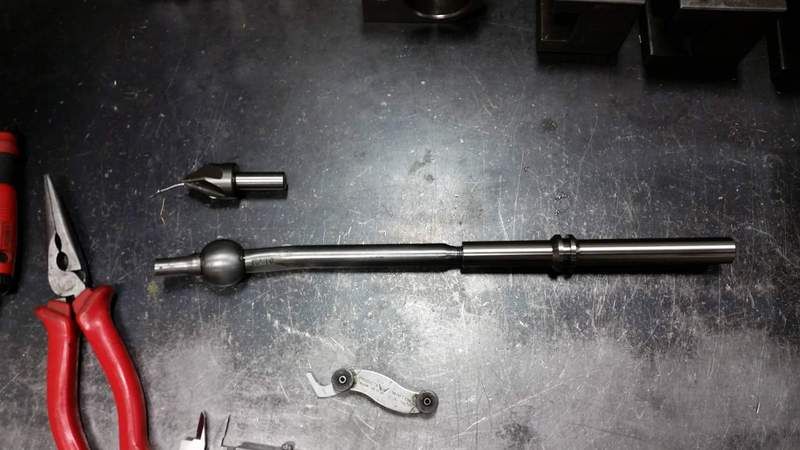
Also started on a shifter project, but more on that later.
Oh hey, another Albertan! I haven't run at Fort Macleod (mostly Westerner nowadays) but I really should. Great fab skills here.
ssswitch wrote: Oh hey, another Albertan! I haven't run at Fort Macleod (mostly Westerner nowadays) but I really should. Great fab skills here.
Fort Macleod is worth the drive. Wide and fast. Reminds me of the Namao events we used to run in Edmonton, but with the landing lights still in place.
Westerner is a little rough for my liking. Have you run at Penhold? I'm going to try to run a more complete WCMA calendar next year, so I'll probably be in Red Deer a few times.
In reply to twopointwo:
I miss Namao a lot, so maybe Fort Macleod is the answer. I only went to Namao for the RX7 club fun-run events though.
No Penhold yet, haven't done a lot of the RDSCC events at all.
Long overdue, being that it's now the middle of winter, but here's my best run from Nationals. The "walloms" or "eyebrows" were a fun course element, and really slowed down the Japanese hoon-wagons.
Sounds good and mean, at least through my phone. ![]()
I drove an F2T car for about 17 years, and I always liked the way it sounded. Some people don't agree though.
I'm trying to get off my ass and put my turbo 626 back together.
Alright. Long time, No update. School has been kicking my ass. Summer job didn't exactly pay great, so the progress on the car wasn't what I had hoped, but I took the opportunity to clean up a bunch of small things and make the car more presentable as a whole.
Did the usual alignment experimentation throughout the year, ended up with the current setup in the front maxed out on camber and caster, so some changes will need to be made in the future.
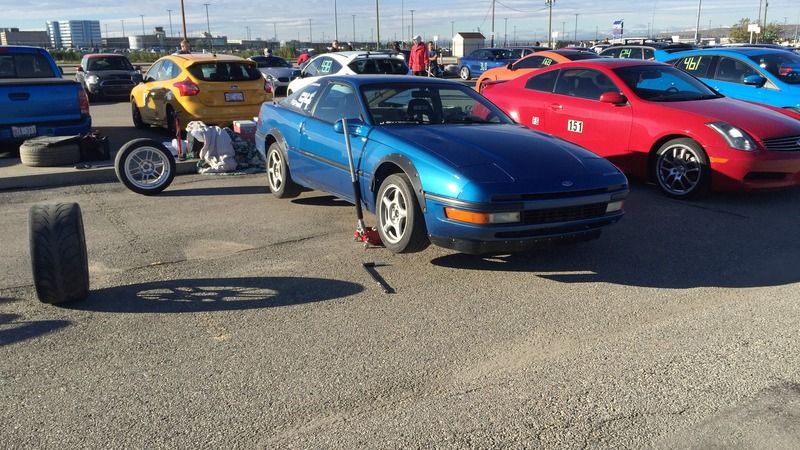
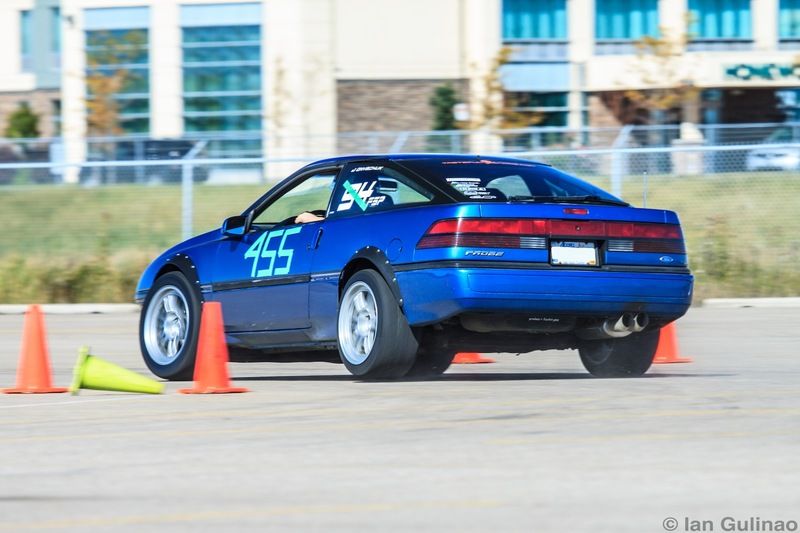
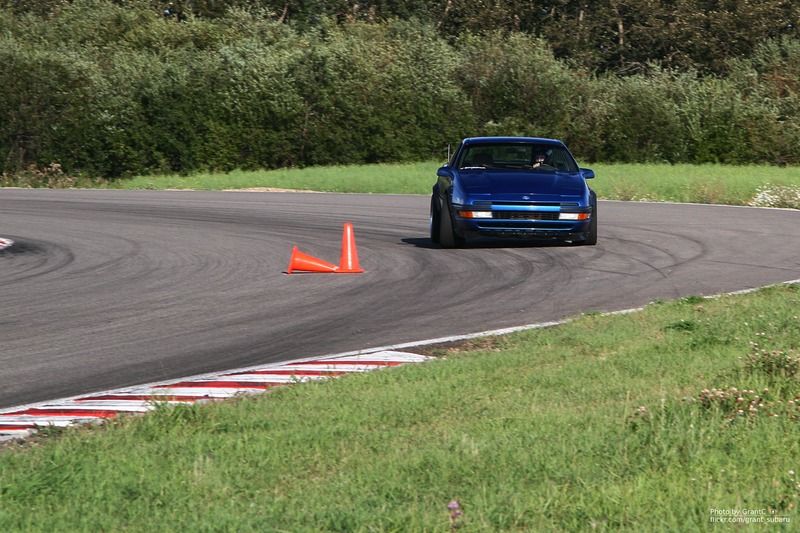
Ran my first Solo I event with the car, ended up second overall ad just hundredths off first. More of that for sure next year. Ran the usual autocross schedule as well. Did decently, but I couldn't keep the car away from cones this year.
Obligatory pic dump from the summer:




With the semester ending and Christmas coming up, I get some time off to finally further the engine project. I'll be pulling the old engine and trans in the next few weeks, and this thread will finally see meaningful updates again.
Alright, so following in the tradition of sporadic mega-updates, I'm back for the 2018 edition.
2017 was interesting. I didn't actually pull the engine last christmas, so I spent another year with double digit whp numbers. Regardless, the car evolved a bit. I was forced (after 273,000km) to finally replace the original clutch, so I threw in an aluminum flywheel that had been sitting on my shelf for years as well. I also opted to try out Carbotech XP8s all around, and I was not diasppointed. Tons of braking power with great release. Yes, they're loud when cold, but they heat up quick enough for autocross duty and I never experienced any fade in 20 minute lapping sessions. I'm sold.
I ran a lot of lapping events and beat the car pretty hard. Multiple events had ambient temperatures hovering around 30 celsius and saw multiple other cars with cooling issues. I never had any mechanical issues aside from a leaking axle seal post clutch replacement. The GD platform may not be the most performance-optimized starting point, but it sure is durable.
As we all know, photobucket has decided to do what they've done. I'll work on getting the important stuff re-hosted. Now, on to the exciting stuff.
The old, tired 273,000km F2 is coming out. No question this time. It has to happen. I had some shop space available to me for a few days where I had a lot more room to work than home, so I took advantage. I braved some winter roads on ZIIs and got the car there. Never before had the new engine and car been so close.
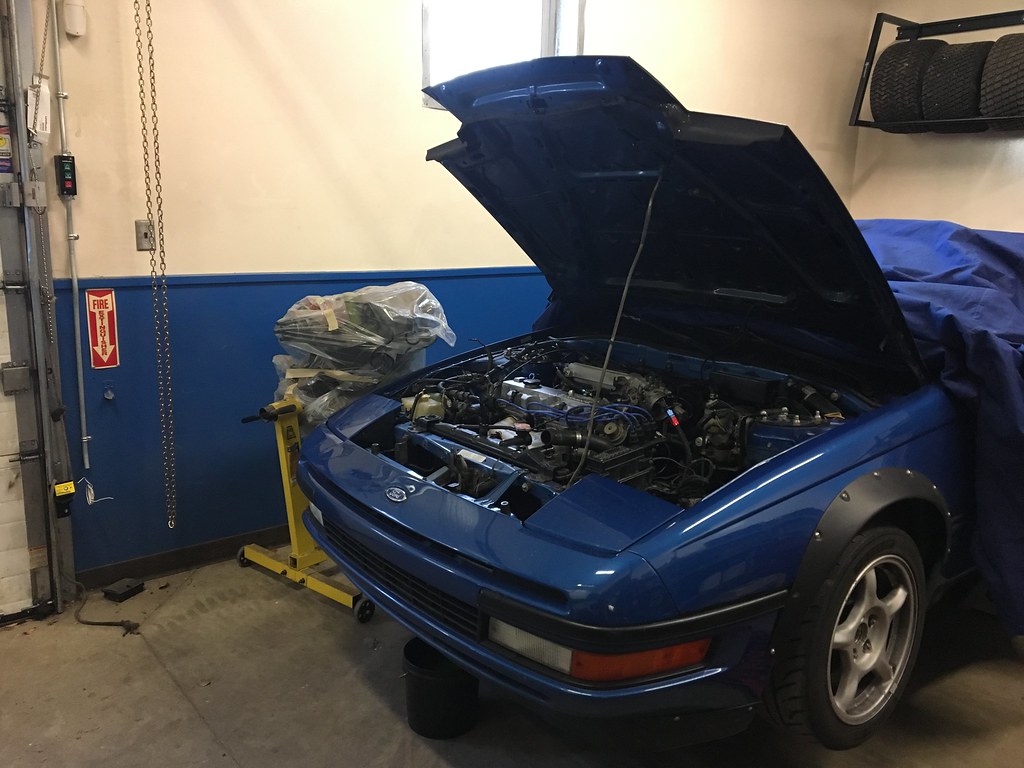
I spent the next day doing the usual boring process of removing all elctrical connections, fuel, powersteering, coolant, etc... which on an F2 really isn't a long list. There's very little going on in the way of electronics here. Then it was time for the fun part.
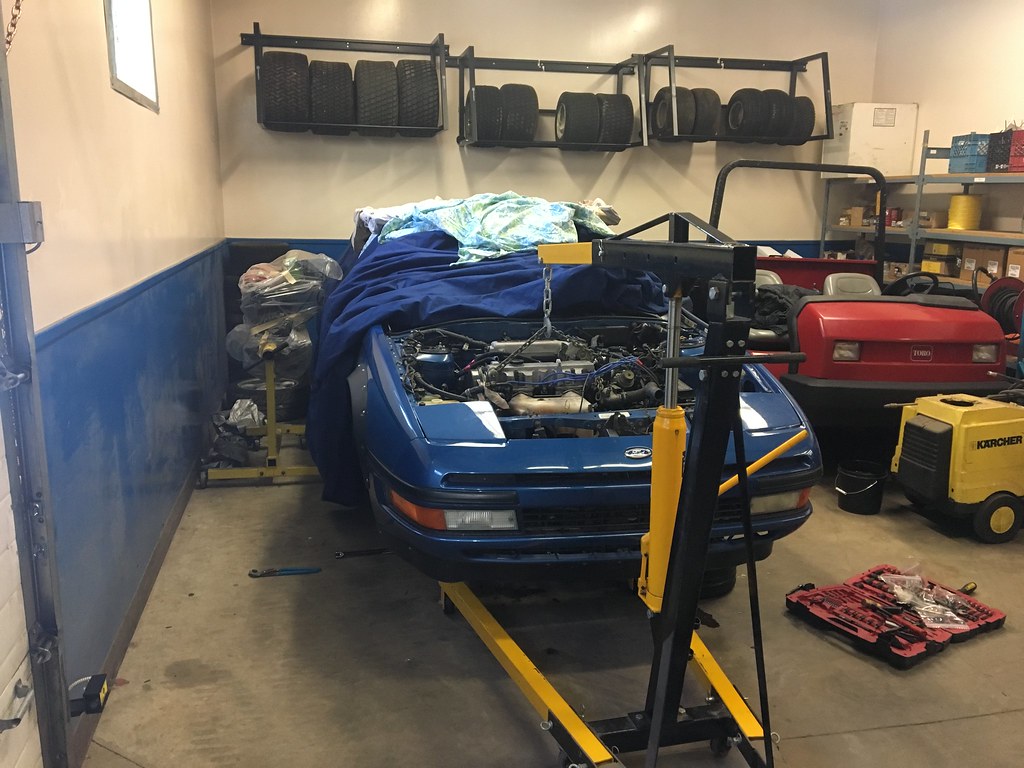
Removal went smoothly. ...for the first few inches. Then it occured to me that the exhaust was still connected. The exhaust on the car was very much in the vein of "good enough" and served its purpose well for the past 10+ years. However, there was no actual bolted connection in the system other than between the manifold and downpipe. Rather than wrestle with 20 years of corrosion and heat cycling, I chose the more GRM approach.
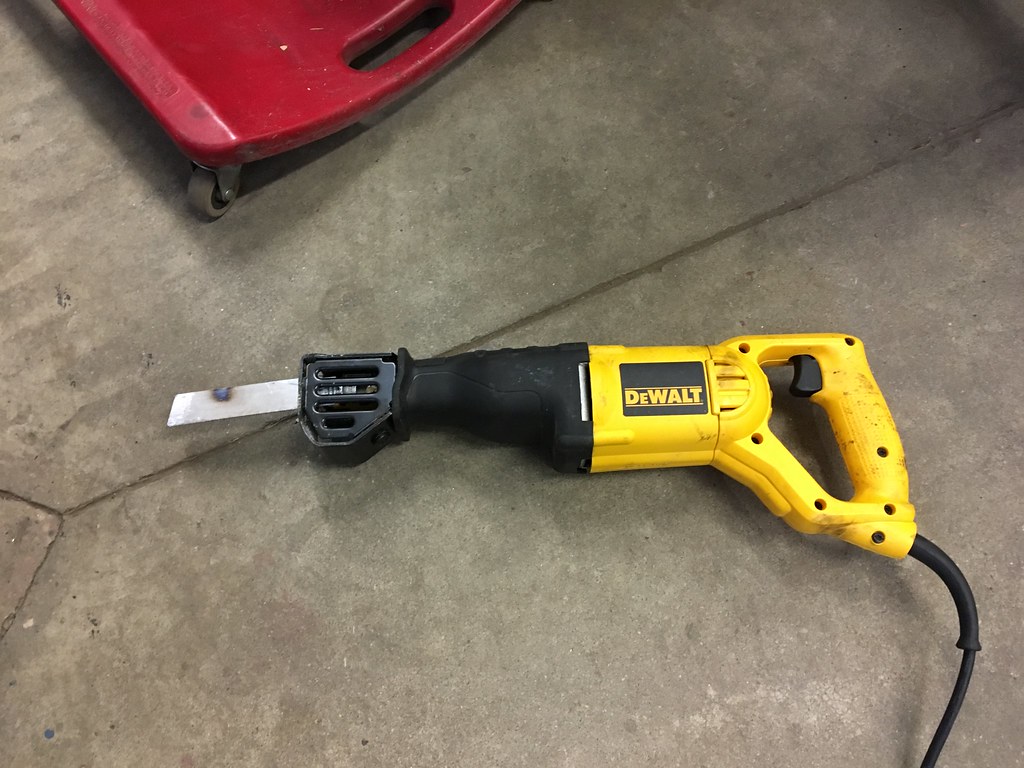
flash forward a few minutes from the sawzall action, and I had a complete F2 and G series transaxle on a pallet. A moment of silence for this engine. For as much oil as it burned and as 1980's truck engine-esque as it was, Im surprisingly sentimental about this thing.
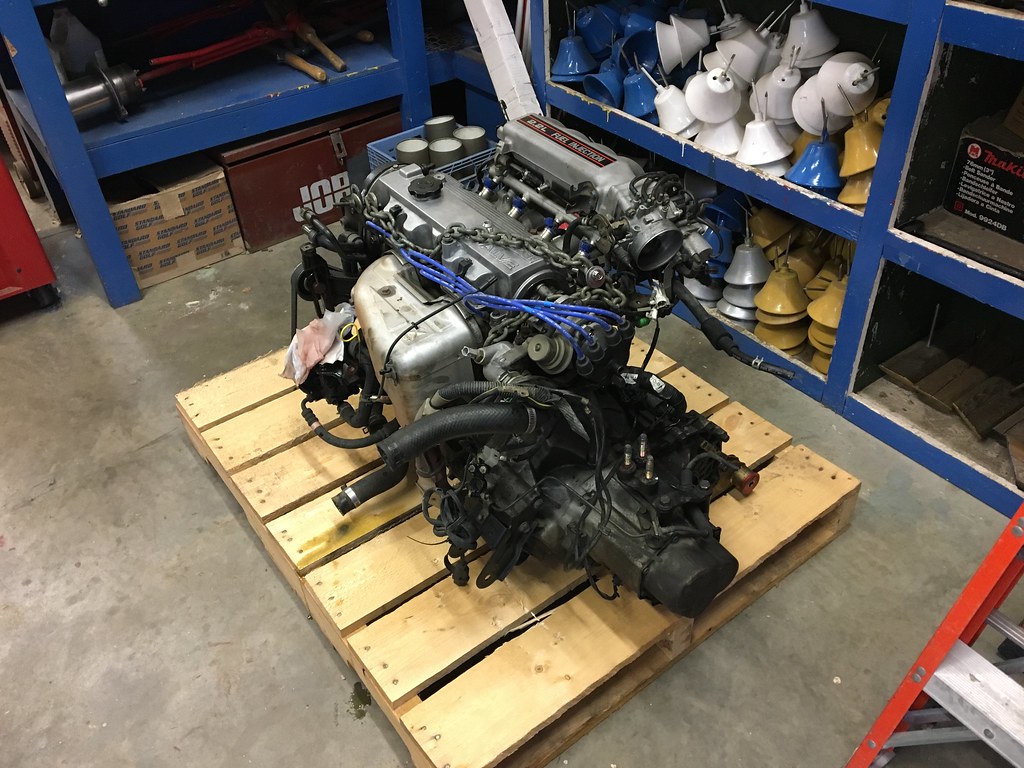
Now the real fun begins. I have my "race" F2T long block that needed some accessories before it could go in. That's an easy swap over and went smoothly aside from the trans. "gusset" requiring washers between it and the block now that I'm no longer using the intake manifold brace.
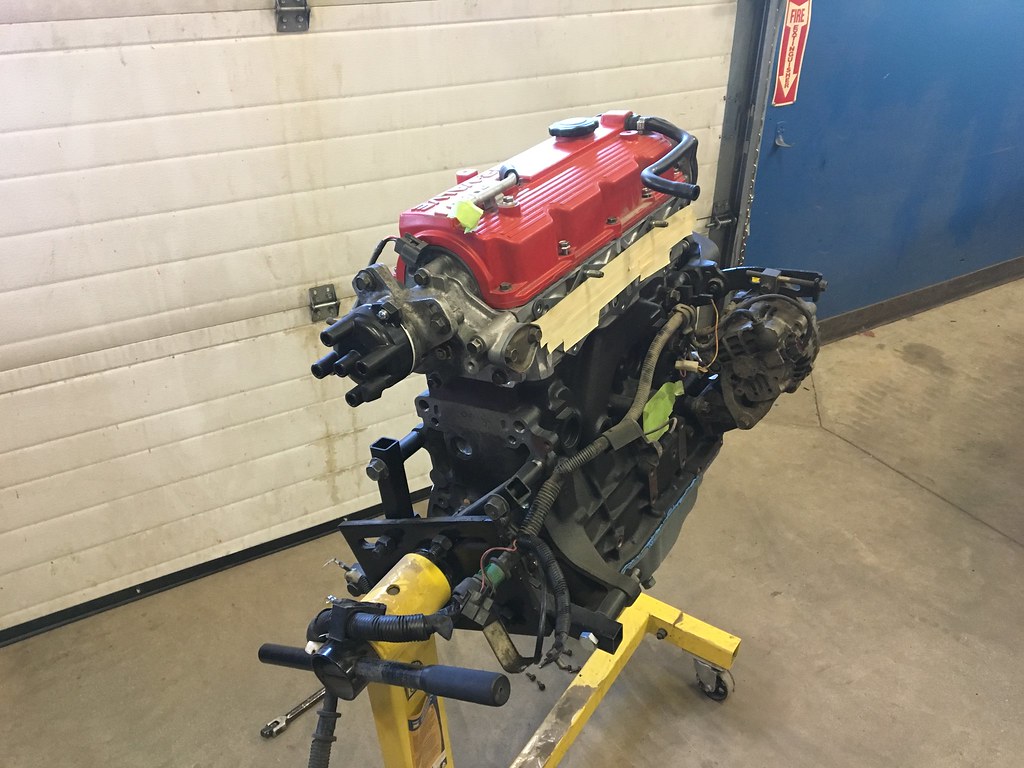
Now, Fidanza. You'd think a reputable company with years of experience making flywheels could get their QC/manufacturing together enough to not ship flywheels with an inner bore that's a few thousandths too small, but alas... Installing the flywheel was a delicate balance of swinging a deadblow very hard and then trying to evenly seat it once the bolts would thread in. I thought using an off the shelf and simple clutch setup would help avoid problems like this, but that was naive. Some aluminum shavings later, the flywheel and clutch were on.
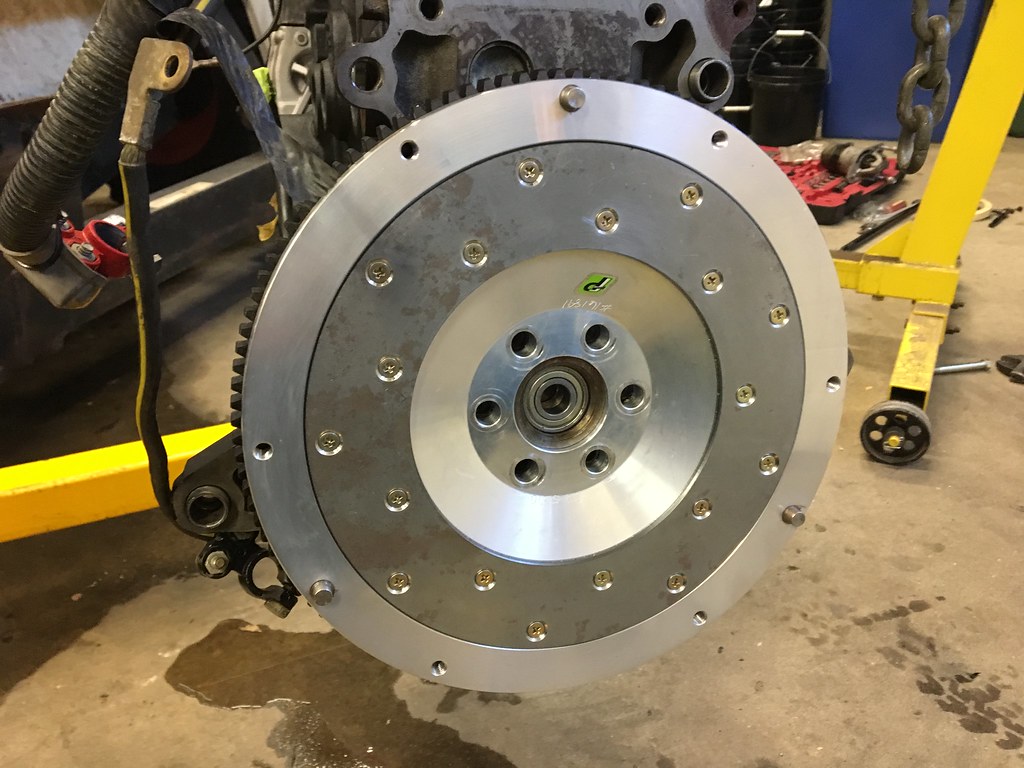
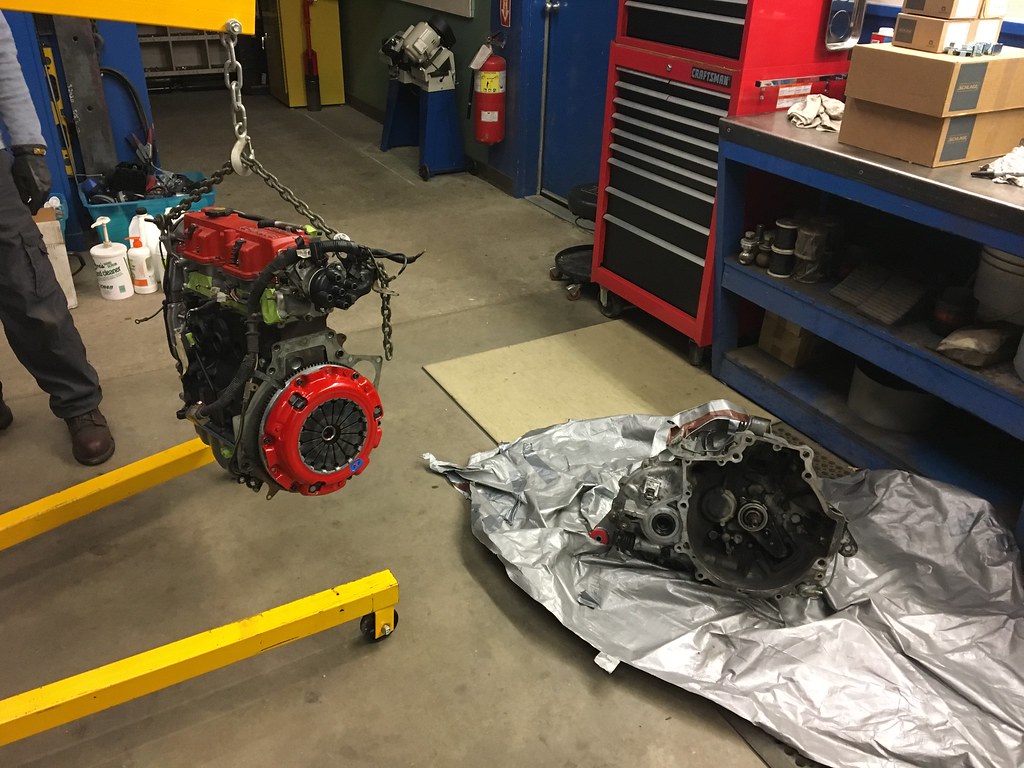
Bonus points for me refusing to install the Exedy branded and China sourced pilot bearing. After some other experiences with Chinese bearings, I'm staying far away from them in applications that require hours of work to access. I got some weird looks at Napa for asking for country of origin on bearings and then asking to see them all, but they had a Japanese made Koyo bearing for $4. Worth it.
The clutch is a South Bend stage 3 endurance disc and pressure plate. I grabbed the disc off of Ben (Swank Force One on here) years ago, and then drove all the way down to indianapolis this summer to pick up 3 different H series transaxles and a whole bunch of other F2T/GD misc. That trip will be another post. Thanks Ben! I then managed to get the transmission installed first try in about 5 minutes. There are miracles all around us. This particular box has an Mfactory helical LSD in it. I also have 2 other GT H types and one from the LX for that juicy final drive when I'm motivated enough to swap it over.
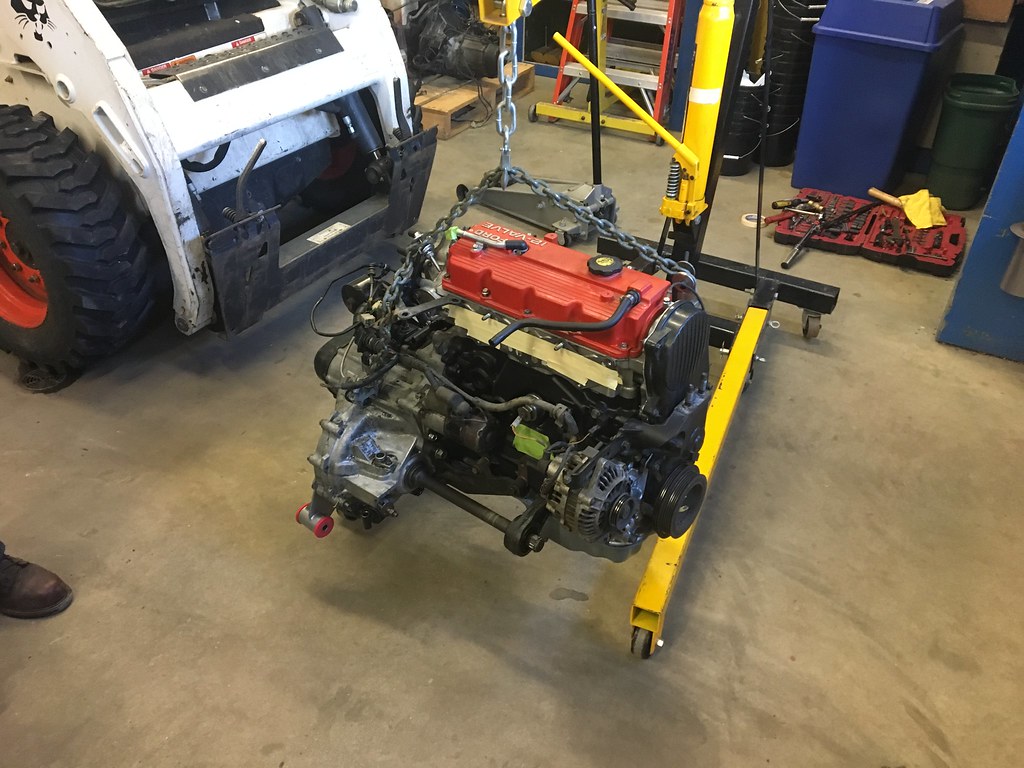
The observant will notice that I have the trans mount on backwards at this point. That was eventually corrected once I determined there was no berkeleying way it would fit.
Nothing really left to do now but drop it in. This was by far the easiest engine install I've ever been a part of. There's s o m u c h s p a c e under the hood on these.
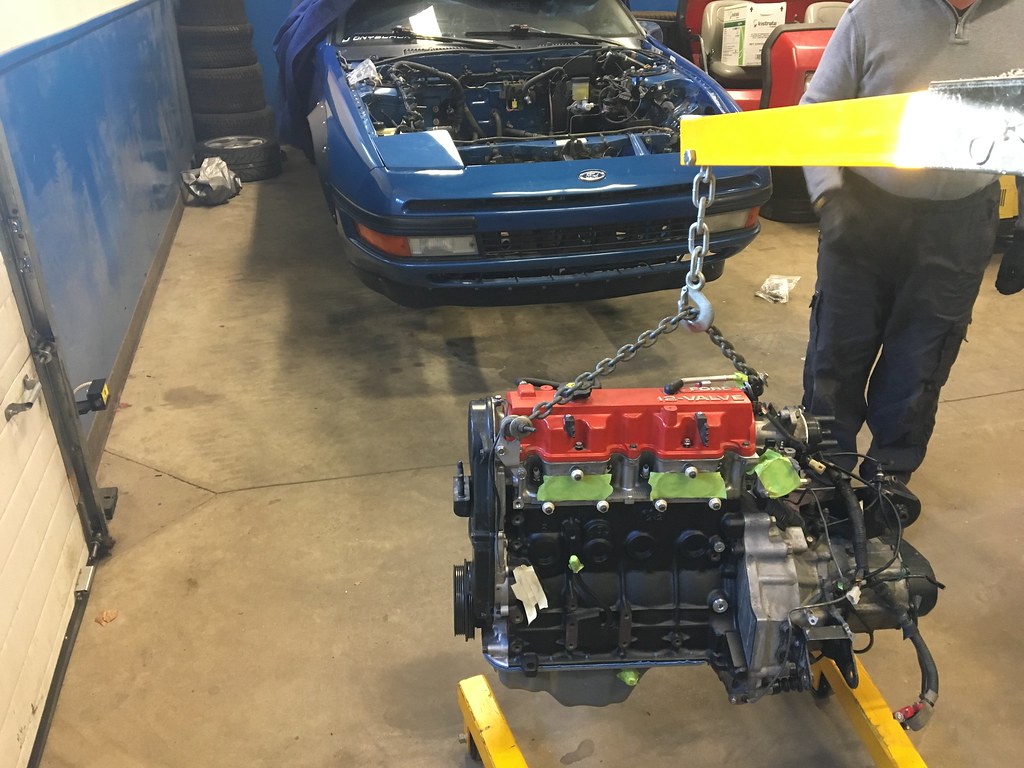
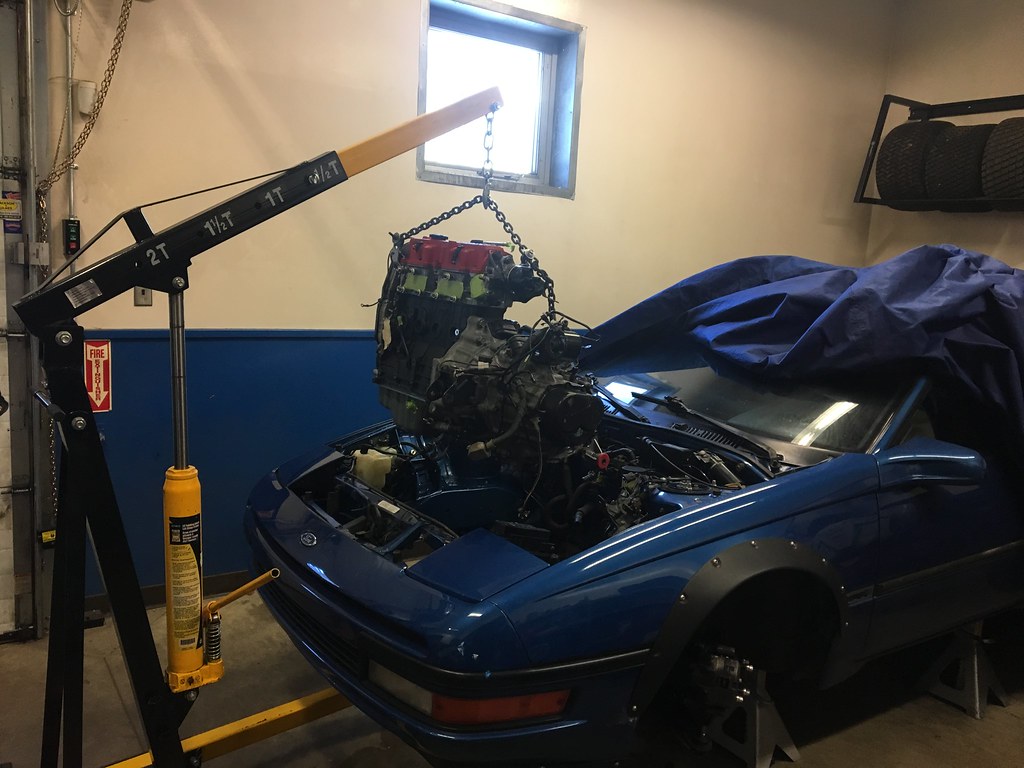
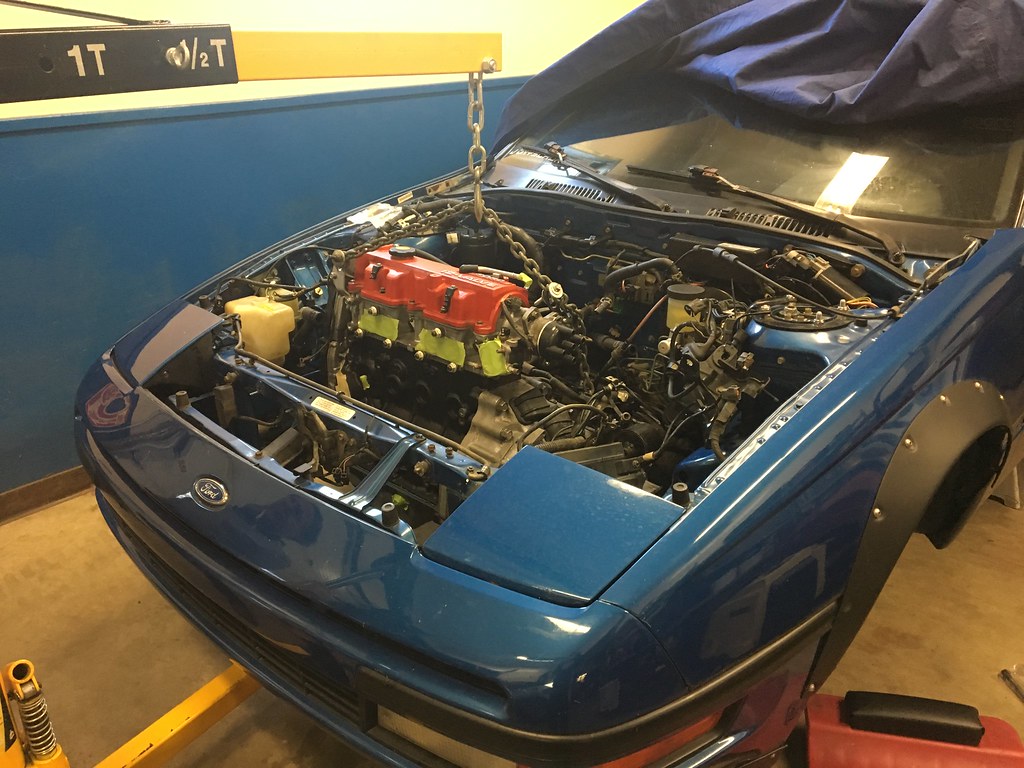
...and that's where it sits. The engine is in. The car is coming home tomorrow. I grabbed a Syncrowave 200 off of friend for a great price recently, so I now have TIG abilities in my own garage. Stay tuned for some sexy stainless fab work over the next few weeks.
Awesome! I hate photobucket. +1 for avoiding the chinese bearings, we do the same at work. Looking for the non-chinese one can save the hassle of redoing it later after finding the non chinese one when the chinese one fails...
Excellent build. I had an MX6 turbo but the previous owner did so much butchery I ran out of money to fix it. Miss it so much.
Love the Blue. Great looking car. Where did you get those fender flares from? I really like the way they look
midniteson said:Love the Blue. Great looking car. Where did you get those fender flares from? I really like the way they look
$150 eBay specials. I then did a fair bit of trimming and general finishing work to get them to work for me. I want to do 1 piece carbon fenders wth box flares eventually, but I’m pretty content with these for now.
Hopefully I’ll have a real update tomorrow. The car Is home now, but I spent the day picking up some tools off of Kijiji and didn’t get any real work done on the car itself.
As I said previously, the car is home in the heated comfort of my own garage. I was able to find a fellow racer with some free time and a trailer that allowed the car to be easily loaded backwards, so the move was much lower stress than I had anticipated. Obligatory low-light images:
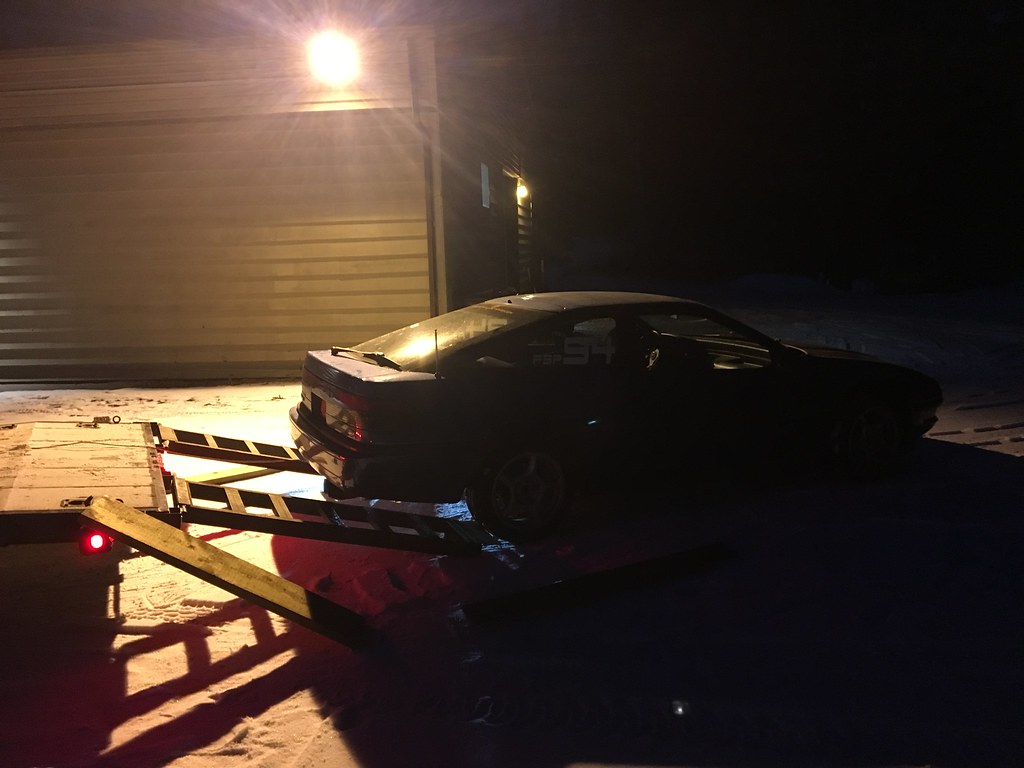
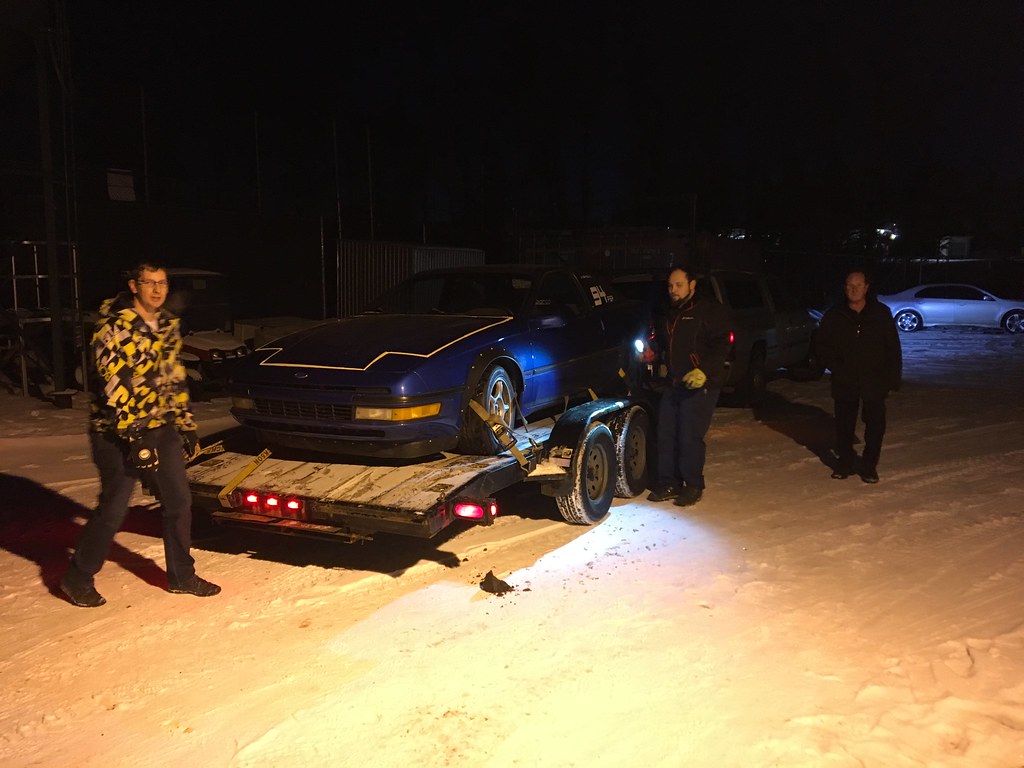
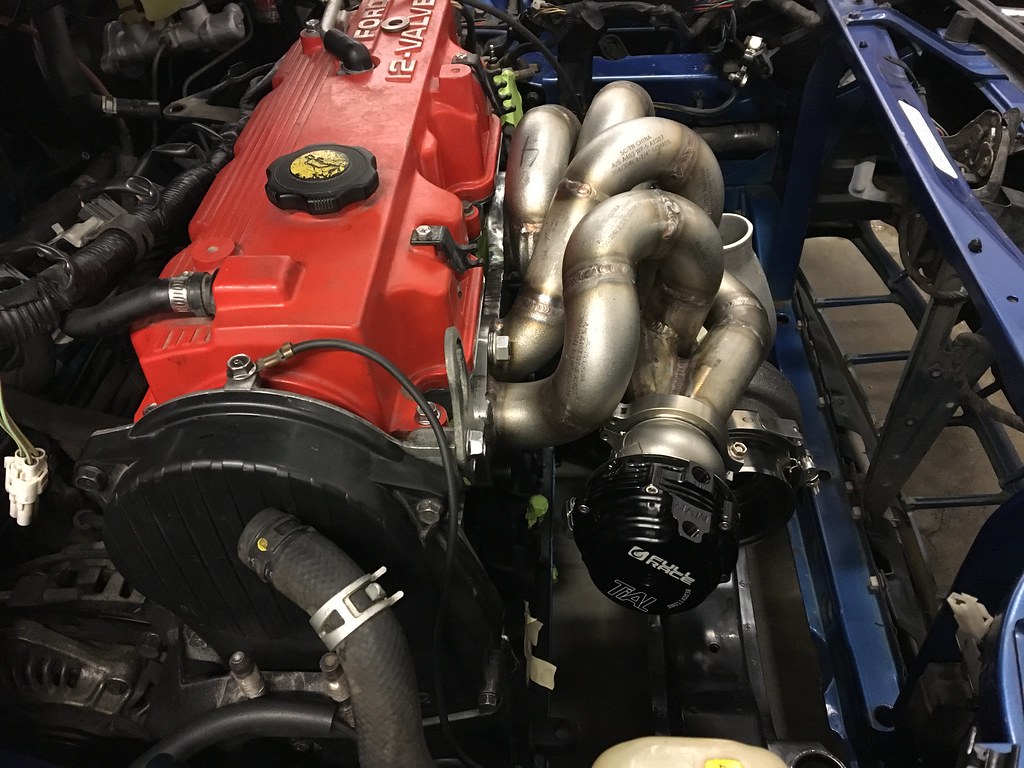
With the car home, I could what any logical person would do next. Bolt on the shiny new exhaust manifold so I could finally see the car with a turbo. I could also start mocking up the down pipe, but more on that later.
 Untitled by James Onyschuk, on Flickr
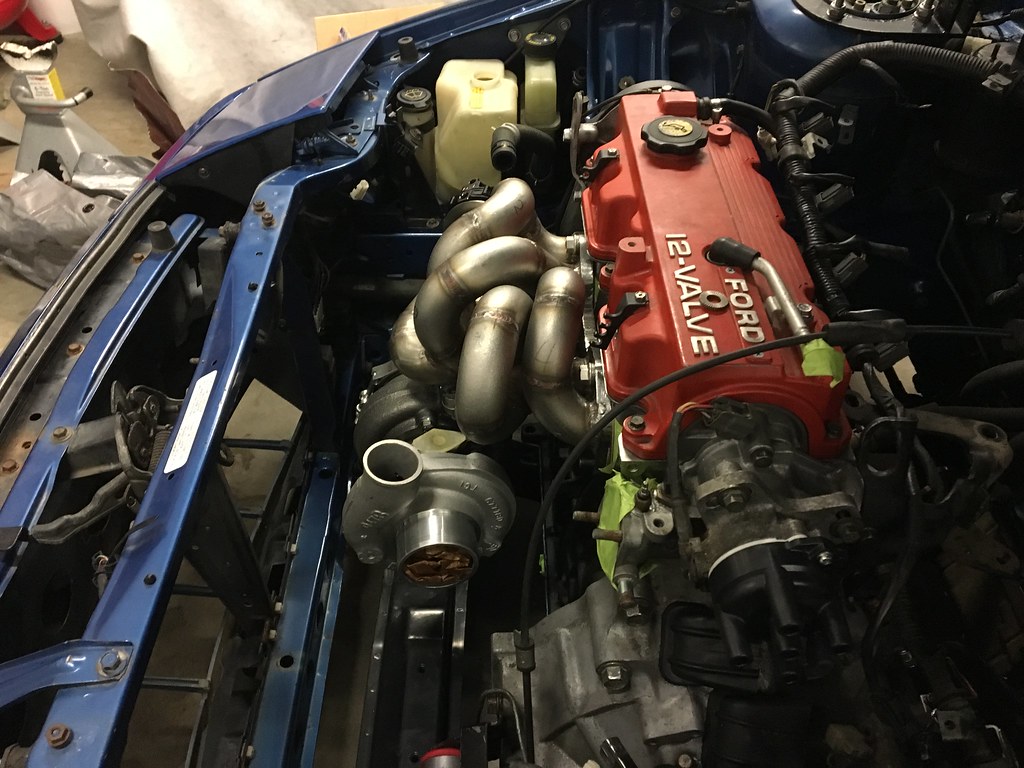 Untitled by James Onyschuk, on Flickr
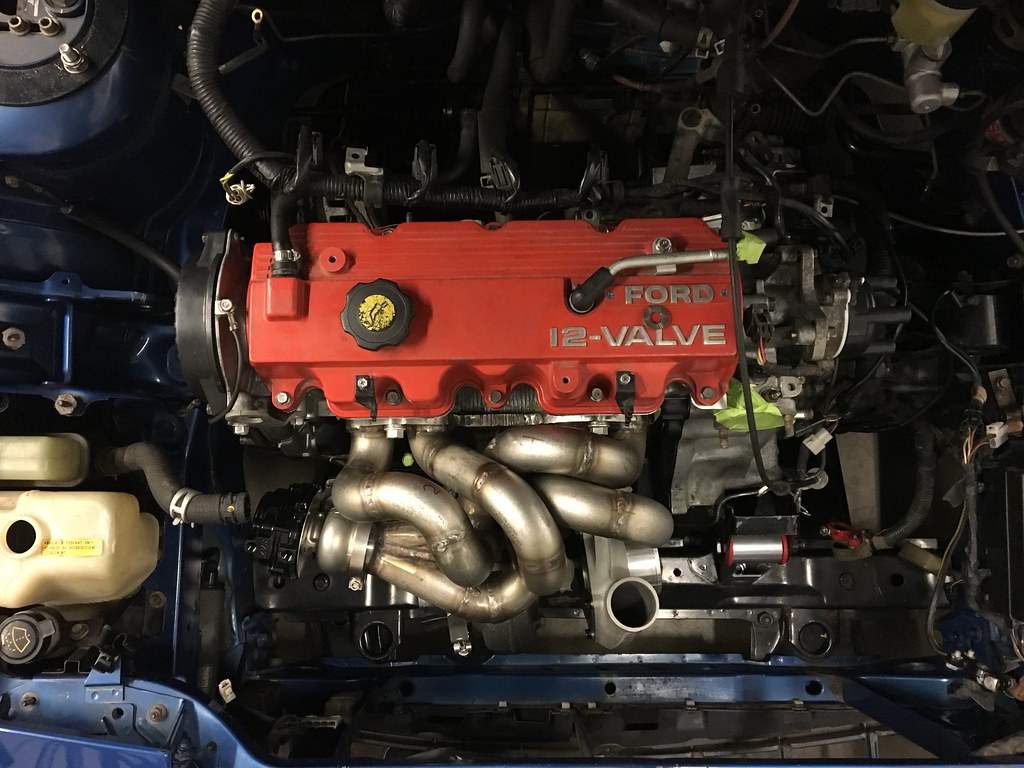 Untitled by James Onyschuk, on Flickr
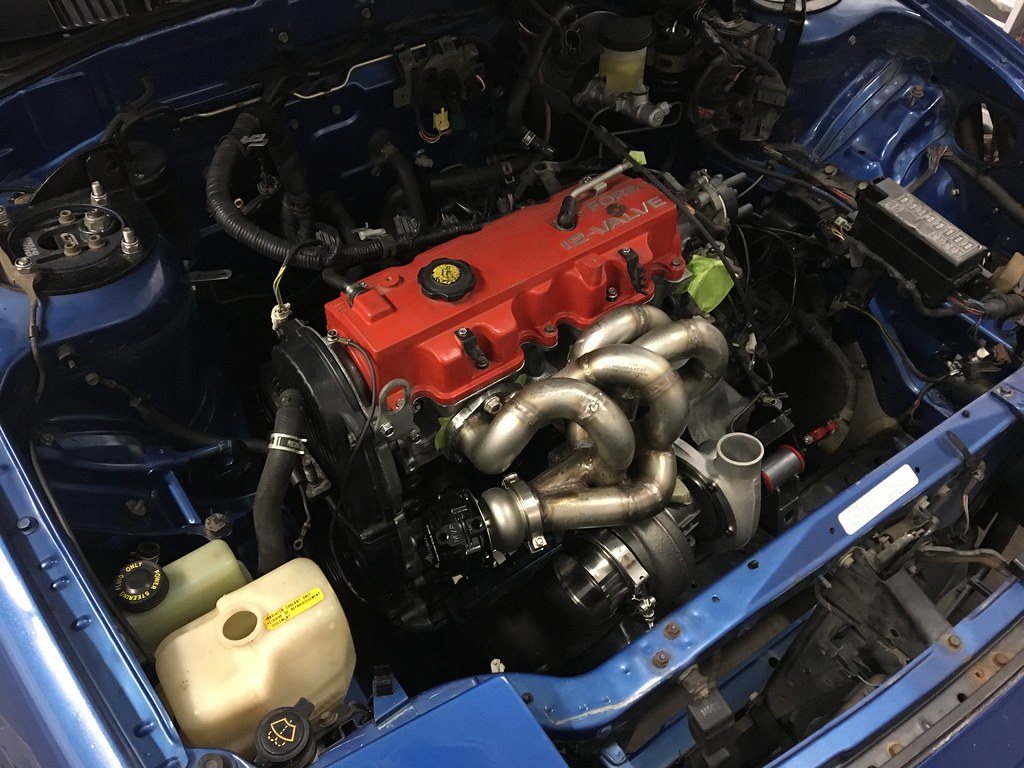 Untitled by James Onyschuk, on Flickr
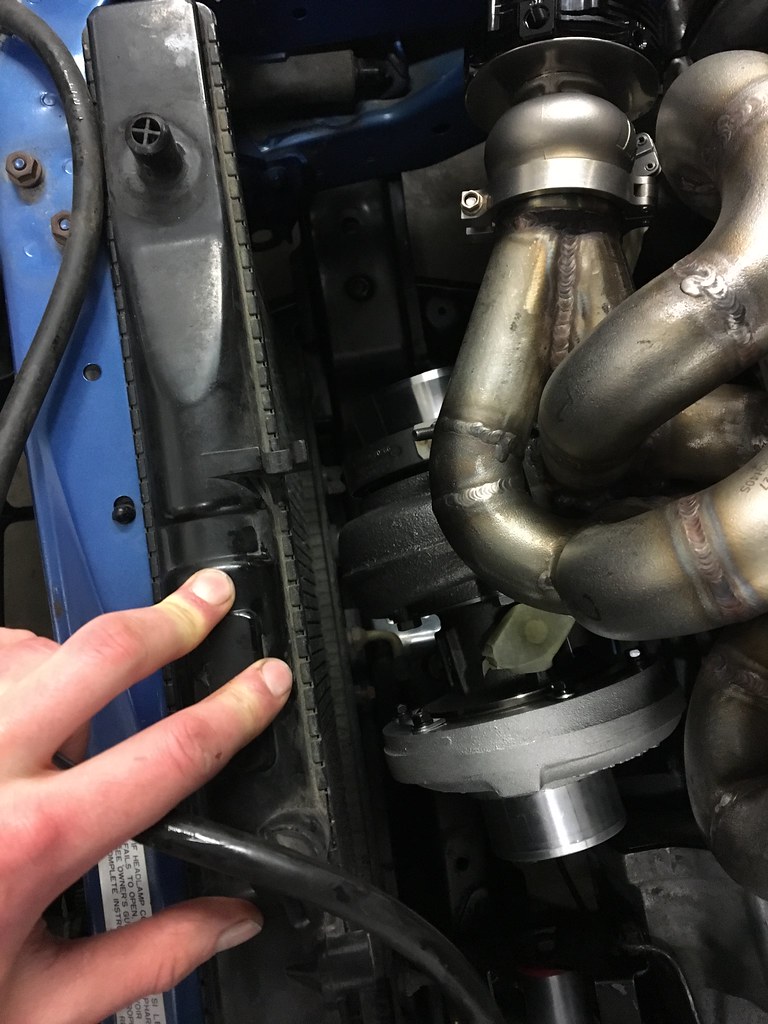
No way in hell the radiator and cooling fan were both just going to slide back in.
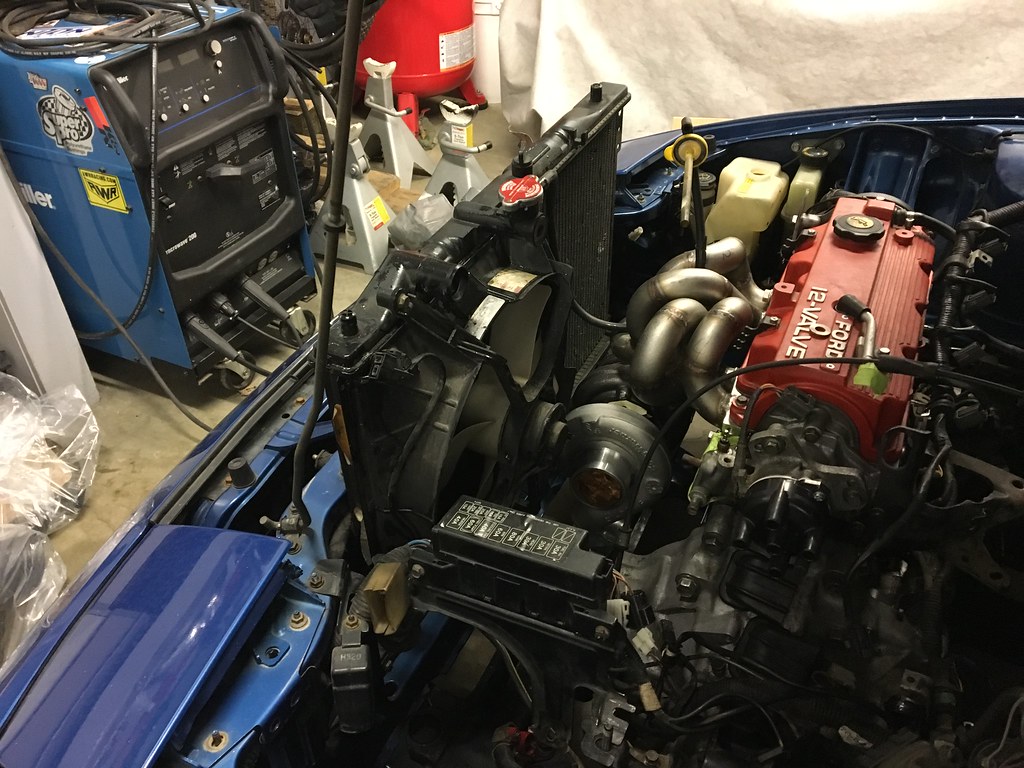 Untitled by James Onyschuk, on Flickr
With the fan removed, the radiator fits, but there isn't excessive clearance. No problem, I wasn't planning on using the stock radiator or mounts, anyway.
 Untitled by James Onyschuk, on Flickr
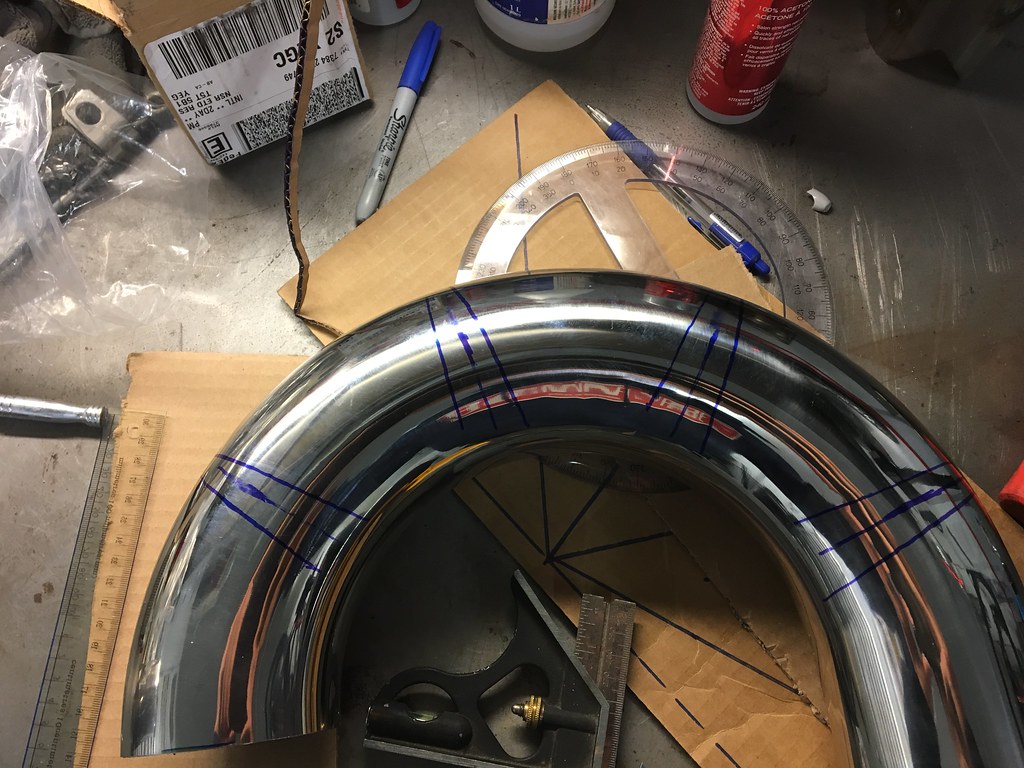
So... Remember that downpipe that I need to build? I decided that because I'd already gone all out on the twin scroll manifold, I may as well take advantage of the oddball flange on all S200/S300 exhaust housings, and run a 3.5" down pipe. The only thing is... The bends I bought aren't tight enough to make the required 180 exiting the turbo and not interfere with the subframe. I have to pie-cut an already bent piece of pipe. The engineering student in me proceeded to draw out the cuts, do a bunch of unnecessary math on what the effective radius would be depending on how I made the cuts, etc... but I'll spare you that. In the end, I just made a cardboard template to mark where the cuts would be radially, and a cardboard triangle to mark the "pie" portion.
 Untitled by James Onyschuk, on Flickr
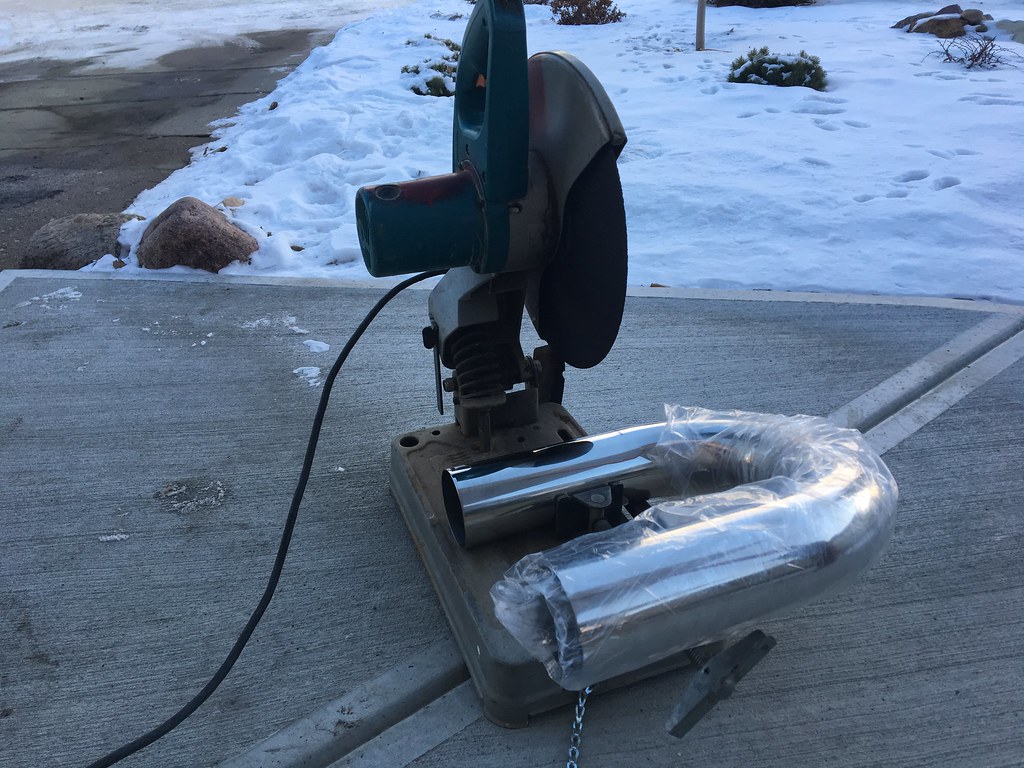
Y'all southerners have it easy. This is my view when I want to cut anything.
 Untitled by James Onyschuk, on Flickr
More to come tomorrow. I hope to actually get some welding done.
...and the fab train rolls on!
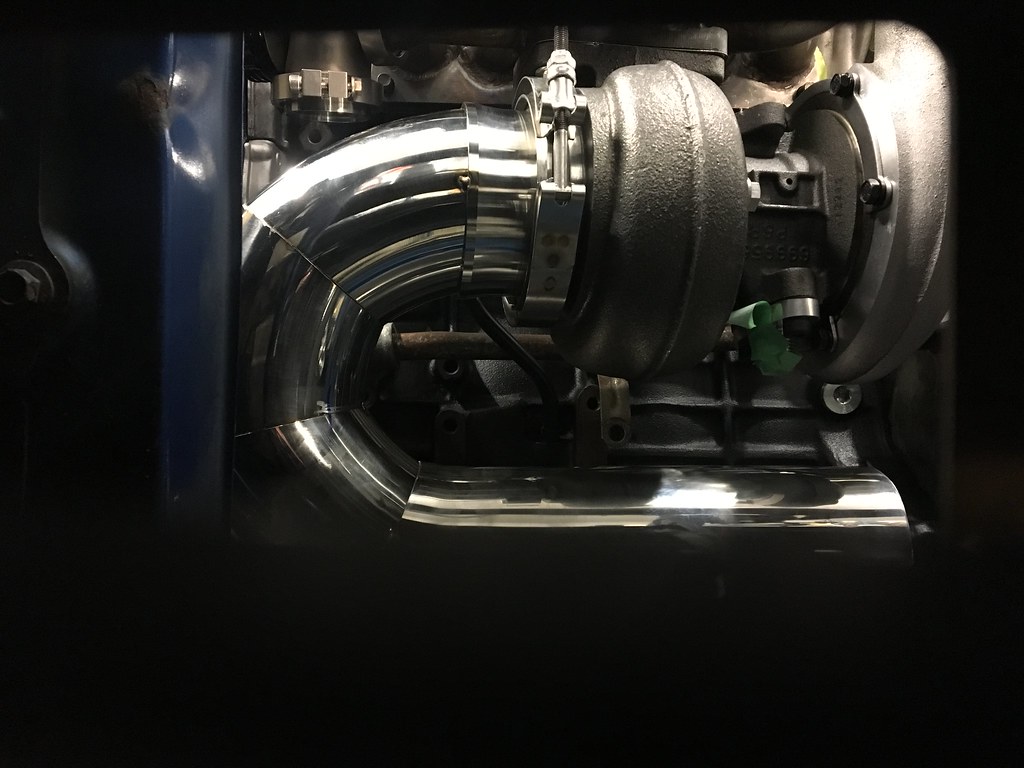
The downpipe in the GD is... interesting. The stock VF11 gets cast iron 90 bolted on the the exhaust side of the turbo so as to clear the AC compressor and PS pump. This is the most restrictive part of the exhaust system on a stock F2T hands down. I no longer have PS or AC, so my life is slightly easier, but it's still tight in there when you're trying to snake 3.5" tubing around everything.
The bends I bought weren't tight enough to make the initial 180 without hitting the subframe, so I had to pie-cut. Each cut is ~10 degrees, which tightens the radius sufficiently. These bends also weren't 18 gauge as advertised, but for a downpipe, 16 gauge makes me feel more secure when things get really hot.
 Untitled by James Onyschuk, on Flickr
The lower rad hose has to run under the downpipe, so I was careful to leave enough room for that. The next hurdle is the oil drain. With this turbo being so much larger in every physical dimension than the stock unit, I couldn't use the stock drain port on the block, so I put a -10 fitting in the pan, which becomes another thing the downpipe must go around.
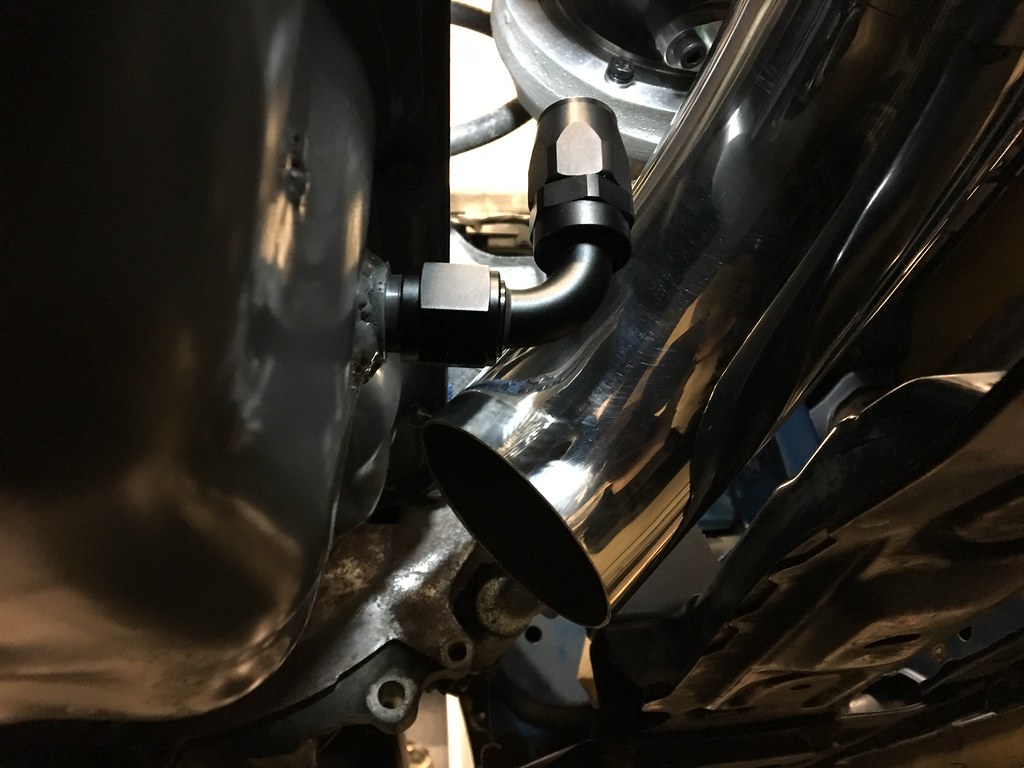 Untitled by James Onyschuk, on Flickr
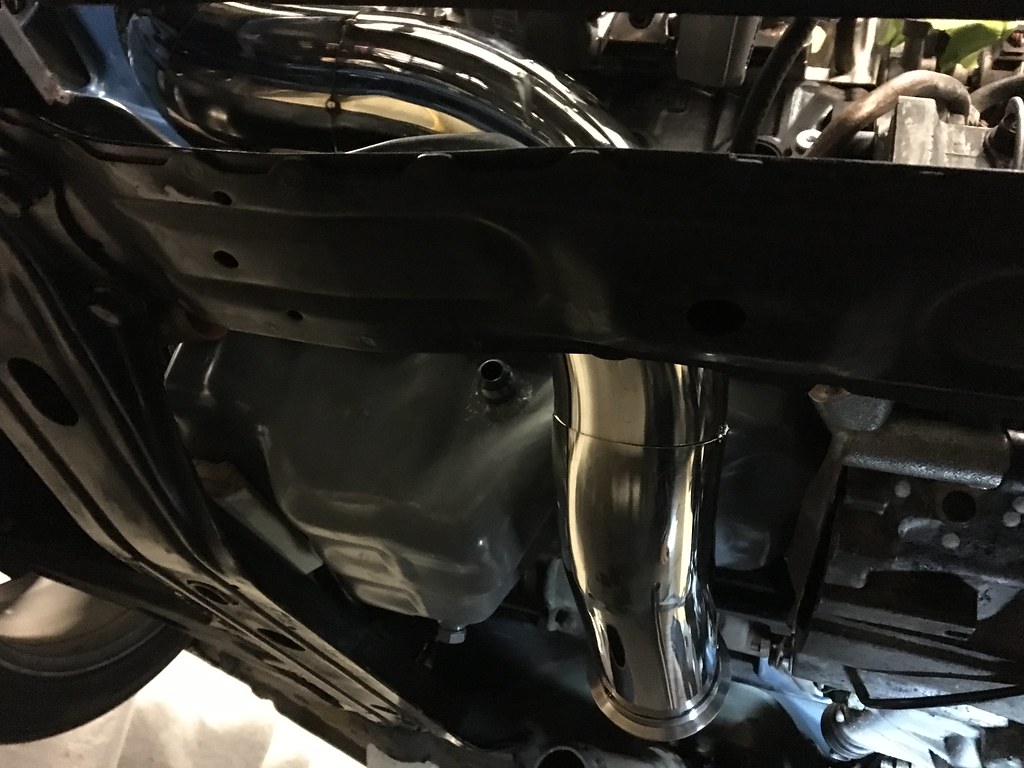 Untitled by James Onyschuk, on Flickr
Now of course with it somewhat complete, it becomes an absolute bitch to get on and off of the car. I may add another V-band to make removal easier, I may not. Here it is outside of the car.
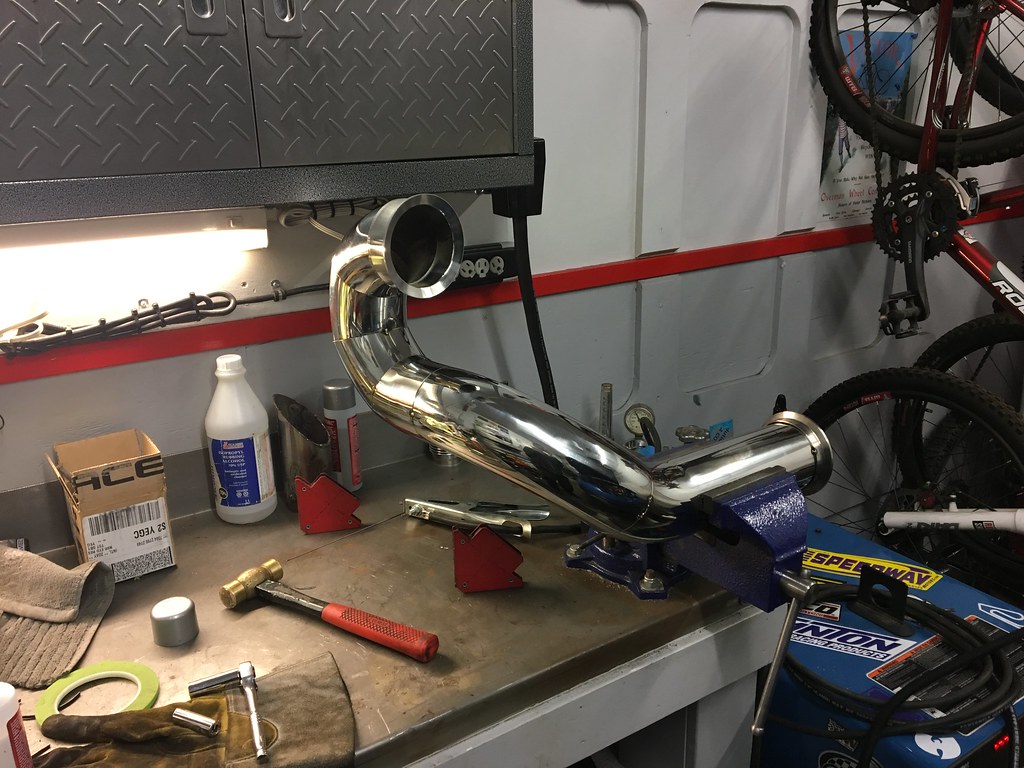 Untitled by James Onyschuk, on Flickr
The next hurdle is wastegate plumbing. I'd love to run it between the downpipe and the block before it rejoins the downpipe, but it may be slightly too tight in there. The good news in that the wastegate tubes I ordered are actually 18g as advertised. The 3" bends I got for the exhaust post downpipe are not, so that's on hold for now. I also need to source a few feet more of 18g straight tubing.
More to come...
You'll need to log in to post.