Challenge Budget: Car/parts $200 Donor Lincoln town car: 410 Engine crossmember: 120 Sold transmission crossmember from Lincoln: 10 Sold rear axle from lincoln: -50 Scrapped what was left of lincoln: -89 trans cooler: 2 Engine swap: 5.0 plus 300 boot Sold kelstar wheels-200 (cant recoup more than we spent) mustang 5.0 convertible engine mounts: 22 1/4 thick, 10x24 chunk of plate steel 7.50 (.30 lb, 25lb) Brand new Watkins glen nascar slicks and wheels, which were bought for $50, and promptly sold to Dallas dad for $50 and some weld wheels with really old drag slicks. So, slicks were $0, but $50 taken out of the recoup limit.
Current total: 712.50
Ok, little more wheeling and dealing this week. Found a guy selling a set of still brand new NASCAR wheels and slicks on craigslist for $200. Ad had been up a month. Nascar wheels and tires are 27.5x12x15. Freaking huge. I really didn't now if they'd fit. Called the guy, turned out he lived 20 miles from me. Told him that if he really wanted them gone, id show up in 30 minutes and give him $50 bucks. Shockingly enough, he took the offer. Said something about he got them for free where he used to work, and at least he could buy beer for the weekend.
So, I bought them, praying they would fit. They did not. Not even close.
[URL=http://s54.photobucket.com/user/dusterbd13/media/amc/20160915_175325_zpspng6pvxe.jpg.html]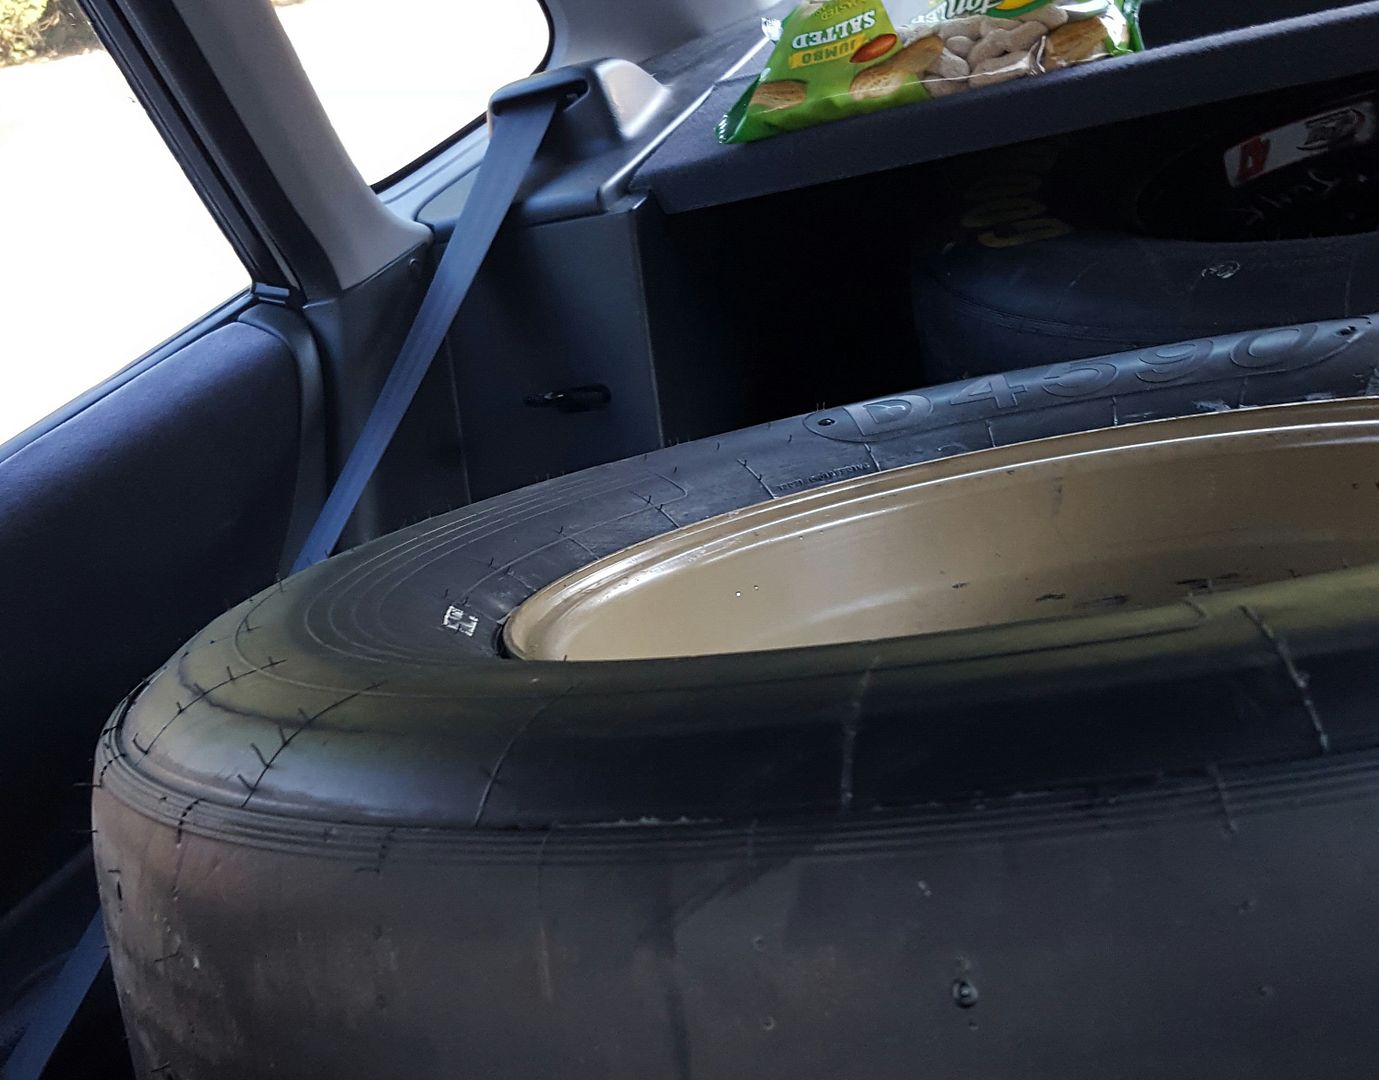 [/URL]
[URL=http://s54.photobucket.com/user/dusterbd13/media/amc/20160915_192452_zpsel7dbnhy.jpg.html]
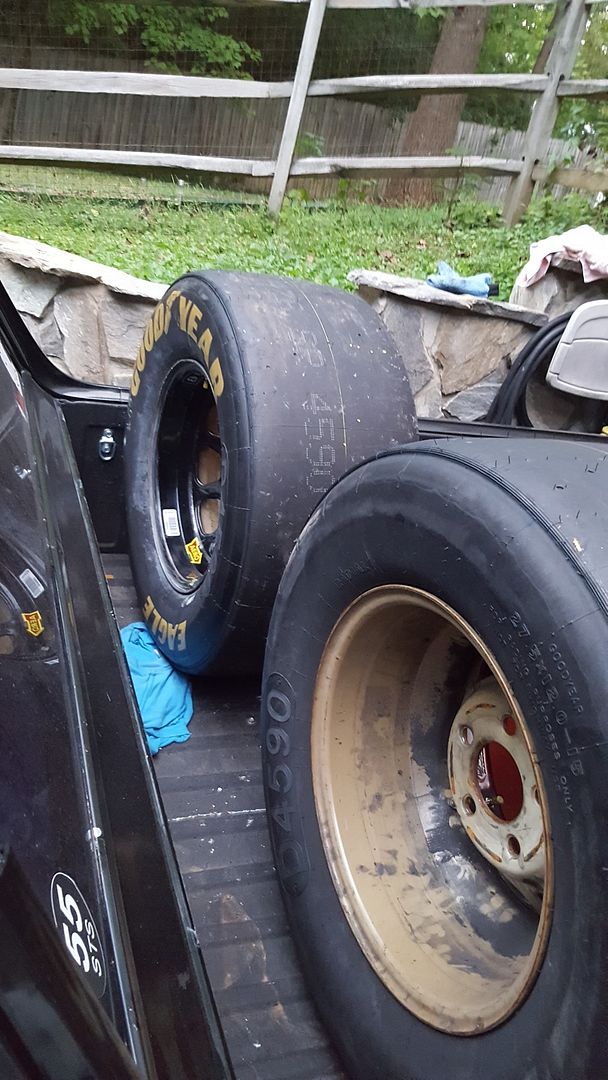 [/URL]
So we traded them to dallas dad for the $50 bucks I spent, plus some really old drag slicks on weld wheels. I think the slicks still have a few passes left in them. We overfilled them full of air, and didnt see any major cracking, and my fingernail still went pretty deep. I know they've been in the top of the barn for at least 4 years, year round, flat. Anyone know enough about drag slicks to tell me what to check before they kill me?
[URL=http://s54.photobucket.com/user/dusterbd13/media/amc/20160916_204806_zpsfpkexzpk.jpg.html]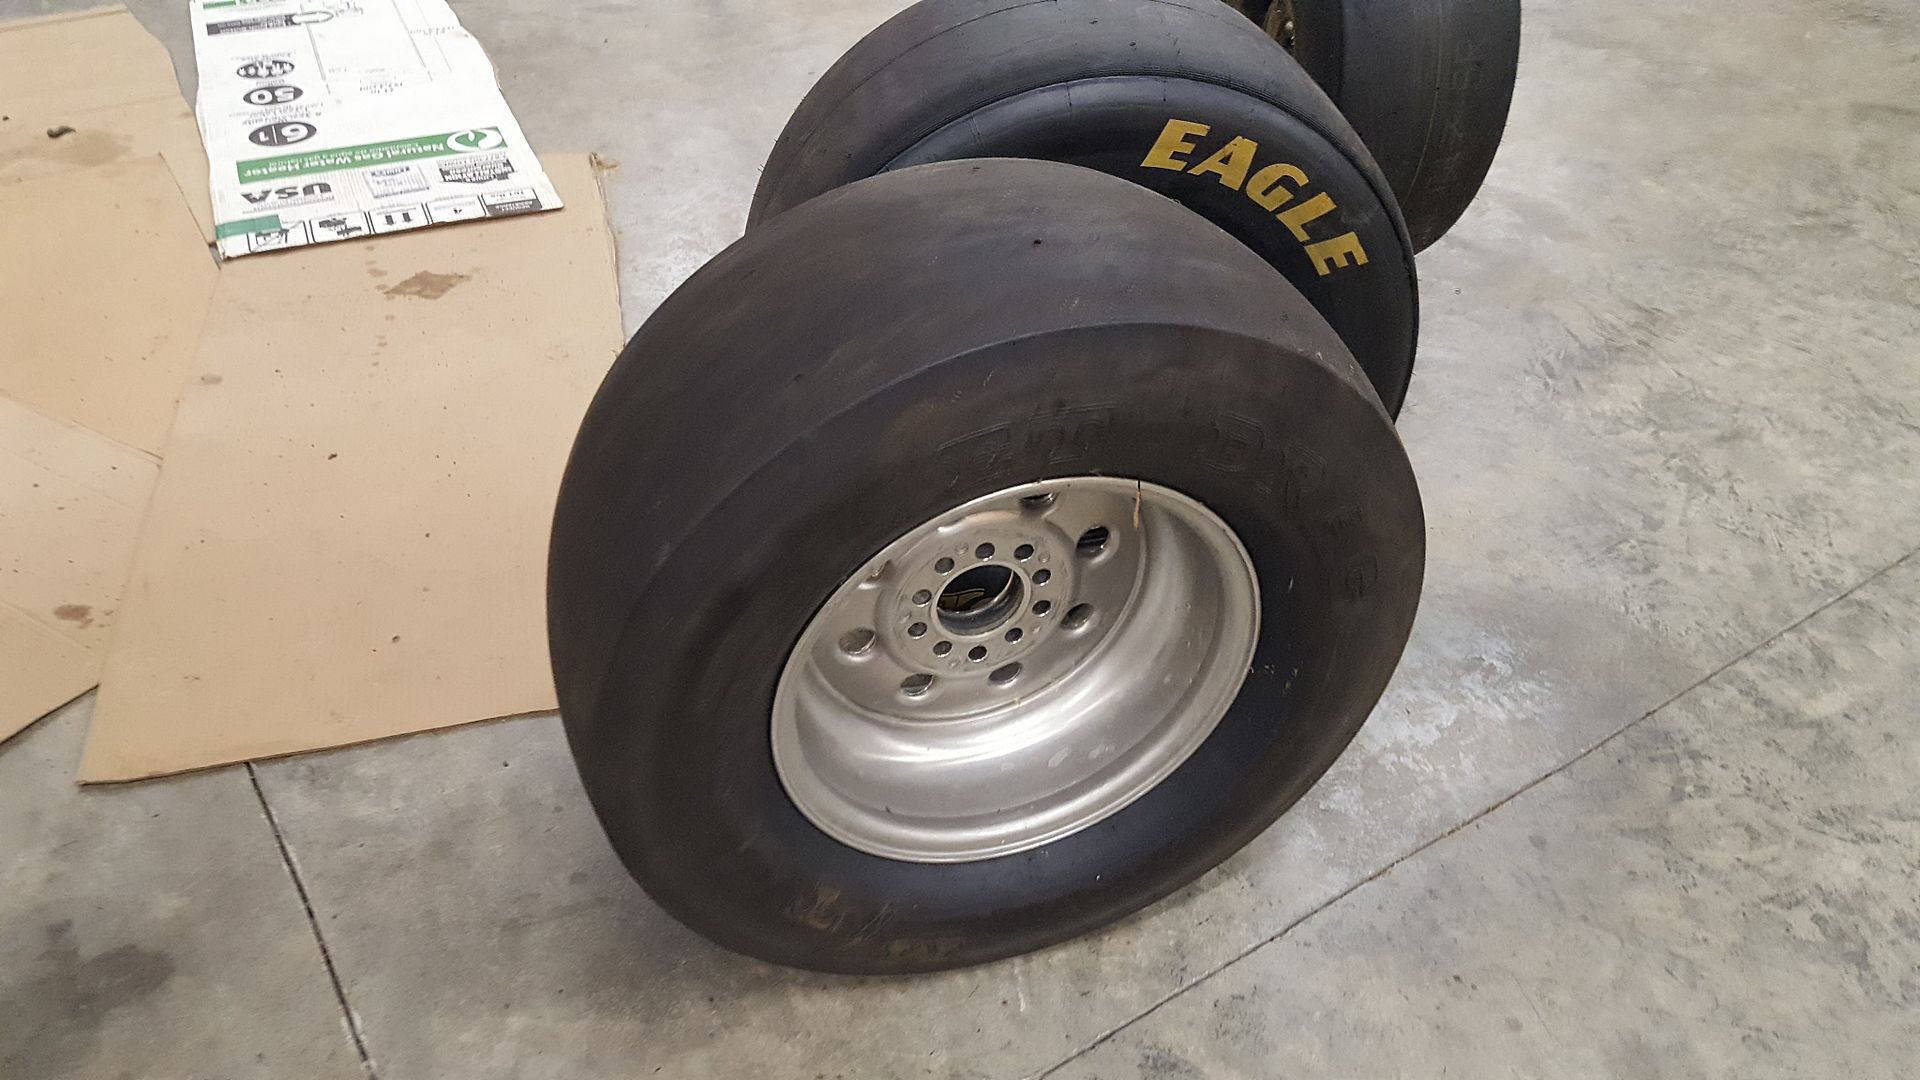 [/URL]
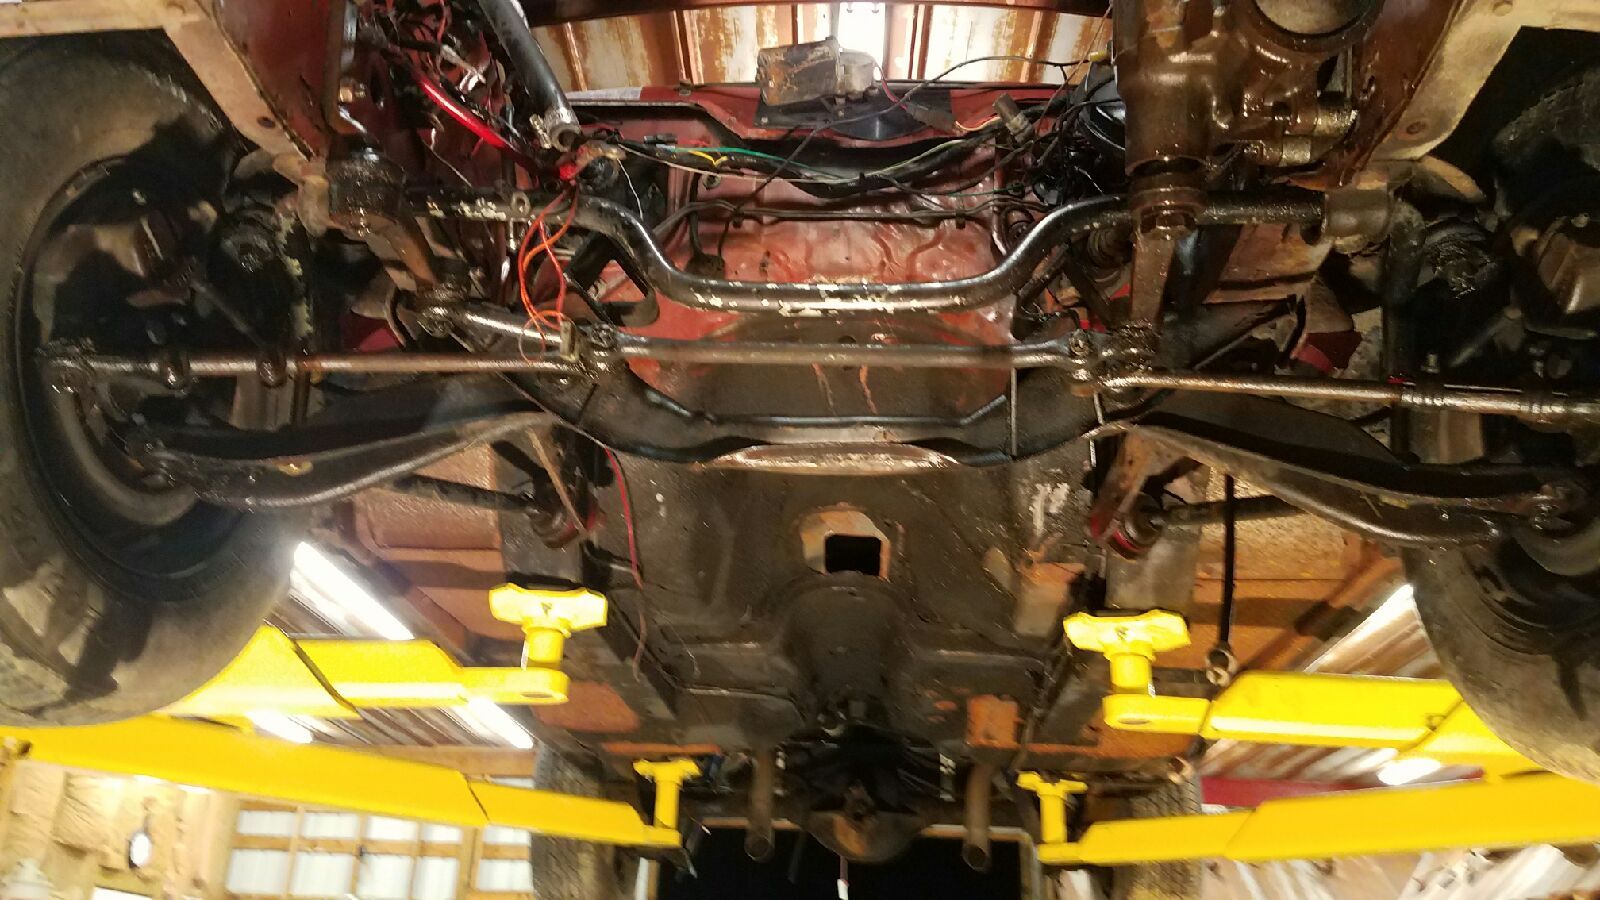
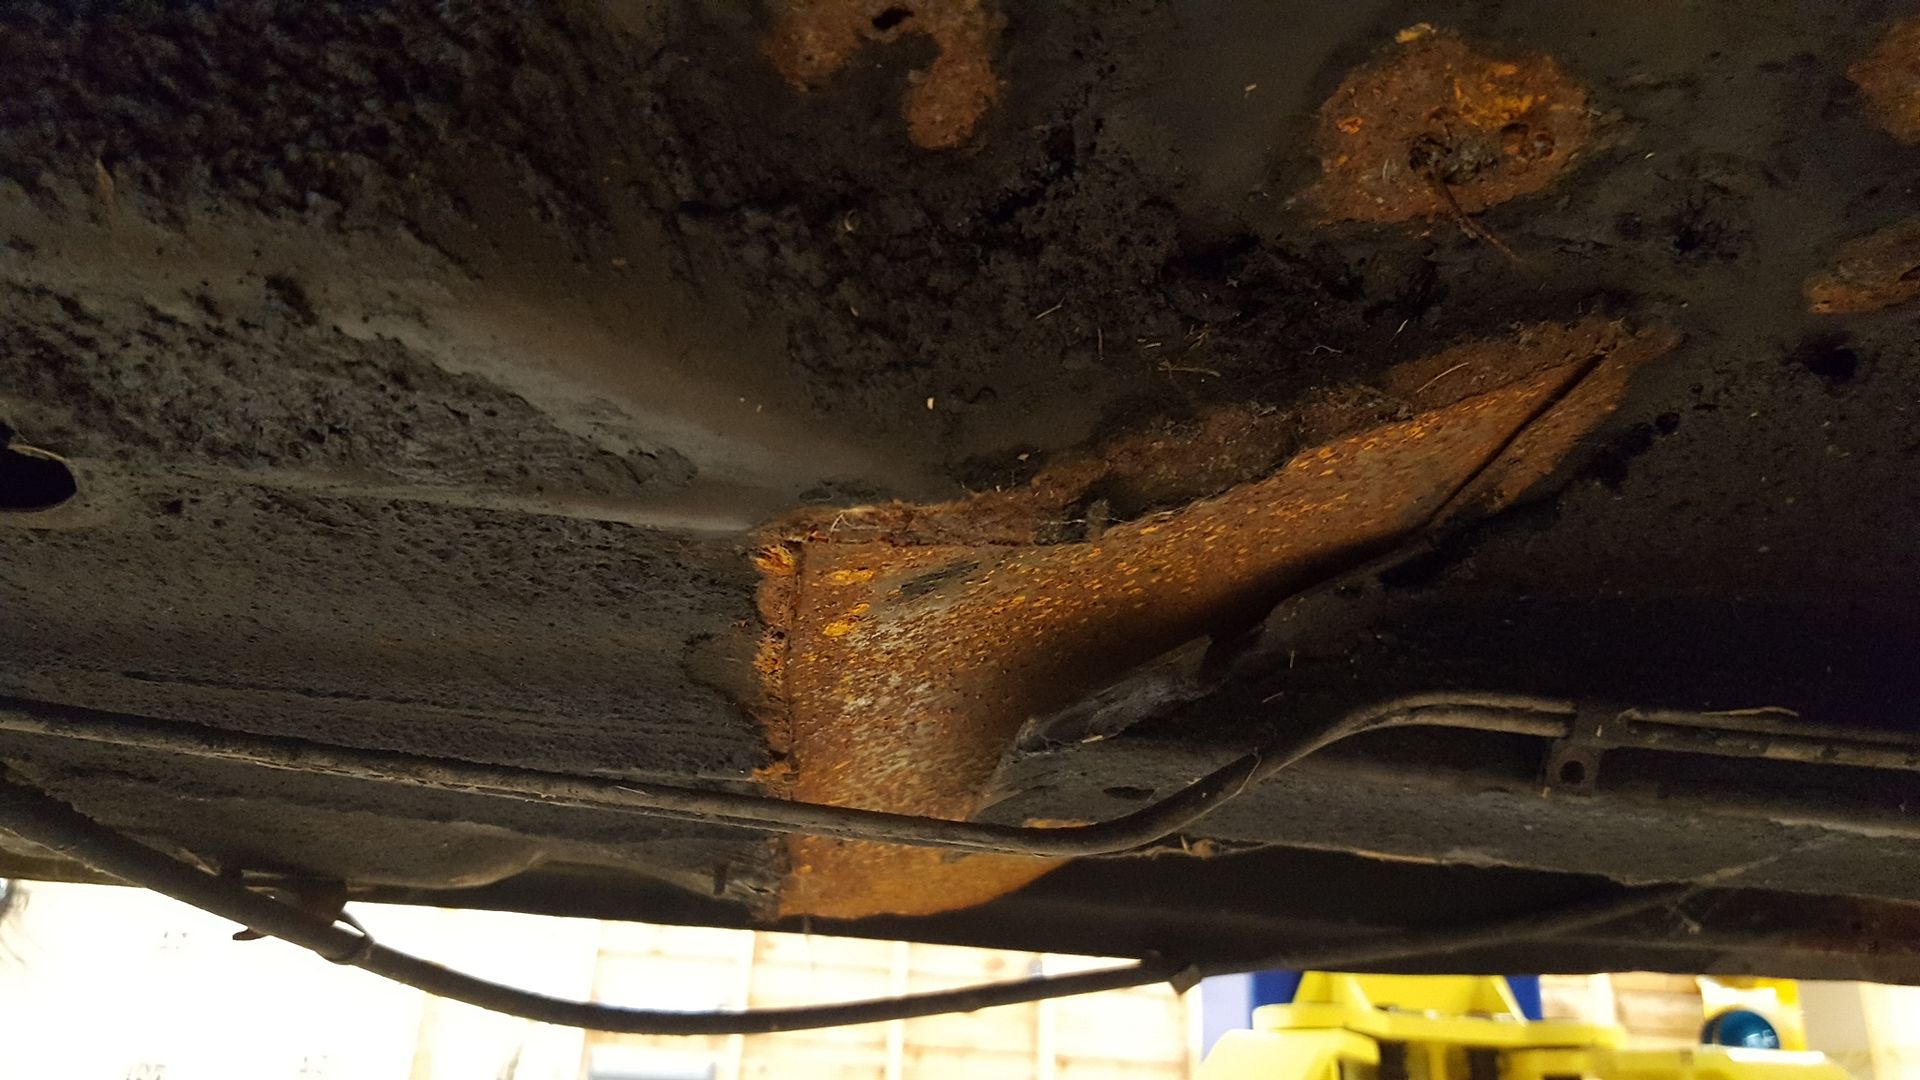
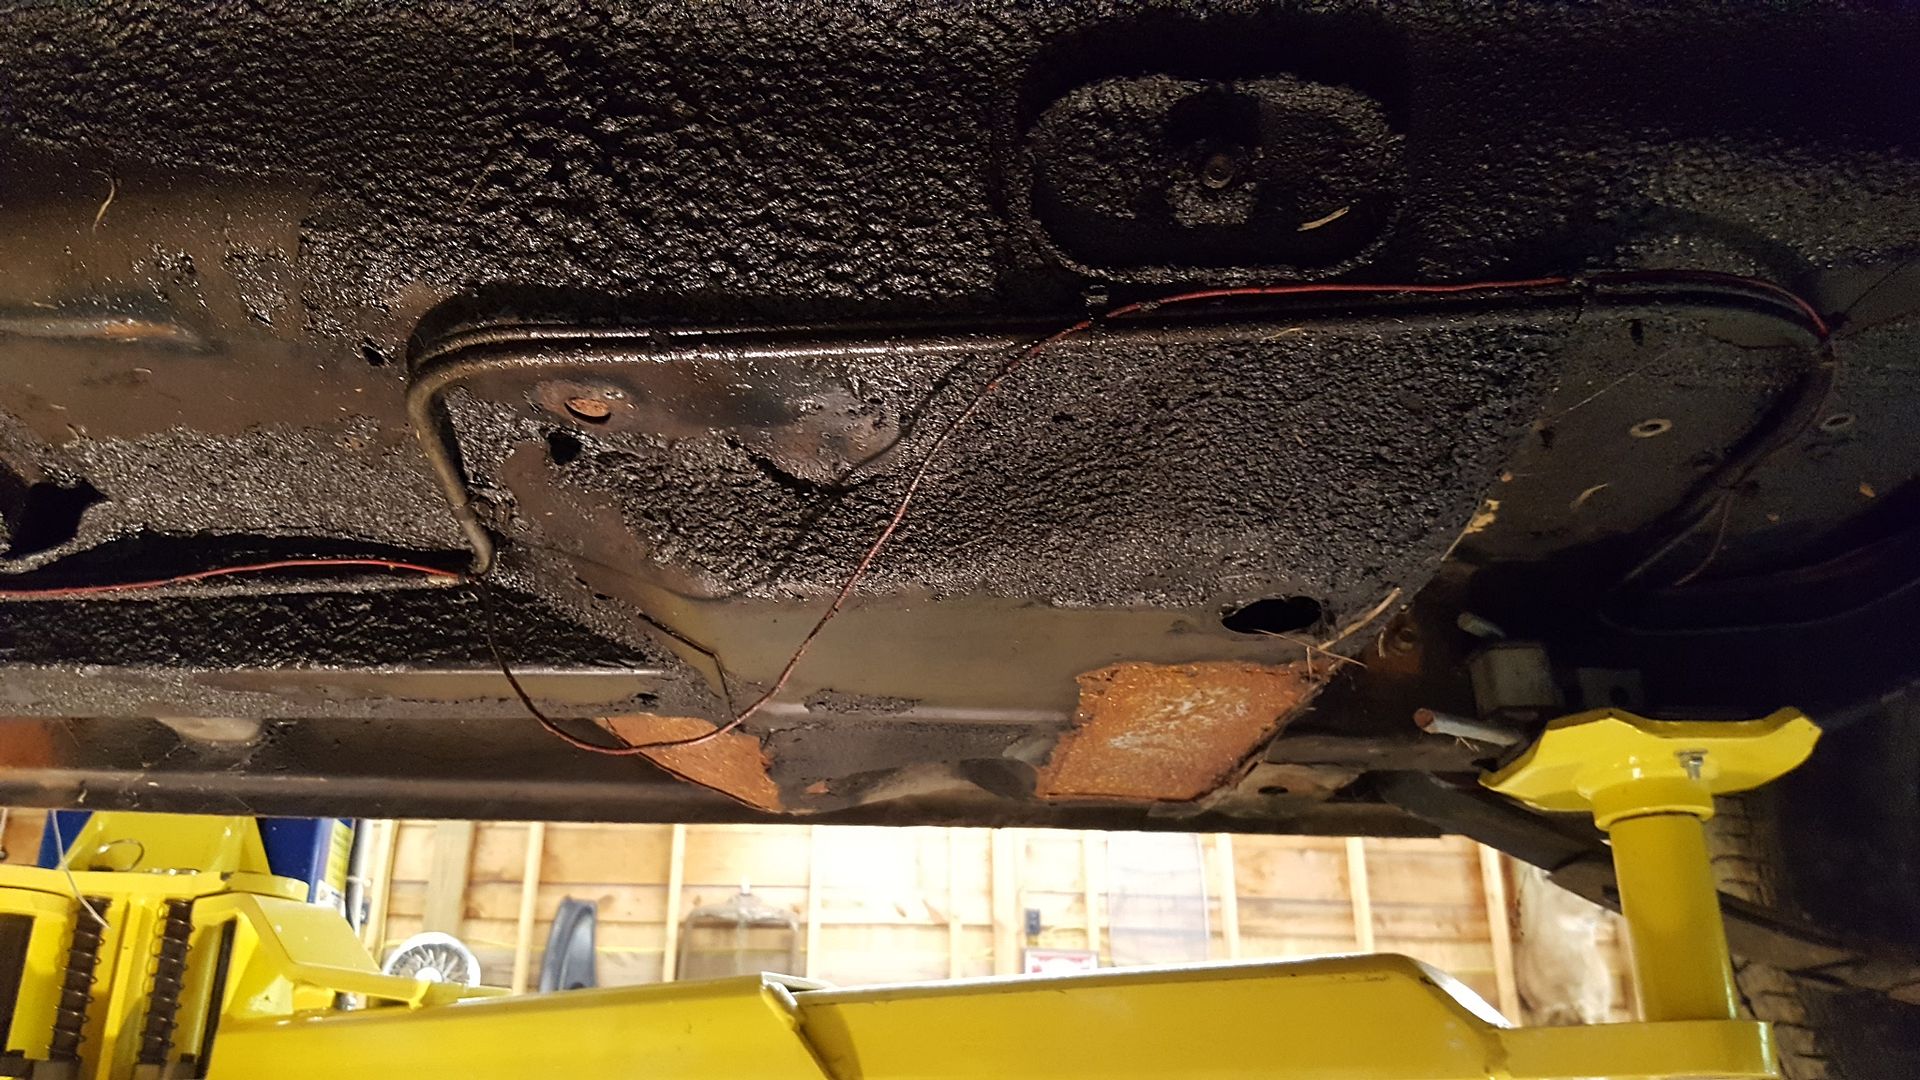
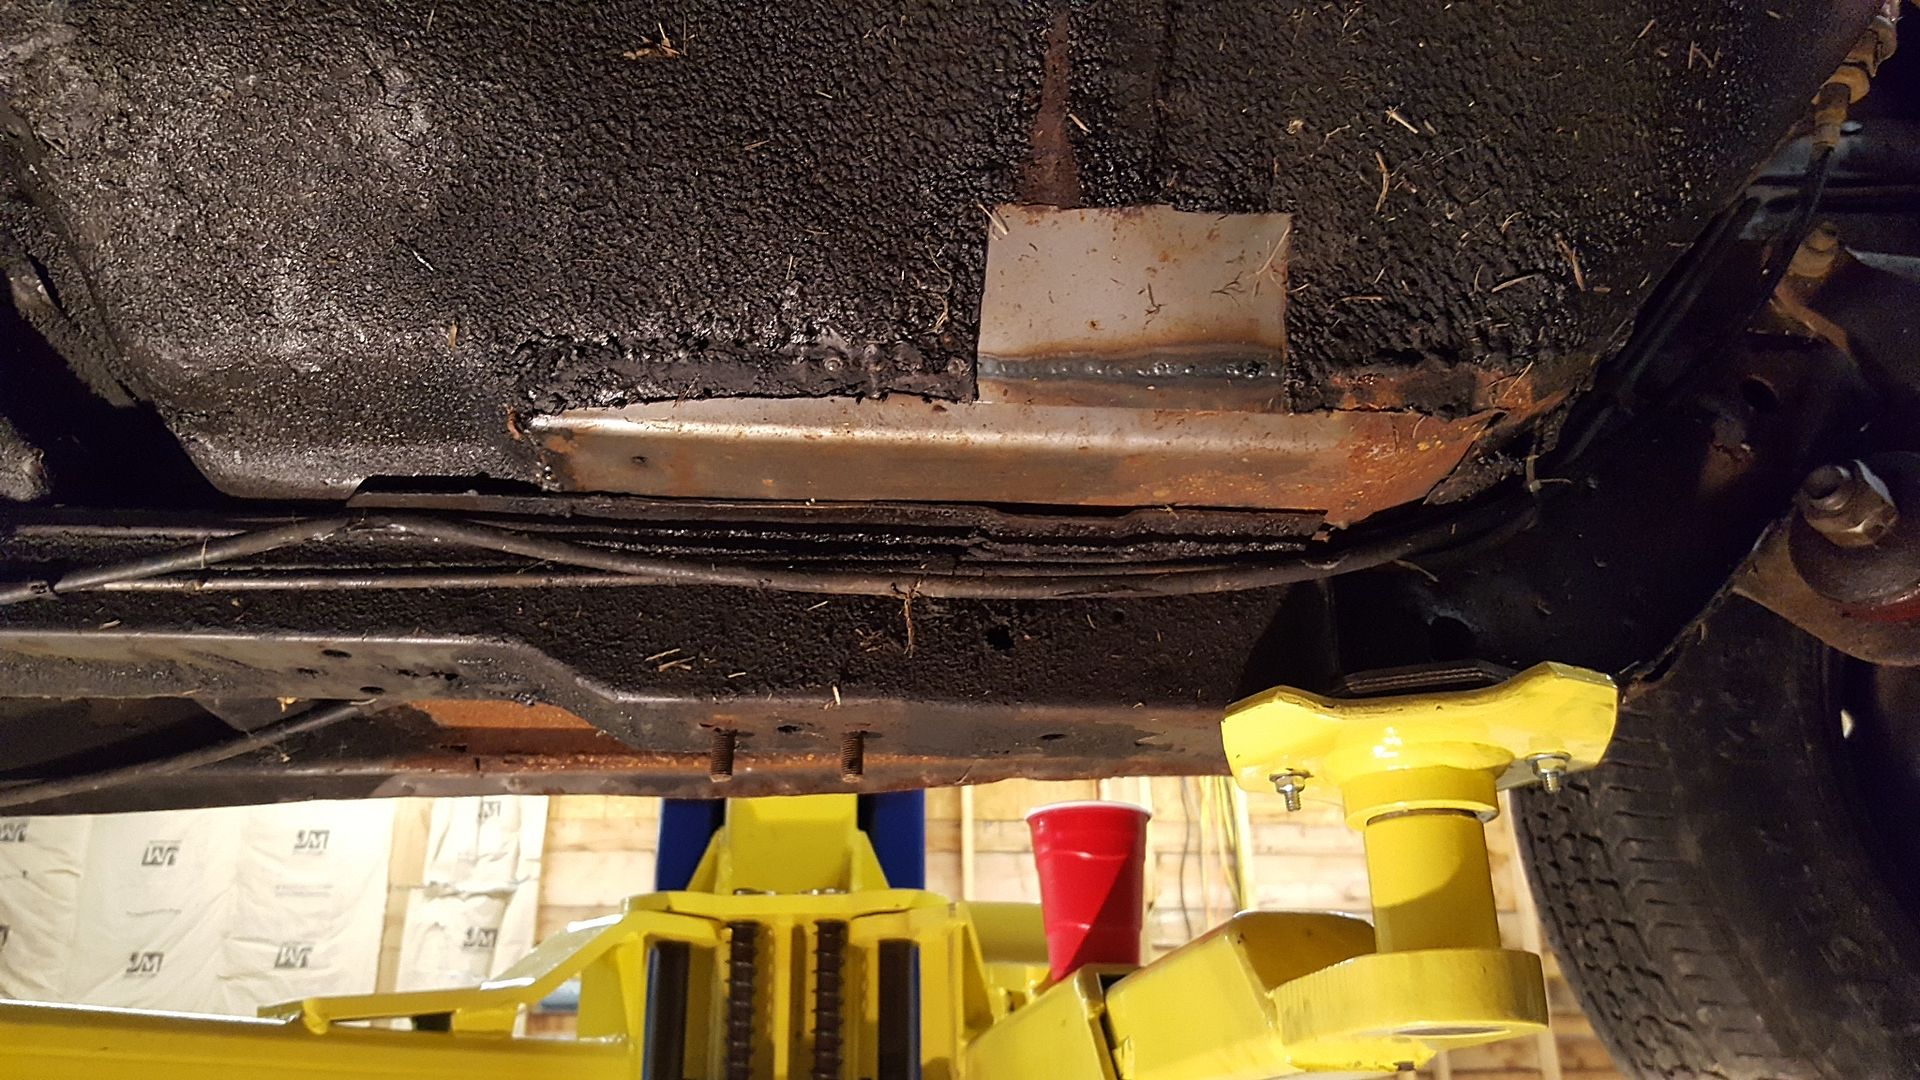
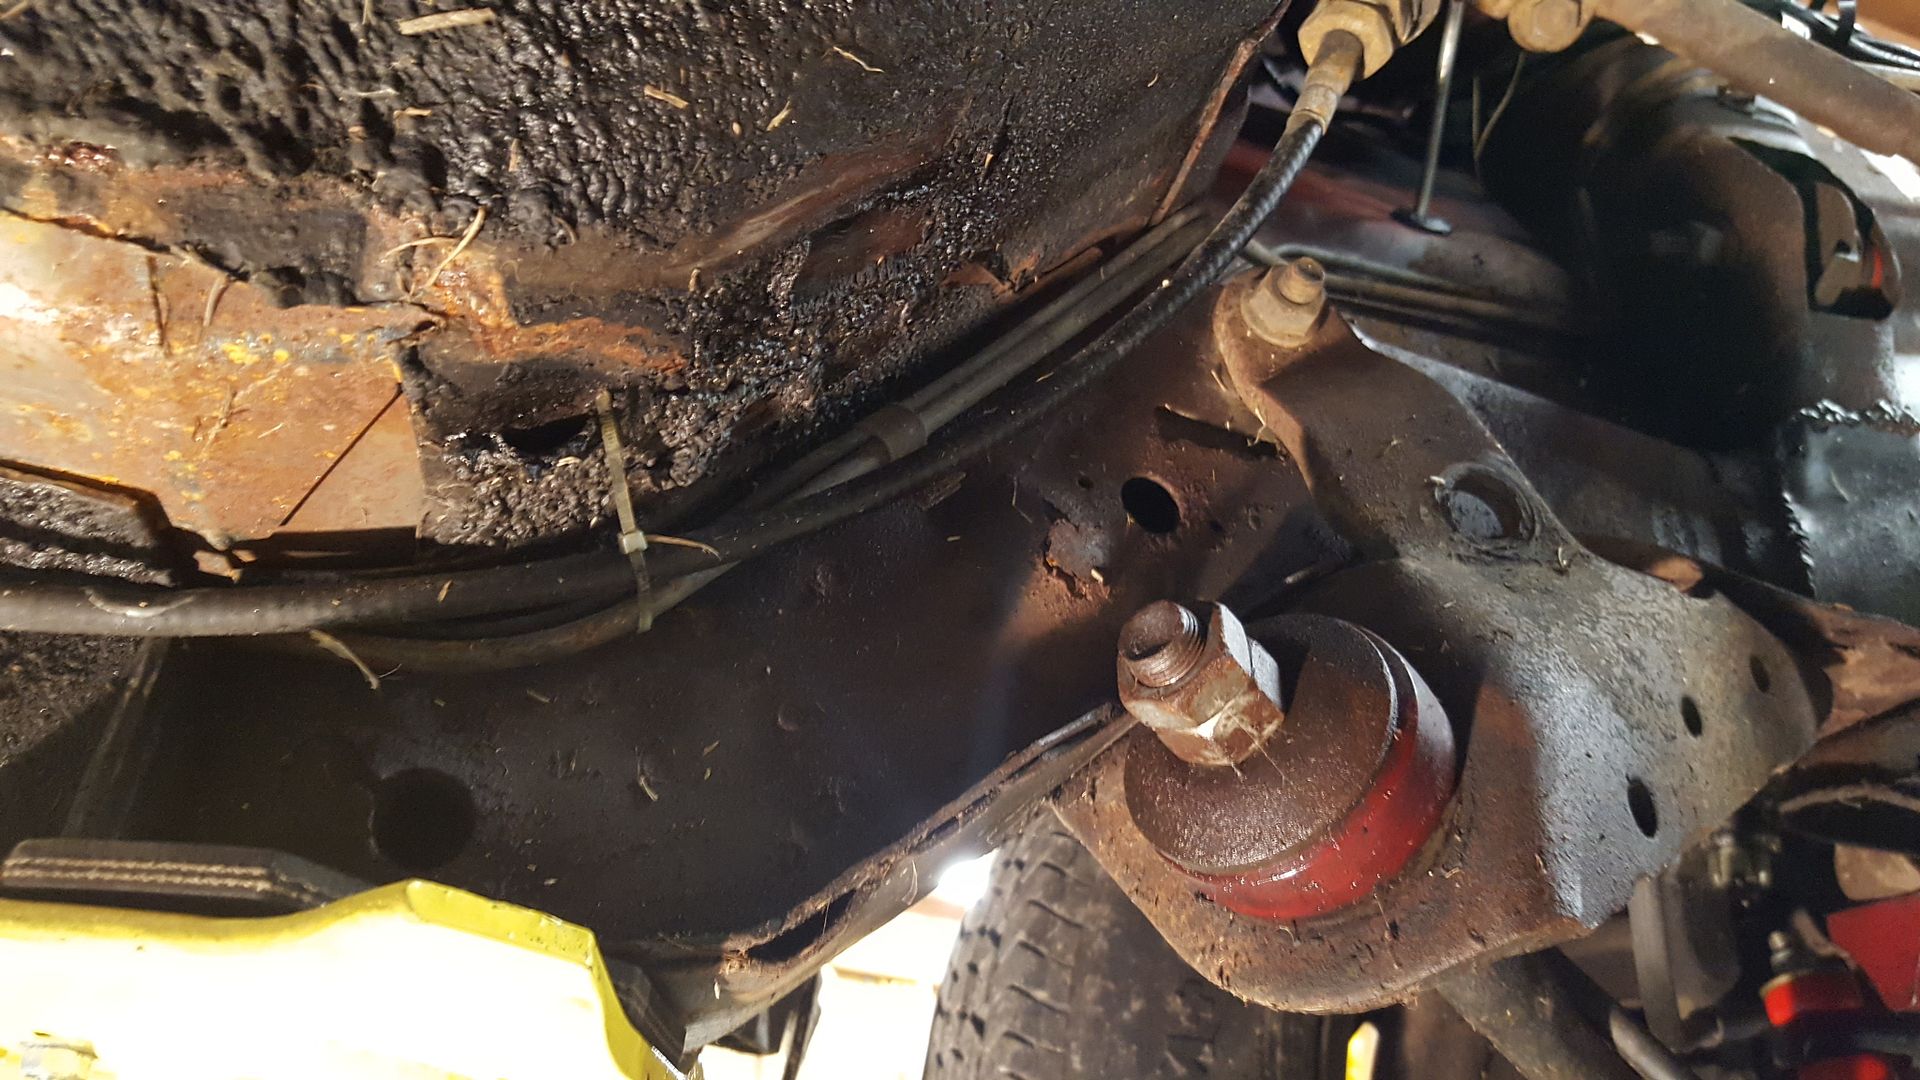
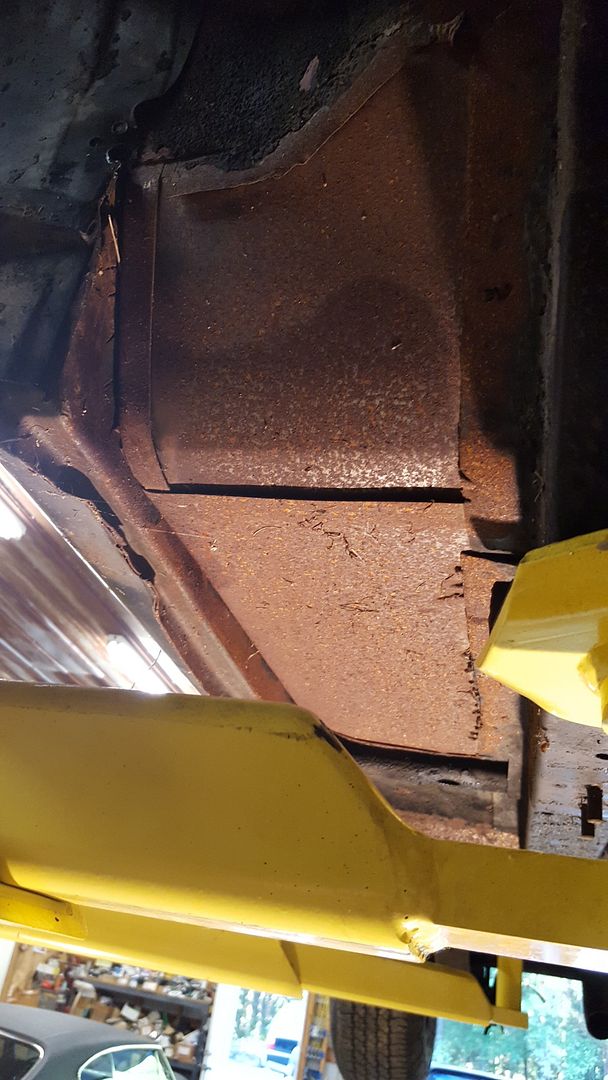
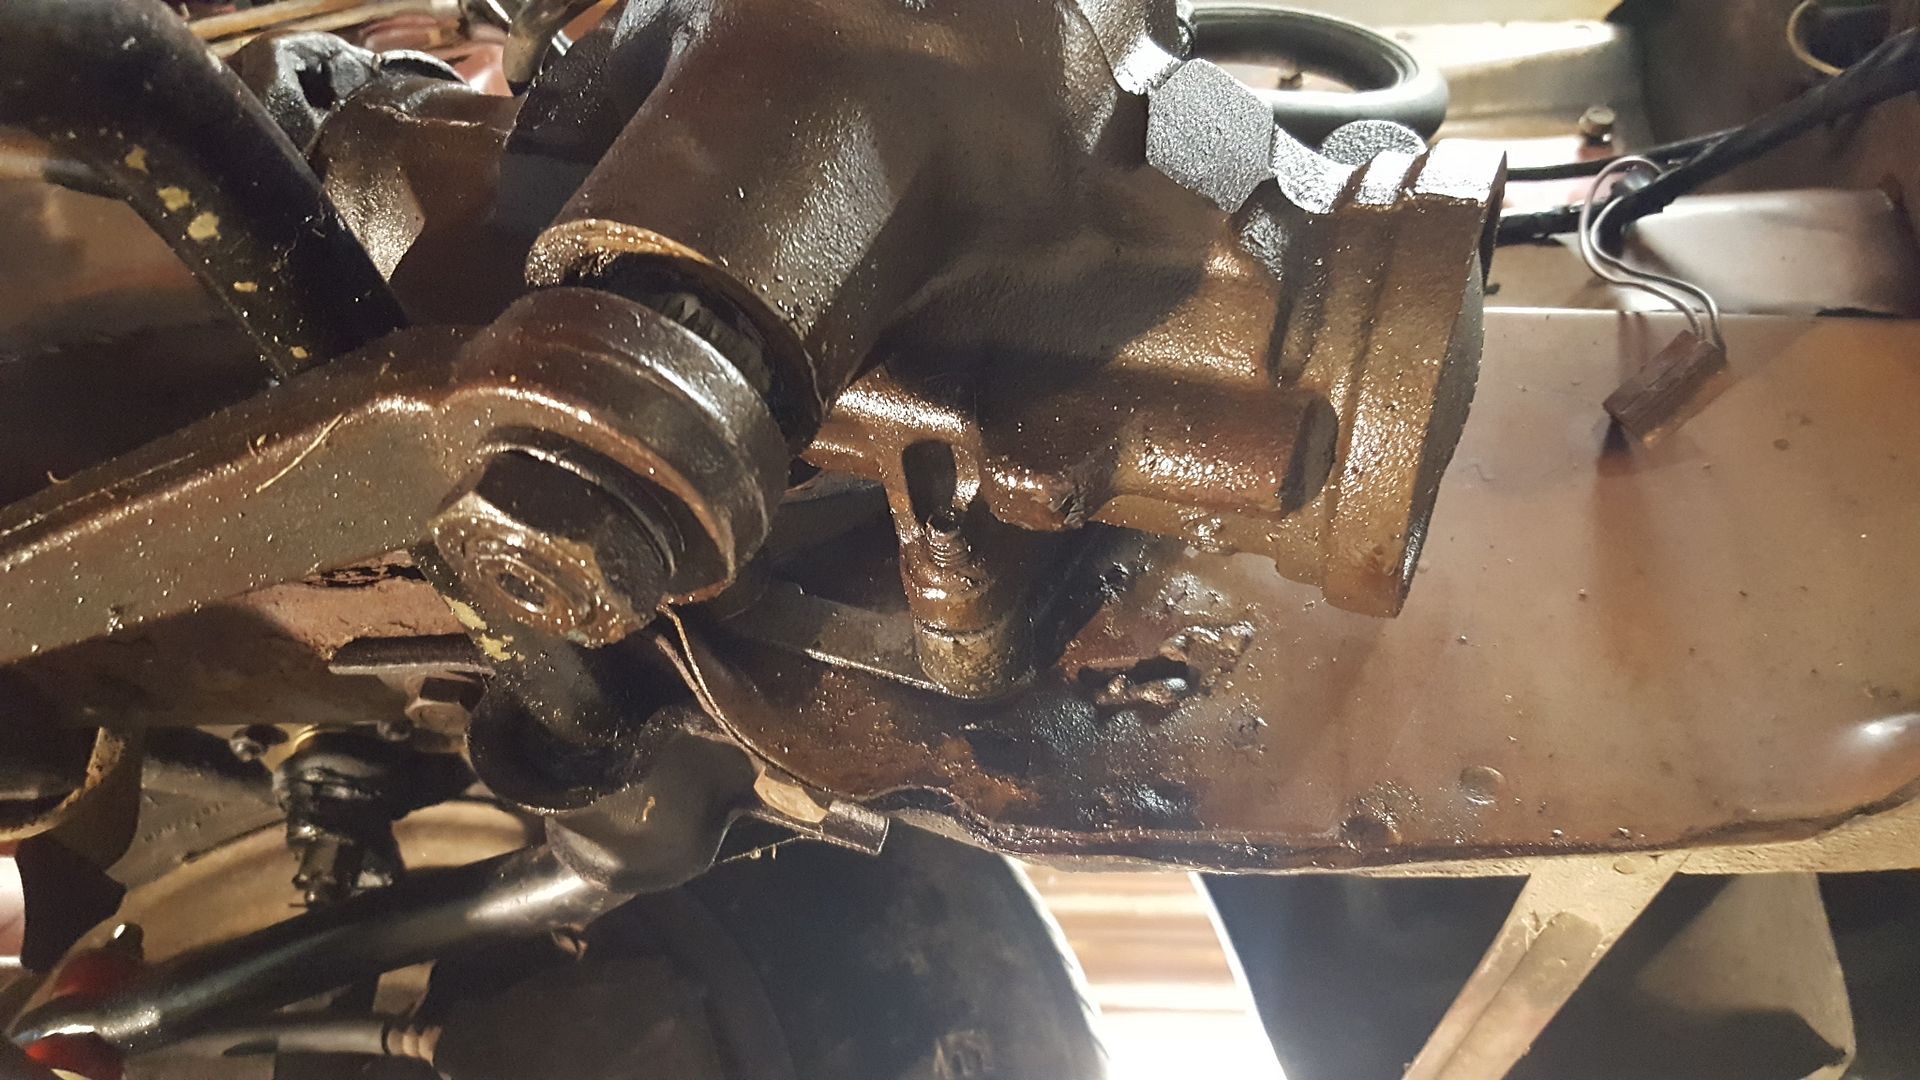
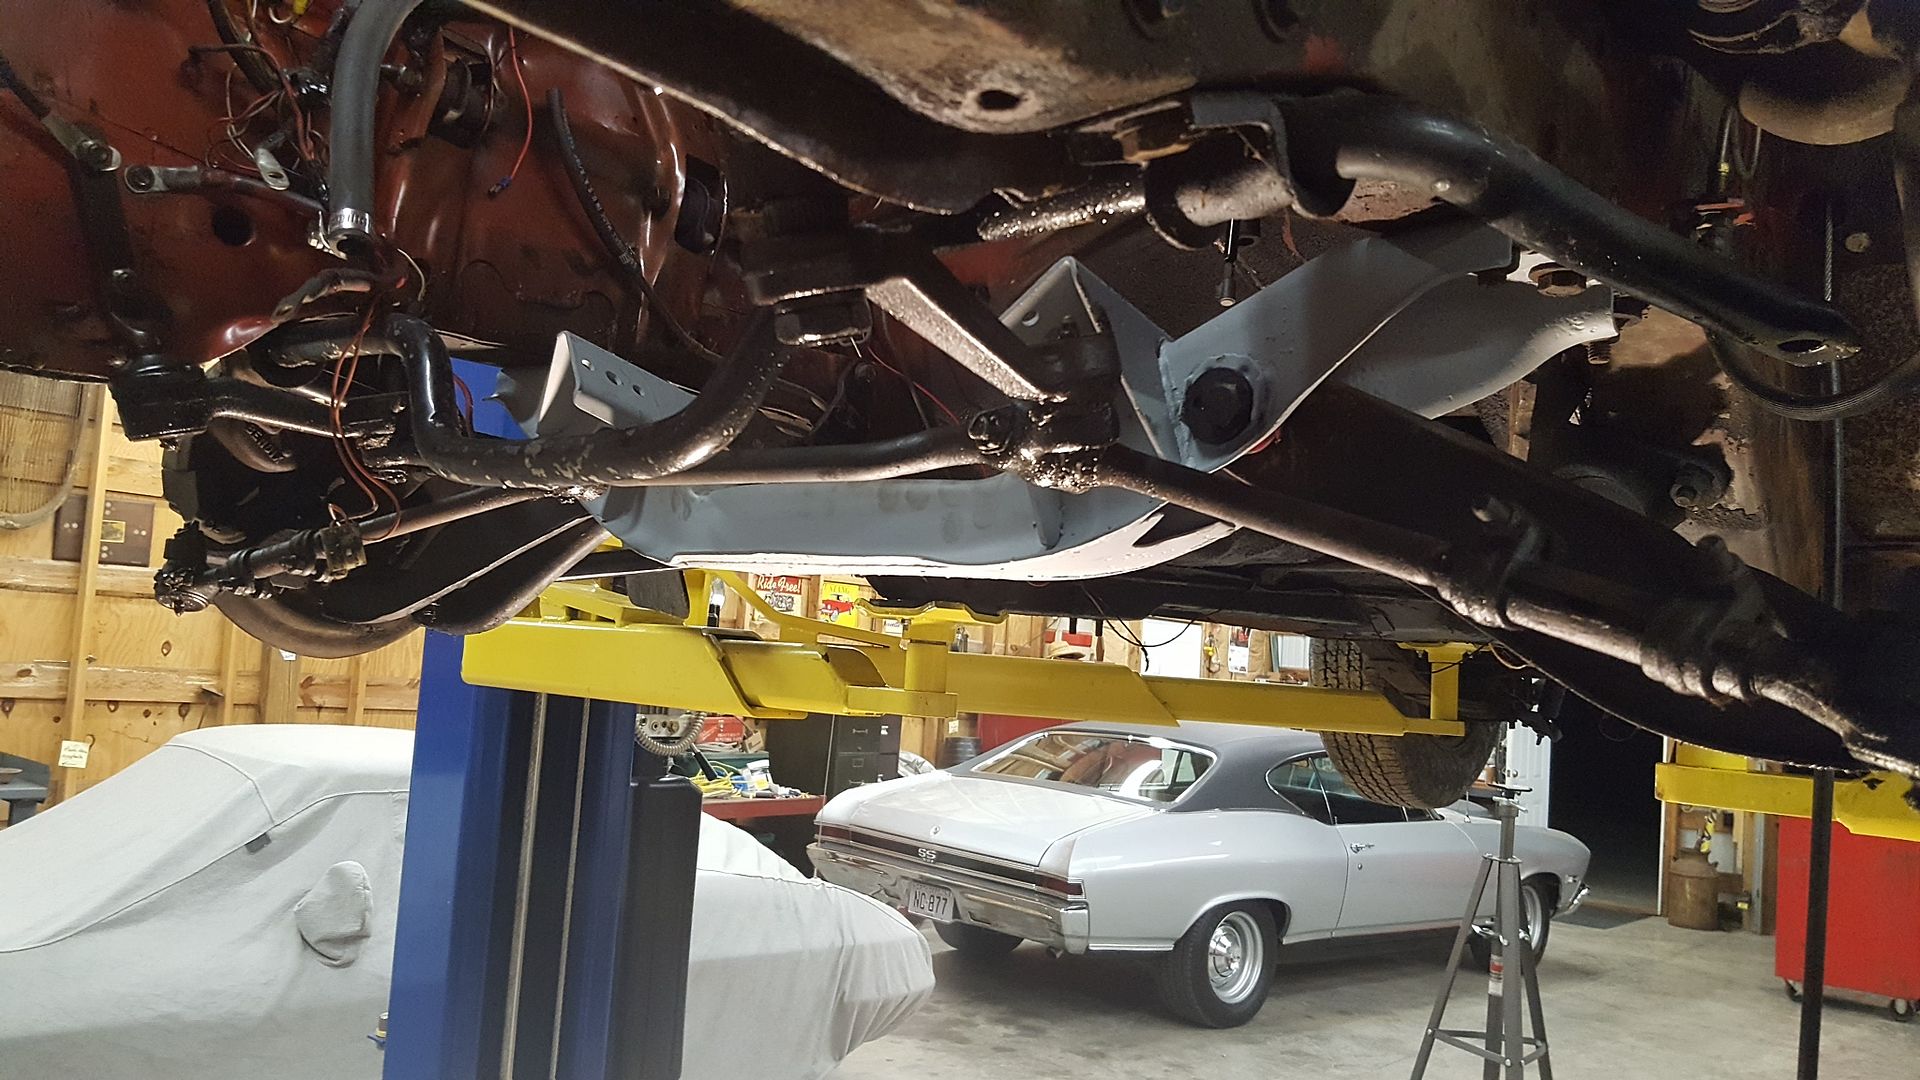
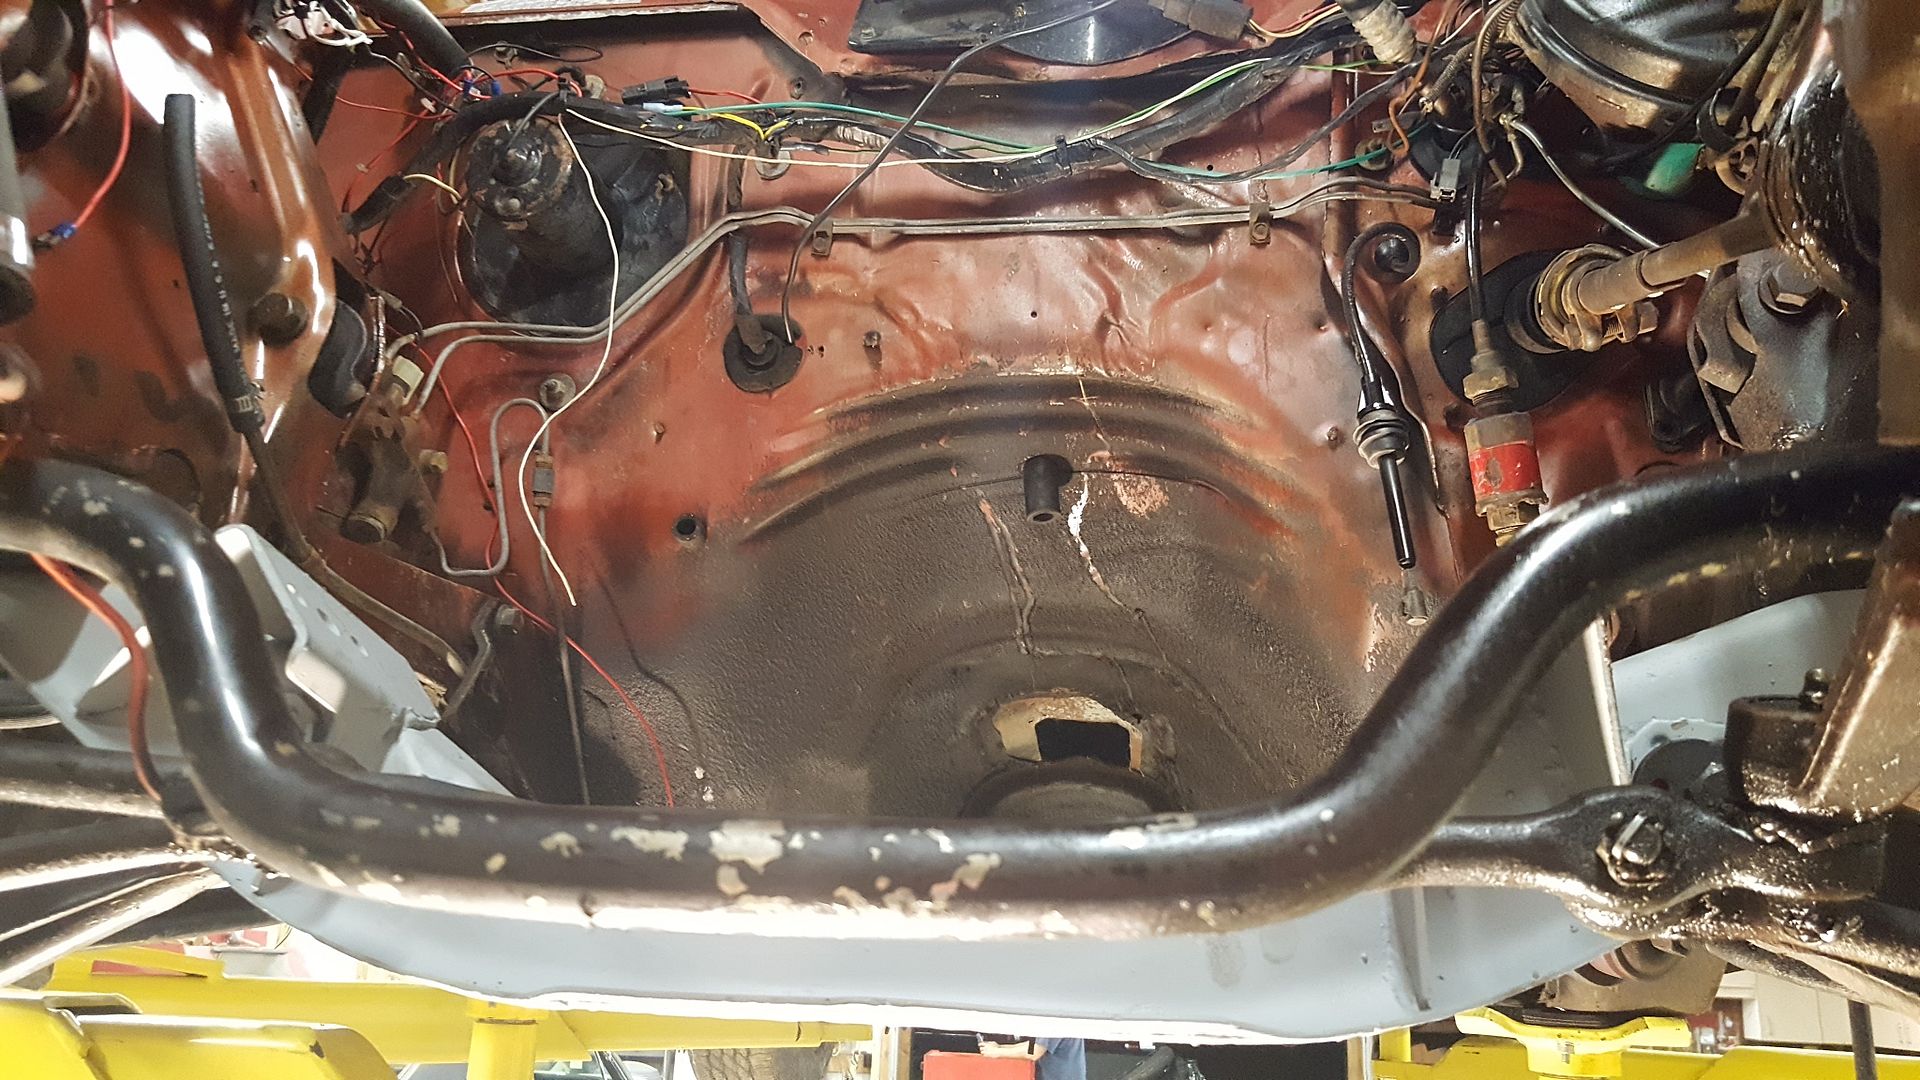
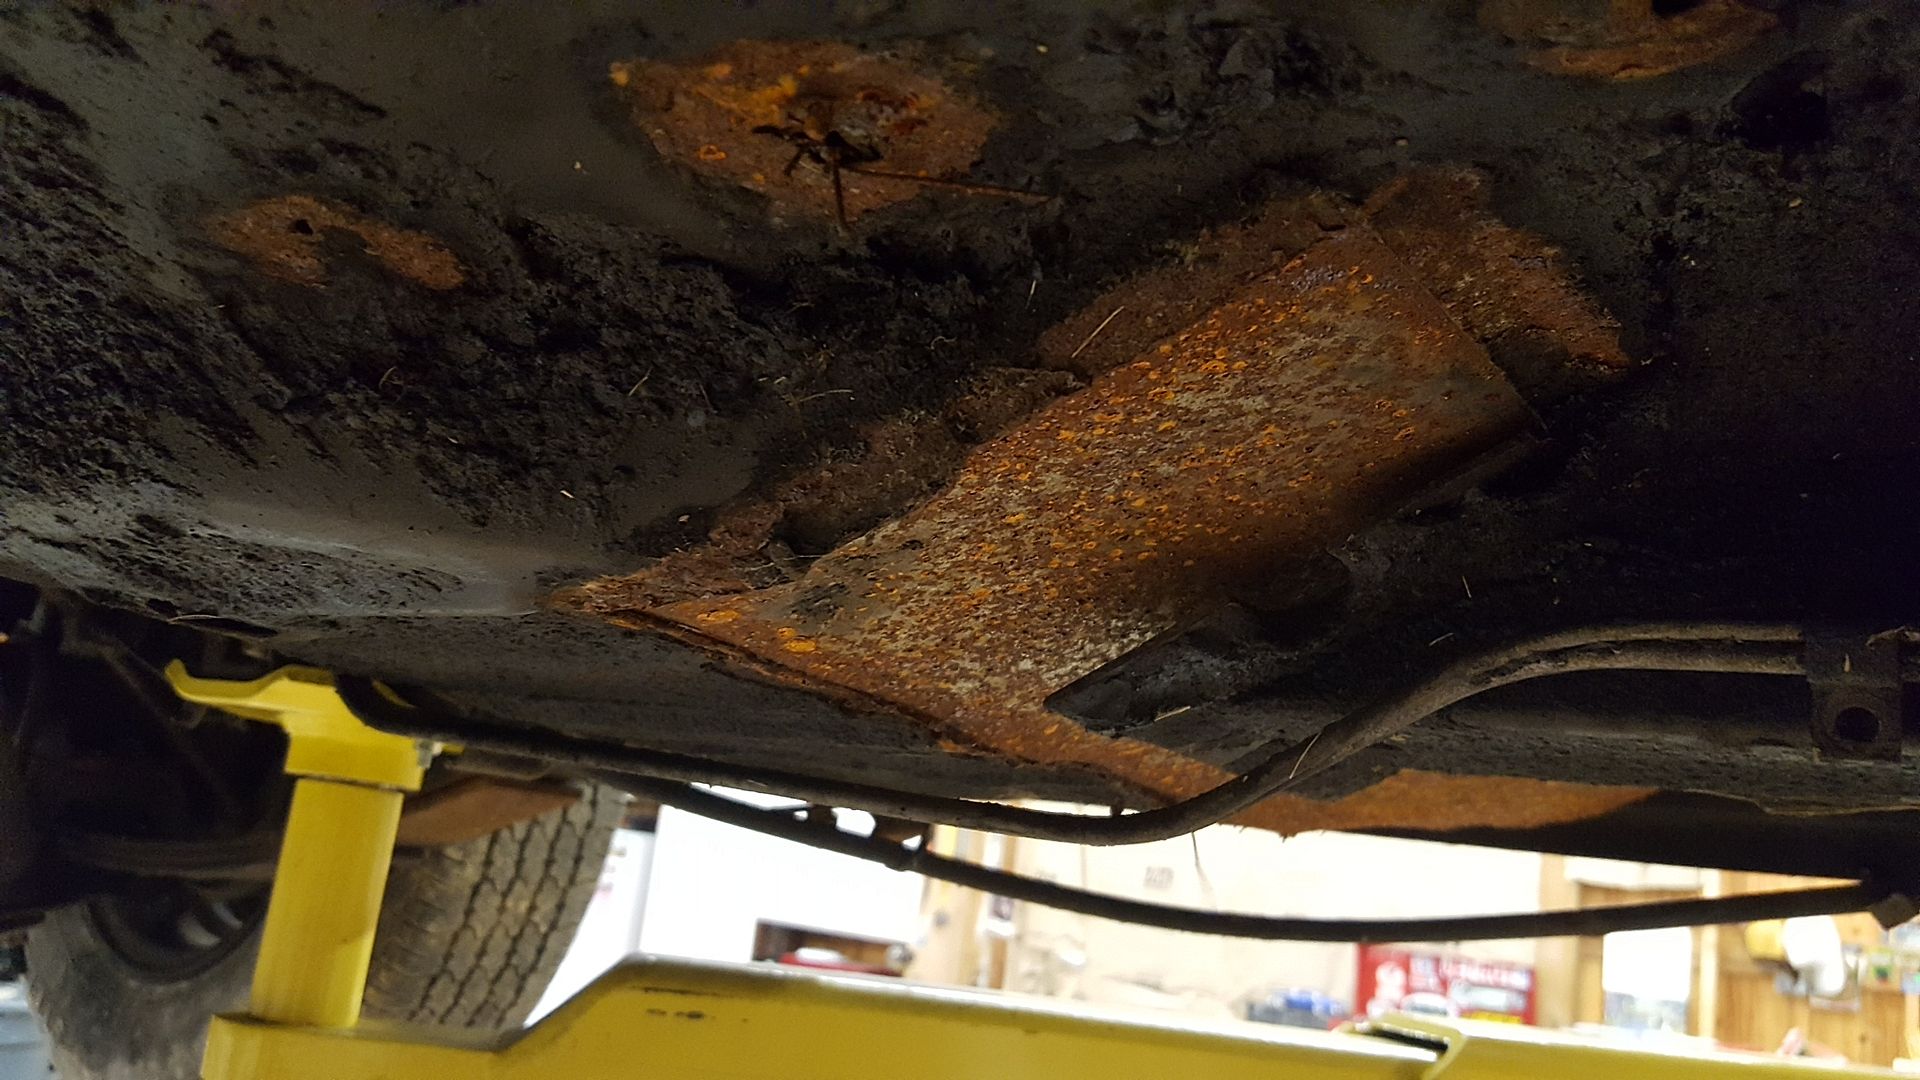
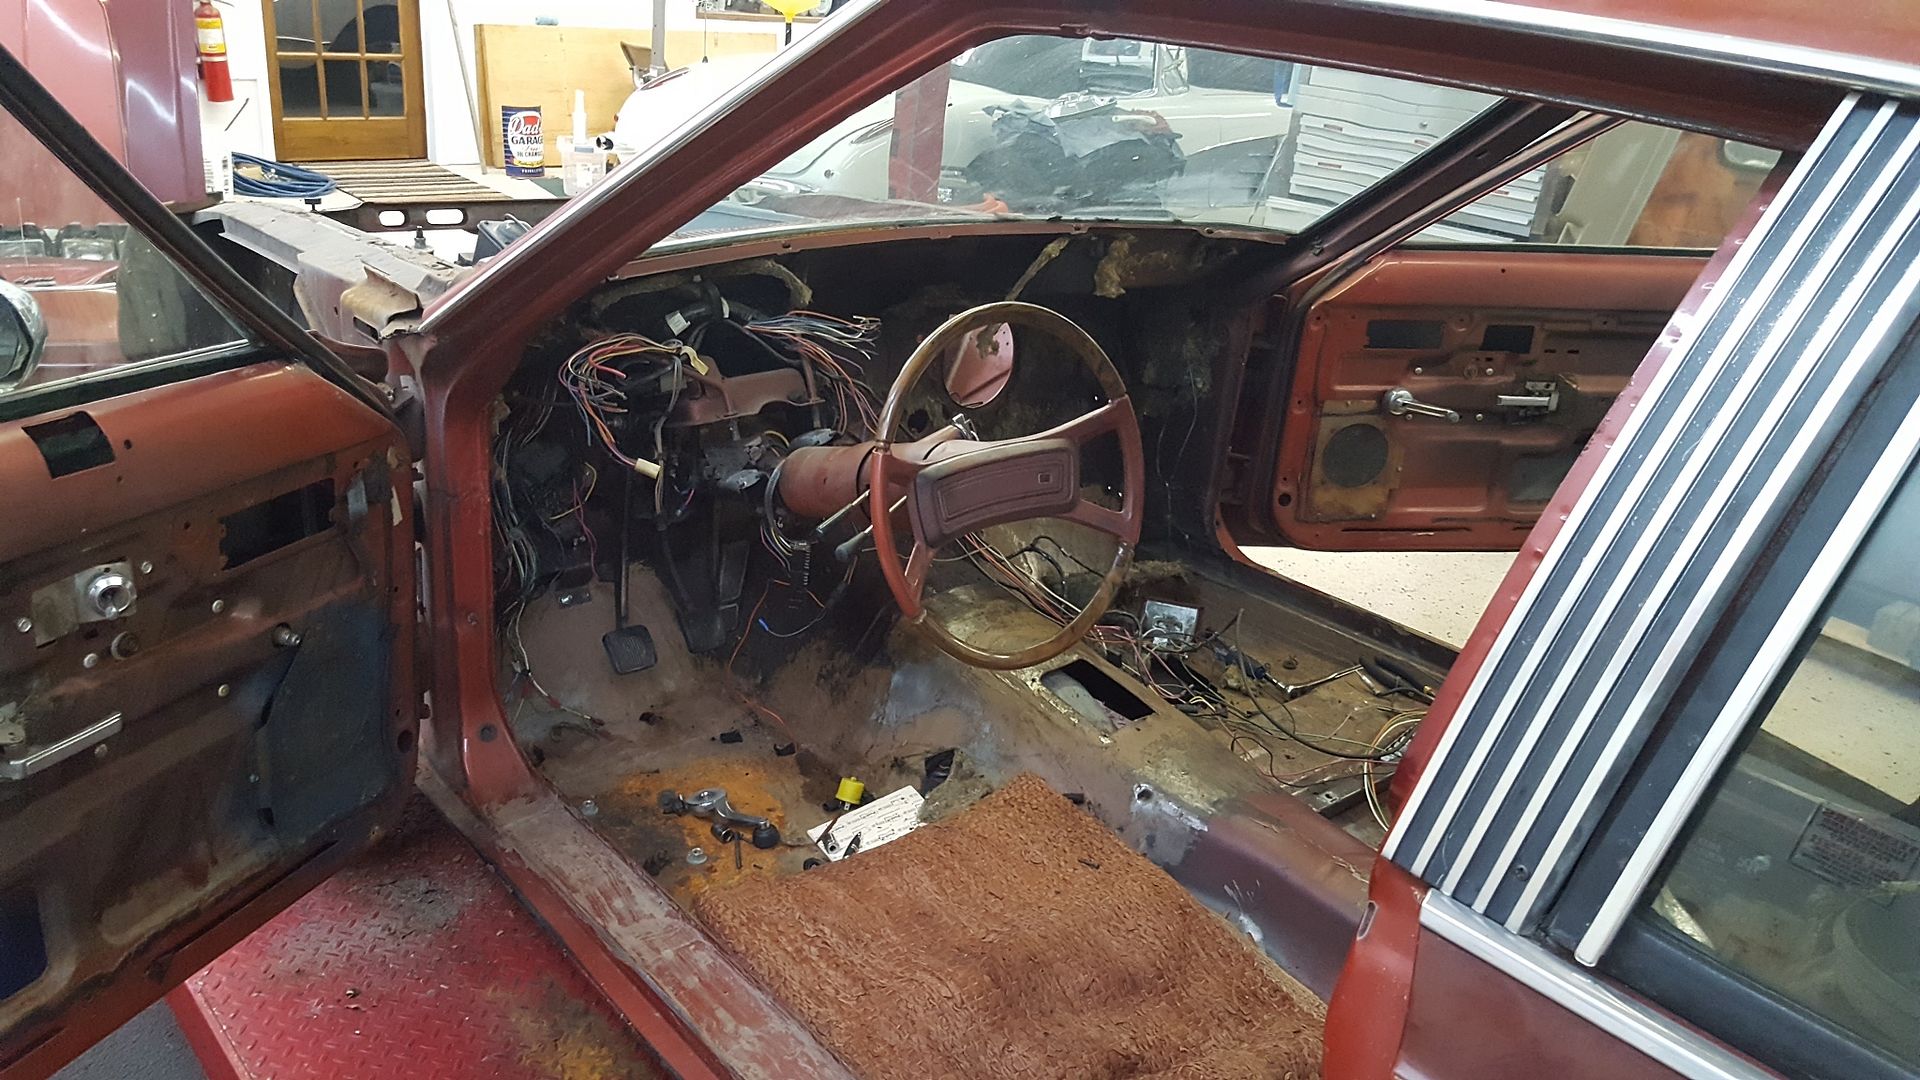
Up next is our first night of actual work on the car itself. Unbending it was step one. Probably should have done that before getting this far. Luckily, the car was far better, though far worse than we expected. We measured every which way we could think of, and the car was still square!!! That’s almost where the good news ends. The car as been the recipient of VERY piss poor rust repair and metal work. Like, the subframe on the drivers side isnt welded to the floor pan, sheet metal only tacked in on the rockers, etc. Scary crap, really, but the lack of structural integrity probably is what saved the car, allowing it to flex when it got wanked.
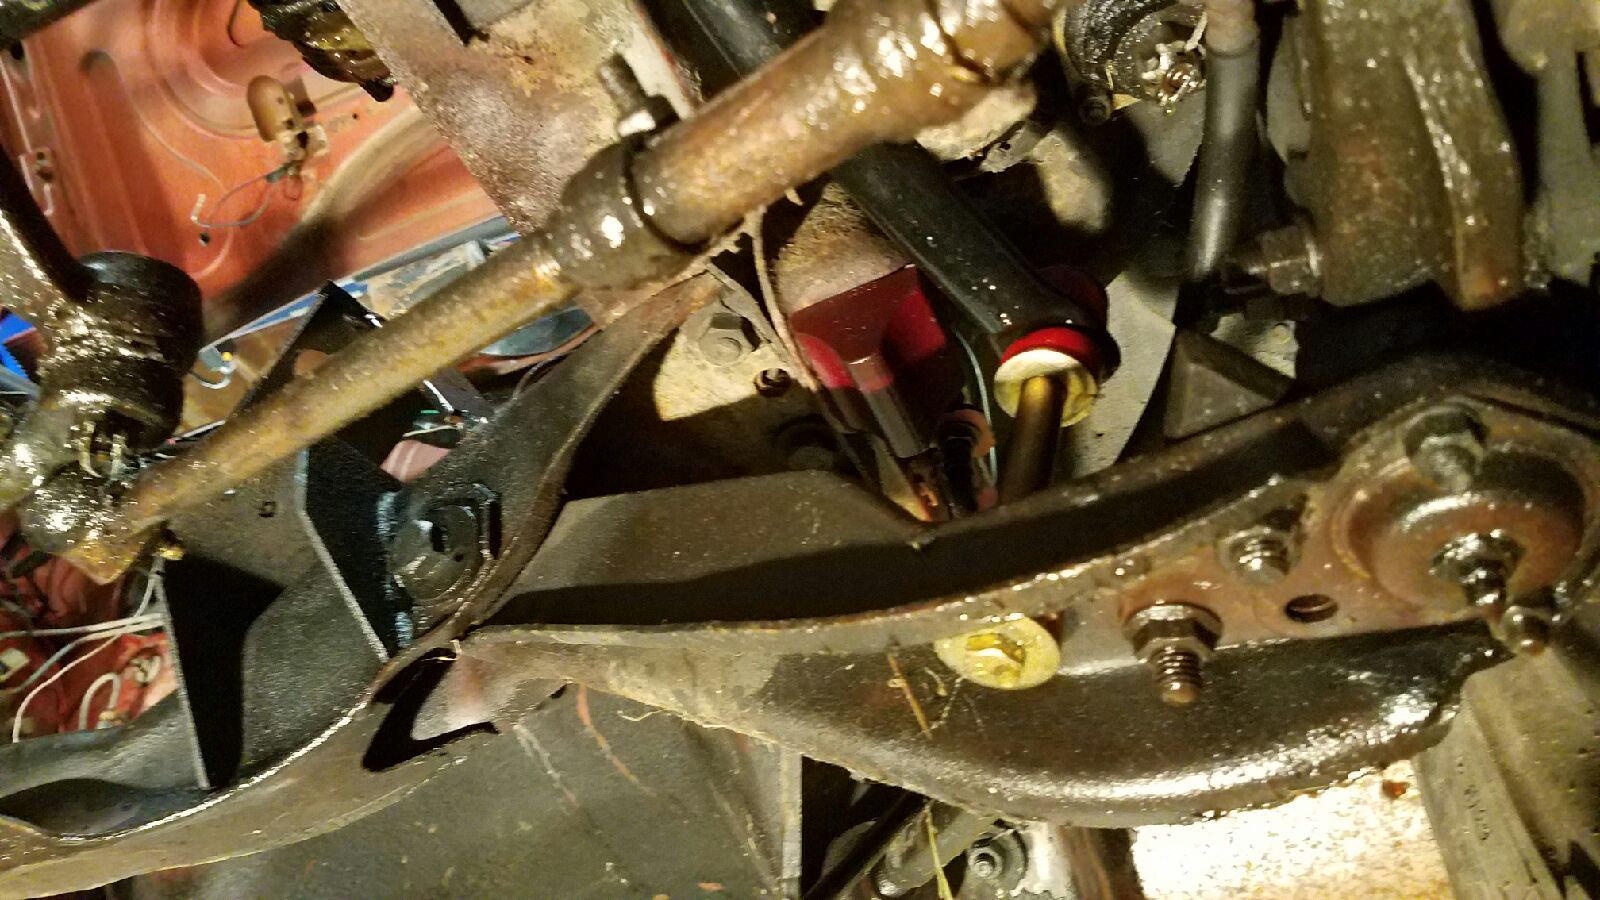
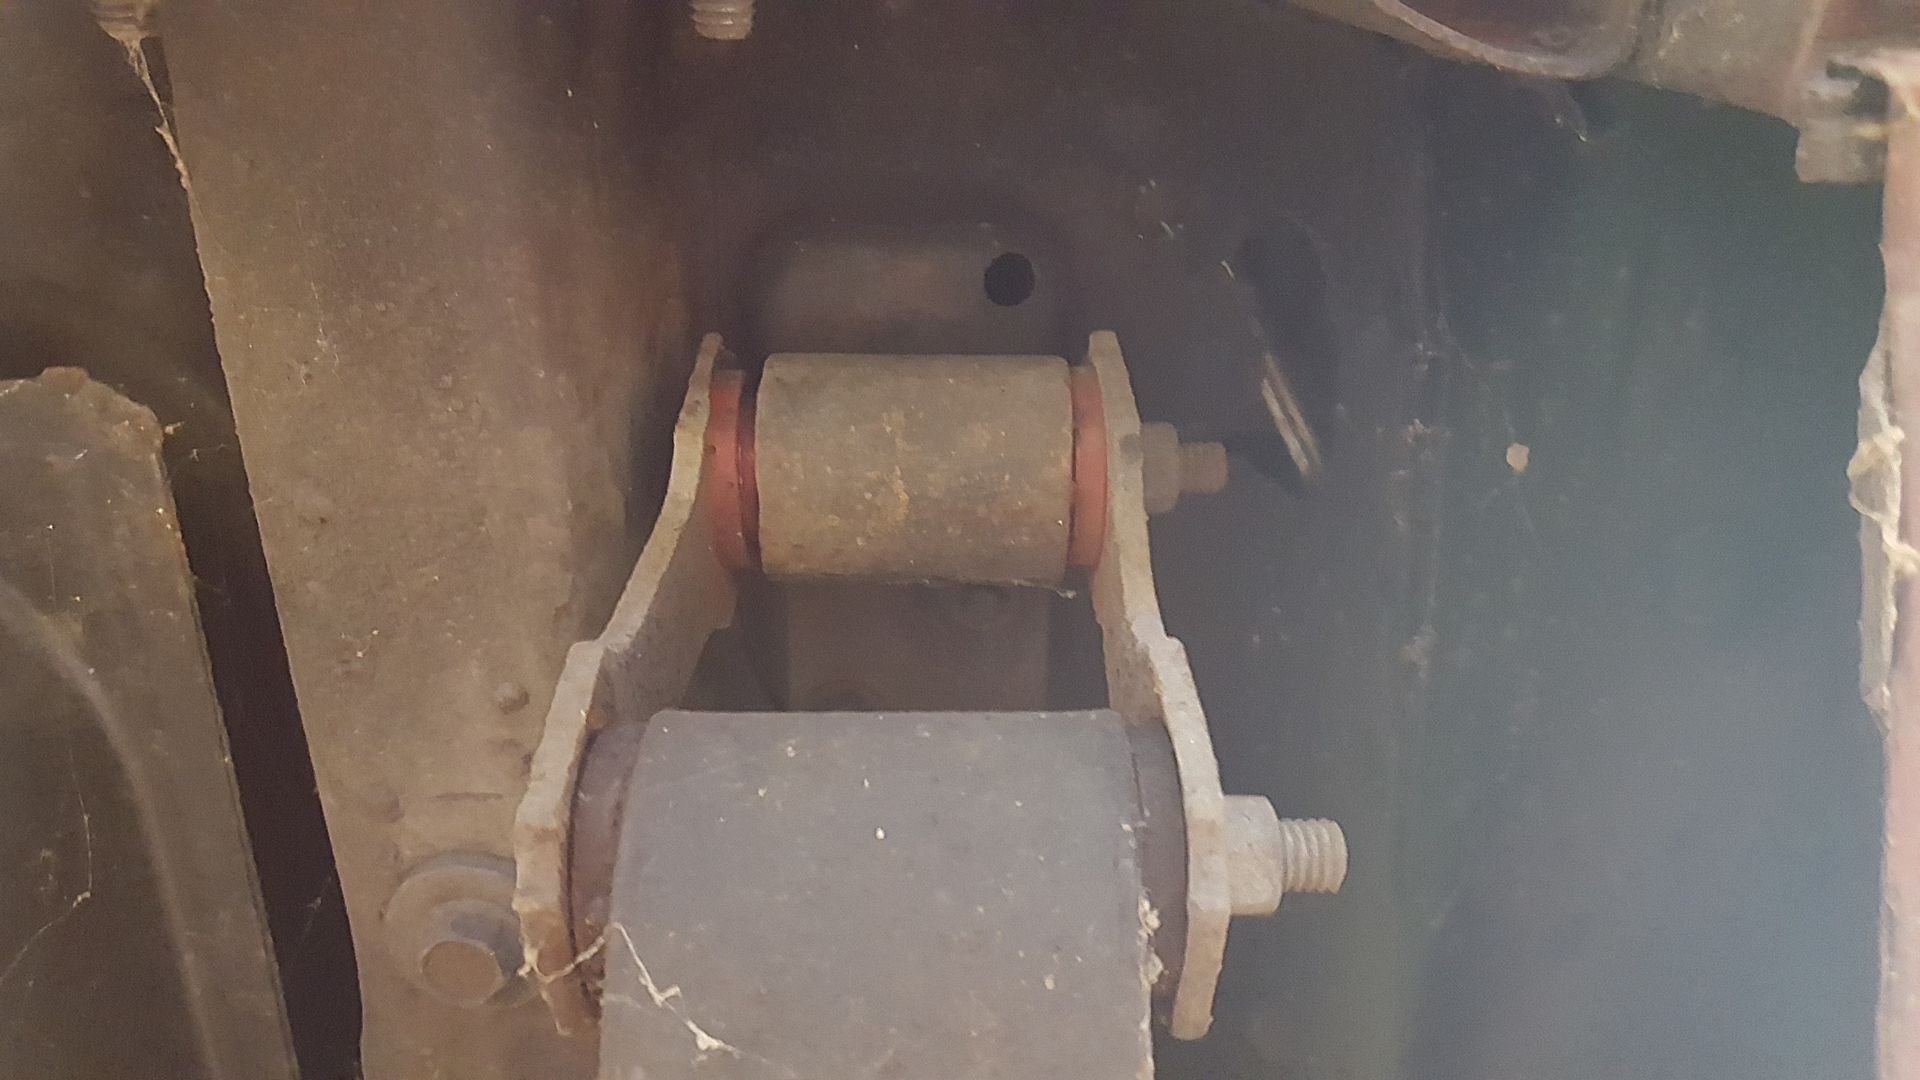
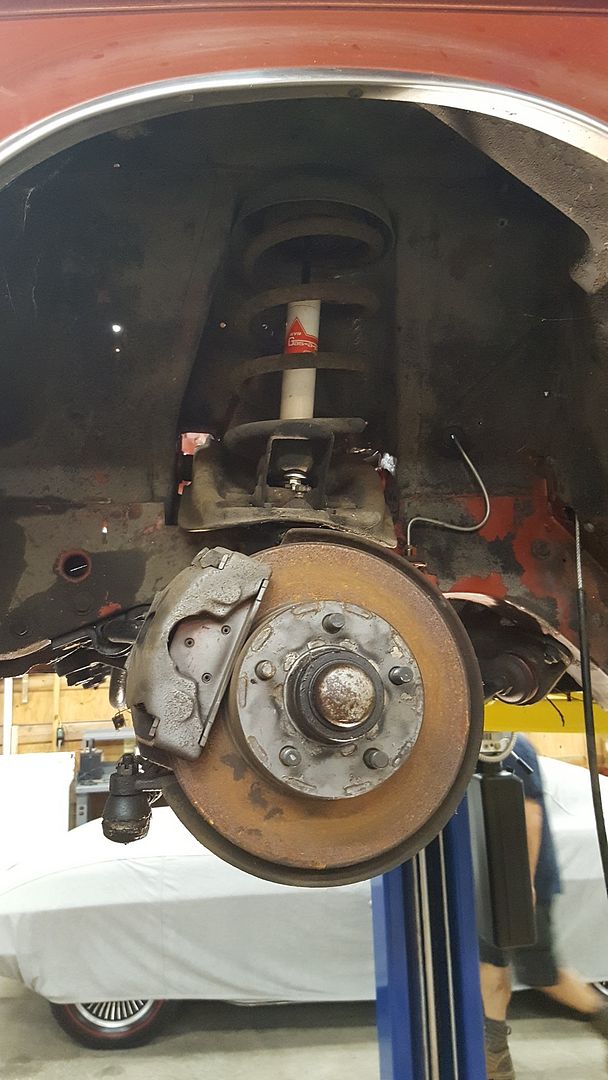
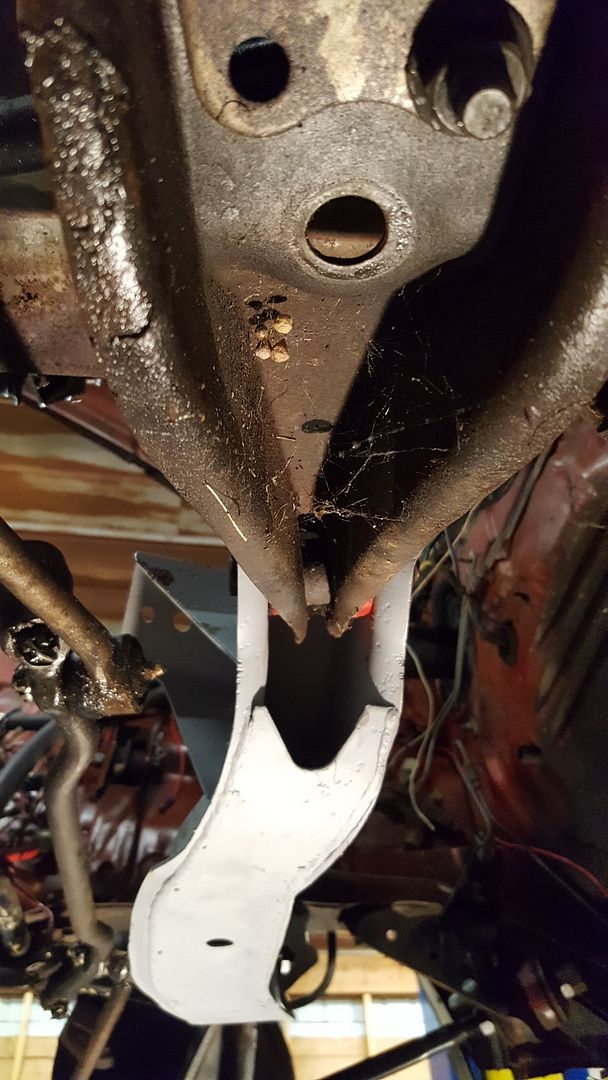
To remove the crossmember, and the lower control arms from it, we had to chop it into pieces. But the LCAs straightened back out, and the strut rods weren't visibly bent. So, major win!! And now, for a dump of pictures from Friday night. Feel free to discuss anything you see, as ive never seen another one of these in person. Just this one.
[URL=http://s54.photobucket.com/user/dusterbd13/media/amc/Resized_20160915_211233_zpsa2vgc3je.jpg.html]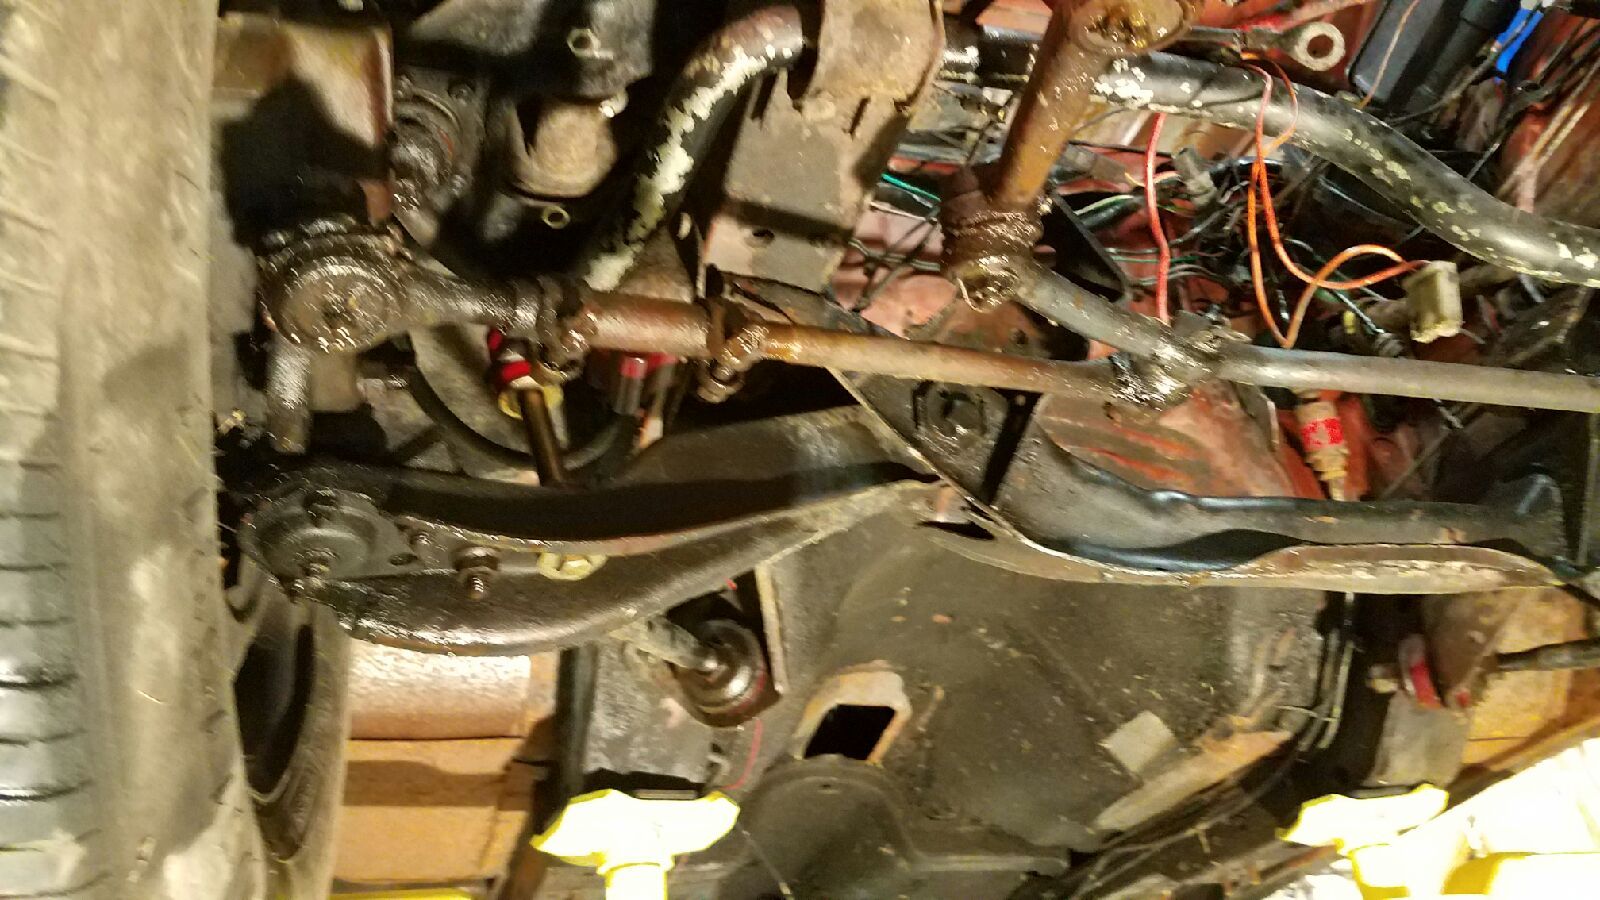 [/URL]
[URL=http://s54.photobucket.com/user/dusterbd13/media/amc/Resized_20160915_211313_zpsd6nh78yw.jpg.html]
 [/URL]
[URL=http://s54.photobucket.com/user/dusterbd13/media/amc/Resized_20160915_211331_zpscosljddx.jpg.html]
 [/URL]
[URL=http://s54.photobucket.com/user/dusterbd13/media/amc/20160916_175953_zpsxizlgali.jpg.html]
 [/URL]
[URL=http://s54.photobucket.com/user/dusterbd13/media/amc/20160916_180013_zps62jhkruf.jpg.html]
 [/URL]
[URL=http://s54.photobucket.com/user/dusterbd13/media/amc/20160916_180033_zpsdp9mwtwm.jpg.html]
 [/URL]
[URL=http://s54.photobucket.com/user/dusterbd13/media/amc/20160916_180052_zpsu0ieecvo.jpg.html]
 [/URL]
[URL=http://s54.photobucket.com/user/dusterbd13/media/amc/20160916_180058_zpswesjsumx.jpg.html]
 [/URL]
[URL=http://s54.photobucket.com/user/dusterbd13/media/amc/20160916_180303_zpsivbqlvic.jpg.html]
 [/URL]
[URL=http://s54.photobucket.com/user/dusterbd13/media/amc/20160916_180316_zps8ywsskno.jpg.html]
 [/URL]
[URL=http://s54.photobucket.com/user/dusterbd13/media/amc/20160916_204656_zpsqxkcgxza.jpg.html]
 [/URL]
[URL=http://s54.photobucket.com/user/dusterbd13/media/amc/20160916_204702_zpsf2jwekpc.jpg.html]
 [/URL]
[URL=http://s54.photobucket.com/user/dusterbd13/media/amc/20160916_204709_zpsvf2nhxlw.jpg.html]
 [/URL]
[URL=http://s54.photobucket.com/user/dusterbd13/media/amc/20160916_204717_zpsynj4oa3z.jpg.html]
 [/URL]
[URL=http://s54.photobucket.com/user/dusterbd13/media/amc/20160916_205015_zpskabazdtl.jpg.html]
 [/URL]
Next up is moving the car from the barn, and down to my shop. And cleaning. And welding. And cleaning. And welding. And cleaning. And welding. and....
Would the sand blaster pressure washer like Toyman used on the bus do it? I've been looking for an excuse to get one.
In reply to tuna55:
In fairness, that was the only way we could think of to get rid of the old gas in the fuel tank.
Challenge Budget: Car/parts $200 Donor Lincoln town car: 410 Engine crossmember: 120 Sold transmission crossmember from Lincoln: 10 Sold rear axle from lincoln: -50 Scrapped what was left of lincoln: -89 trans cooler: 2 Engine swap: 5.0 plus 300 boot Sold kelstar wheels-200 (cant recoup more than we spent) mustang 5.0 convertible engine mounts: 22 1/4 thick, 10x24 chunk of plate steel 7.50 (.30 lb, 25lb) Brand new Watkins glen nascar slicks and wheels, which were bought for $50, and promptly sold to Dallas dad for $50 and some weld wheels with really old drag slicks. So, slicks were $0, but $50 taken out of the recoup limit.
Current total: 712.50
Update: we went to the charotte autofair this weekend. We spent money, and came away with a hell of a plan.
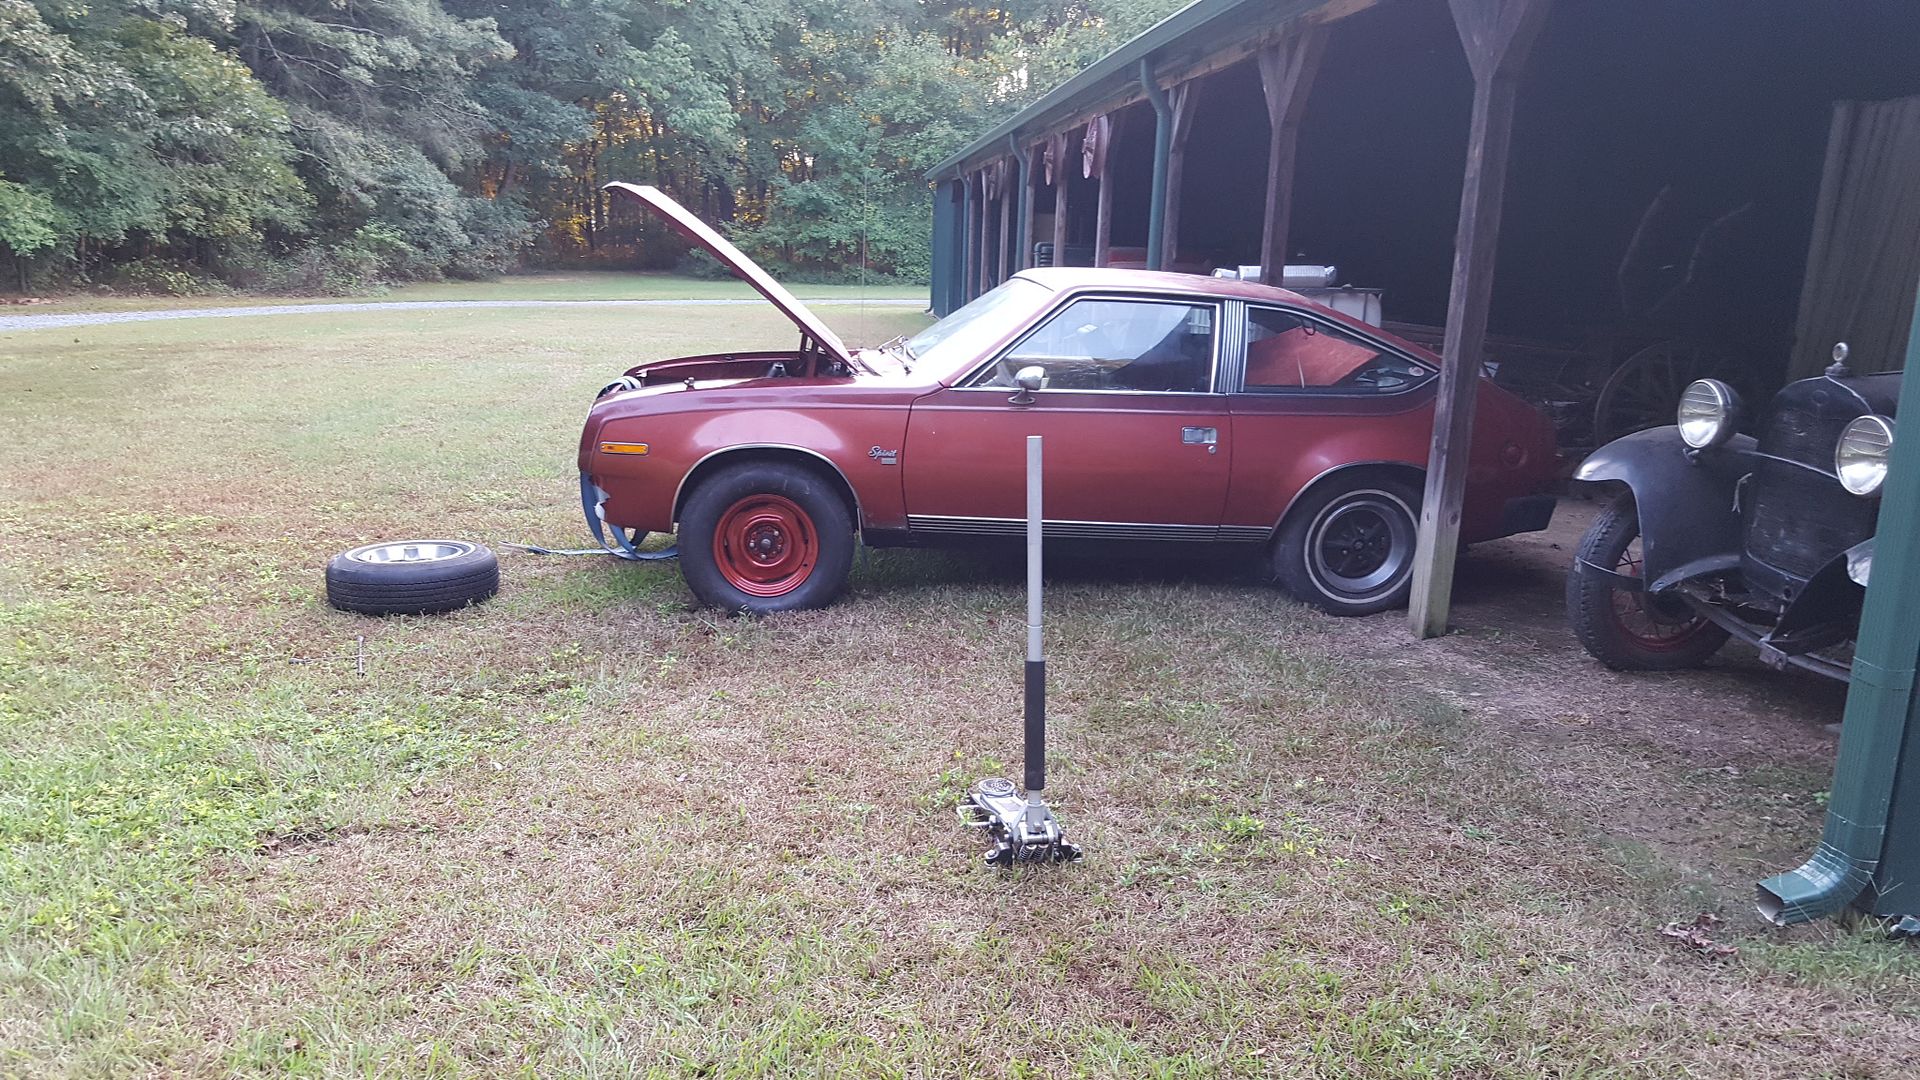
Before that, though, we were working on the tire package. After all, how are you expected to turn without grip? So far, we have tried nascar slicks (28x12x15) that didn't fit. We had previously run 235/60/15 cooper cobras on it. They fit. The 28x10.5 drag slicks mostly fit. So, I figured some 27x10x15 bias ply circle track slicks would fit. Local circle track racer gave us a set of 4 to try out, that still had a little life left in them.
They do not. Well, they do not clear stock bodywork. They would fit if were were willing to radius the wheelwells. We are not. So we gave them back.
What we finally settled on is a set of 25.5x8x15 bias ply slicks. On 15x7 mopar steel wheels from a diplomat that were given to us. We also tested out the color match industrial gloss paint. The tire in the picture is a 27x8x15. Is actually measures 28x10 when mounted and inflated. We have plenty of clearance with it in the back, but it hits the fender and wheel well in the front pretty bad. Its also not too pinched on the 7 inch wheel. This is a $5 used dirt track tire that we got t experiment. The wheel is done with a harbor freight spray gun as an experiment. Both served their purpose.
[URL=http://s54.photobucket.com/user/dusterbd13/media/amc/20160924_182719_zpsxll4drhn.jpg.html]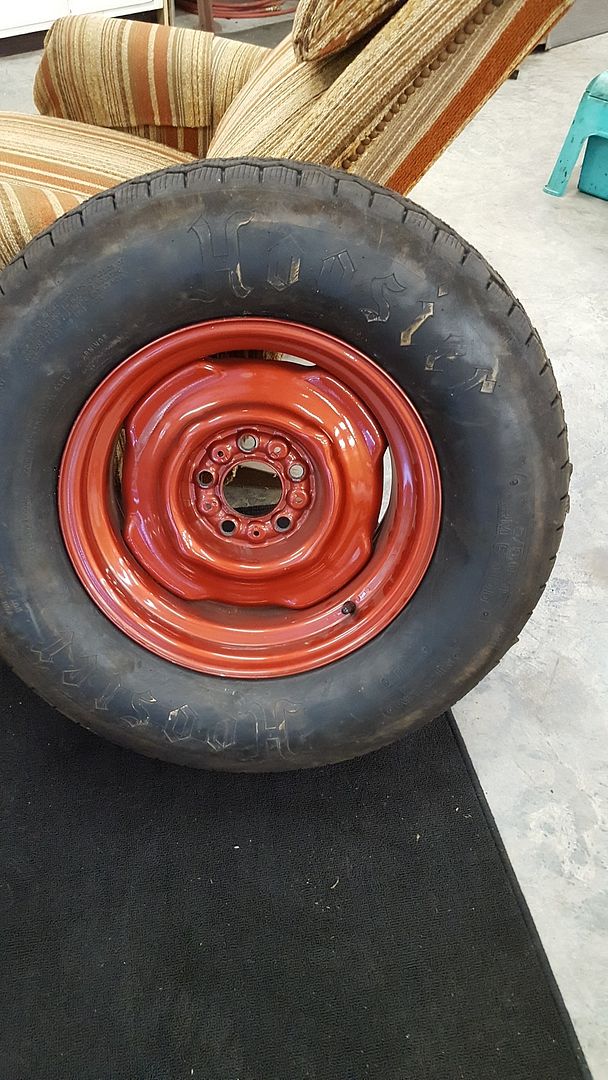 [/URL]
[URL=http://s54.photobucket.com/user/dusterbd13/media/amc/20160924_183715_zpsfpfyc9c8.jpg.html]
 [/URL]
Next is the crusty plated gold we scored at the autofair.
$5 grant wheel and hub (smaller diameter wheel gives more feedback. Well see if it stays.
[URL=http://s54.photobucket.com/user/dusterbd13/media/amc/20160924_182819_zps6pqus5ko.jpg.html]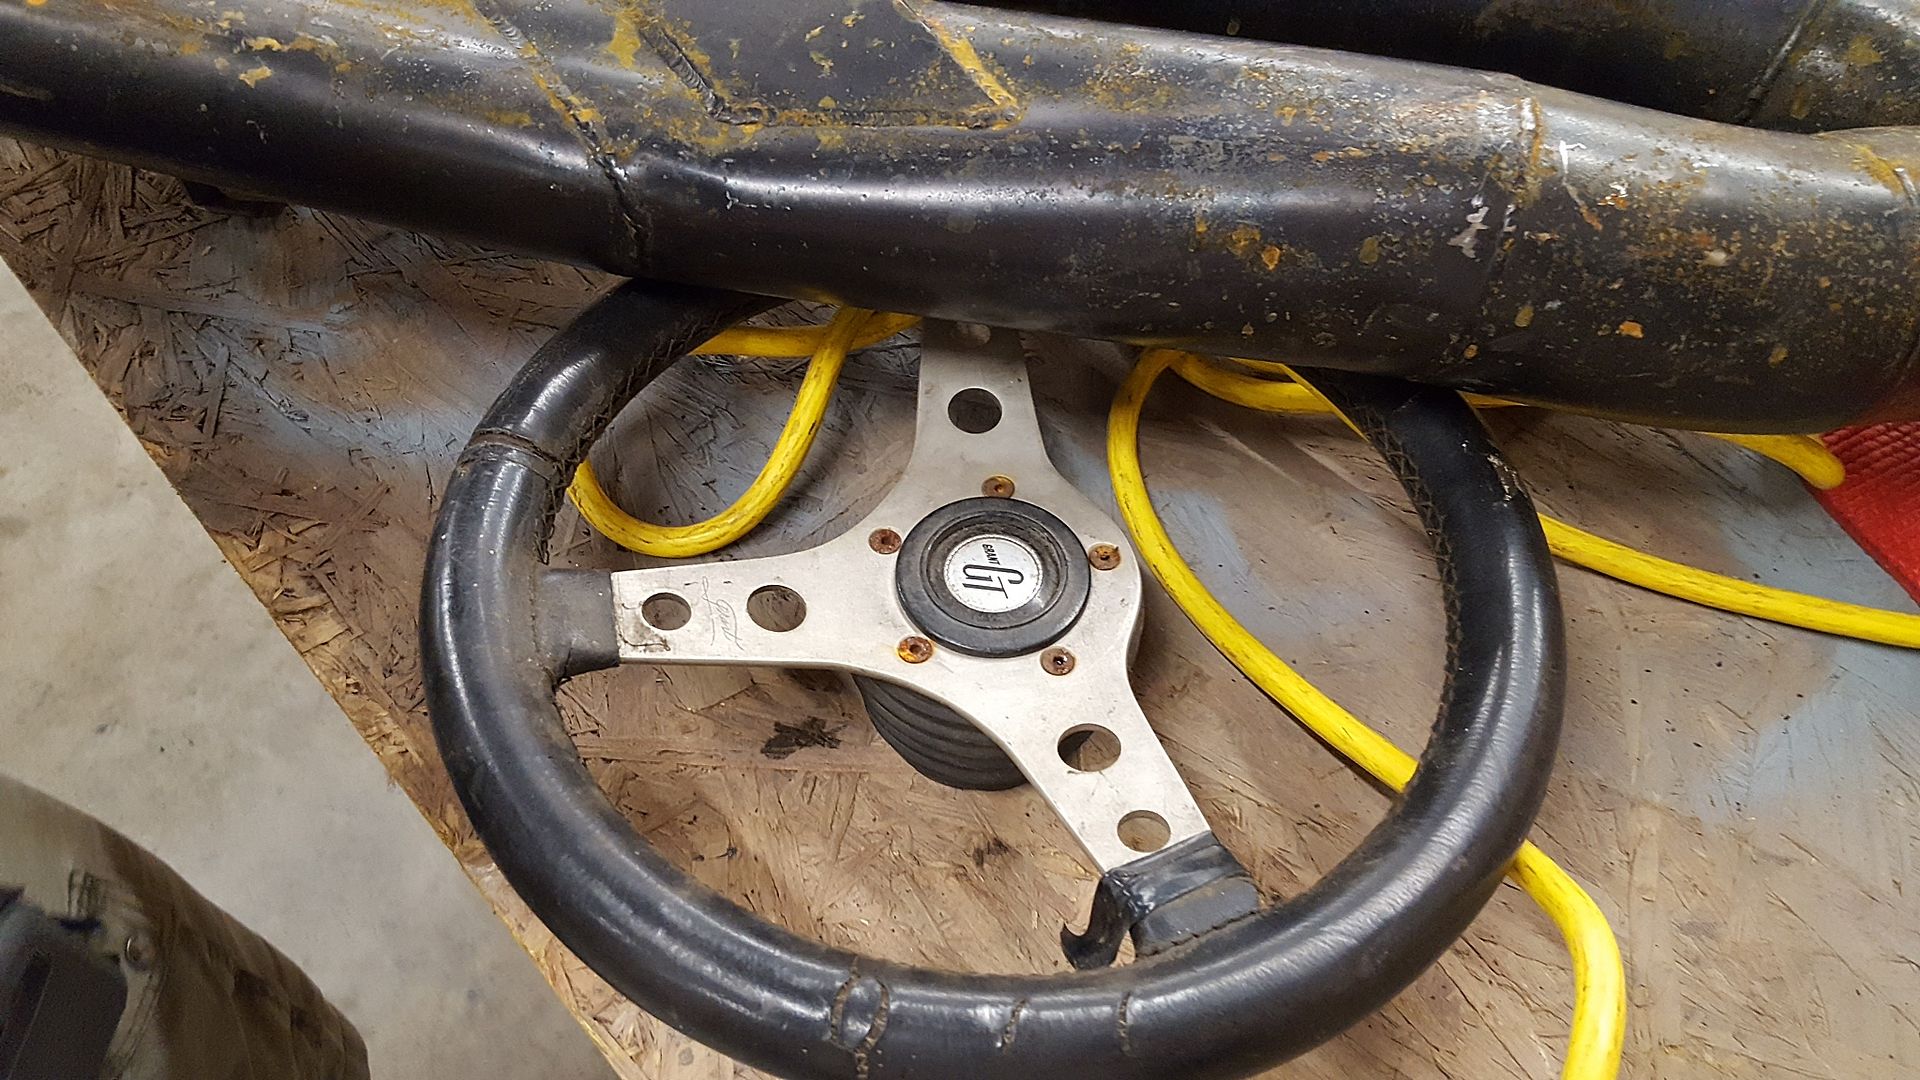 [/URL]
BOOM TUBES!!!! ($25, with brackets)
[URL=http://s54.photobucket.com/user/dusterbd13/media/amc/20160924_182812_zps1cbdvyfa.jpg.html]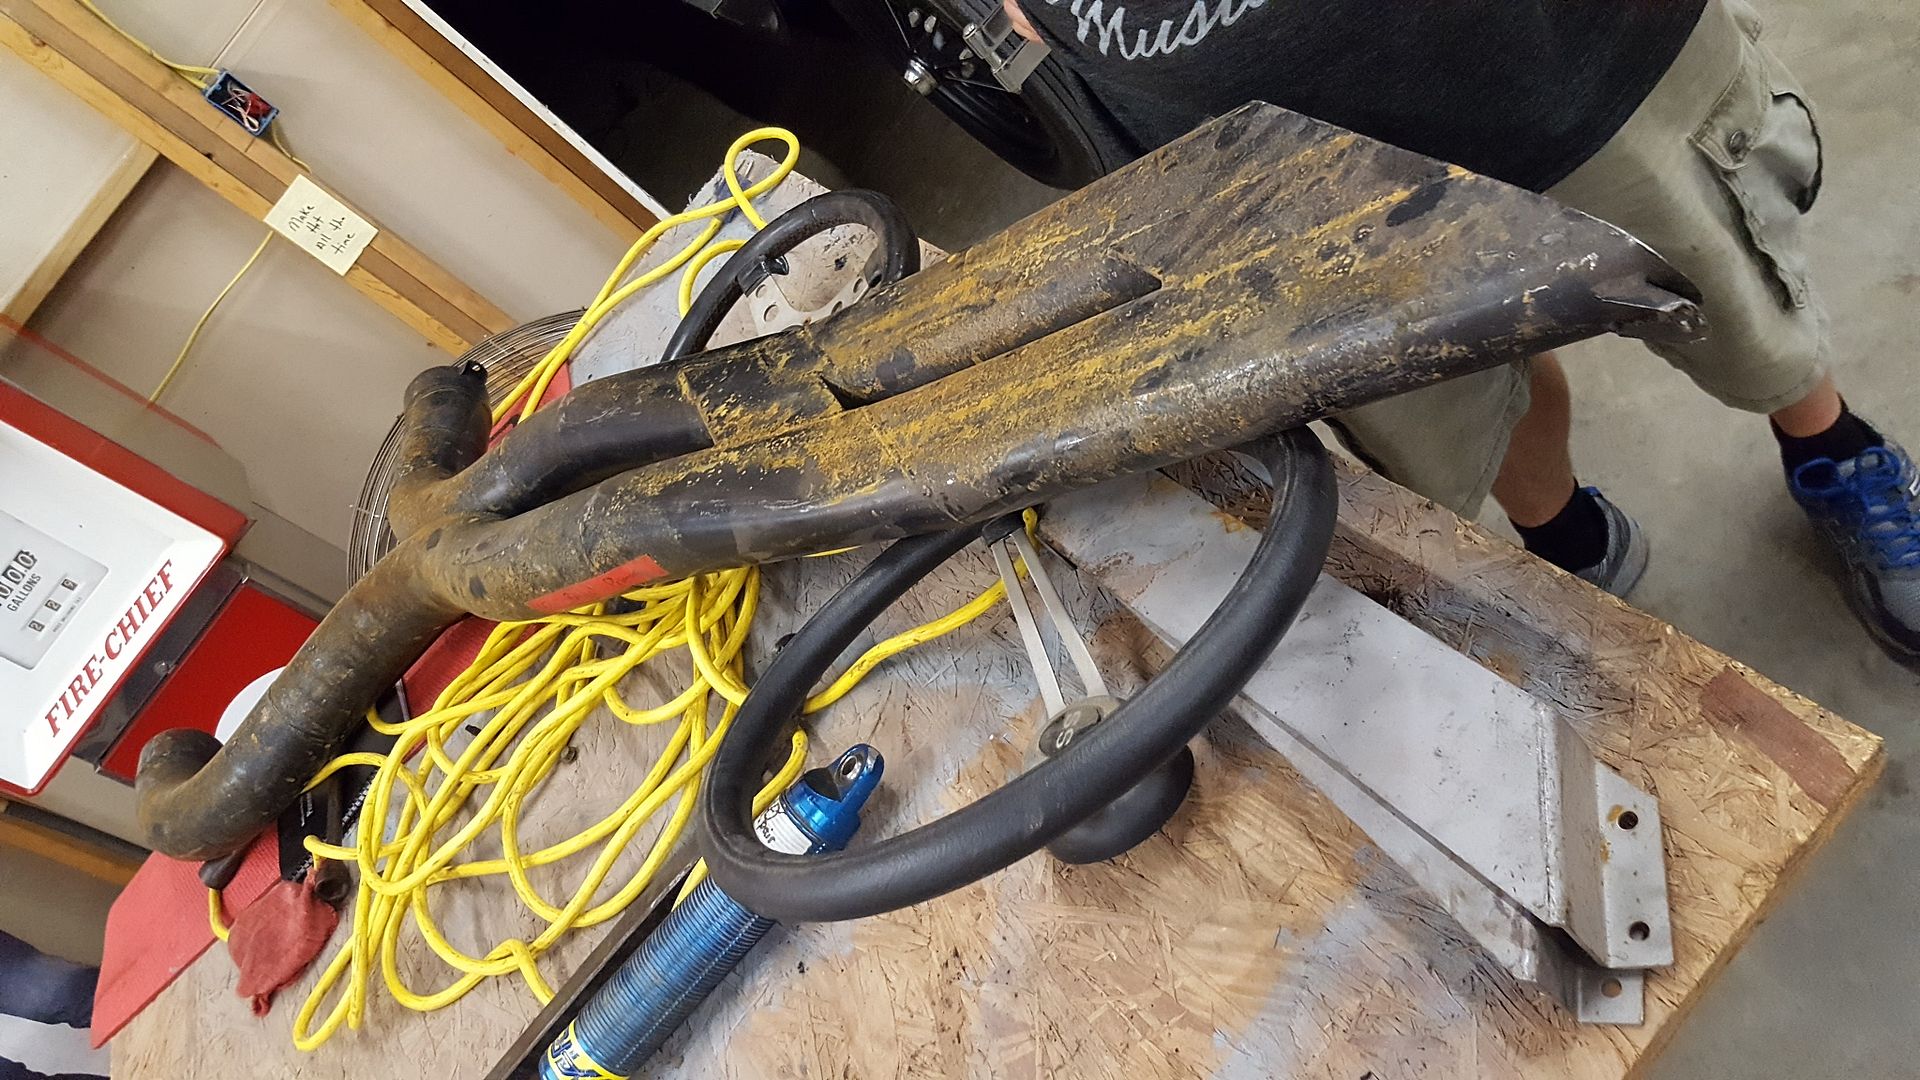 [/URL]
AFCO threaded body coilovers for the front end, $100. The fabricated center link was left by the trash can, so free.
[URL=http://s54.photobucket.com/user/dusterbd13/media/amc/20160924_182808_zpsumfy1foq.jpg.html]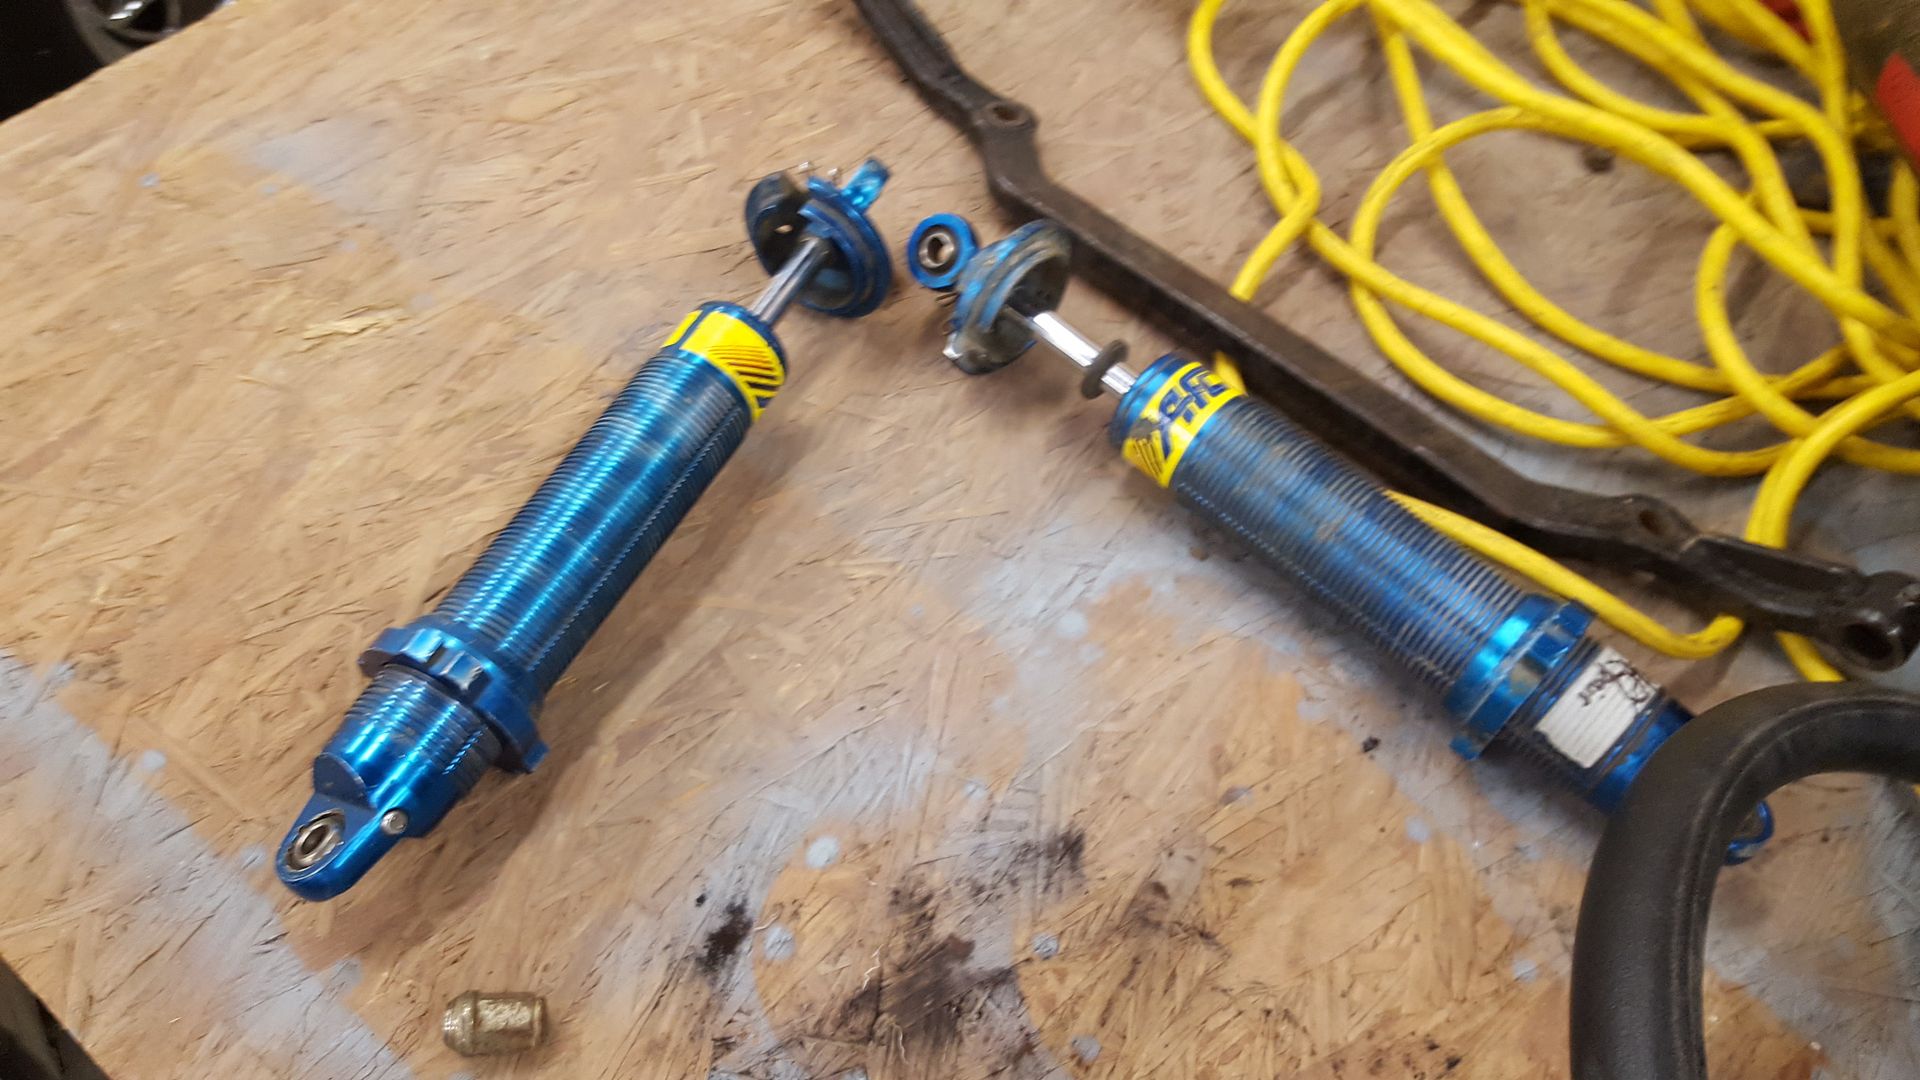 [/URL]
6 5/8 heim and jamb nuts, as well as threaded tube for the front suspension: $65
[URL=http://s54.photobucket.com/user/dusterbd13/media/amc/20160924_182747_zpshpujrg4e.jpg.html]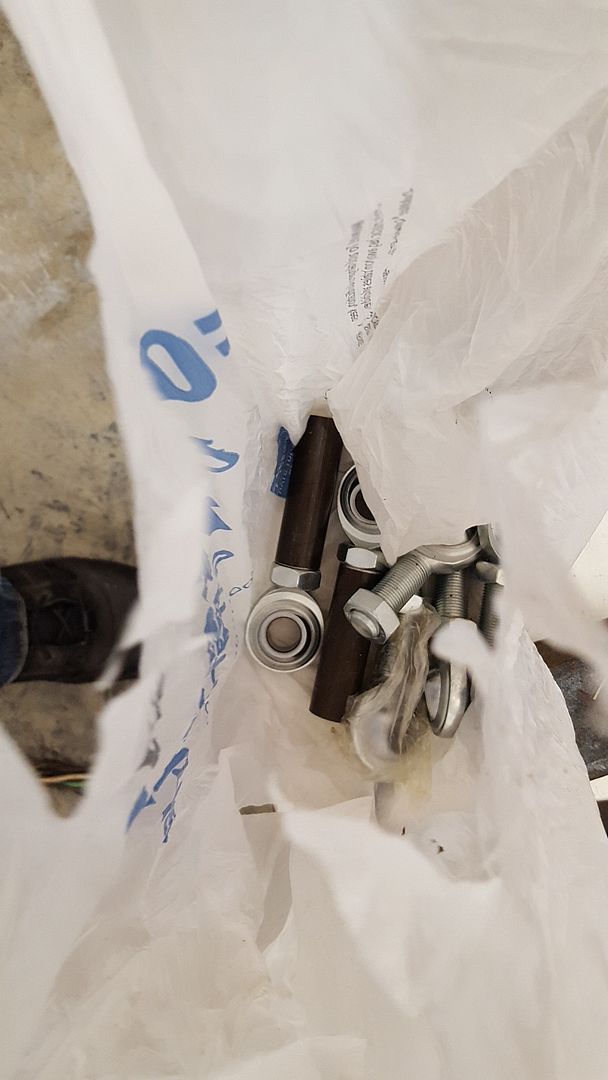 [/URL]
Pair of aluminum seats, $40. Sheet of flame retardant high density foam $10
[URL=http://s54.photobucket.com/user/dusterbd13/media/amc/20160924_182733_zpszopjjeyq.jpg.html]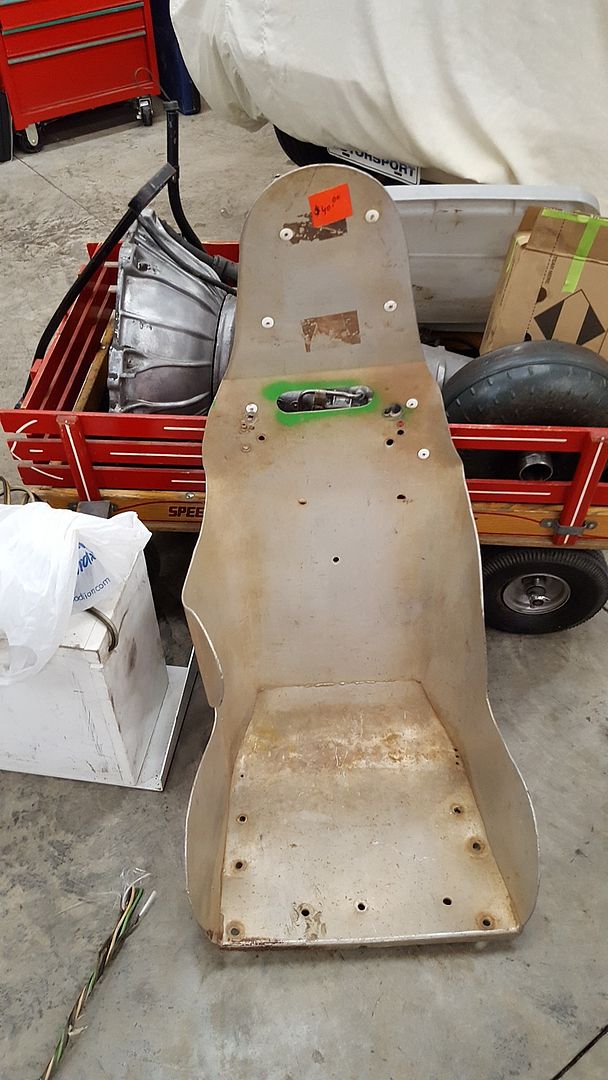 [/URL]
[URL=http://s54.photobucket.com/user/dusterbd13/media/amc/20160924_182800_zpss0ro9pyn.jpg.html]
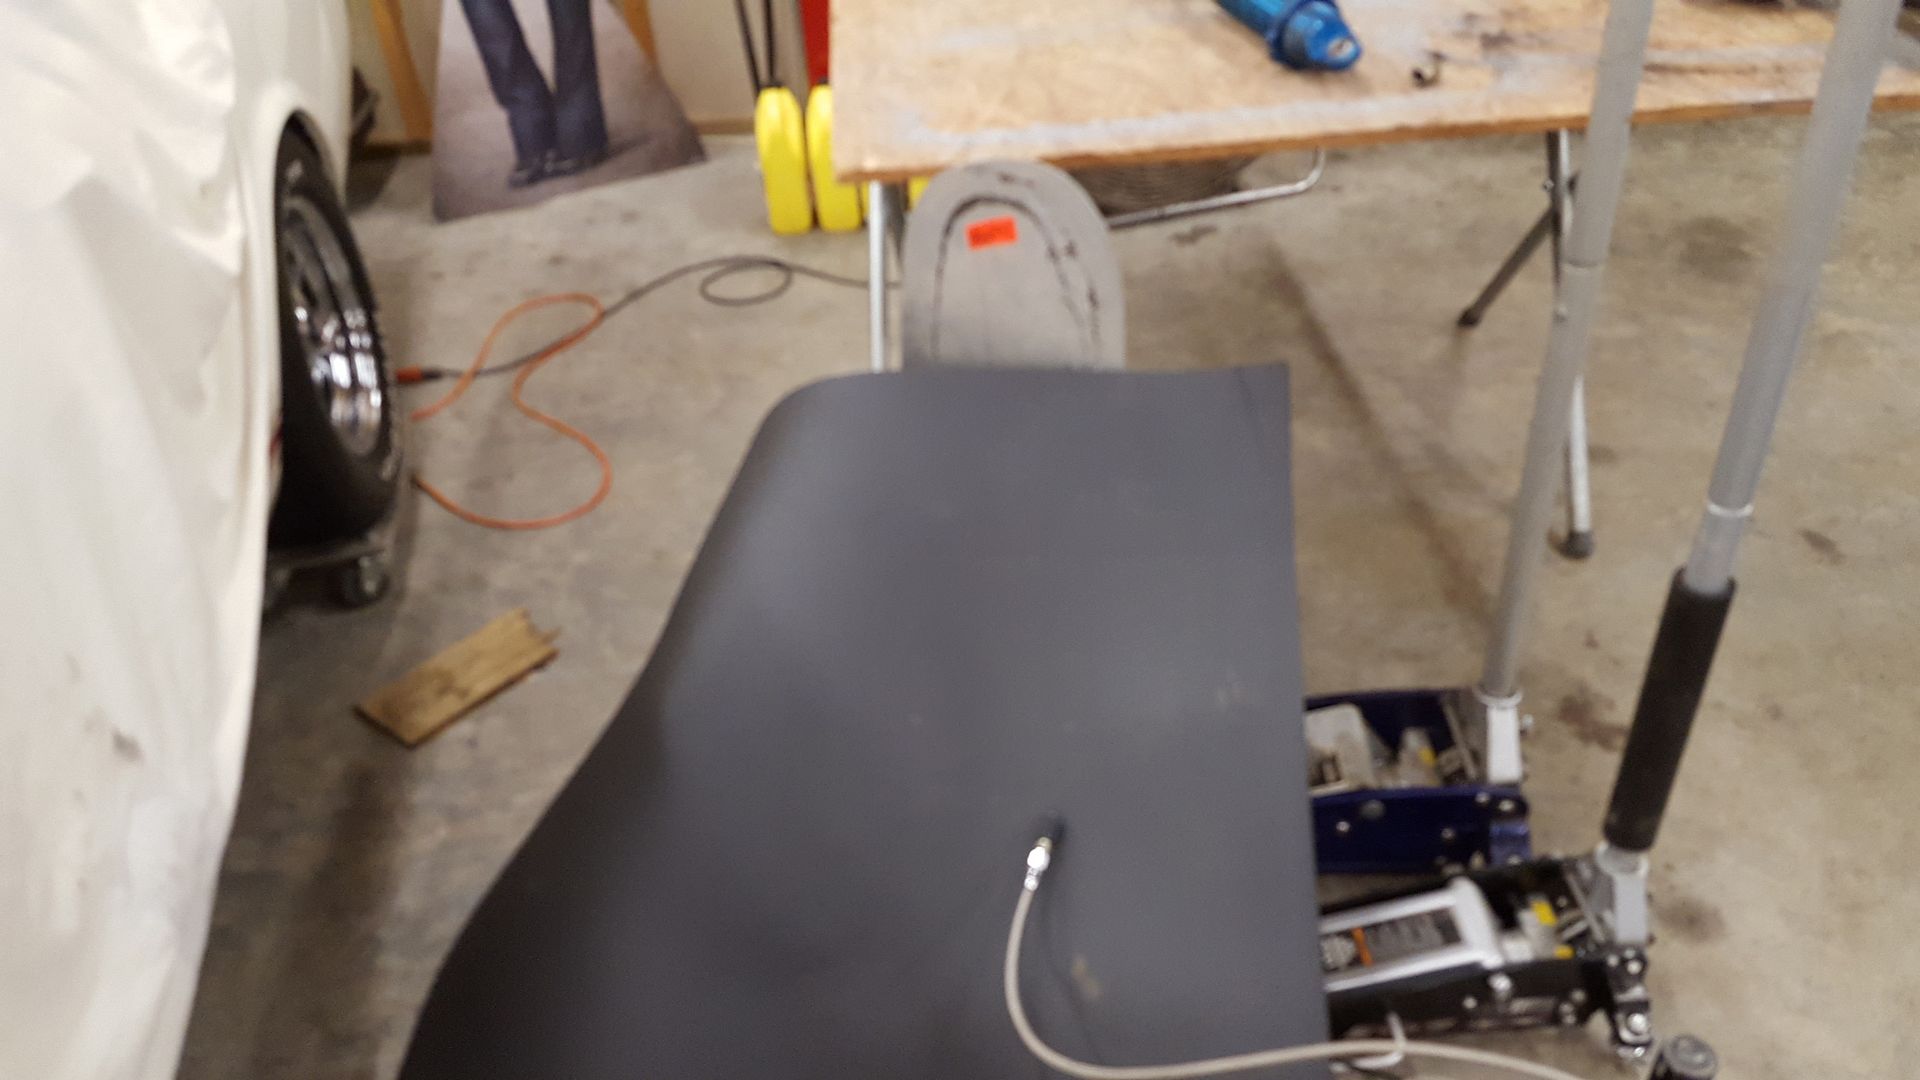 [/URL]
Fire suppression system parts (not included in challenge budget. But ive had 2nd degree burns on the boys before, so were getting safety gear come hell or high water)
[URL=http://s54.photobucket.com/user/dusterbd13/media/amc/20160924_182758_zpsxrkcp4qc.jpg.html]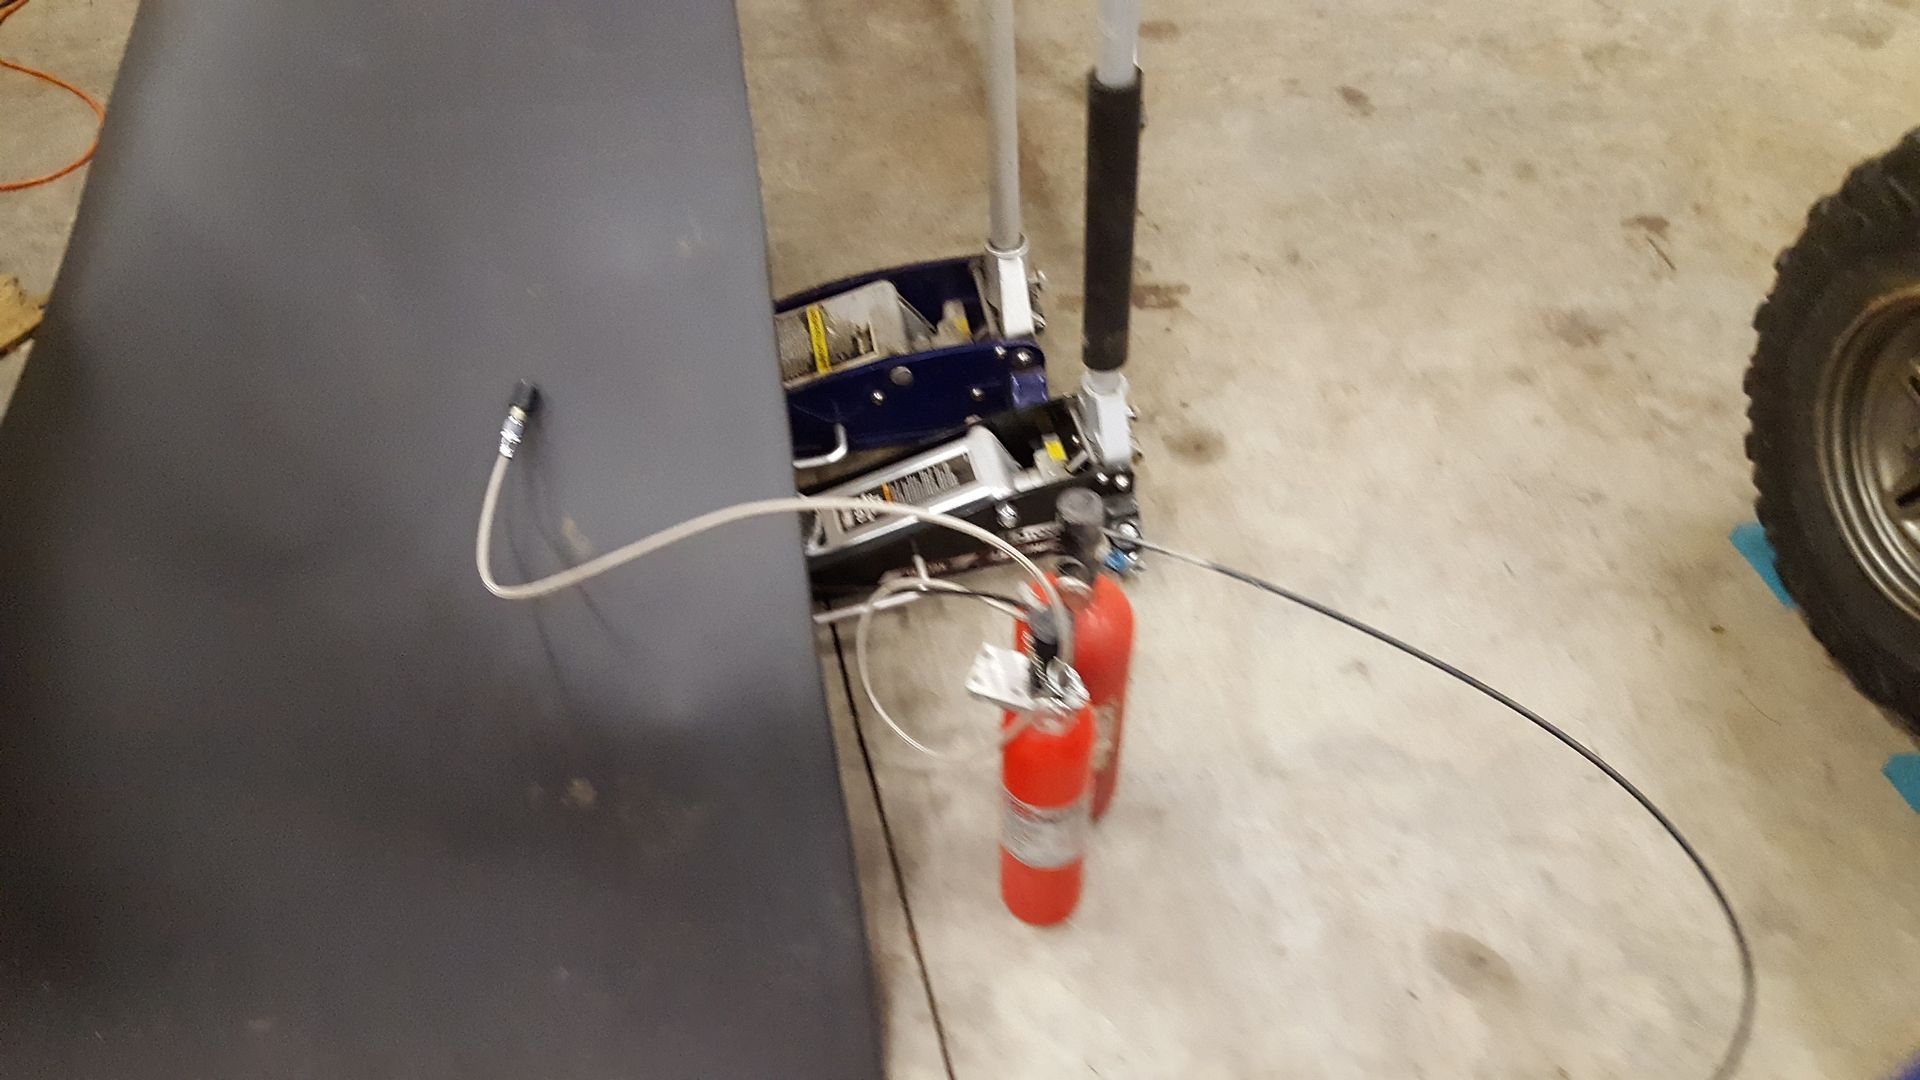 [/URL]
Long tube headers for 66-67 mustang, and oil pan $15
[URL=http://s54.photobucket.com/user/dusterbd13/media/amc/20160924_182755_zpsl8170nkn.jpg.html]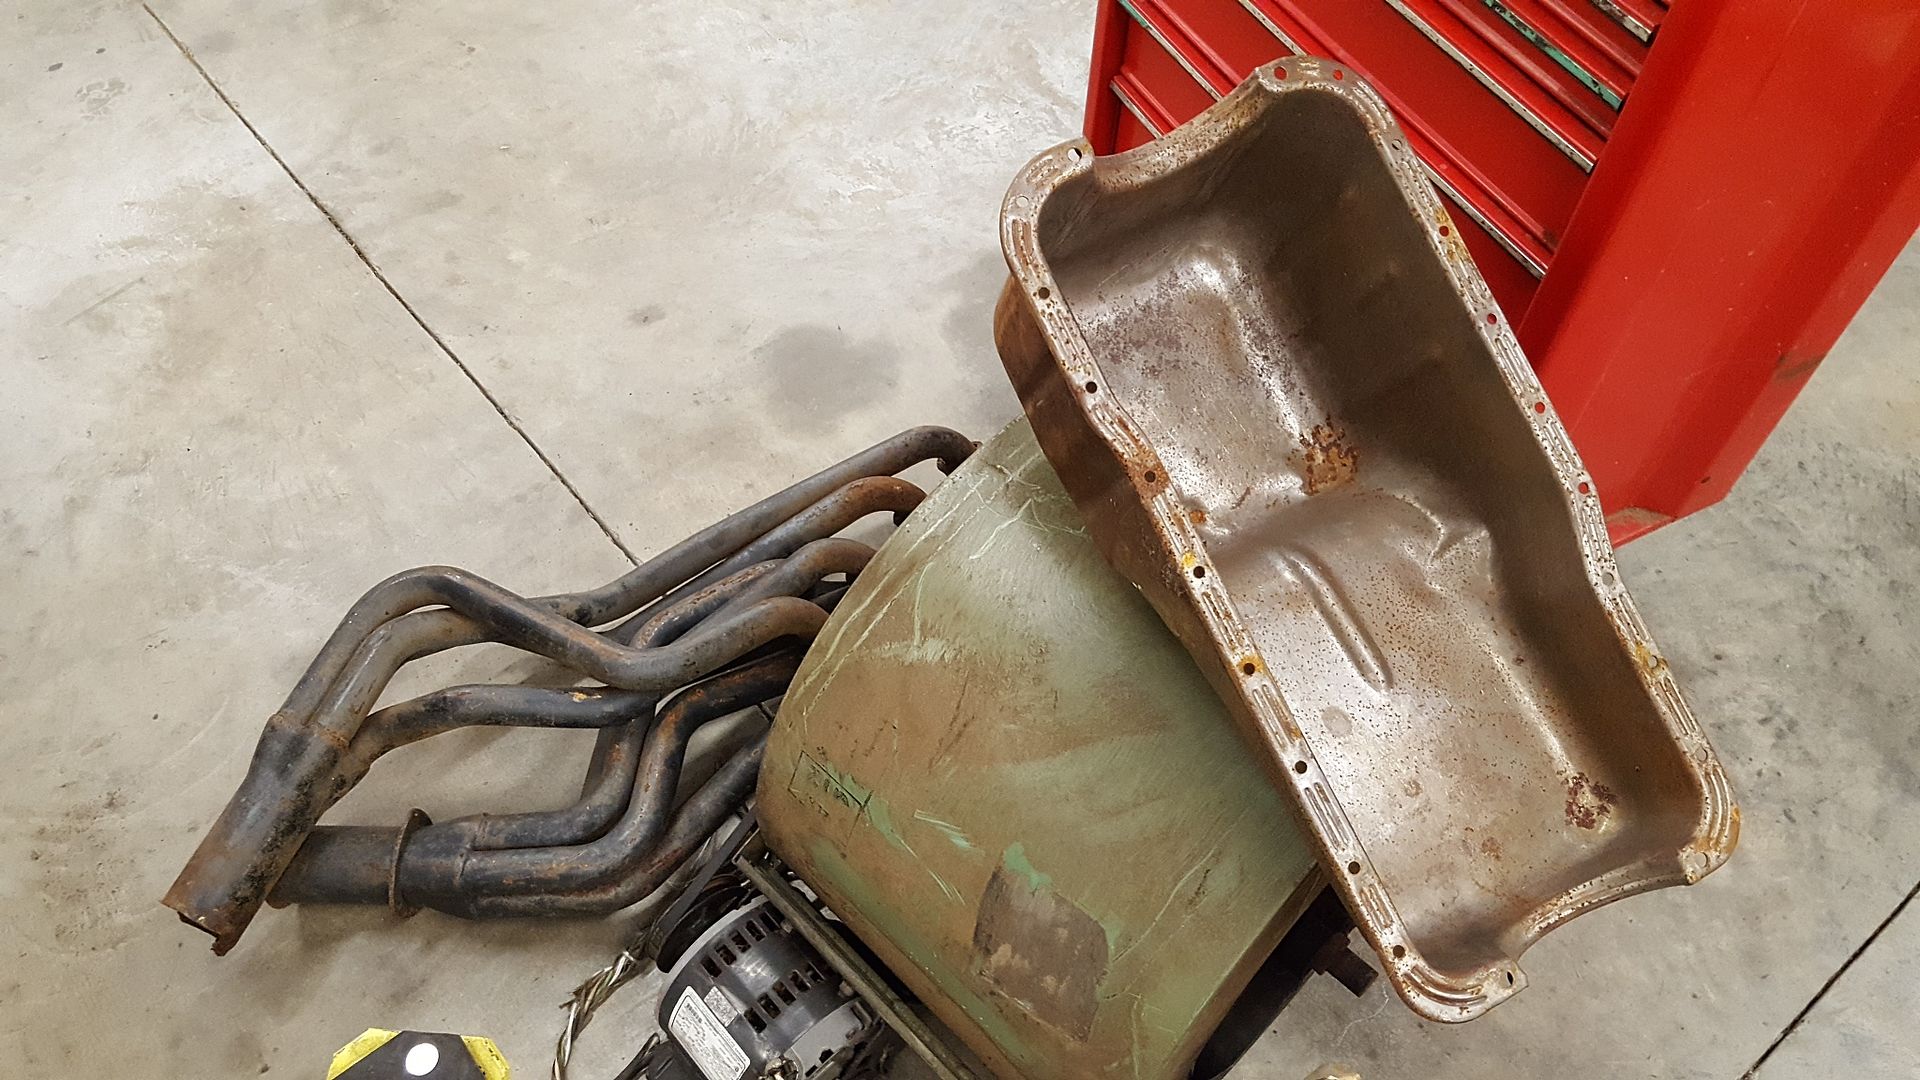 [/URL]
Solid steel lowering blocks, with the holes drilled to offset the rear axle rearwards. $5
[URL=http://s54.photobucket.com/user/dusterbd13/media/amc/20160924_182749_zpsuywjgc65.jpg.html]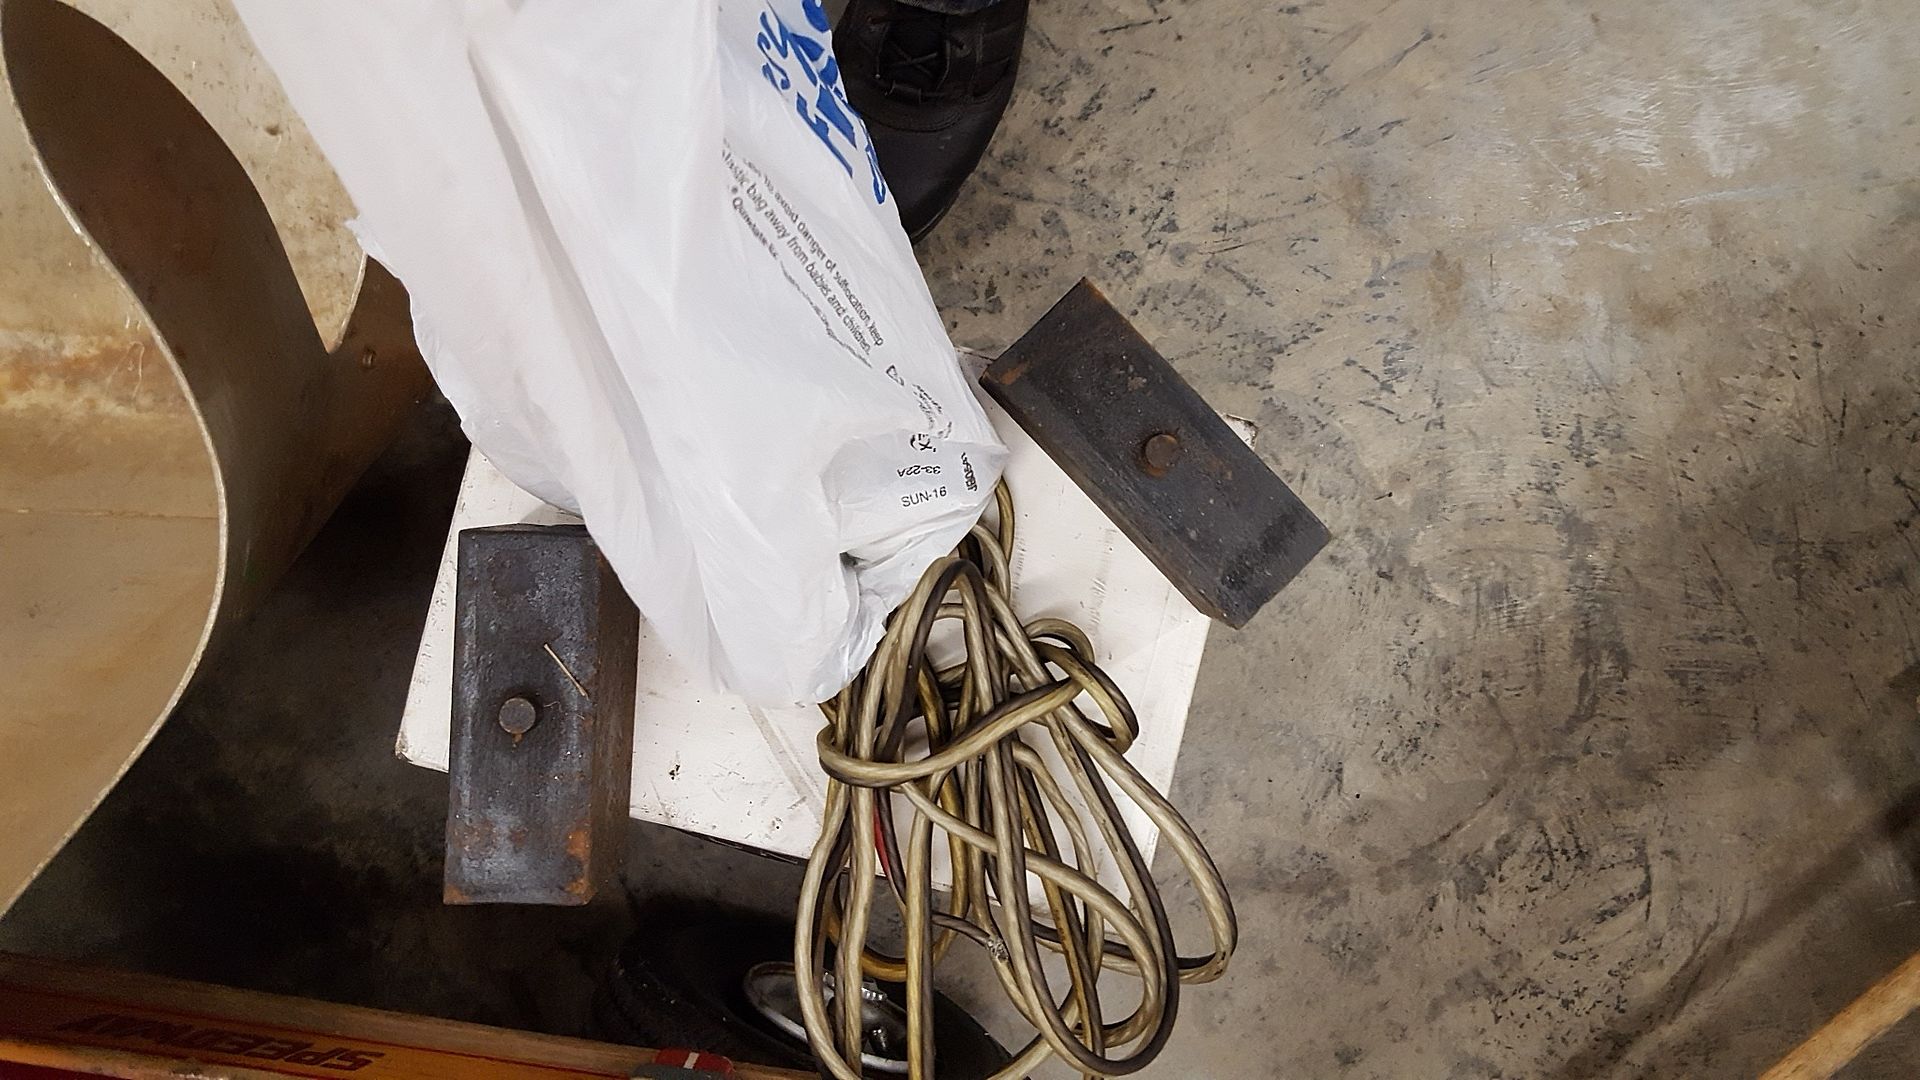 [/URL]
New challenge budget total: 977.50
This coming week, were meeting a challenge competitor Tuesday night. Then, Thursday or Friday were towing the car to my shop and beginning the cleaning/welding/painting the underside thrash. We need to make subframe connectors while we are at it as well, if anyone has any good info for spirits.
[URL=http://s54.photobucket.com/user/dusterbd13/media/amc/20161007_221121_zpsgtxgzhoh.jpg.html]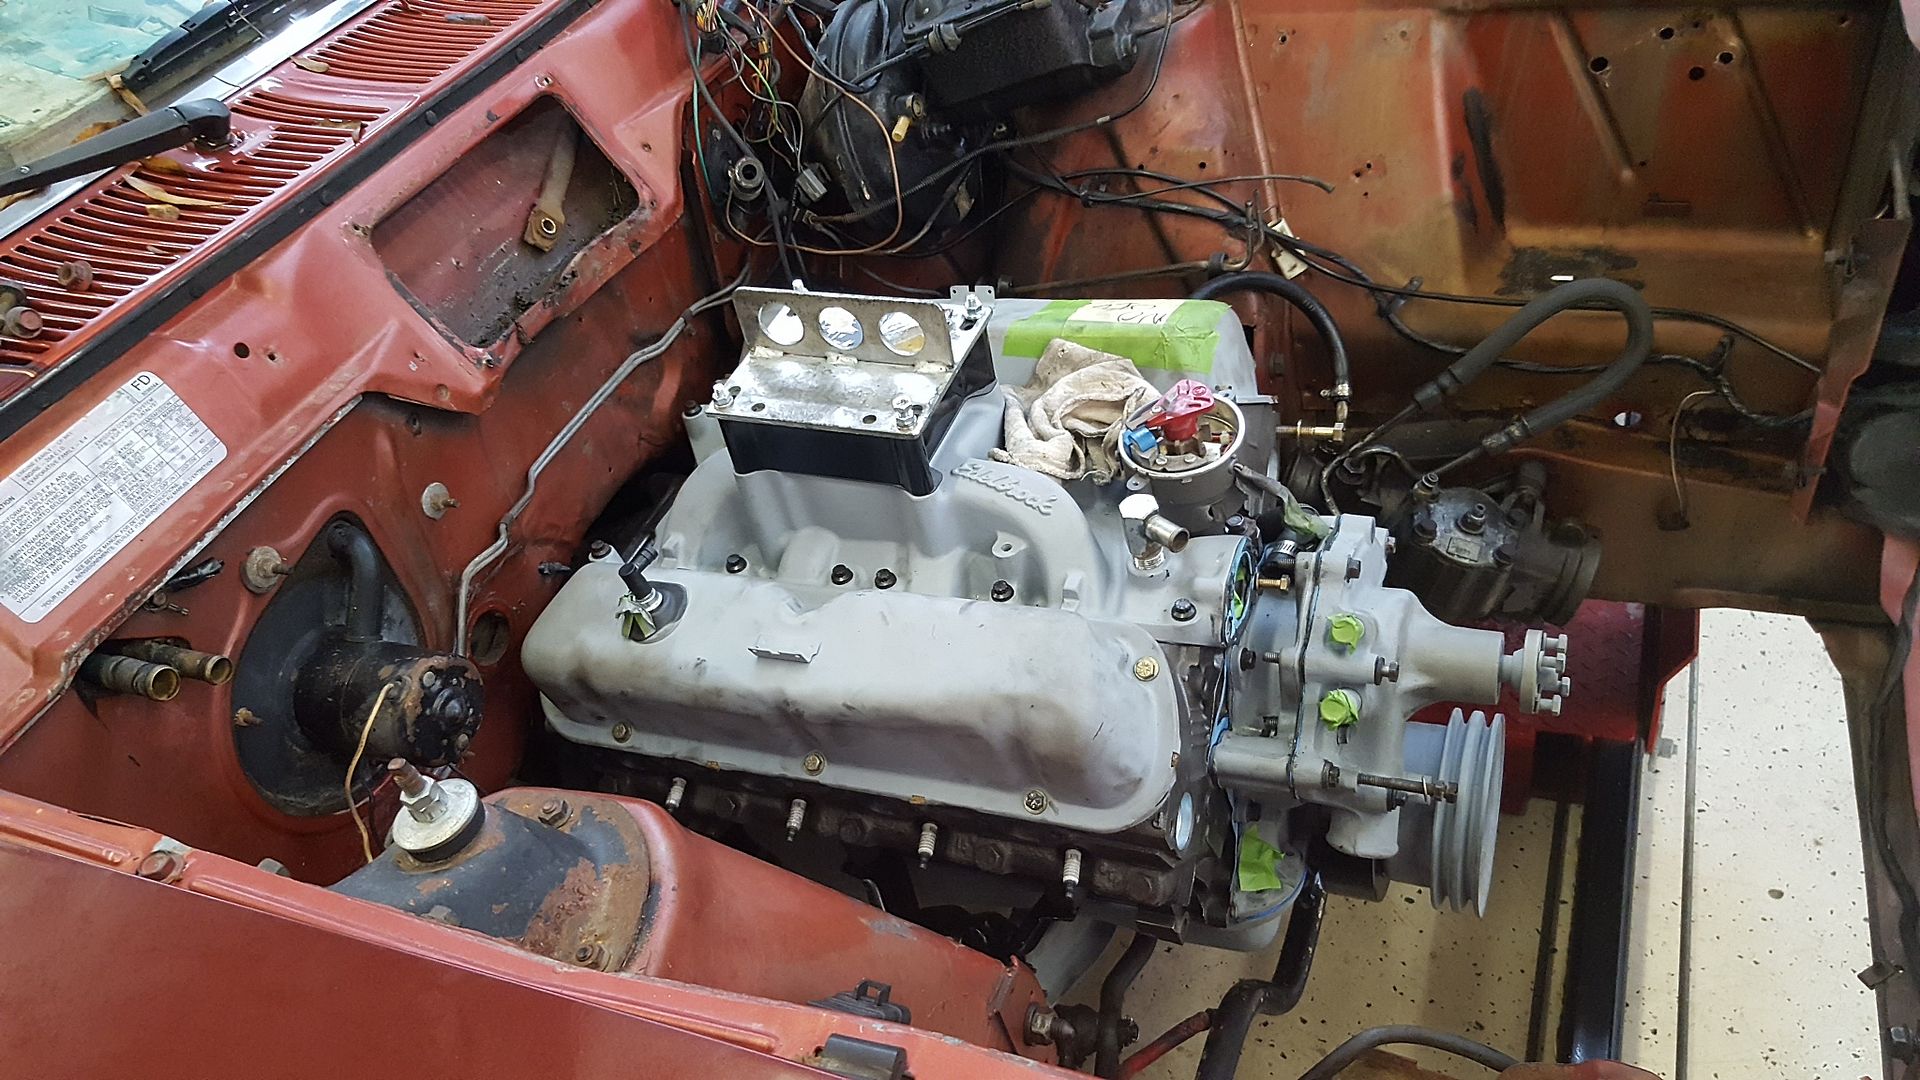 [/URL]
How did I miss this build? Great job and that engine porn is excellent. When you do a list put two spaces at the end of the line and it'll format out right. Thanks again for the vortec heads.
Usually I do the double space.
I'm using a free word processing program now and it occasionally does funky crap.
You're welcome. Hopefully they don't need anything.
And that engine and transmission are as low and far back as we can make them. Front cylinder is in line euto with the forward control arm bolt, crank centerline is even with the hub, if not a touch lower.
Full updates Monday. Lots more to do before I am willing to type it all up.
Challenge Budget: Car/parts $200
Donor Lincoln town car: 410
Engine crossmember: 120
Sold transmission crossmember from Lincoln: 10
Sold rear axle from lincoln: -50
Scrapped what was left of lincoln: -89
trans cooler: 2
Engine swap: 5.0 plus 300 boot
Sold kelstar wheels-200 (cant recoup more than we spent)
mustang 5.0 convertible engine mounts: 22
2x2 angle iron, tractor supply 12.05
Brand new Watkins glen nascar slicks and wheels, which were bought for $50, and promptly sold to Dallas dad for $50 and some weld wheels with really old drag slicks. So, slicks were $0, but $50 taken out of the recoup limit.
$5 grant wheel and hub (smaller diameter wheel gives more feedback. Well see if it stays.
BOOM TUBES!!!! ($25, with brackets)
AFCO threaded body coilovers for the front end, $100. The fabricated center link was left by the trash can, so free.
6 5/8 heim and jamb nuts, as well as threaded tube for the front suspension: $65
Pair of aluminum seats, $40. Sheet of flame retardant high density foam $10
Fire suppression system parts (not included in challenge budget. But ive had 2nd degree burns on the boys before, so were getting safety gear come hell or high water)
Long tube headers for 66-67 mustang 10 Solid steel lowering blocks, with the holes drilled to offset the rear axle rearwards. $5
New challenge budget total: 977.05
Update time!!
The challenge car is at the shop where we will be doing the majority of the building/finishing. It had a stuck right rear brake drum for no apparent reason, so we popped the drum off to make it roll easier. Pushed it onto the lift, and got all the E36 M3 cleaned out and organized on the shelves. Then, started on consolidating the pile of parts. First order of business was making the engine and trans fit. The goal, as it always should be, was to stuff it as far back and low in the chassis as physically possible, without having to re-engineer the firewall/steering/etc. That seems too much like work, so were avoiding it at all costs.
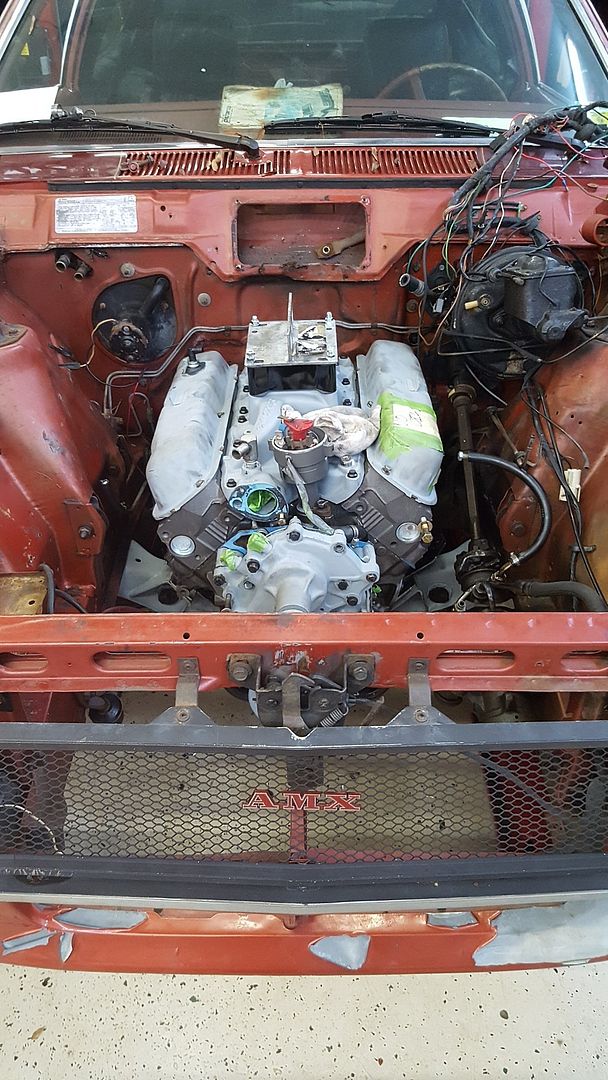
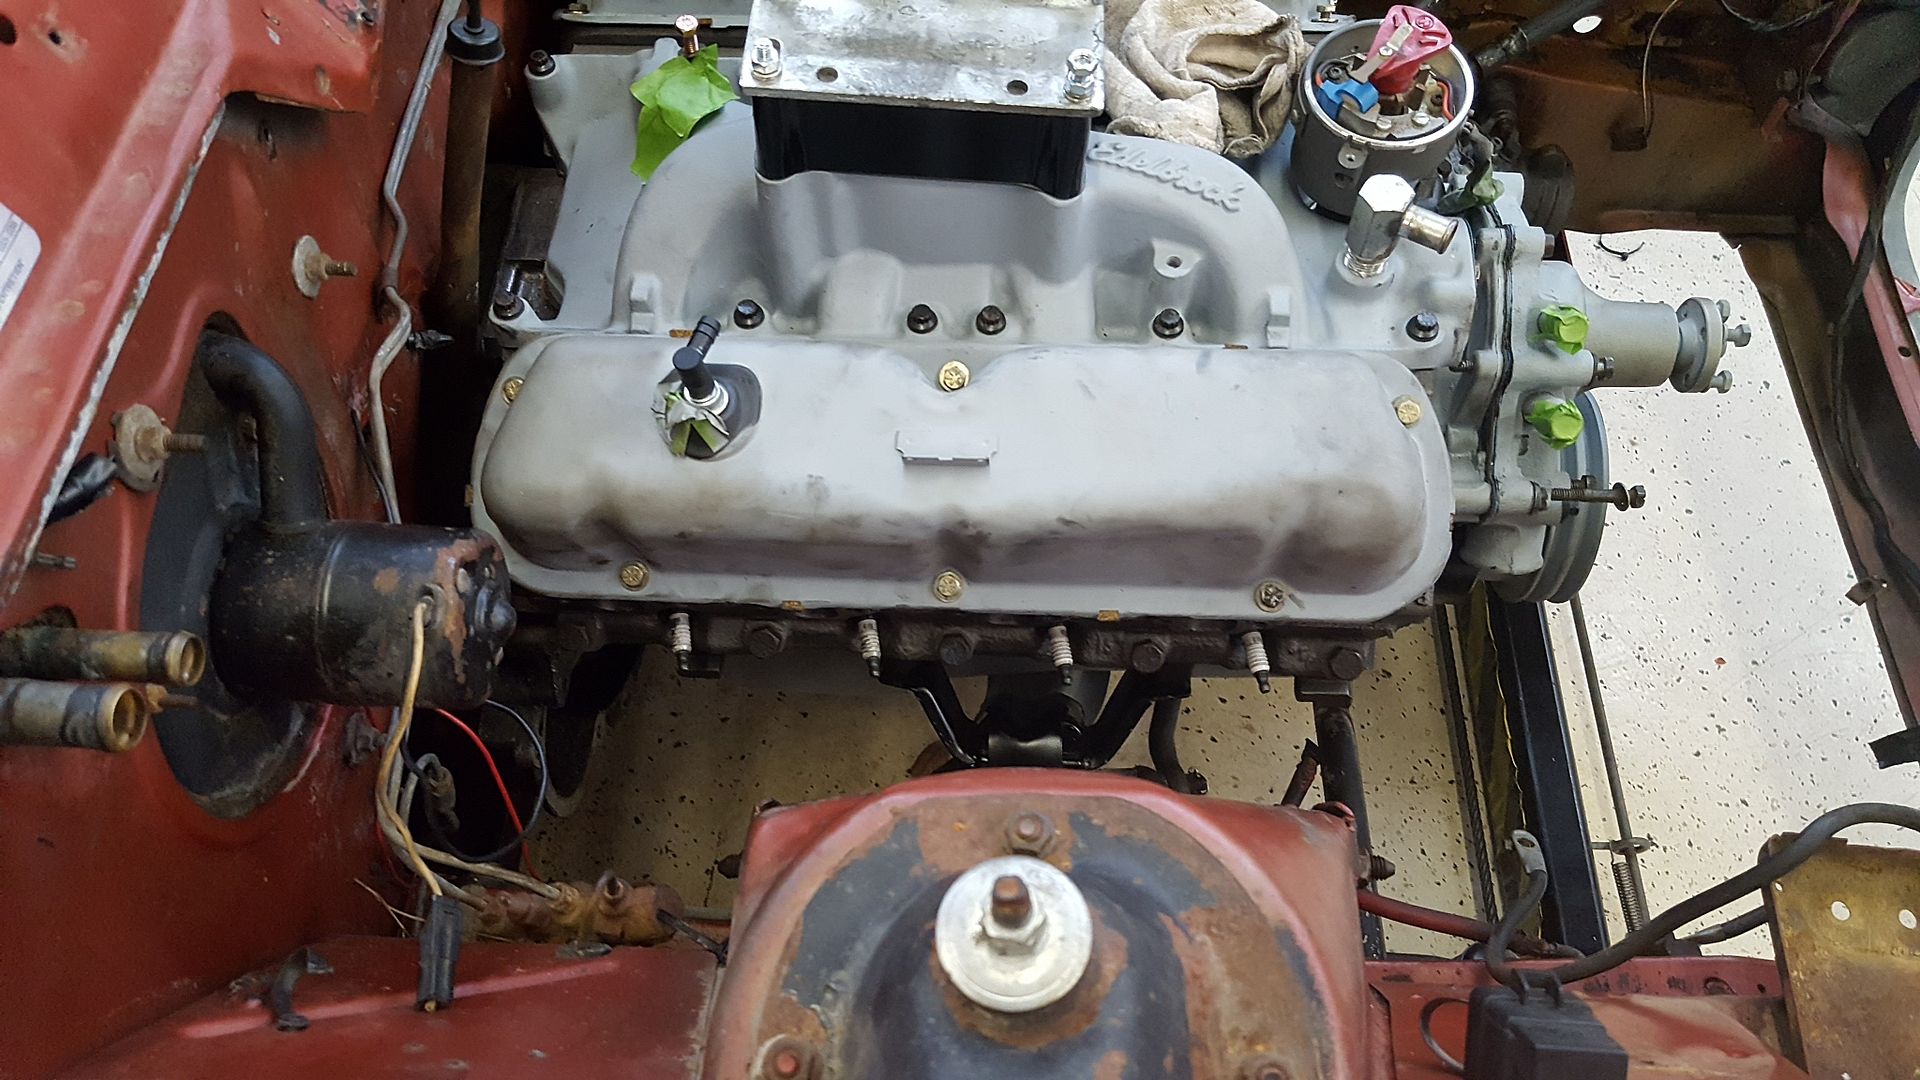
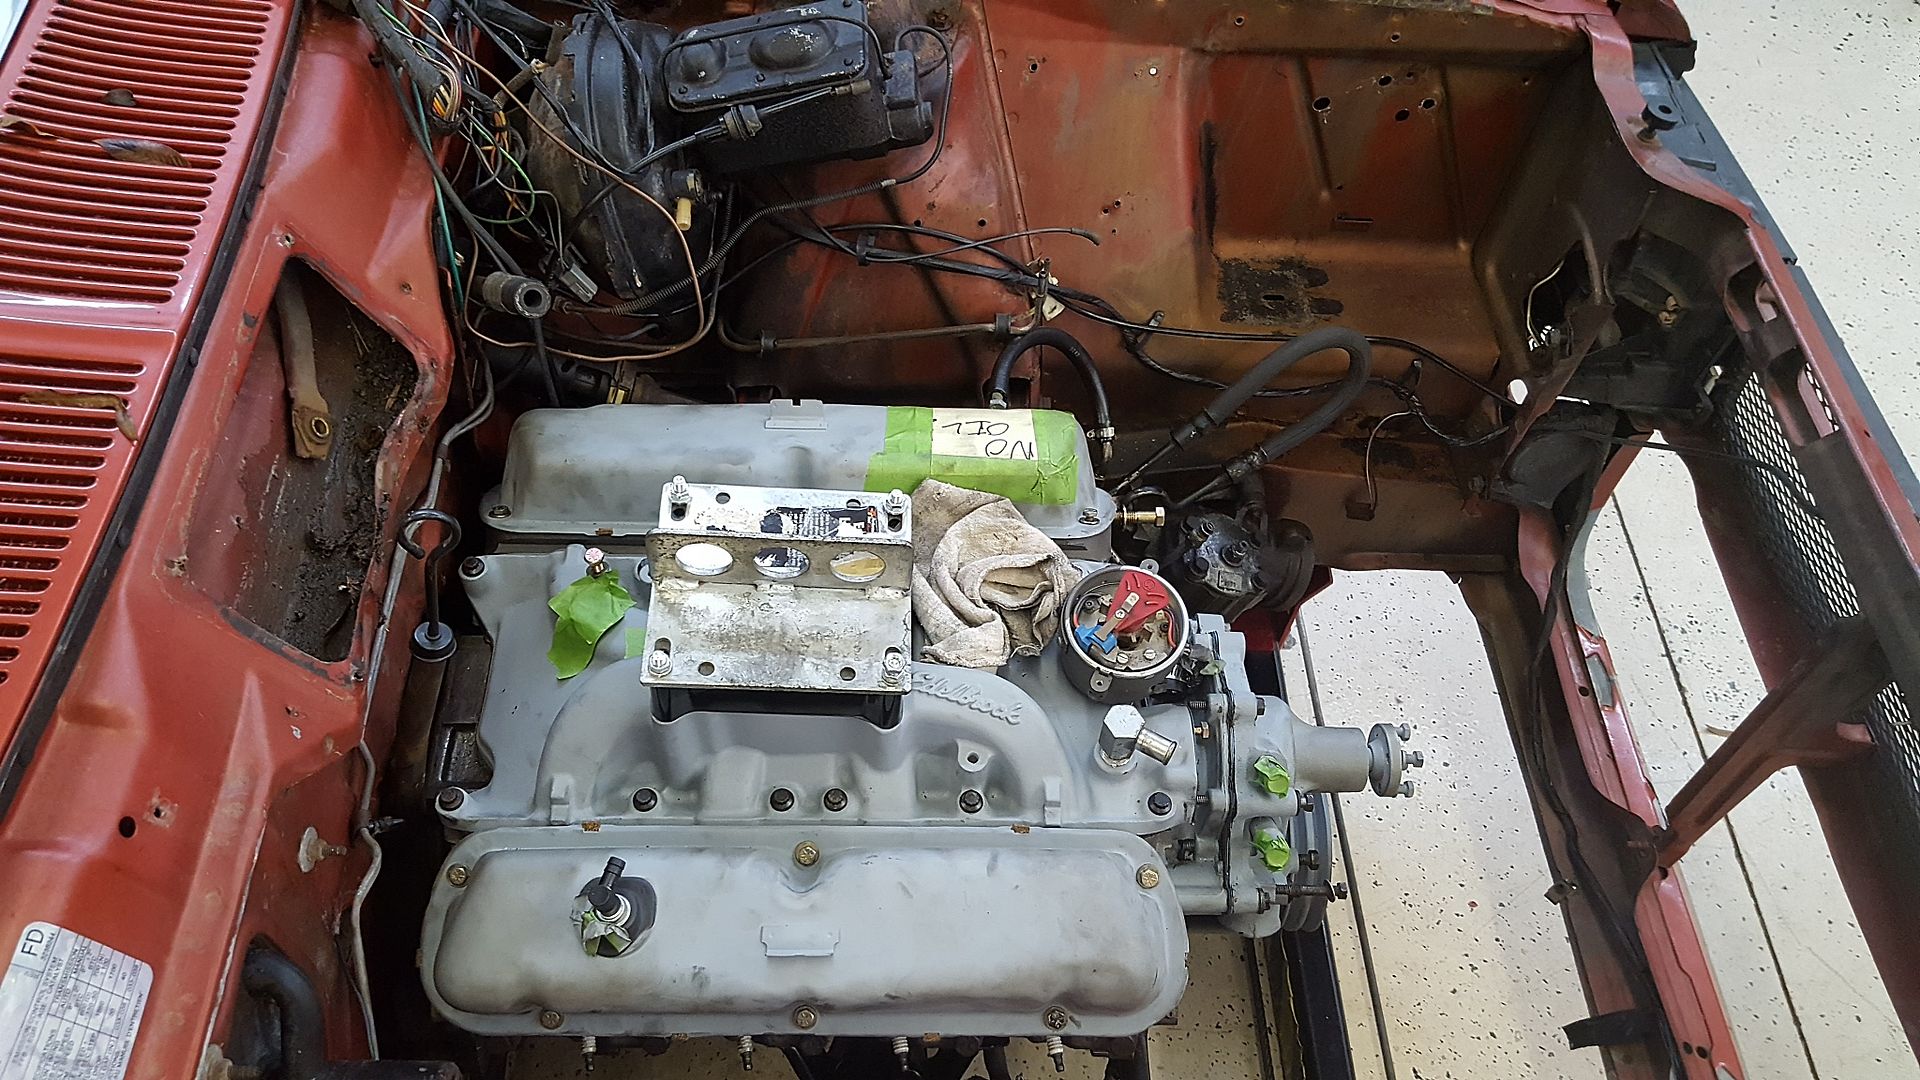
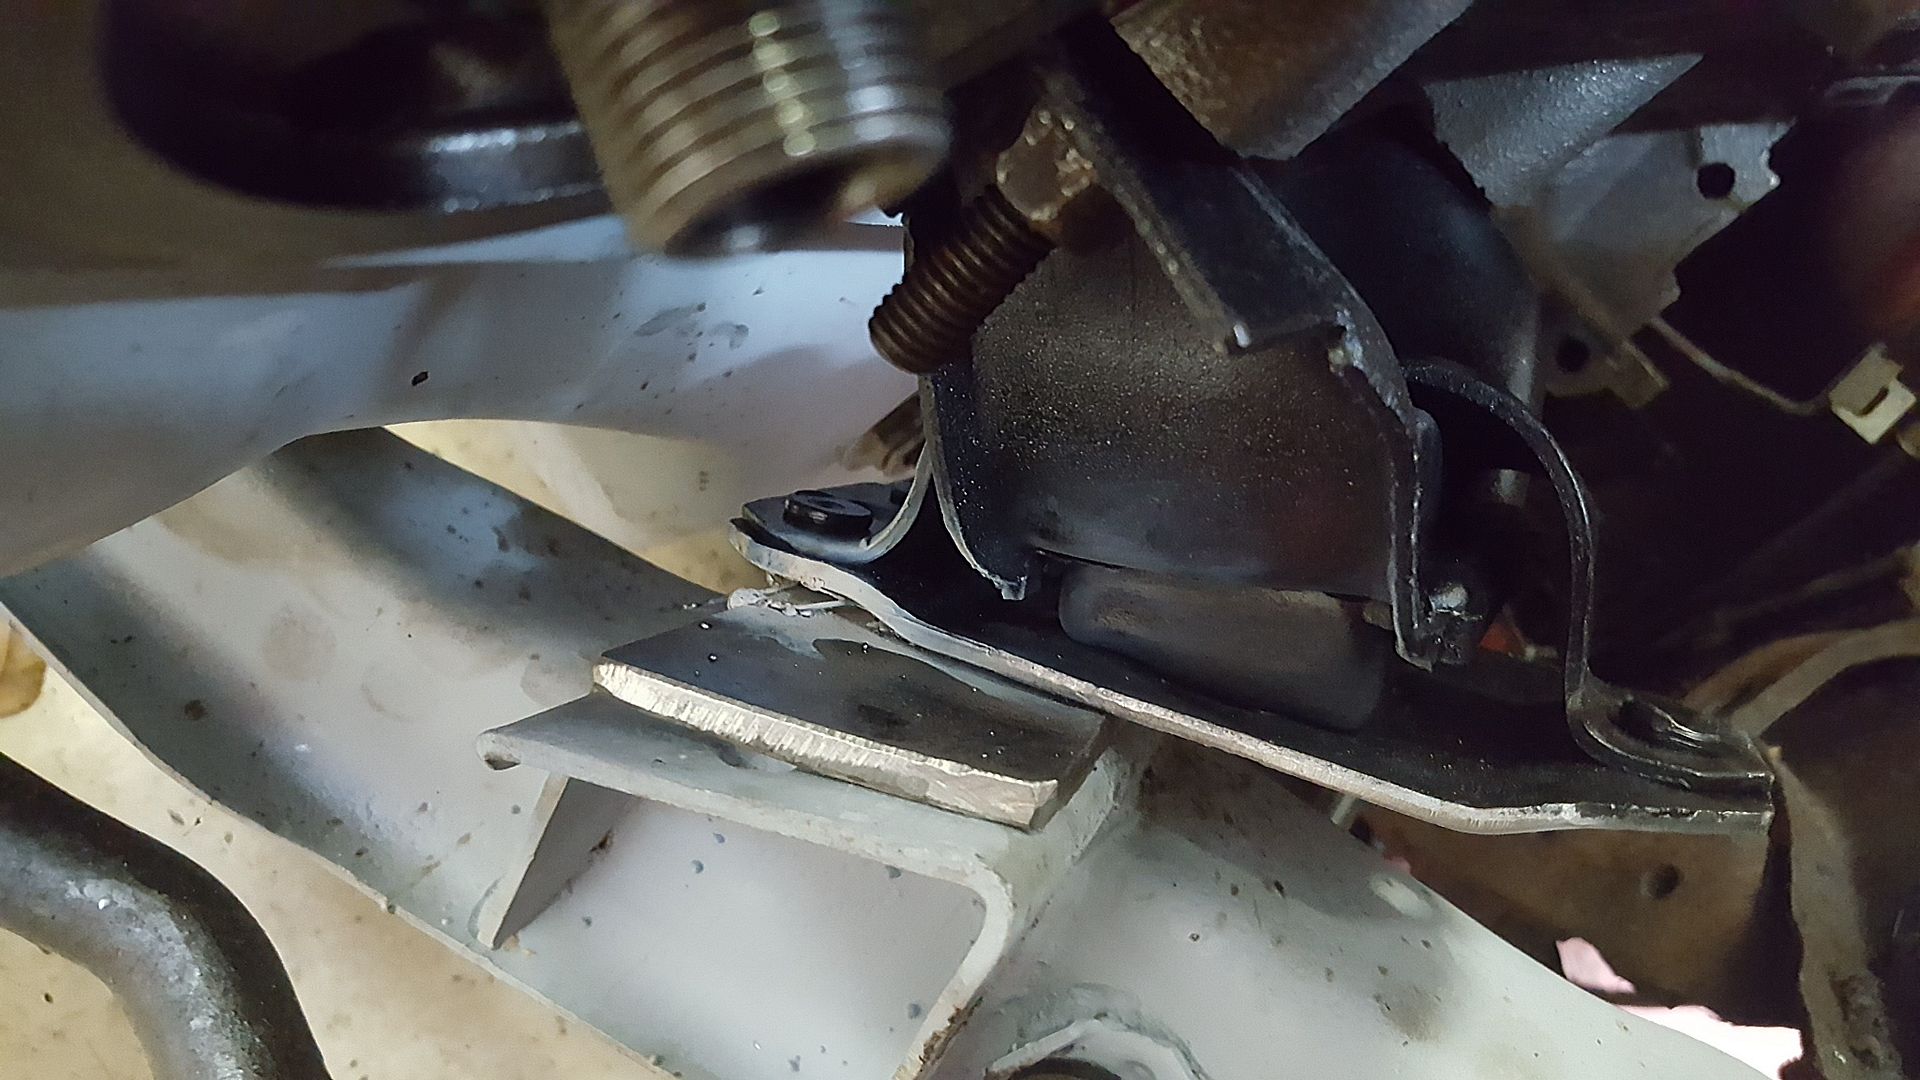
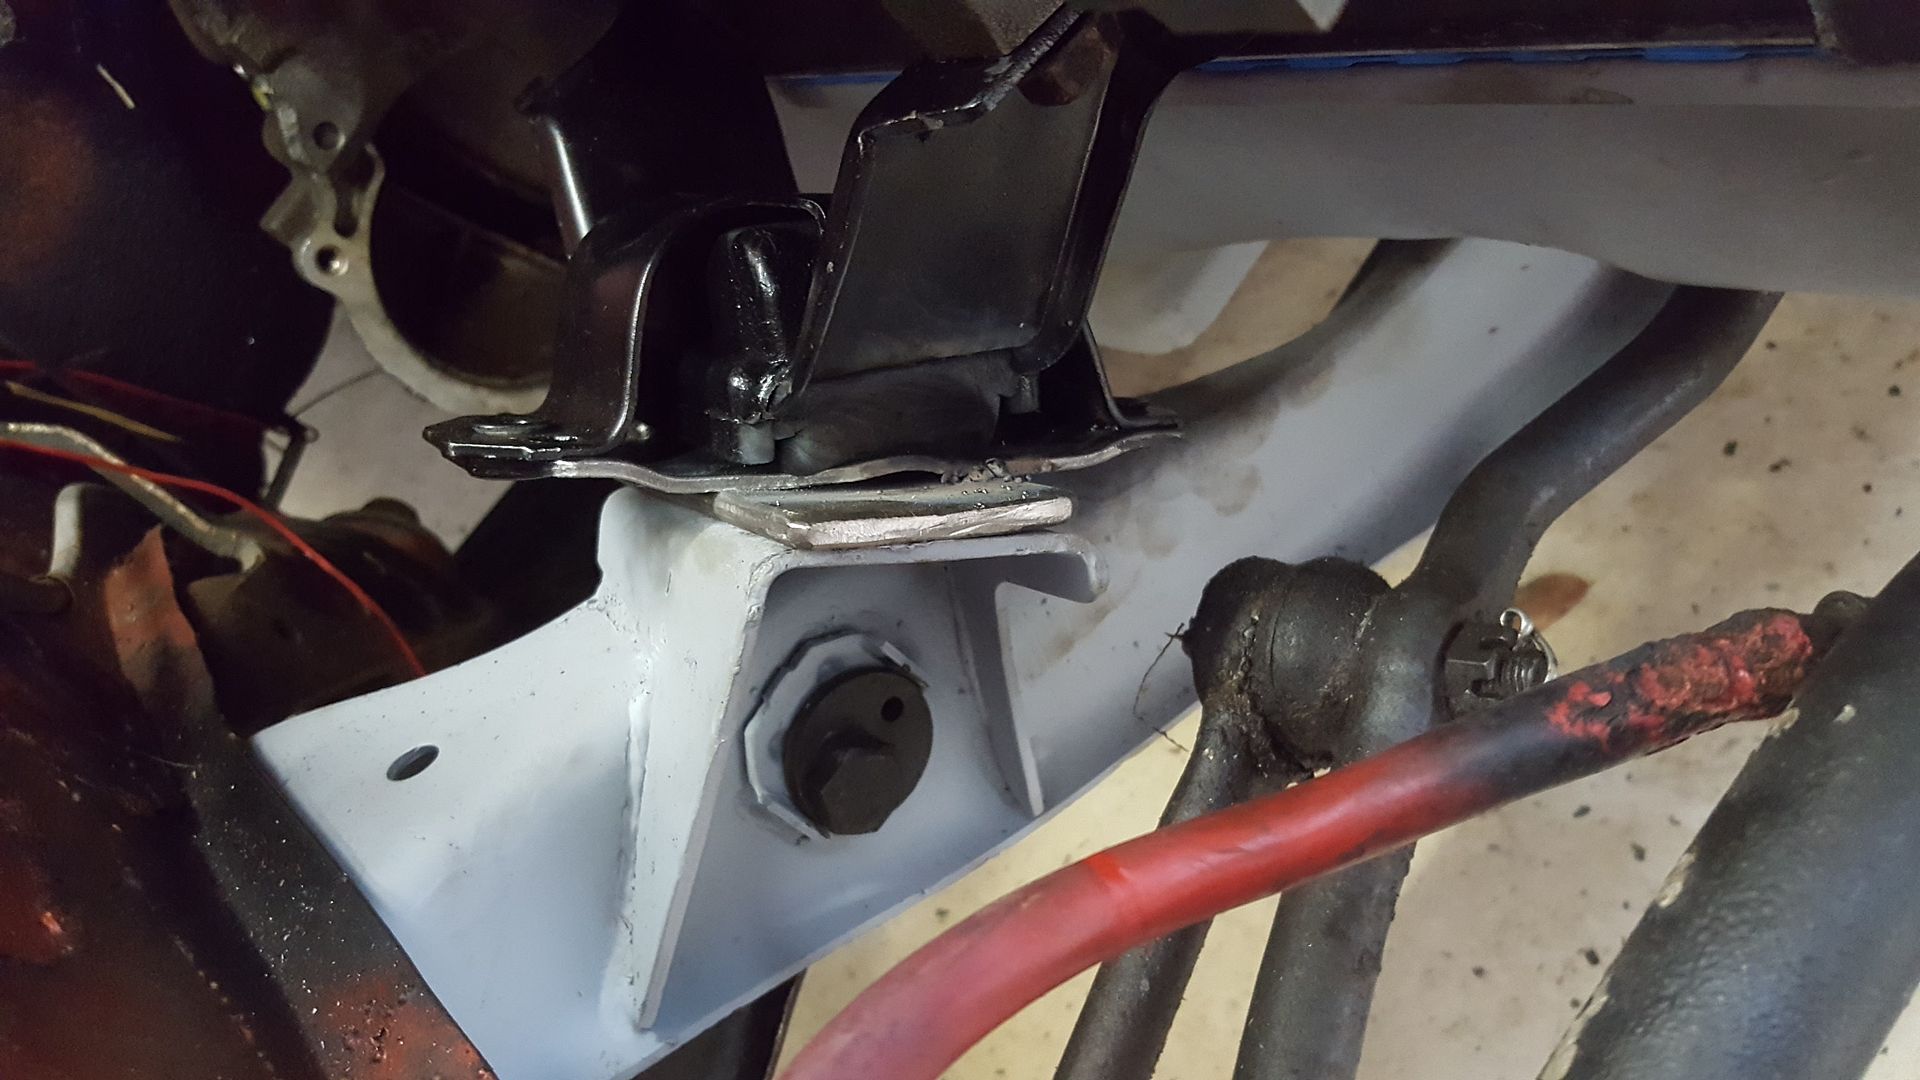
Dustin, Dallas, and I got a start on it Friday night. We learned a few things in the process, such as an AOD is longer from engine to trans mount than a t5. So much so, that a new trans crossmember would have to be made. We also learned that the mustang convertible mounts make the engine almost a bolt in, but are HUGE when it comes time to get to the exhaust. But we used them for mock-up Friday night while we brew on the solution.
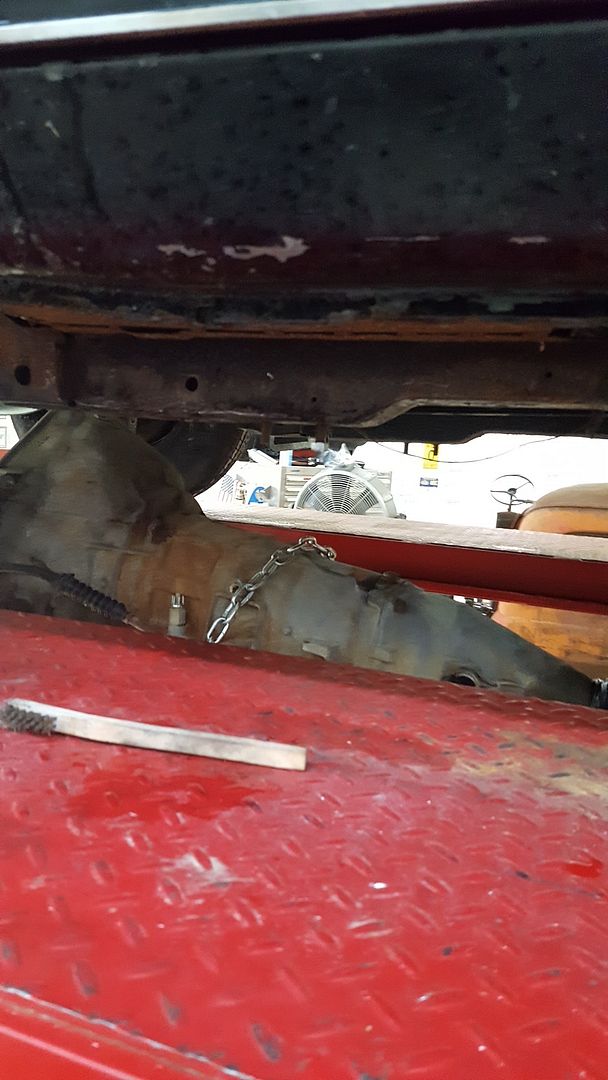
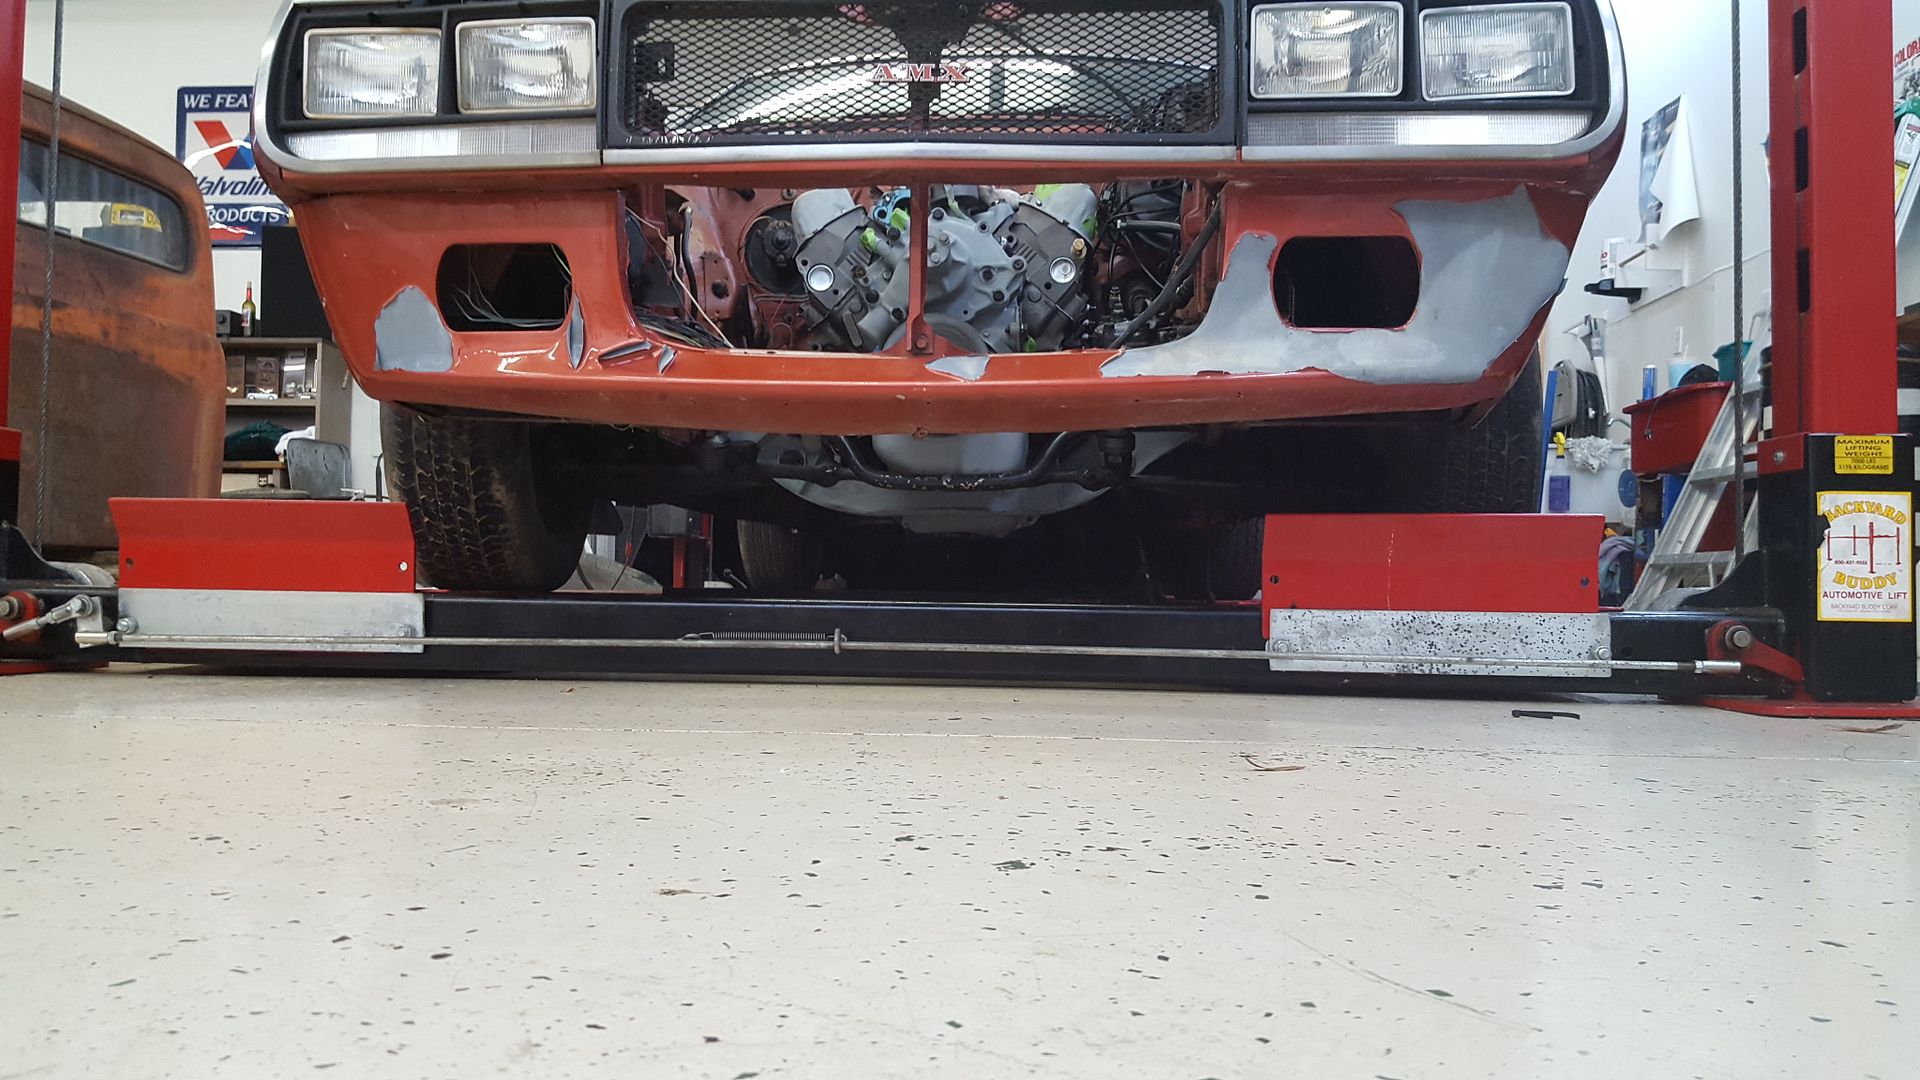
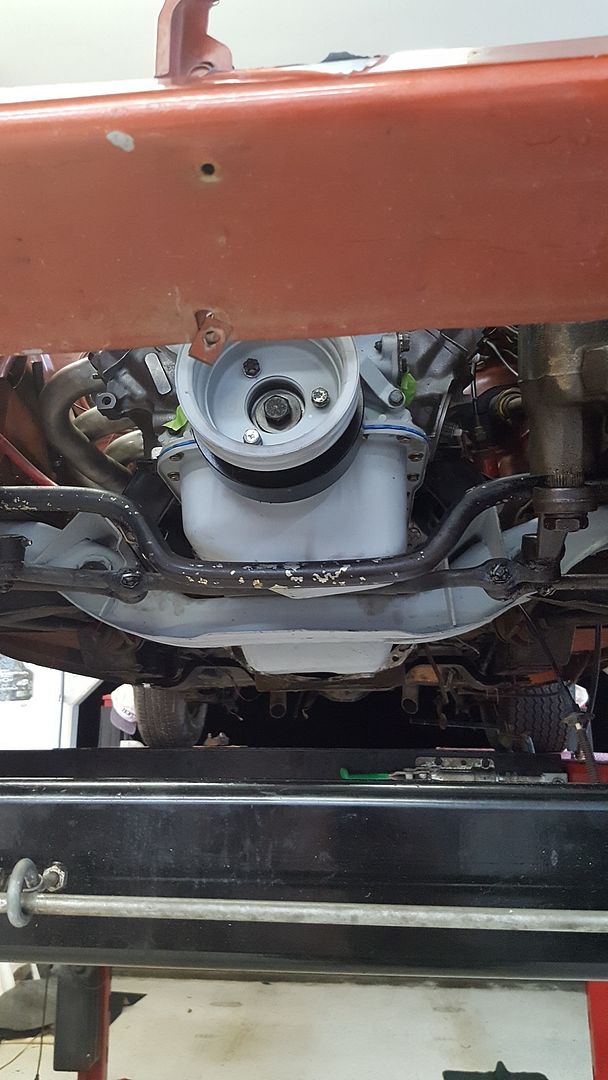
After a few hours of eating, cursing, staring, and fiddling, this is where we wound up.
[URL=http://s54.photobucket.com/user/dusterbd13/media/amc/20161007_172347_zps84hjfwon.jpg.html]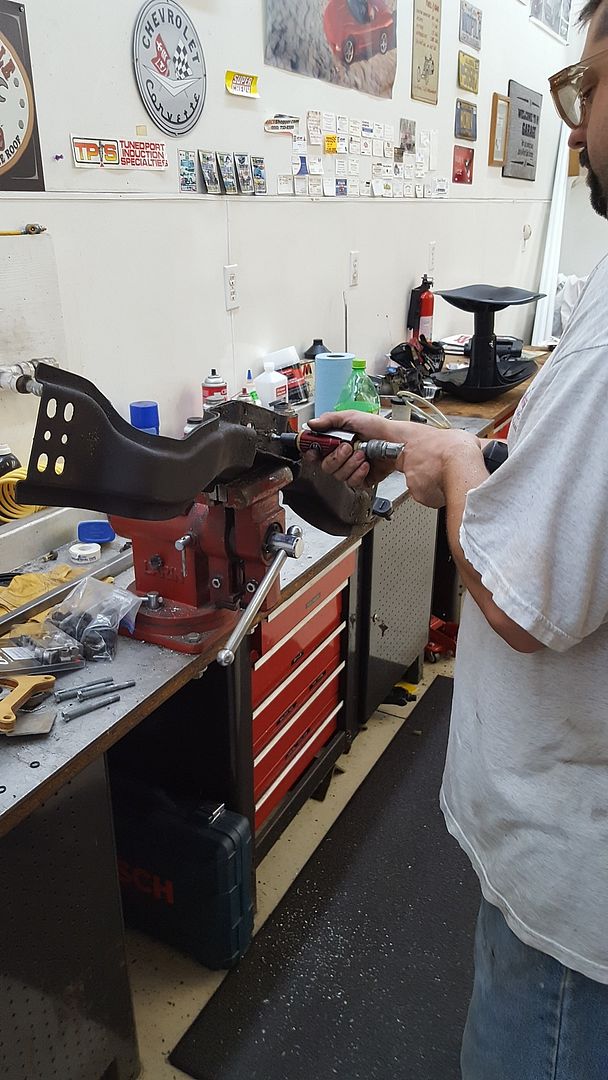 [/URL]
[URL=http://s54.photobucket.com/user/dusterbd13/media/amc/20161007_172350_zps2nc8gcjp.jpg.html]
 [/URL]
[URL=http://s54.photobucket.com/user/dusterbd13/media/amc/20161007_221117_zpsaiccxjum.jpg.html]
 [/URL]
[URL=http://s54.photobucket.com/user/dusterbd13/media/amc/20161007_221121_zpsgtxgzhoh.jpg.html]
 [/URL]
[URL=http://s54.photobucket.com/user/dusterbd13/media/amc/20161007_221212_zpsnte4bi98.jpg.html]
 [/URL]
[URL=http://s54.photobucket.com/user/dusterbd13/media/amc/20161007_221217_zpsgwordnci.jpg.html]
 [/URL]
[URL=http://s54.photobucket.com/user/dusterbd13/media/amc/20161007_221221_zpsxi0u7f9q.jpg.html]
 [/URL]
[URL=http://s54.photobucket.com/user/dusterbd13/media/amc/20161007_221224_zpshx9gufaf.jpg.html]
 [/URL]
[URL=http://s54.photobucket.com/user/dusterbd13/media/amc/20161007_221239_zpsoi589fg5.jpg.html]
 [/URL]
[URL=http://s54.photobucket.com/user/dusterbd13/media/amc/20161007_221251_zpsstyws3aw.jpg.html]
 [/URL]
[URL=http://s54.photobucket.com/user/dusterbd13/media/amc/20161007_221256_zps8bcjdijc.jpg.html]
 [/URL]
[URL=http://s54.photobucket.com/user/dusterbd13/media/amc/20161007_221314_zps7ii8rkt6.jpg.html]
 [/URL]
[URL=http://s54.photobucket.com/user/dusterbd13/media/amc/20161007_223235_zps1bmzelfn.jpg.html]
 [/URL]
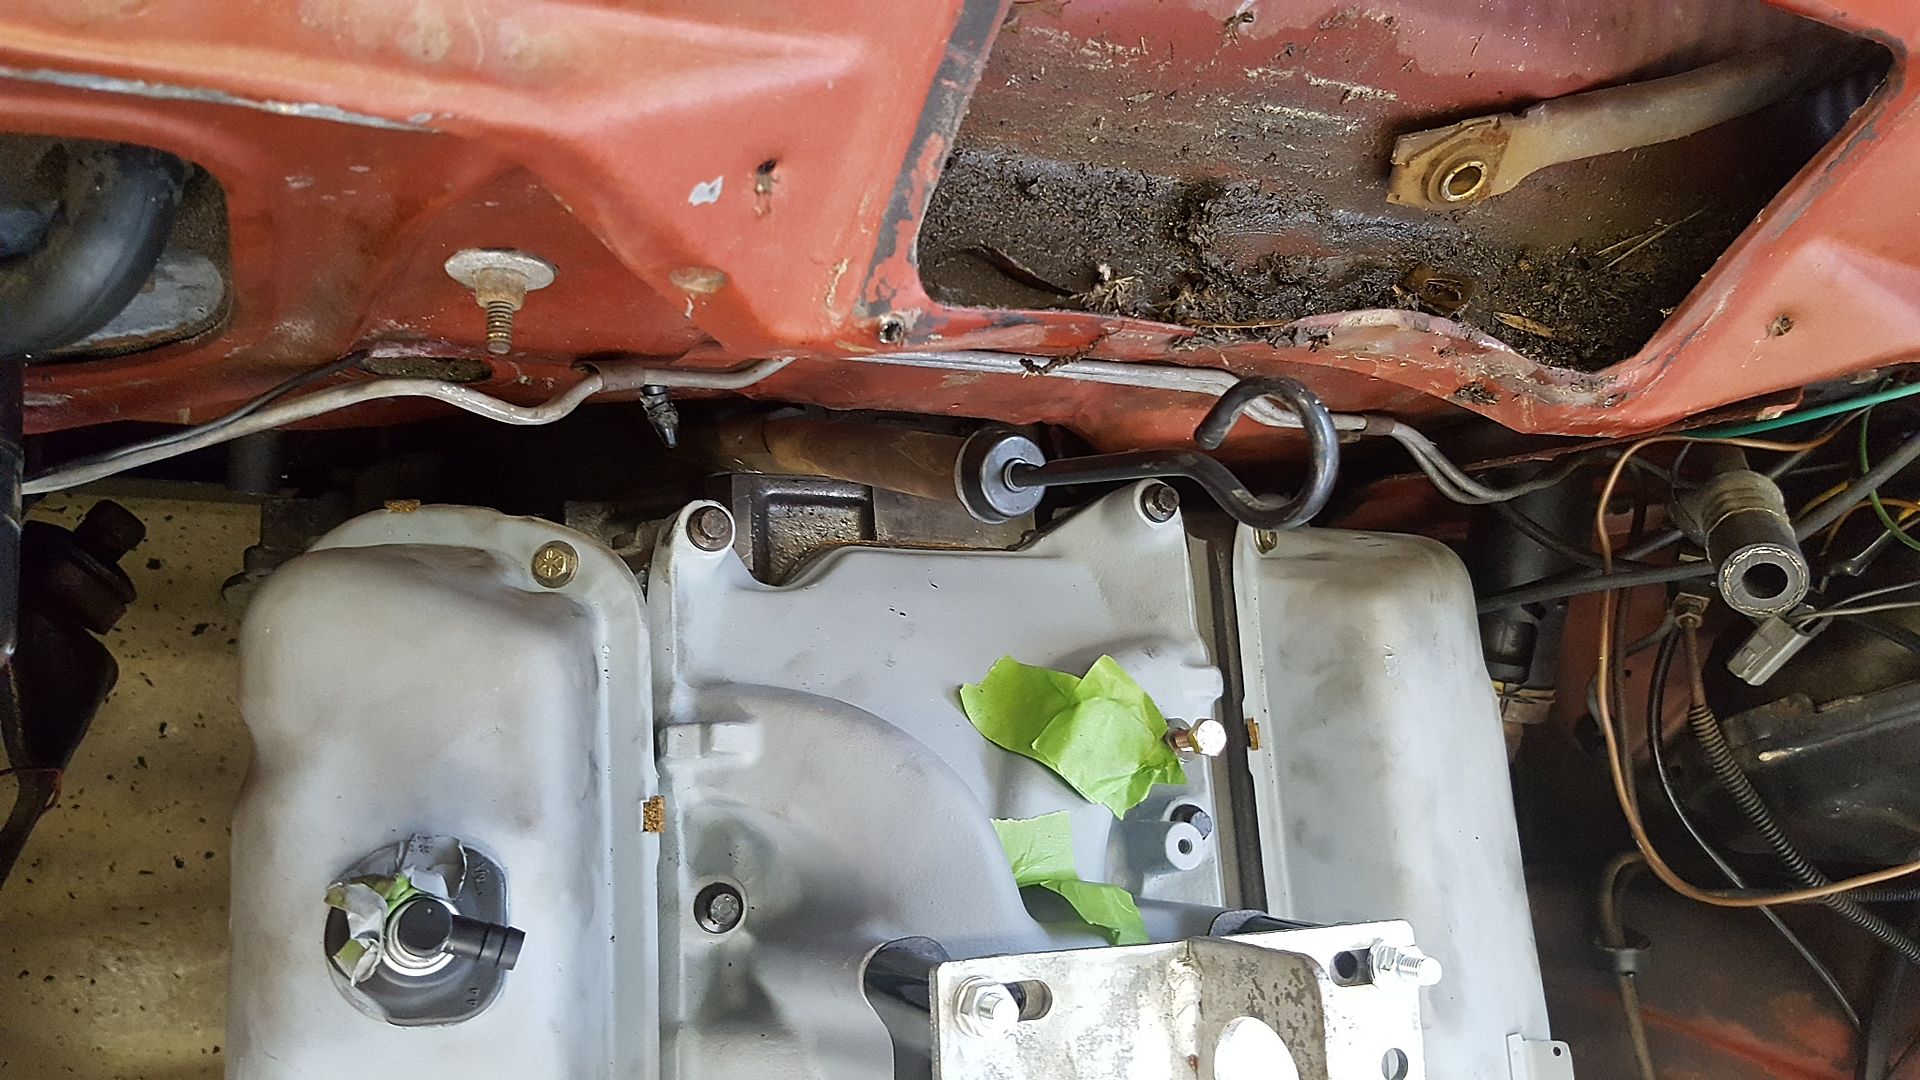
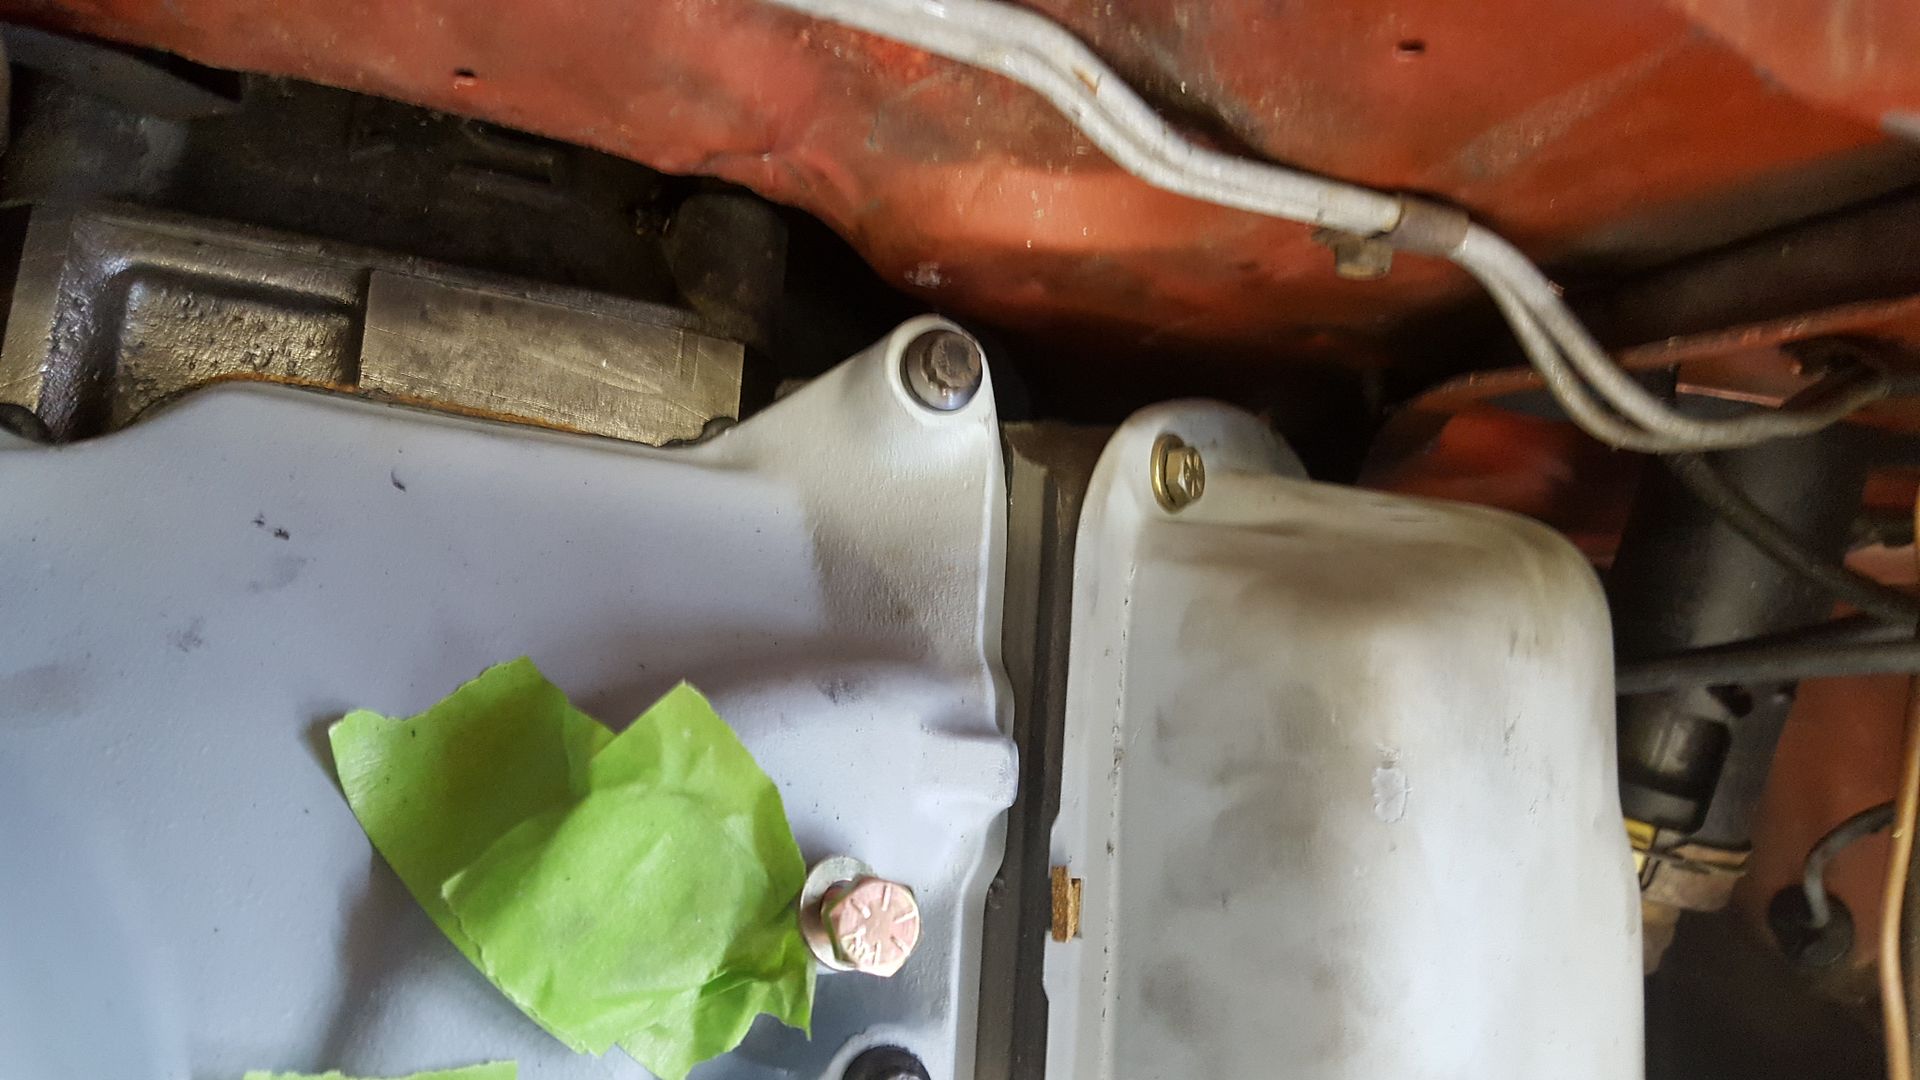
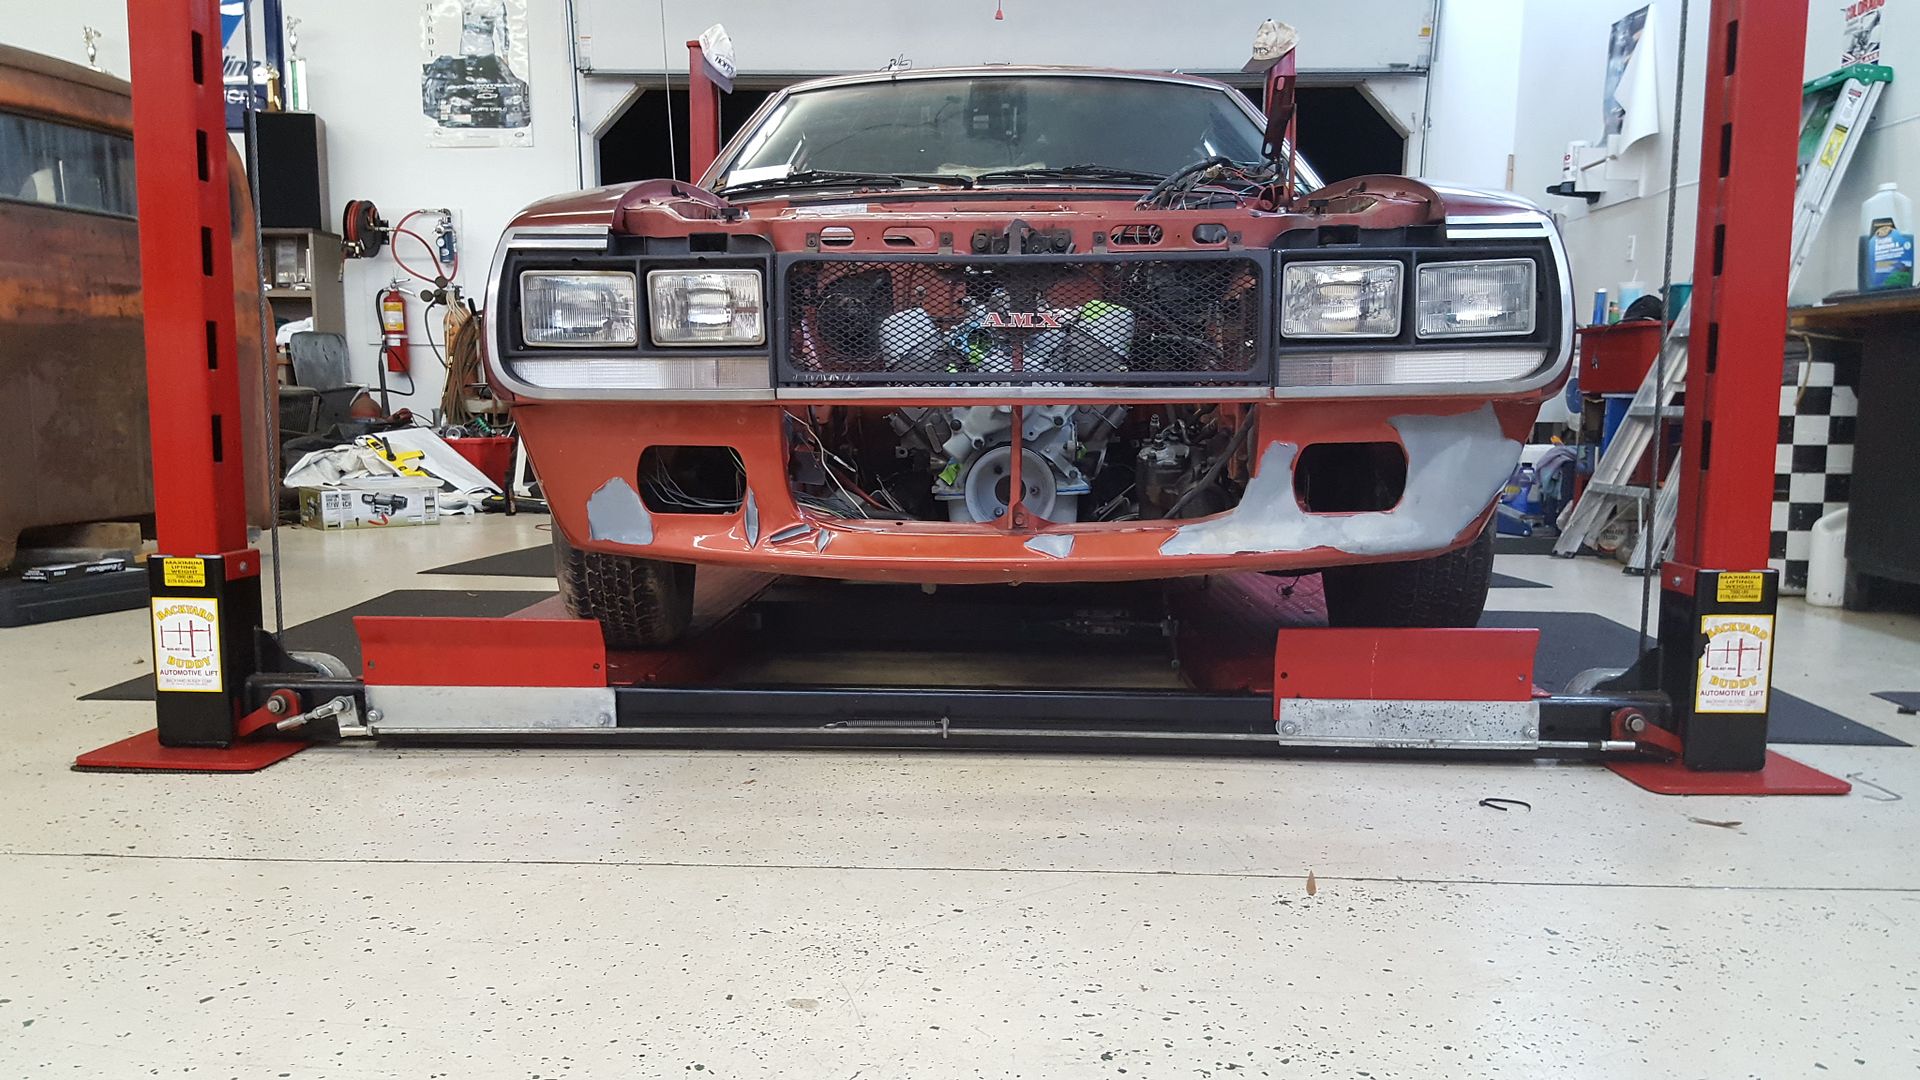
The engine has about 1/4 inch at the closest point in the firewall. It is as low as we can go without the foxbody oil pan hitting things. The front spark plugs are even with the front most upper control arm bolts, and the crank center line is even with the spindle center line. It is STUFFED back into the engine bay. We will have to drill holes through the firewall to access the transmission bolts, as they are almost completely in the tunnel.
Then, we closed up shop for the night. It was late, and Dallas had his kids the next day.
So we got back on it Saturday evening. First, we had to make a run to tractor supply for more welding wire, a piece of angle iron, and some tarps. Plan for Saturday was to get the drivetrain firmly mounted, and undercoating cleaned off.
Well, it only kind of happened. Building the new trans crossmember took far longer than I thought, between welder trouble, design revisions, etc. But we got it made. Still have to drill the trans mount holes and bolt it down, but I didn't have a single sharp drill bit. Part of the reason it took so long. But we got a lot done.
Factory trans crossmember half ass installed. Would need a lot of work to fit properly, and heavy.
[URL=http://s54.photobucket.com/user/dusterbd13/media/amc/20161007_223244_zps2mnlnogv.jpg.html]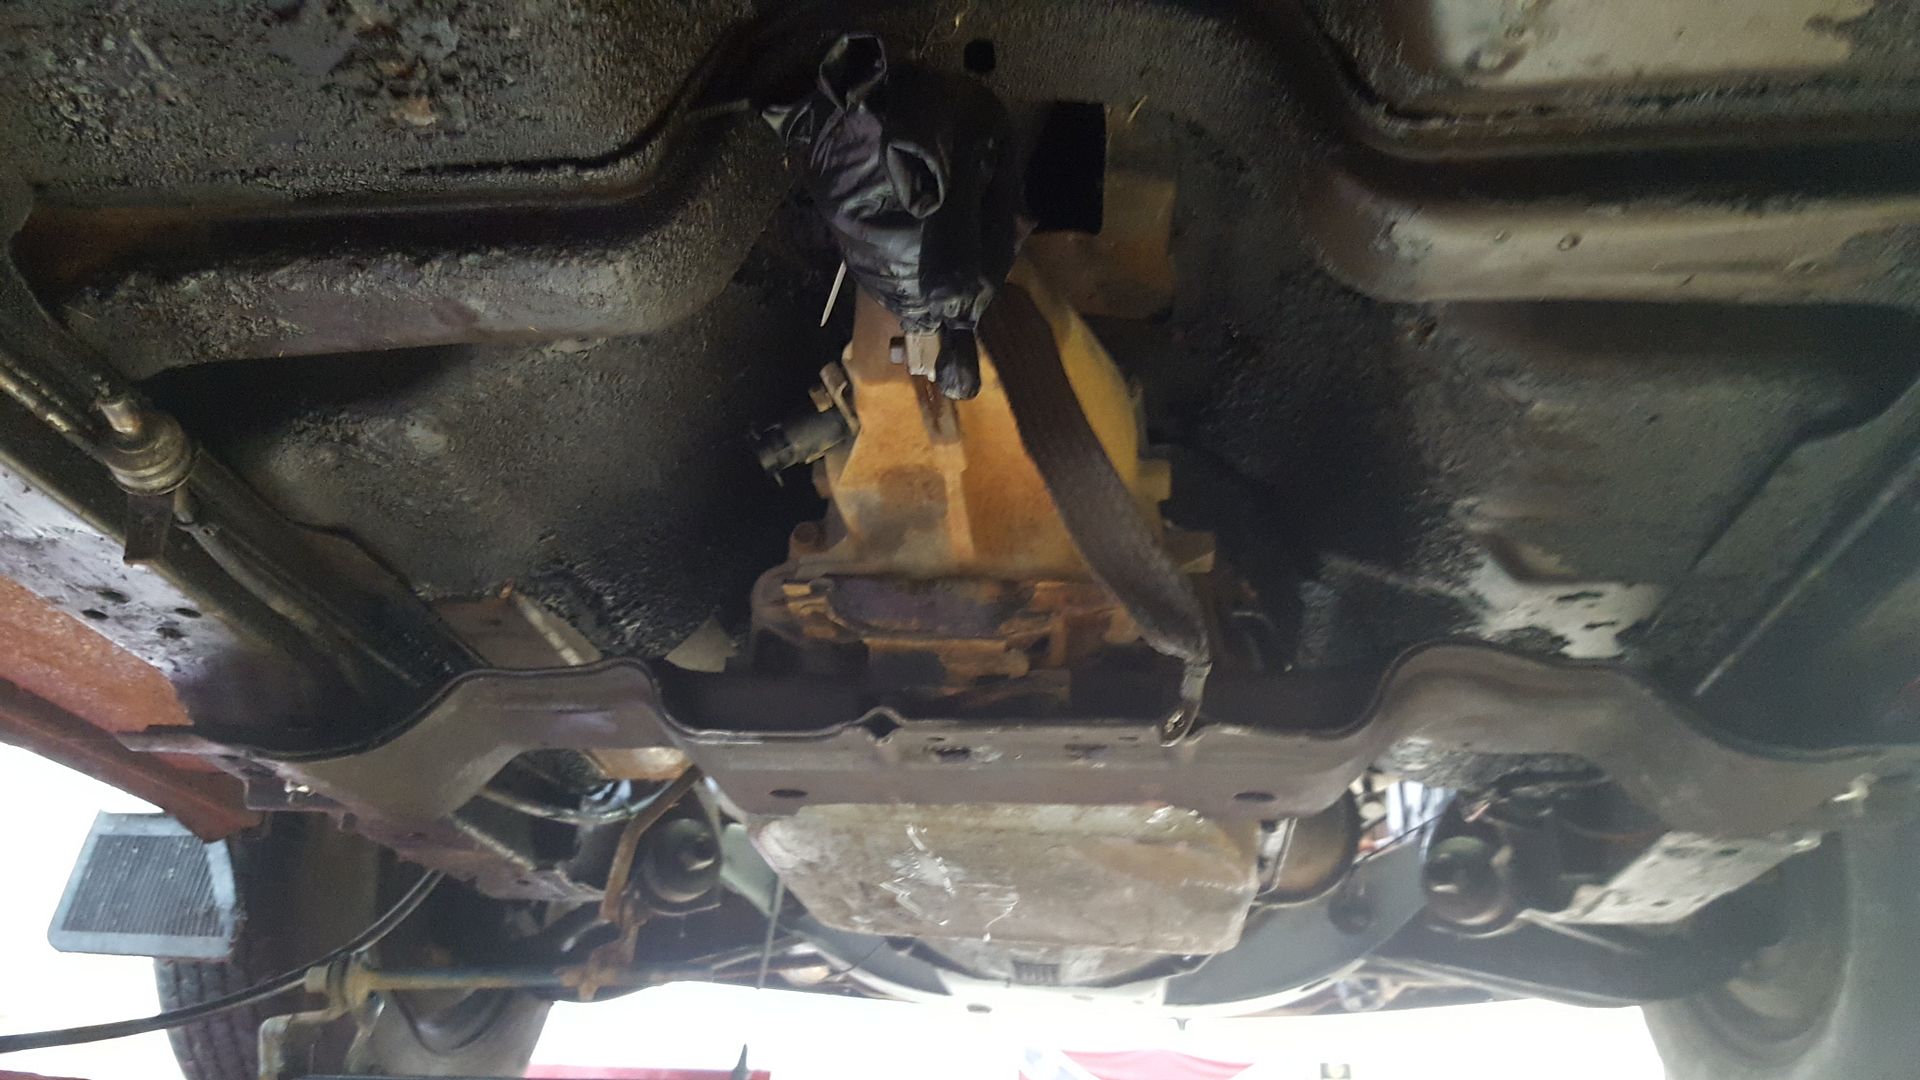 [/URL]
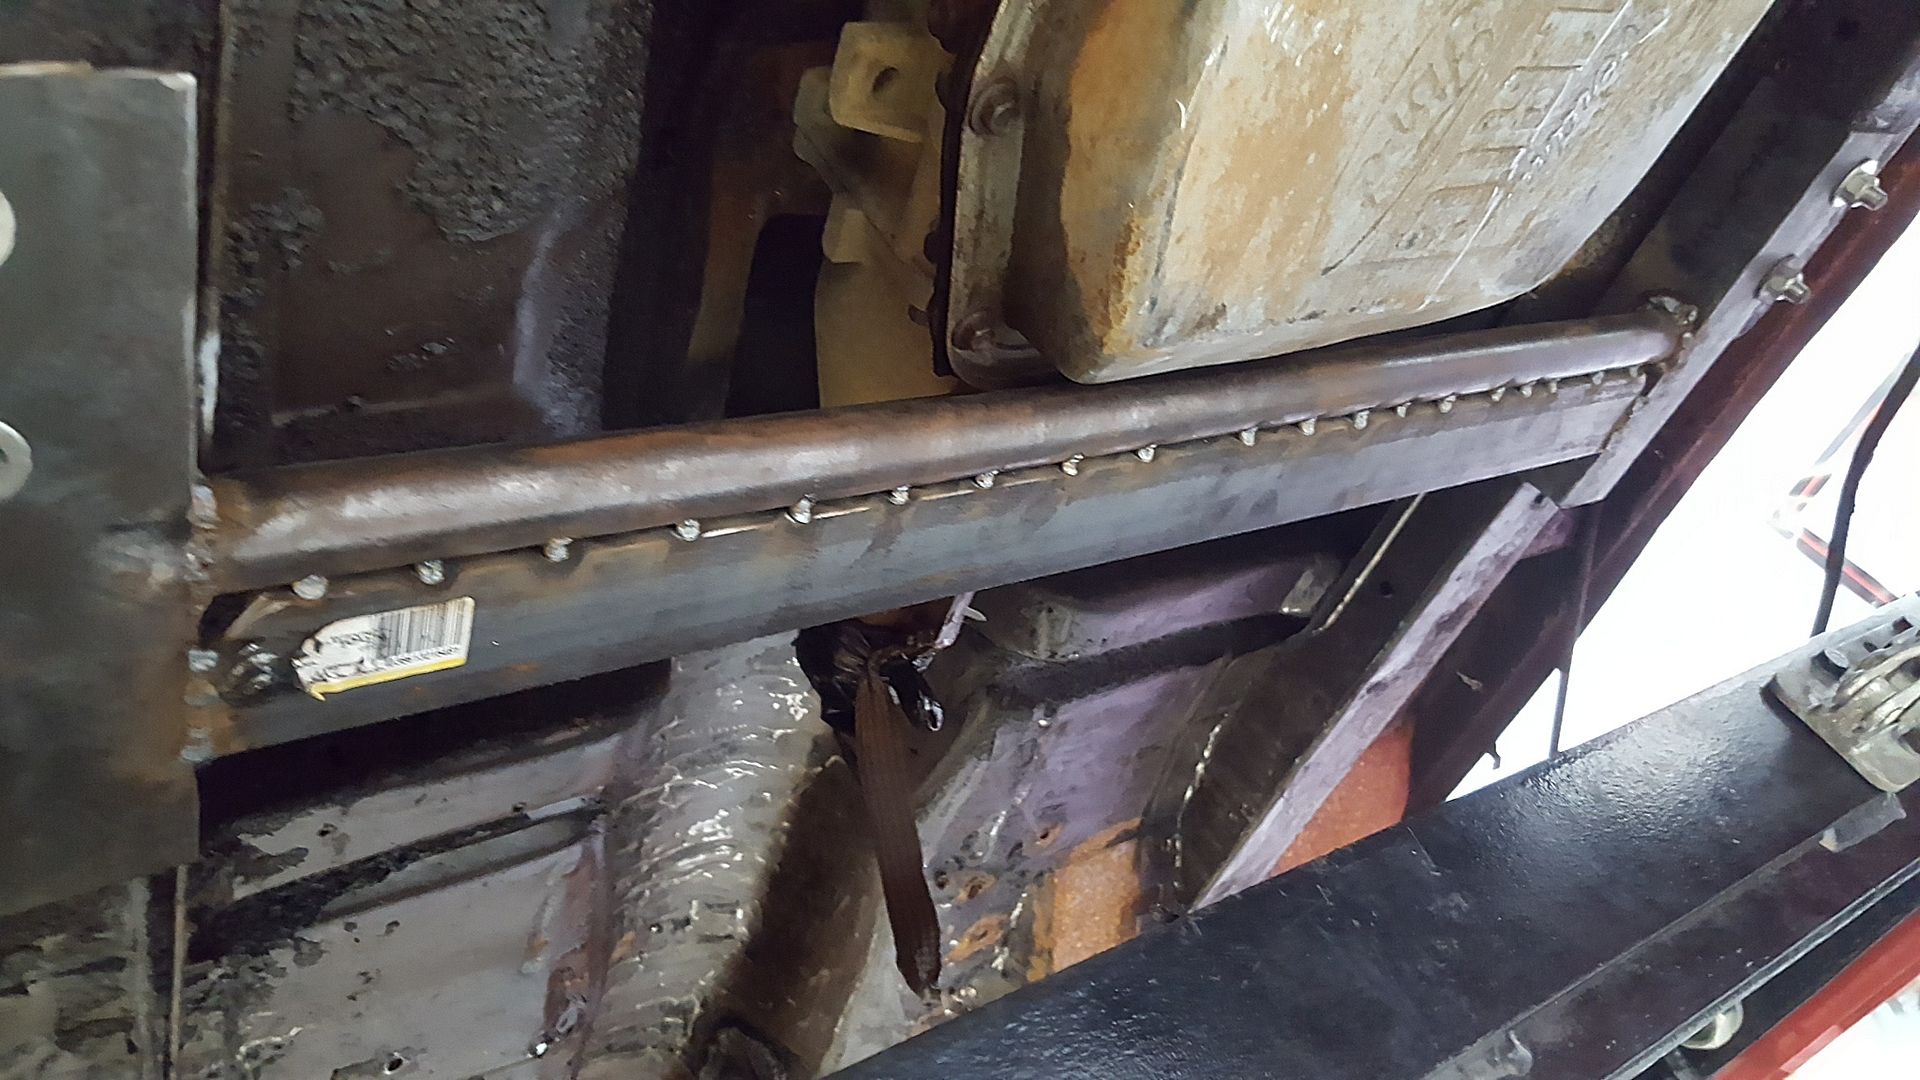
And the one I made. About half the weight, strong, and simple.
[URL=http://s54.photobucket.com/user/dusterbd13/media/amc/20161008_190537_zpshwjfiw8n.jpg.html]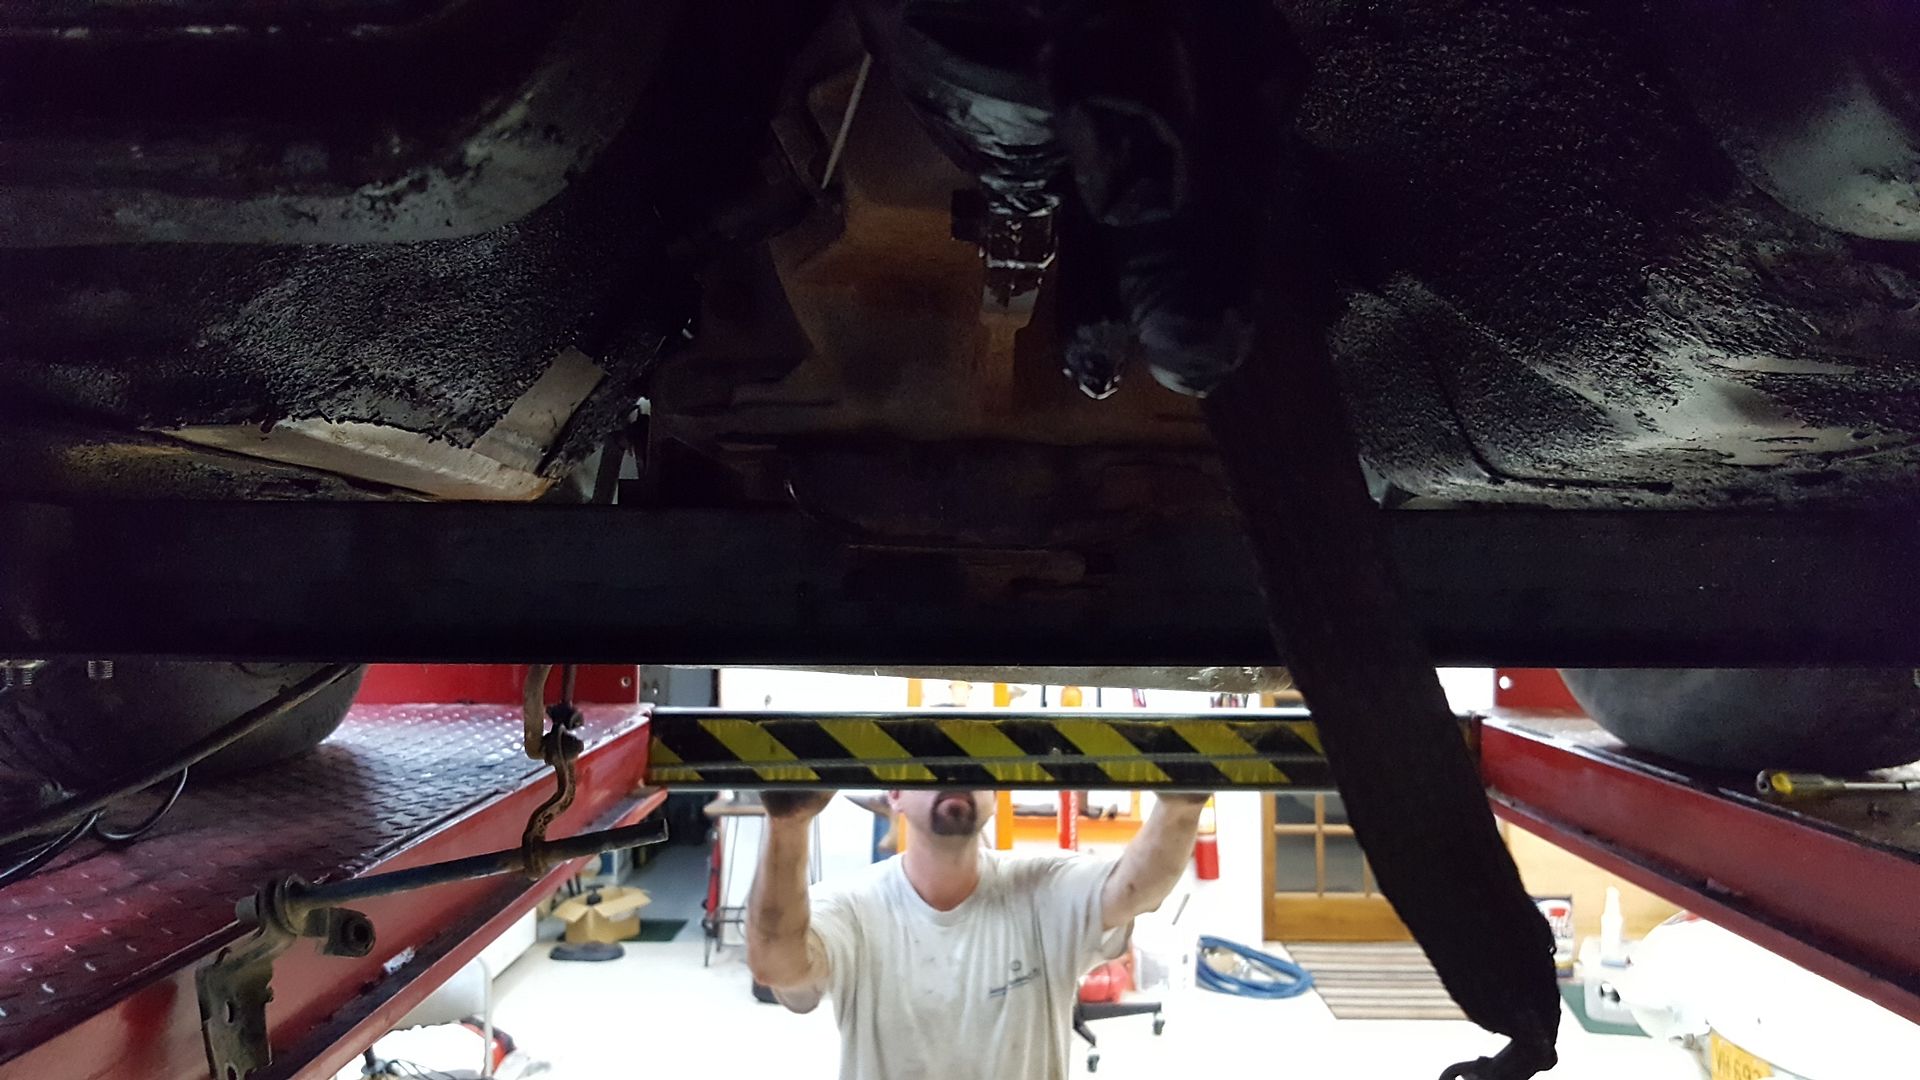 [/URL]
[URL=http://s54.photobucket.com/user/dusterbd13/media/amc/20161008_190548_zpsg3vbvguk.jpg.html]
 [/URL]
[URL=http://s54.photobucket.com/user/dusterbd13/media/amc/20161008_190552_zpsmyjulwl1.jpg.html]
 [/URL]
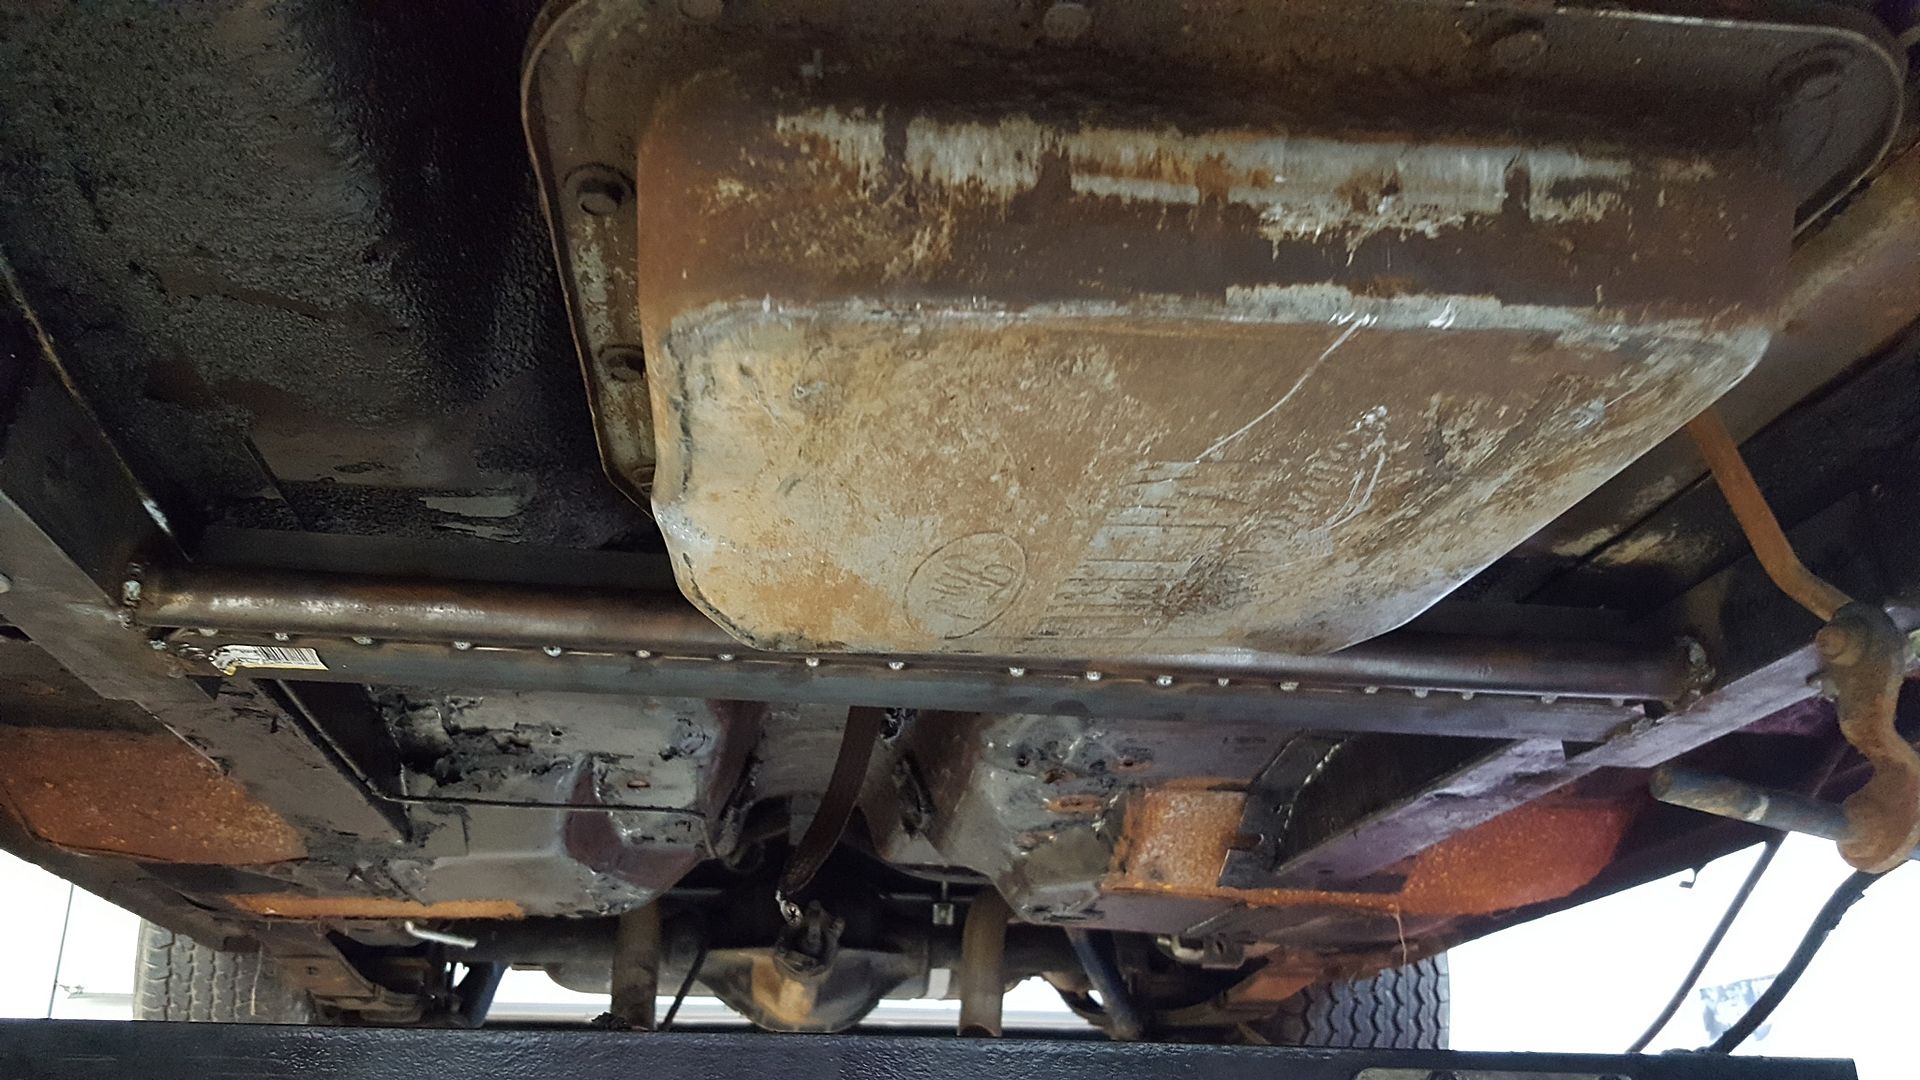
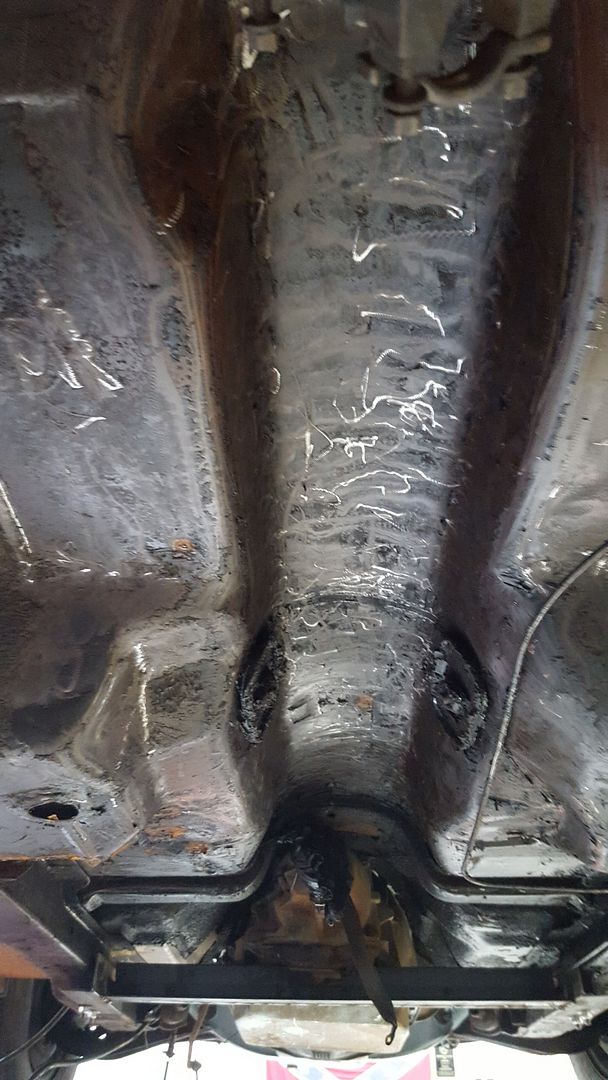
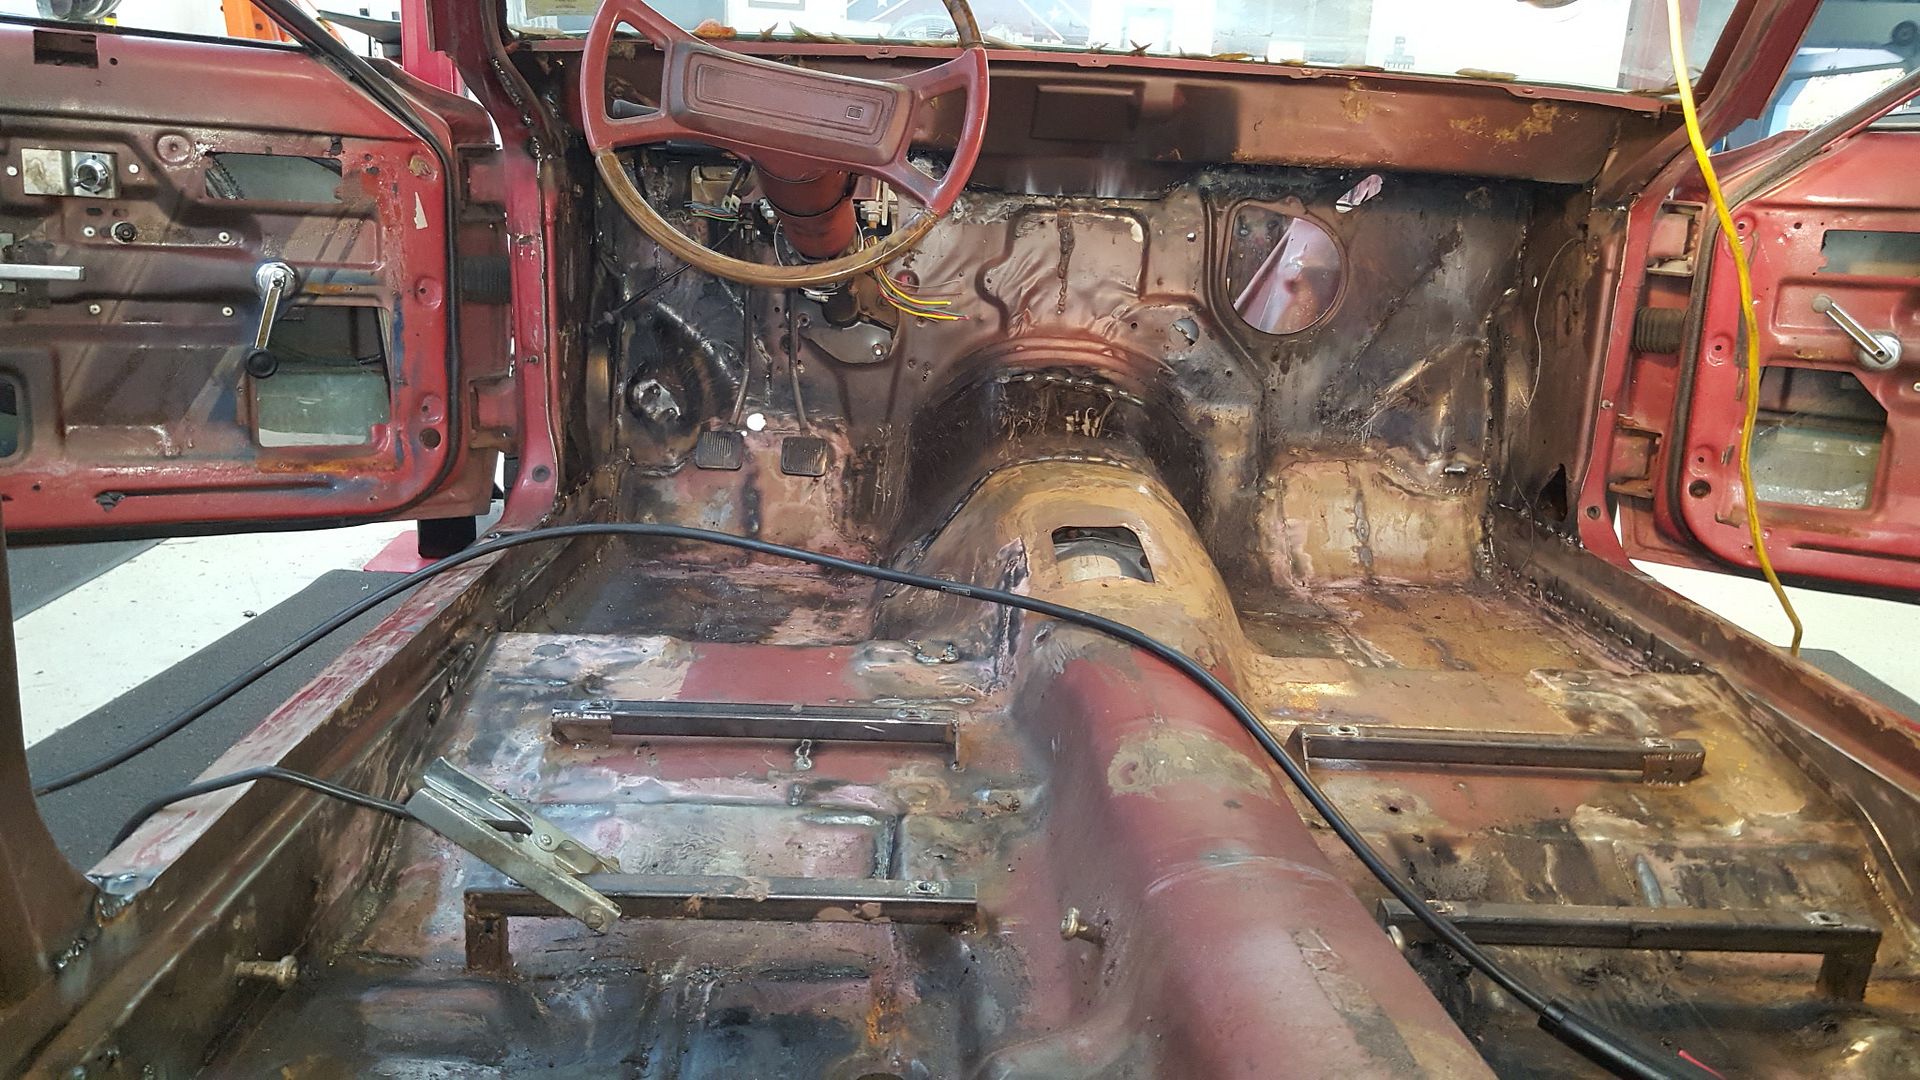
And where dallas got to on undercoating remocval. We are using the harbor freight oscillating tool with a scraper blade, and so far its worked great on the softer stuff. We havent tried on the really hard stuff yet. But it all has to come off. That way we can seam weld and paint. Dallas also began stripping everything underneath that wont be reused or needed. Parking brakes, evap lines, old brackets, speedo cable, etc. Everything under here is a greasy, nasty mess. And rusty. Just a miserable job at this point.
[URL=http://s54.photobucket.com/user/dusterbd13/media/amc/20161008_190527_zps0hvele3b.jpg.html]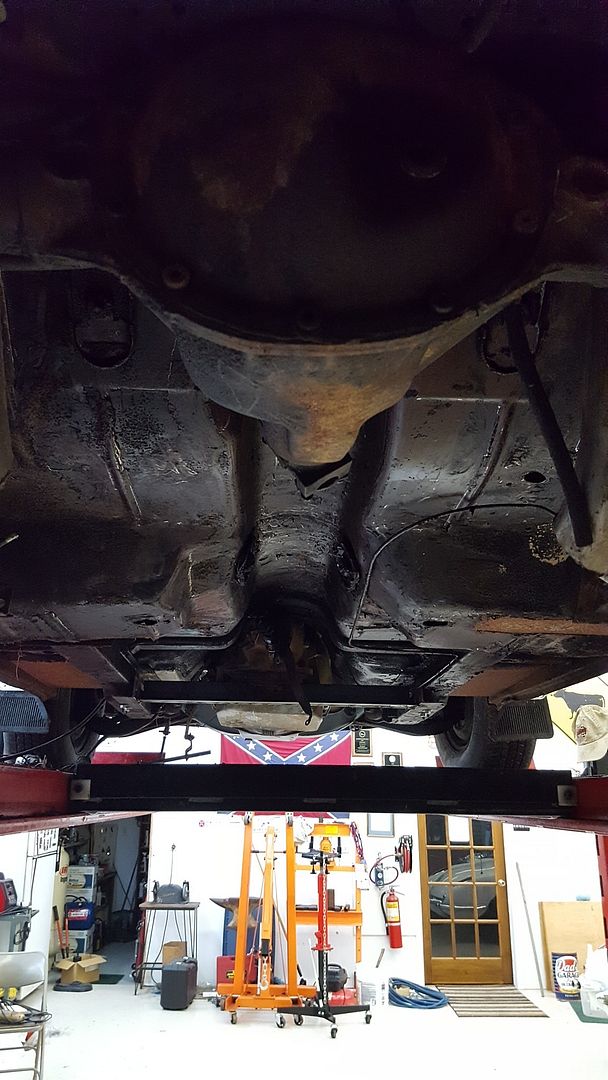 [/URL]
[URL=http://s54.photobucket.com/user/dusterbd13/media/amc/20161008_190531_zpsz725h6eu.jpg.html]
 [/URL]
This Friday ill start on the new slimmer motor mounts, as well as getting driveline angles and such set. The team has a busy weekend, so don't expect much. And that's only after I get over this stomach bug and get gas for the welder. The trans crossmember was made without any, and its UGLY.
Challenge Budget: Car/parts $200
Donor Lincoln town car: 410
Engine crossmember: 120
Sold transmission crossmember from Lincoln: 10
Sold rear axle from lincoln: -50
Scrapped what was left of lincoln: -89
trans cooler: 2
Engine swap: 5.0 plus 300 boot
Sold kelstar wheels-200 (cant recoup more than we spent)
2x2 angle iron, tractor supply 12.05
Brand new Watkins glen nascar slicks and wheels, which were bought for $50, and promptly sold to Dallas dad for $50 and some weld wheels with really old drag slicks. So, slicks were $0, but $50 taken out of the recoup limit.
$5 grant wheel and hub (smaller diameter wheel gives more feedback. Well see if it stays. BOOM TUBES!!!! ($25, with brackets)
AFCO threaded body coilovers for the front end, $100. The fabricated center link was left by the trash can, so free.
6 5/8 heim and jamb nuts, as well as threaded tube for the front suspension: $65
Pair of aluminum seats, $40. Sheet of flame retardant high density foam $10
Fire suppression system parts (not included in challenge budget. But ive had 2nd degree burns on the boys before, so were getting safety gear come hell or high water)
Long tube headers for 66-67 mustang 10
Solid steel lowering blocks, with the holes drilled to offset the rear axle rearwards. $5
Tractor supply bolts and washers: 3.06
New challenge budget total: 958.11
So, Saturday didn't exactly go as planned.
I just wasn't happy with the hybrid mustang convertible mounts, so I pulled them out and chucked them in the scrap bin. I figured I could create sold mounts that did what I want them to do cheaper and better than making the rubber ones work. I also wanted to give a fair whack at making things fit better. So, consider these mounts version two. Please give feedback on them, as there's something I don't like and I cant figure out what.
the constraints were simple: light, strong, removable, and as small as possible. So I used the motor mount brackets from the lincoln as the base. They fit the block, and had a bolt through design. Figured it was a good starting point. But I lost the damn bolts. So we went to tractor supply, where 3.06 netted us two proper length grade 5 bolts, and 4 fender washers. Put them in place on the block, leveled everything up into location, and drank a cup of coffee. Test fitted the mustang long tubes, and realized that the strut rod brackets would be in the way of them fitting, but they were close enough that it seemed worth a try. So I went to remove the strut rod brackets. The strut rods and brackets come close to 15lbs each side, and are horrible intrusive and introduce significant bind to the front suspension. Plans were previously laid to replace them with heim joints and swedged tubing, so the old ones could come out at any time. (fun fact: the car will not roll without them. Well it will, but the lower control arms cause so much flex that the steering angle changes while you're pushing from the front of the car, the car falls off the lift, and the tires become jammed into the fenders. That was fun....) So we went to pull the nuts and “captured studs” that hold the strut rod brackets in. My teammate began turning, and two studs on each strut rod bracket started spinning. After cutting the offending “studs” off, I learned that no, one fixed stud and two through bolts that my teammate had missed. Lots of time and cursing because of him not looking close enough under the dirt and undercoating....
Anyway, the passengers side header fell right into place. Awfully close at the collector to the AOD, but workable with a rosebud tip and a cheater bar. The driver side is close, we will have to relocate one or two tubes slightly to clear the firewall and toe-board. But, early mustang headers fit a 302 powered AMC!!!
[URL=http://s54.photobucket.com/user/dusterbd13/media/amc/20161015_183958_zpsrjldjlrs.jpg.html]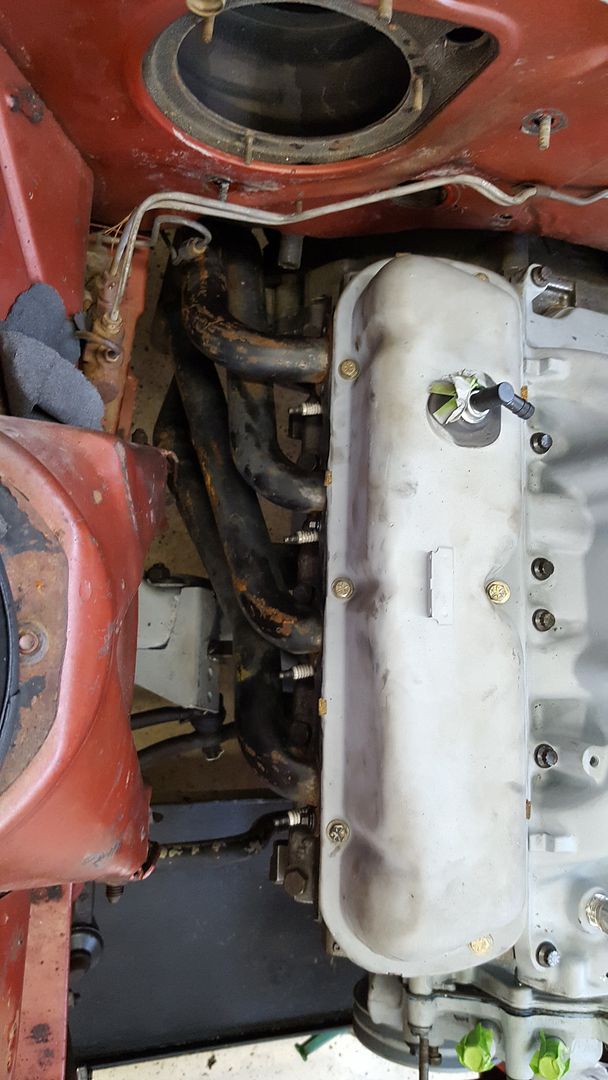 [/URL]
So now it was off to build motor mounts. On the passengers side, I got all fancy. This mount will be loaded primarily in compression, so I wanted it to be strong in that plane. Used a few inches of scrap 16 gauge 1x1 square tube that I found out back in the scrap pile. Welded a 3/8 nut in one end, and made a rough guesstimate for height. Also, cut the top of the t short enough to leave room for two fender washers so the engine would stay locked in place on the bolt.
[URL=http://s54.photobucket.com/user/dusterbd13/media/amc/20161015_183432_zps3fwoivef.jpg.html]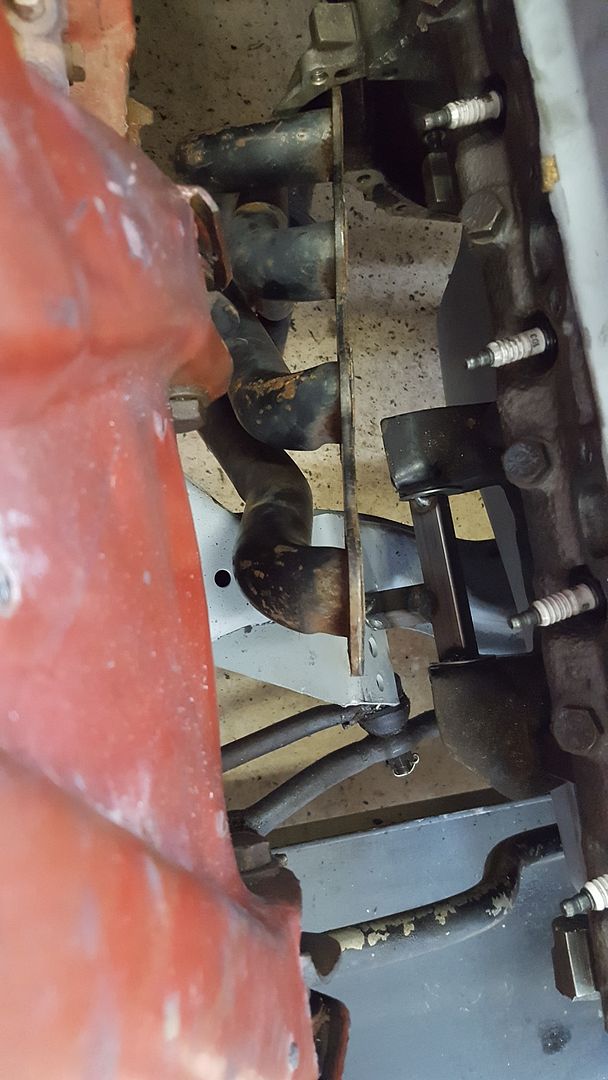 [/URL]
Drivers side, I was much more concerned about tension. So I used again a few inches of the 16 gauge and fender washers, as well as the last little bit of the 2x2 angle iron from the trans crossmember.
[URL=http://s54.photobucket.com/user/dusterbd13/media/amc/20161015_184009_zps9sxsk0wa.jpg.html]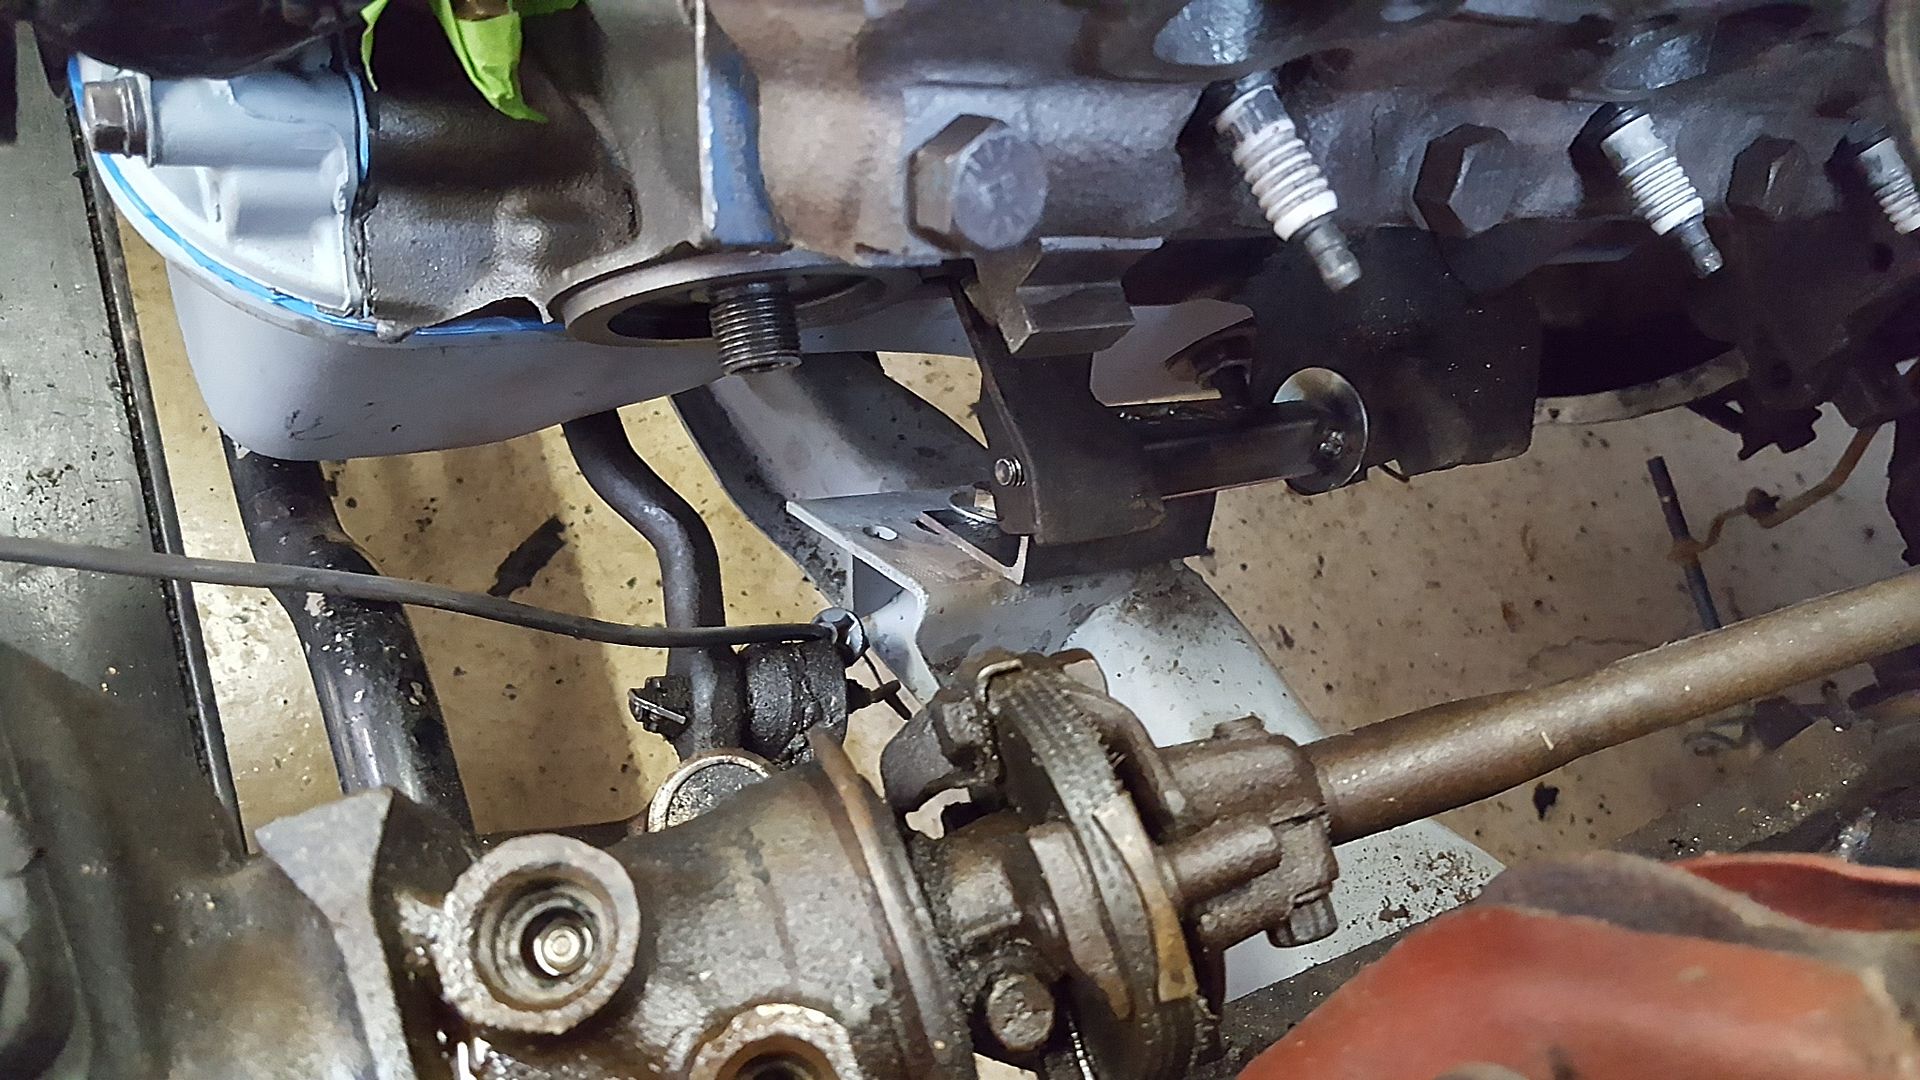 [/URL]
These were made all in the car so I knew they would fit. Not a comfortable welding position.
[URL=http://s54.photobucket.com/user/dusterbd13/media/amc/20161015_183435_zpsxwraollh.jpg.html]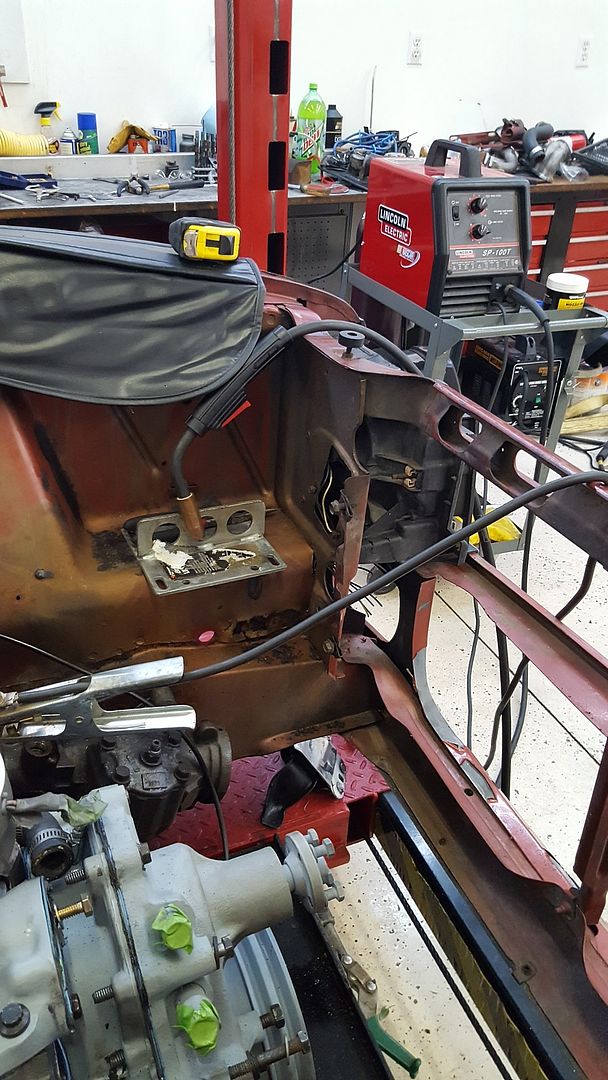 [/URL]
While I was playing fabricator, Dallas was stripping the car. See, we have to get it all the way down to bare surfaces for seam welding, rust repair, hole filling, and painting. Teammate Dustin got us a gallon of PPG rusty metal primer, and a gallon of PPG industrial enamel in race car gray for 1 dollar each. This is not a BS price, it is what he sells the same mistint paint to his customers for. So, win!!
[URL=http://s54.photobucket.com/user/dusterbd13/media/amc/20161015_194637_zps0ky8klhn.jpg.html]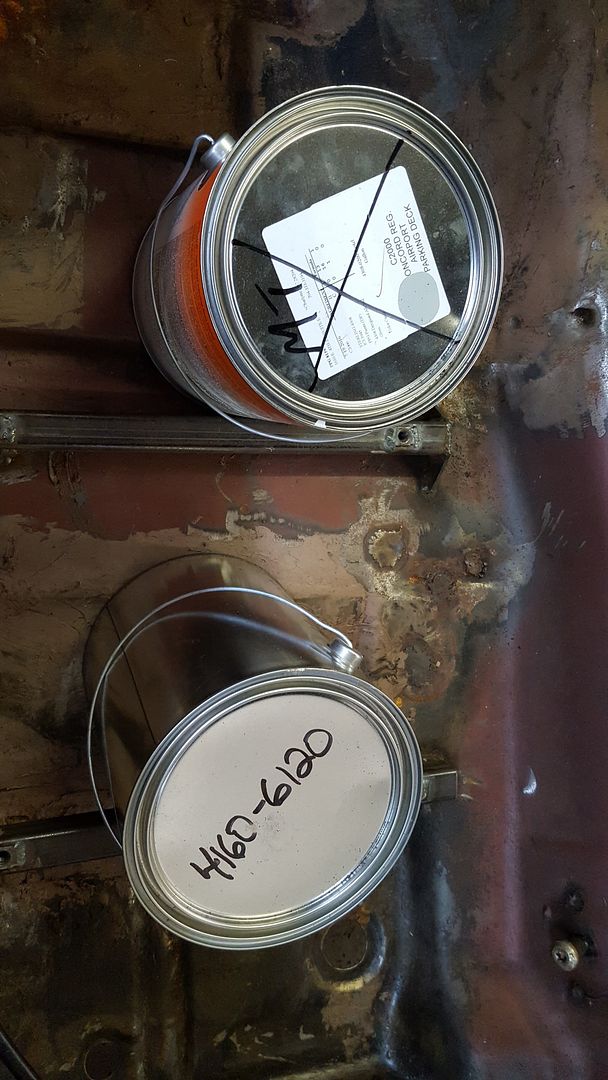 [/URL]
[URL=http://s54.photobucket.com/user/dusterbd13/media/amc/20161015_184647_zpsmo2ecdgu.jpg.html]
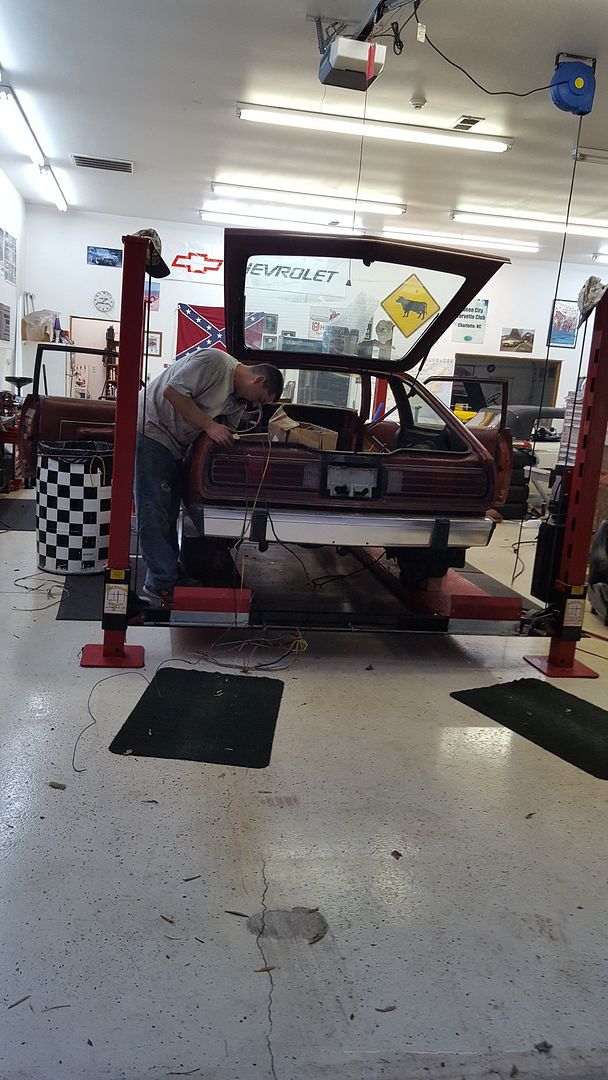 [/URL]
[URL=http://s54.photobucket.com/user/dusterbd13/media/amc/20161015_194701_zpskrvhah2n.jpg.html]
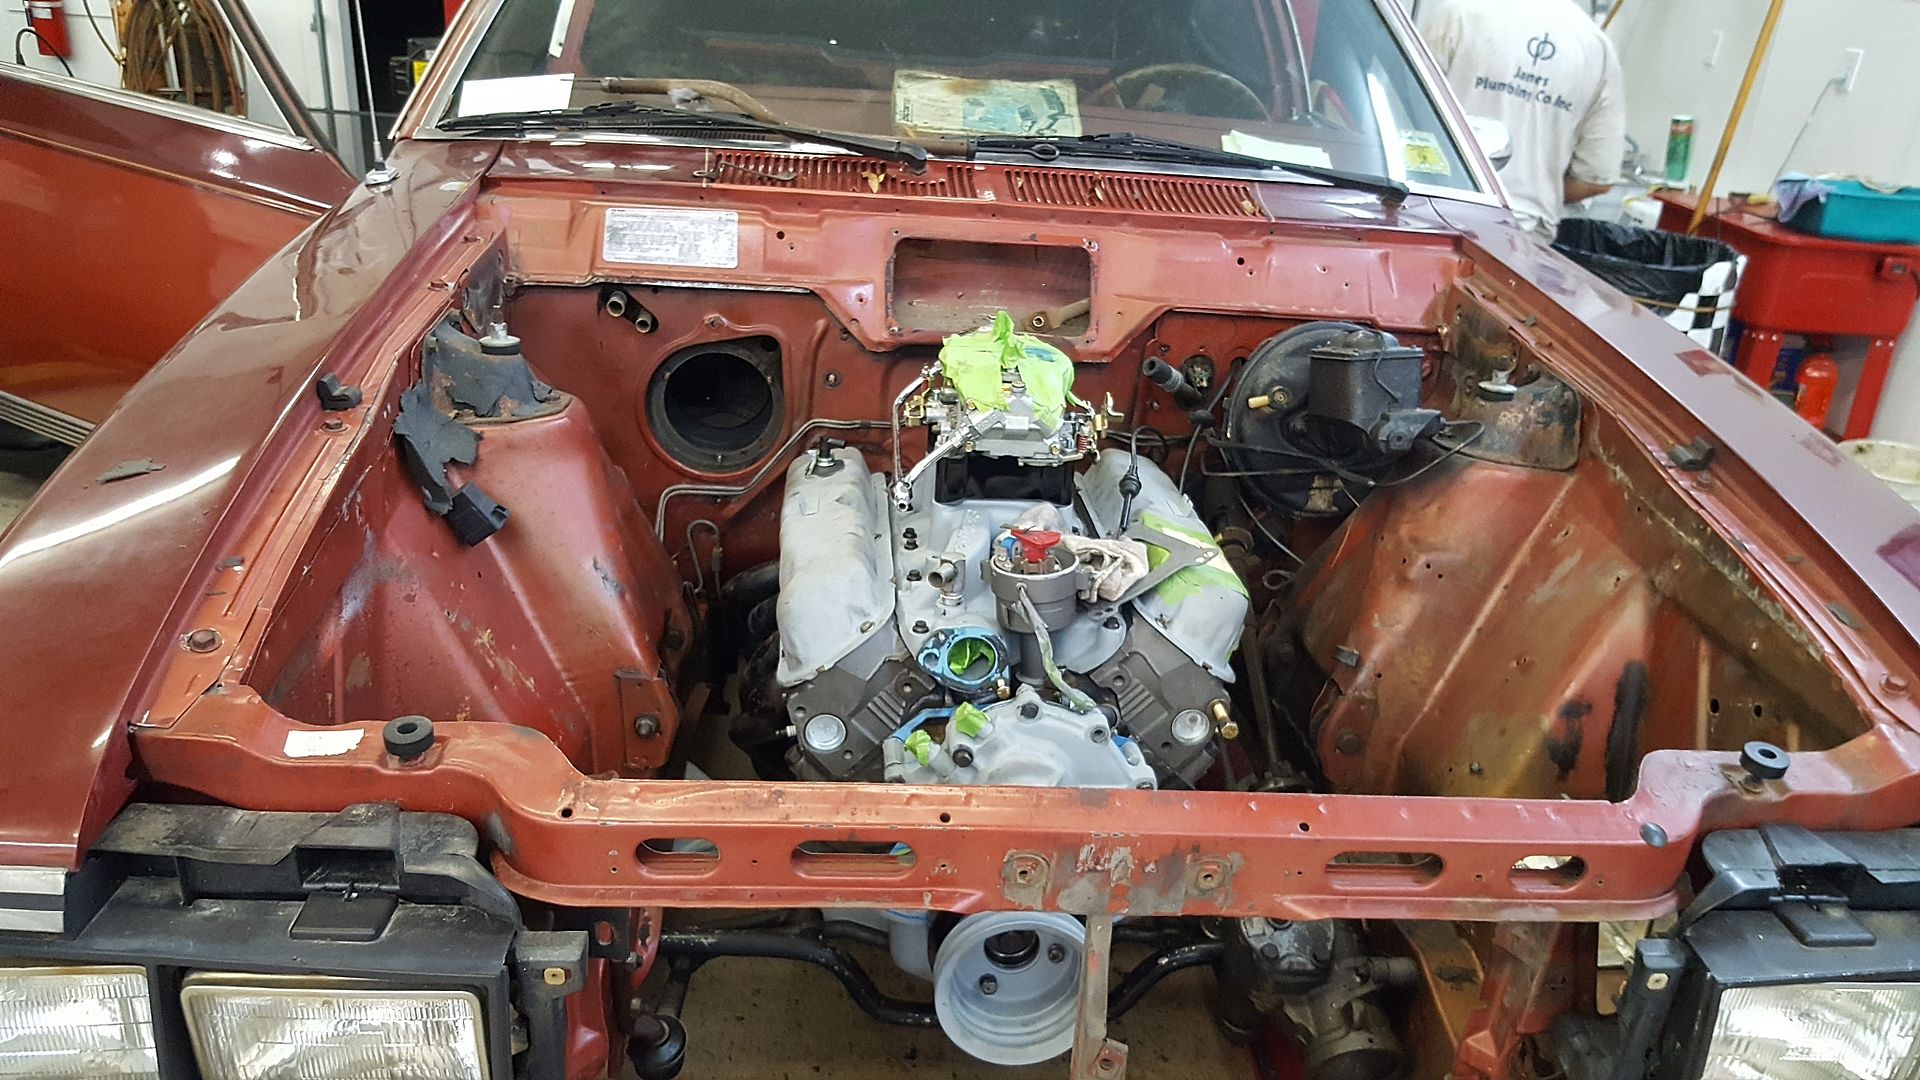 [/URL]
[URL=http://s54.photobucket.com/user/dusterbd13/media/amc/20161015_194649_zpsbvlj6a1m.jpg.html]
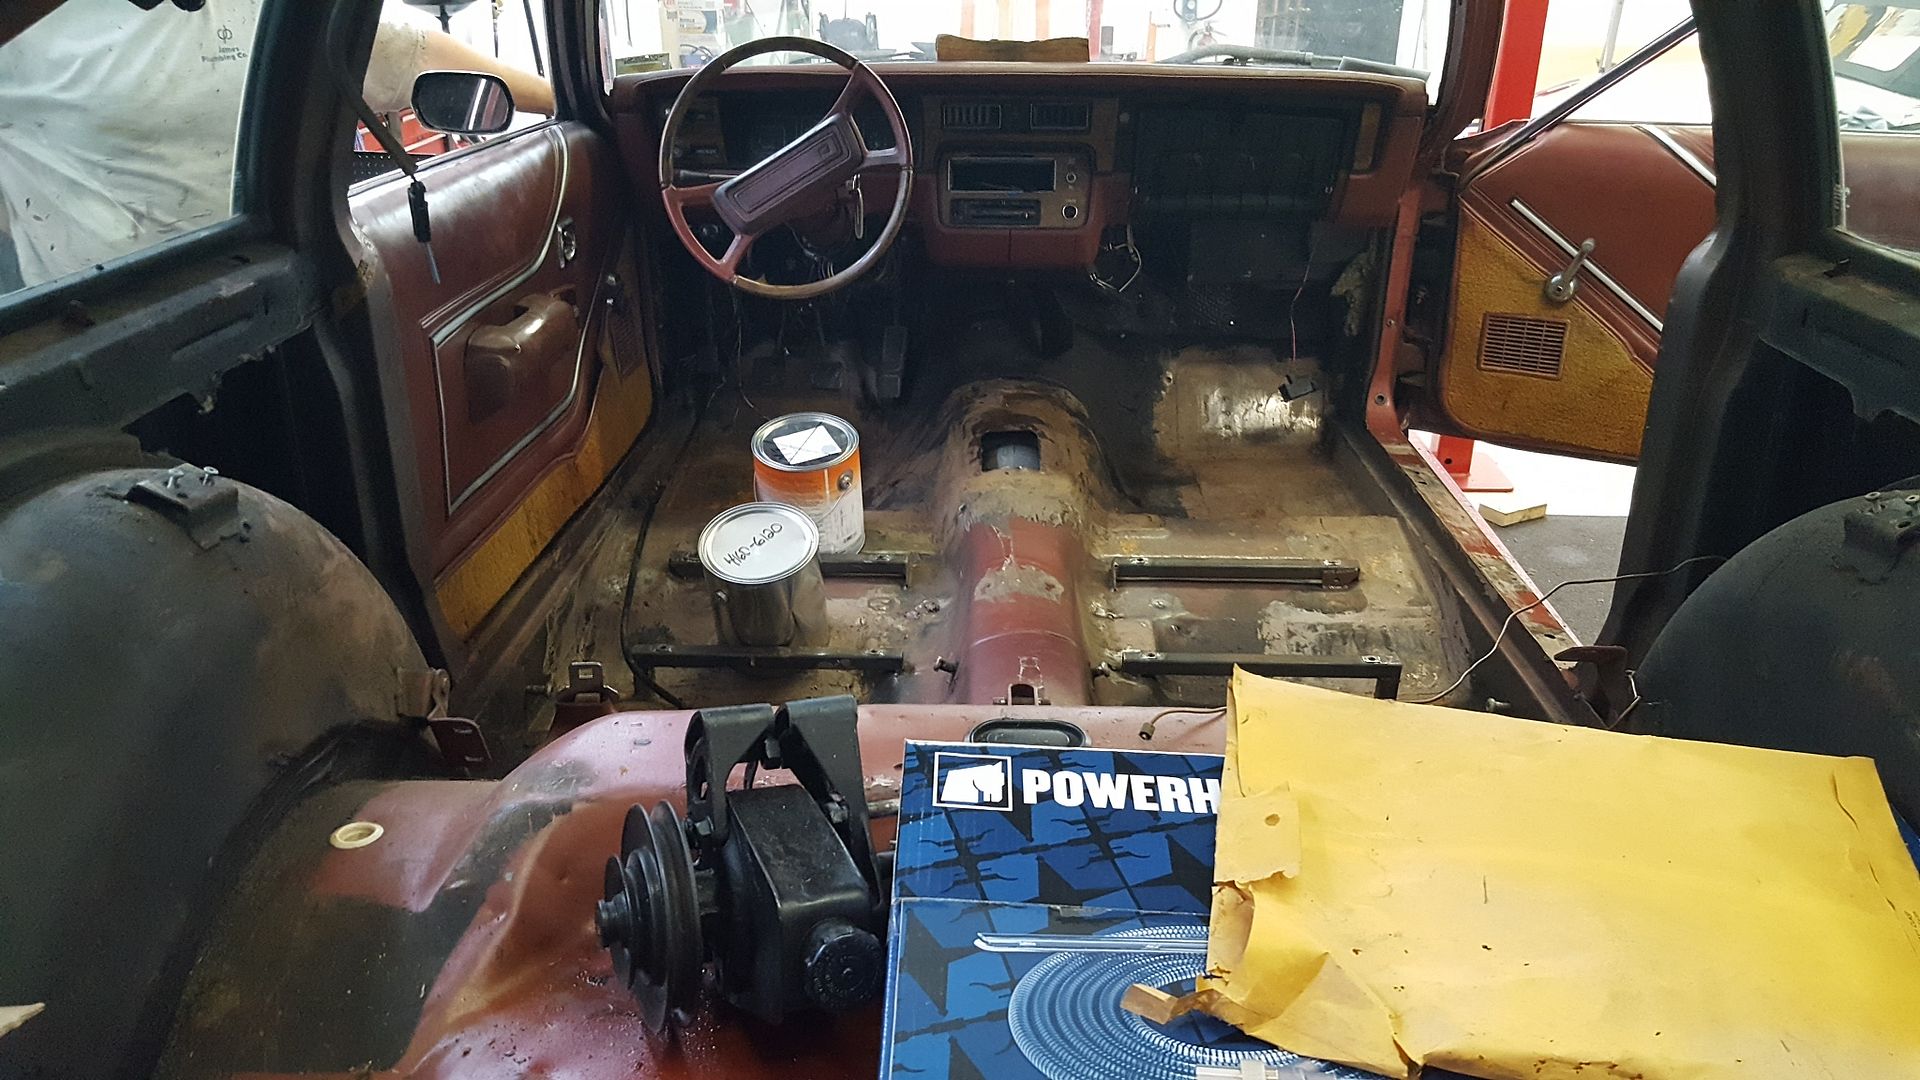 [/URL]
Lastly, a picture of the scary seat brackets the car came with. They are well fabricated, but they are welded to very thin, very flexible parts of the floor pan. We actually found cracks around the floor on the drivers side from where they were flexing the sheet metal.
[URL=http://s54.photobucket.com/user/dusterbd13/media/amc/20161015_194642_zpsge4shrjq.jpg.html]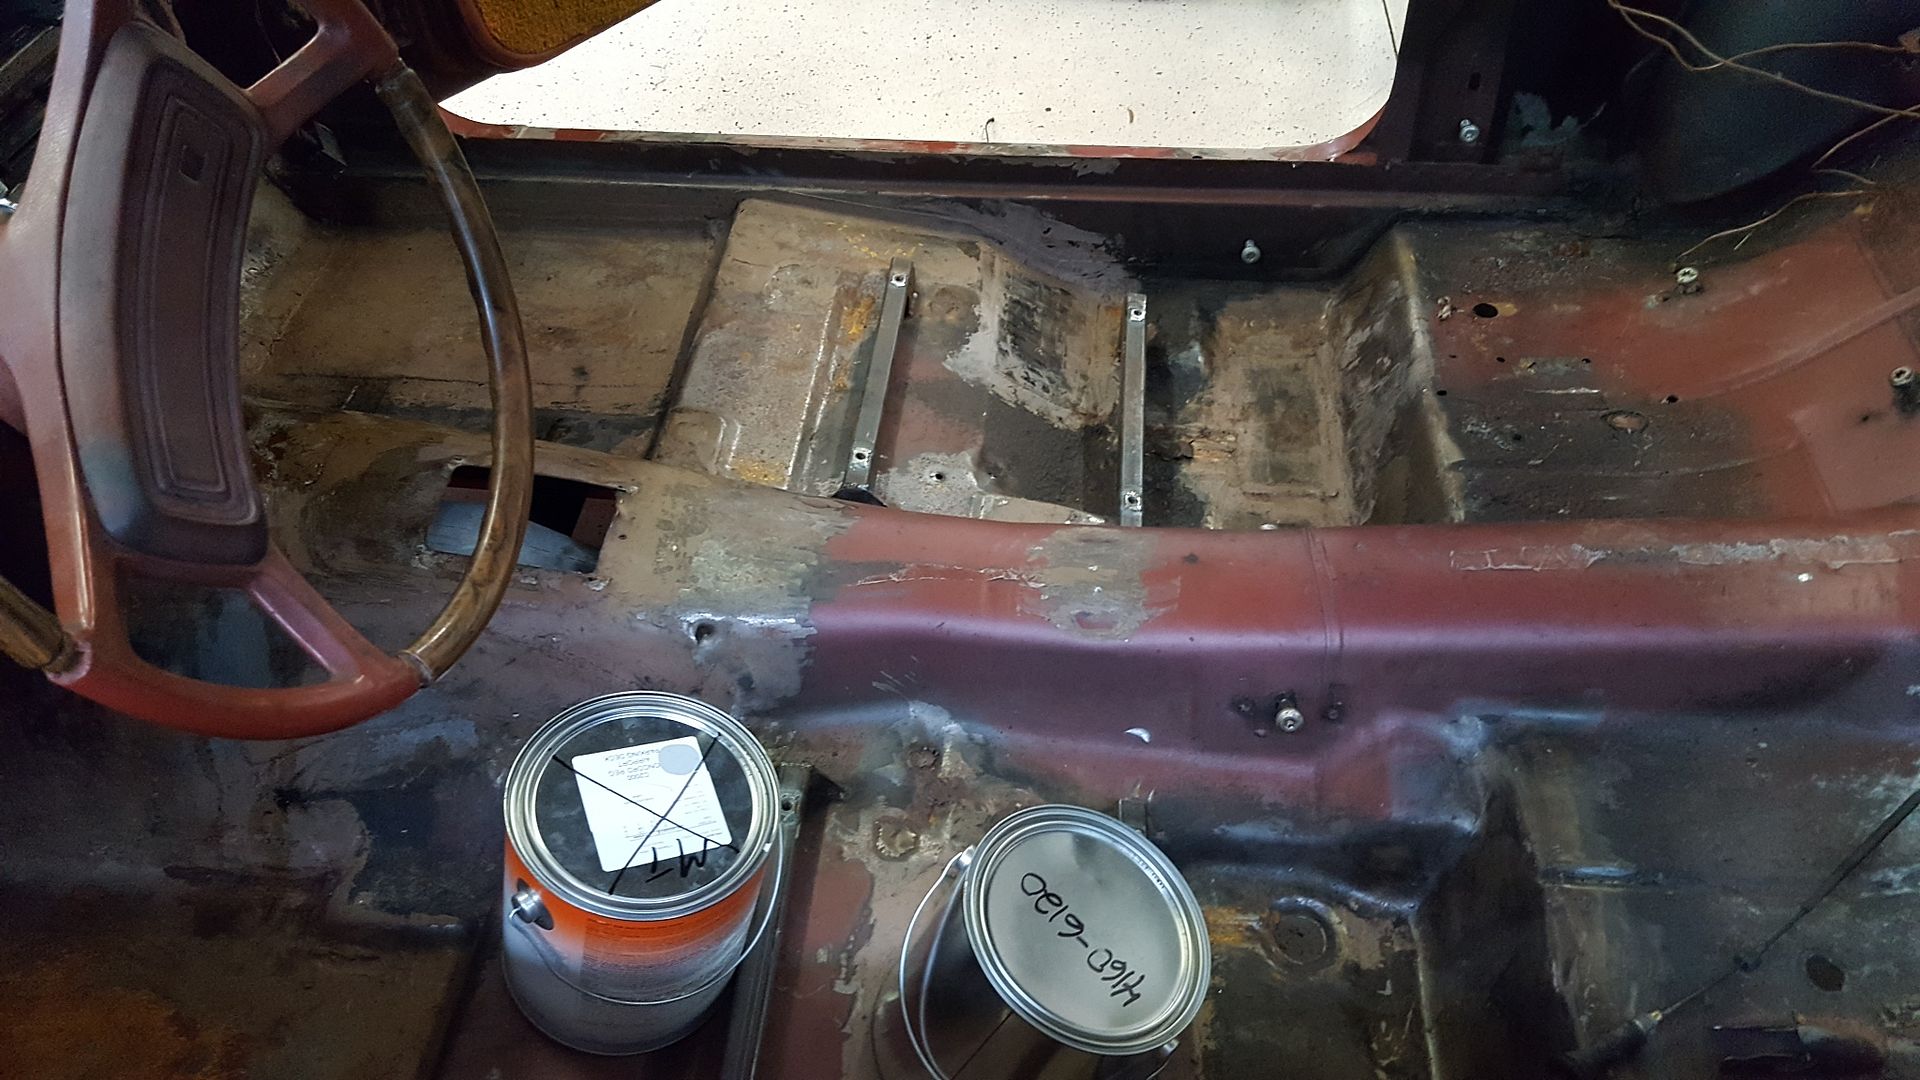 [/URL]
Up next is working up the cage design with our newest teammate, building strut rods so the car can roll, and finishing gutting and cleaning and stripping. We will leave you with a Google image I found of what we want the car to look like at the challenge. Only copper, with steelies. And no front bumper. I have no idea whose car it is, but if you do, please help me contact them. I would LOVE to find out more about it. Its awesome!
[URL=http://s54.photobucket.com/user/dusterbd13/media/amc/DSC_00031_zpsmcdlqxuz.jpg.html]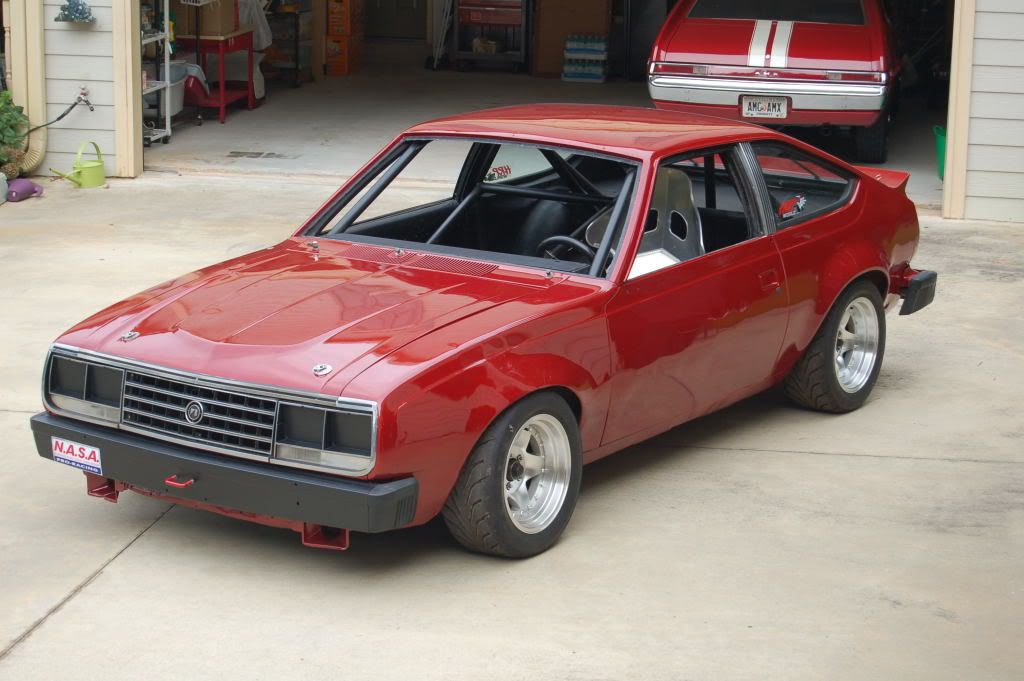 [/URL]
Challenge Budget: Car/parts $200
Donor Lincoln town car: 410
Engine crossmember: 120
Sold transmission crossmember from Lincoln: 10
Sold rear axle from lincoln: -50
Scrapped what was left of lincoln: -89
trans cooler: 2
Engine swap: 5.0 plus 300 boot
Sold kelstar wheels-200 (cant recoup more than we spent)
2x2 angle iron, tractor supply 12.05
Brand new Watkins glen nascar slicks and wheels, which were bought for $50, and promptly sold to Dallas dad for $50 and some weld wheels with really old drag slicks. So, slicks were $0, but $50 taken out of the recoup limit.
$5 grant wheel and hub (smaller diameter wheel gives more feedback. Well see if it stays. BOOM TUBES!!!! ($25, with brackets)
AFCO threaded body coilovers for the front end, $100. The fabricated center link was left by the trash can, so free.
6 5/8 heim and jamb nuts, as well as threaded tube for the front suspension: $65
Pair of aluminum seats, $40. Sheet of flame retardant high density foam $10
Fire suppression system parts (not included in challenge budget. But ive had 2nd degree burns on the boys before, so were getting safety gear come hell or high water)
Long tube headers for 66-67 mustang 10
Solid steel lowering blocks, with the holes drilled to offset the rear axle rearwards. $5
¼ plate, scrap metal yard: 7.50
Mustang convertible mounts 22
Bending plate cost 25
Swedged tubing, ebay: 31.90
New challenge budget total: 1041.45
So, we’ve been busy. And things have escalated quickly.
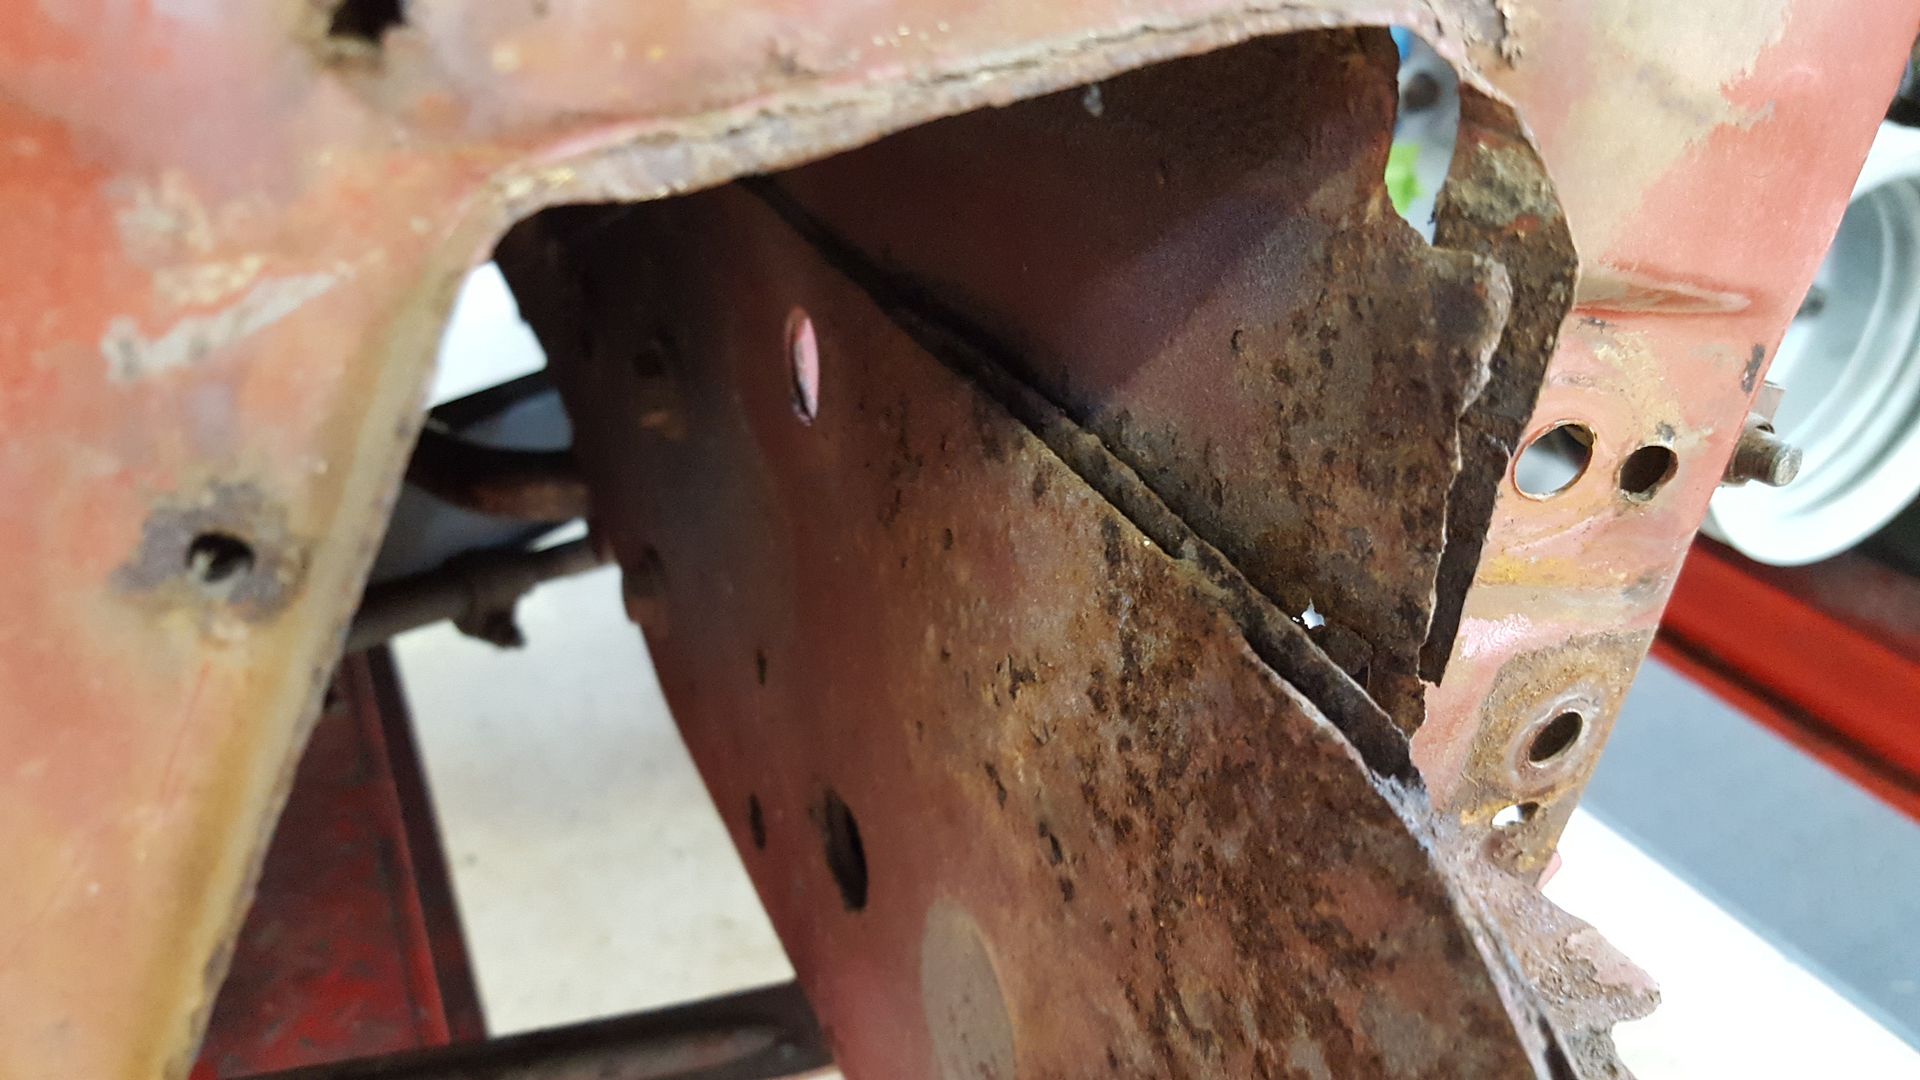
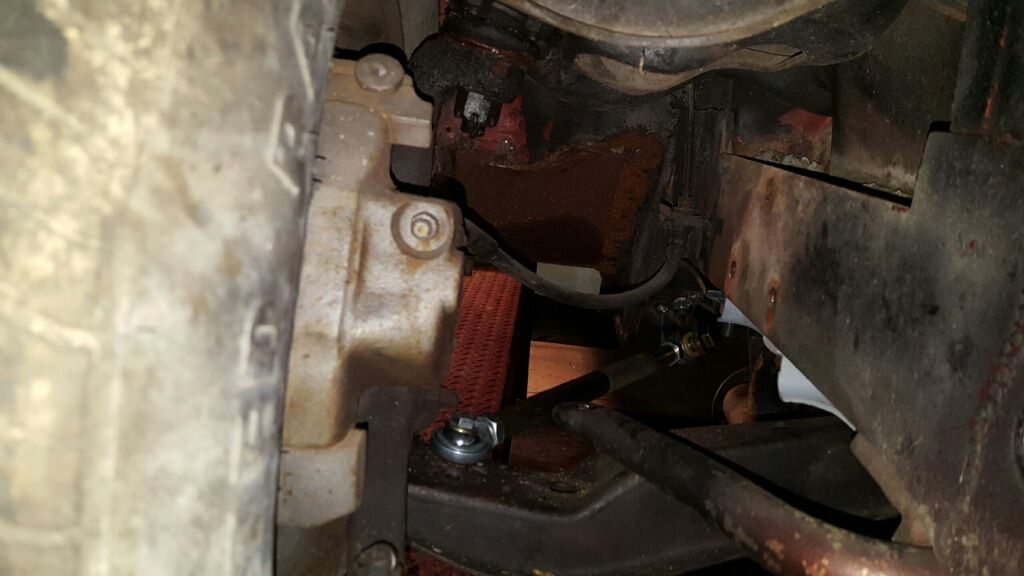
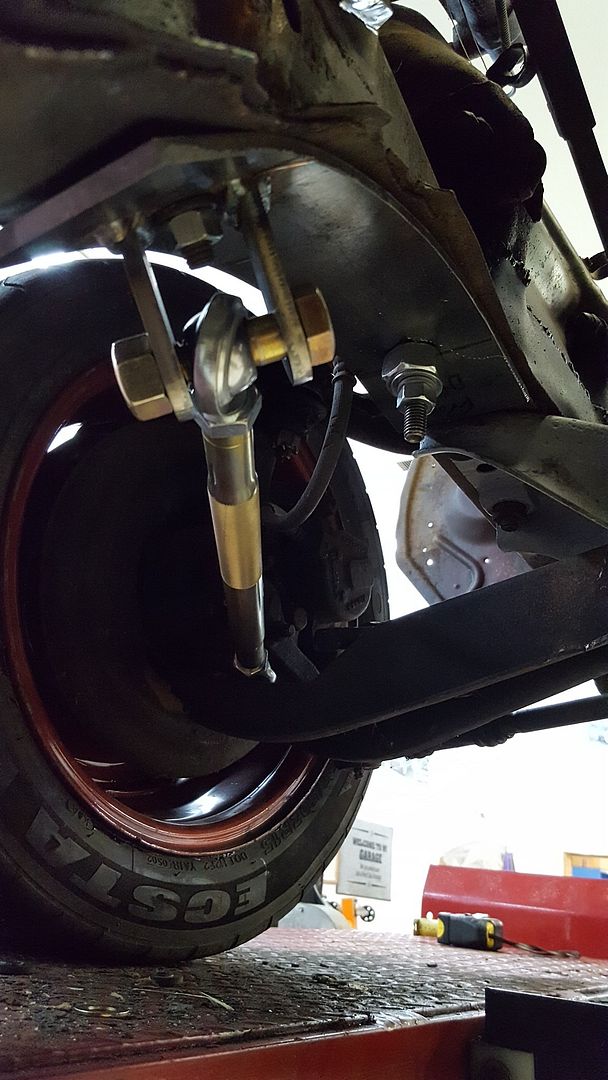
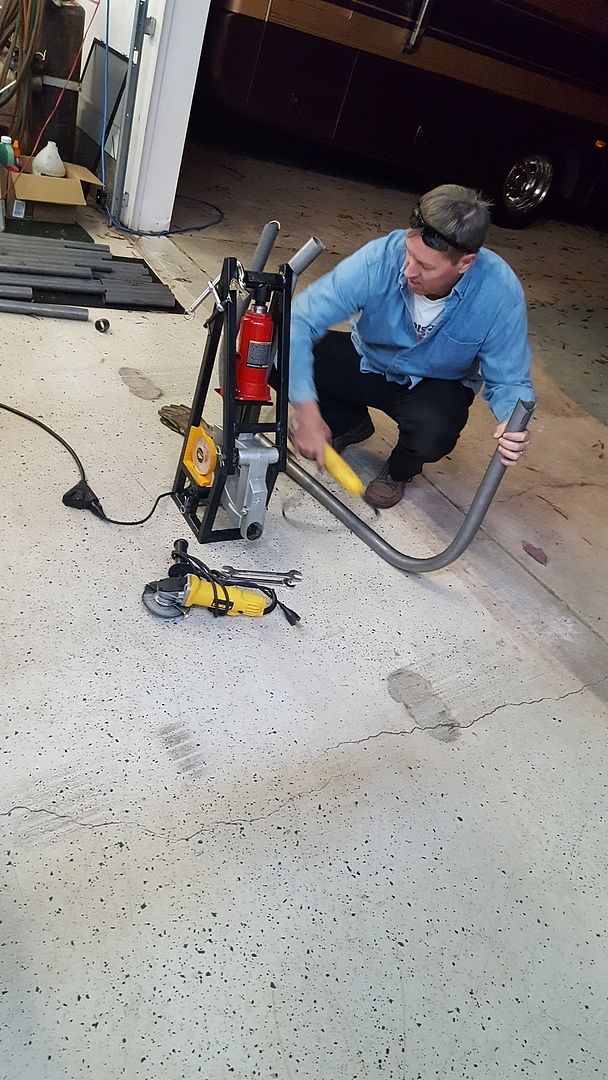
First things first, we had to get the car rolling again, which meant I needed to fab strut rods. A fellow GRM member gave me some tabs for the strut rods, and I ordered 12 inch long swedged tubing. Using the ¼ plate I initially bought for engine mounts, and some cardboard aided design, I have some bolt on plates made for this. According to my research, the frame rails on this car were originally 3 layers of sheetmetal. With all the rust and damage, I figure were probably down to one. I didn’t want to trust my life to a layer of sheetmetal with a bracket welded on. So I traced the curve of the framerail onto a piece of cardboard, and trimmed until it fit both sides. Took my plate and piece of cardboard to j&w welding in Albemarle, where he cut it to size and bent it up for me in about 20 minutes while I waited. Only charged me $25. Took it down to the shop with my 12 inch long swedged tubing, marked and drilled the holes to use the factory strut rod mounting hardware and holes, and started figuring out how to set base caster measurements.
[URL=http://s54.photobucket.com/user/dusterbd13/media/amc/20161024_174854_zpsudqlvaao.jpg.html]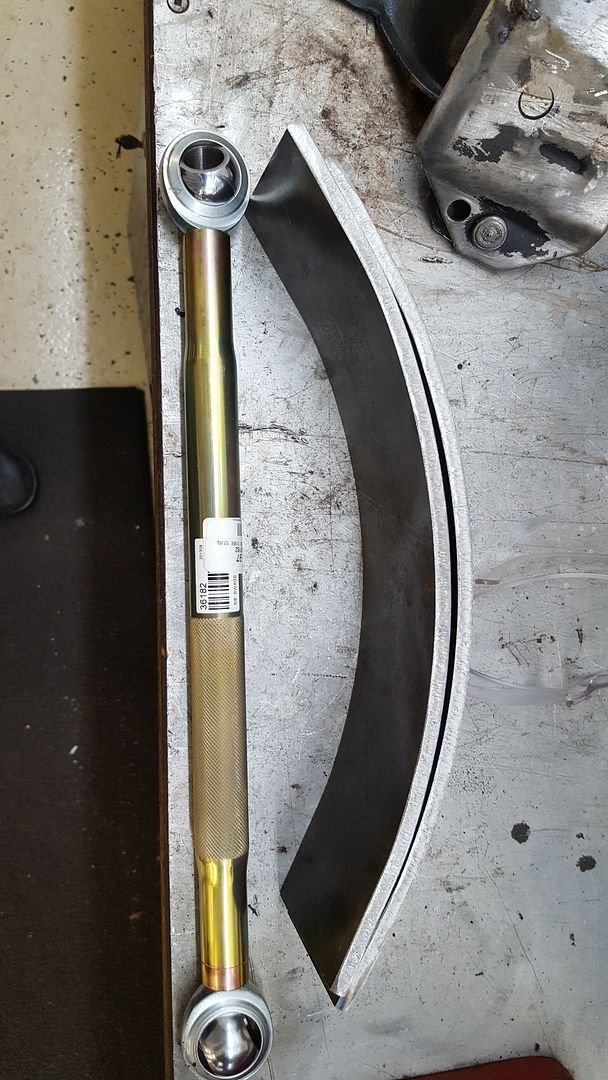 [/URL]
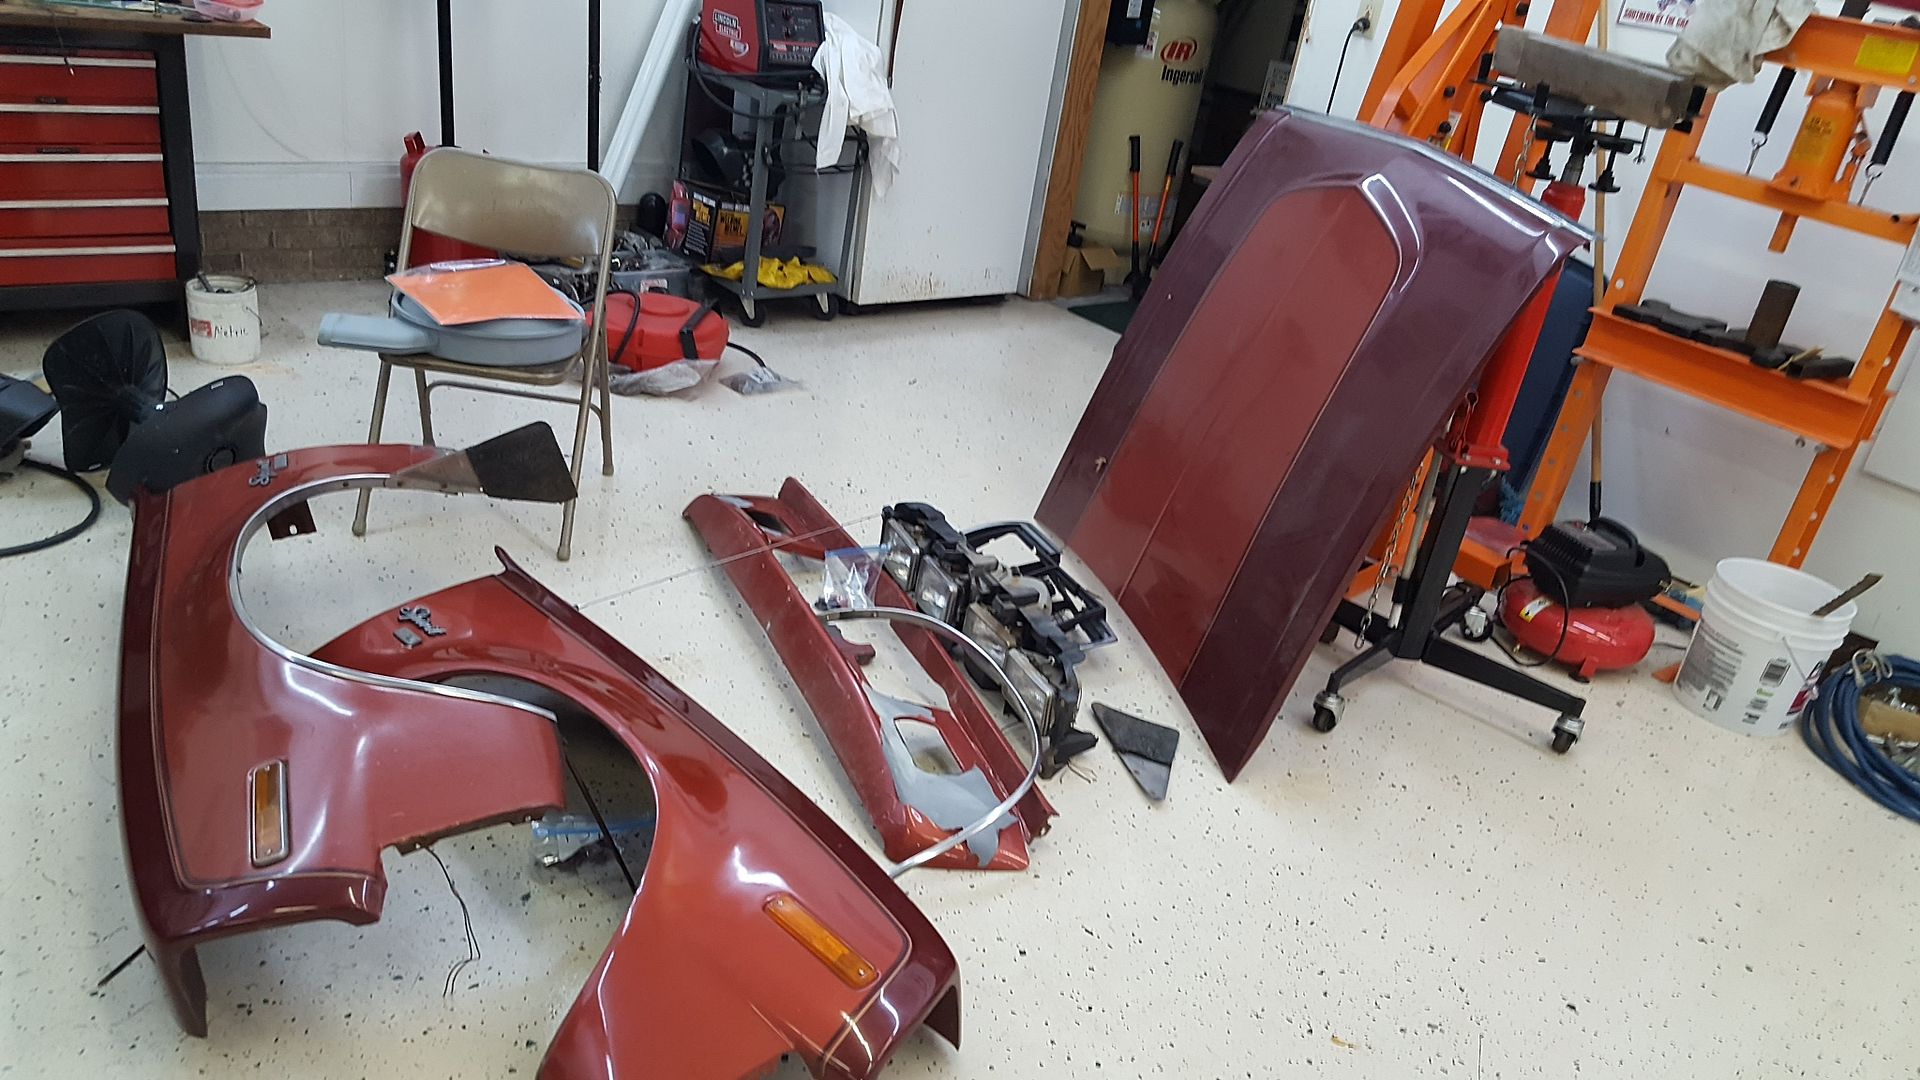
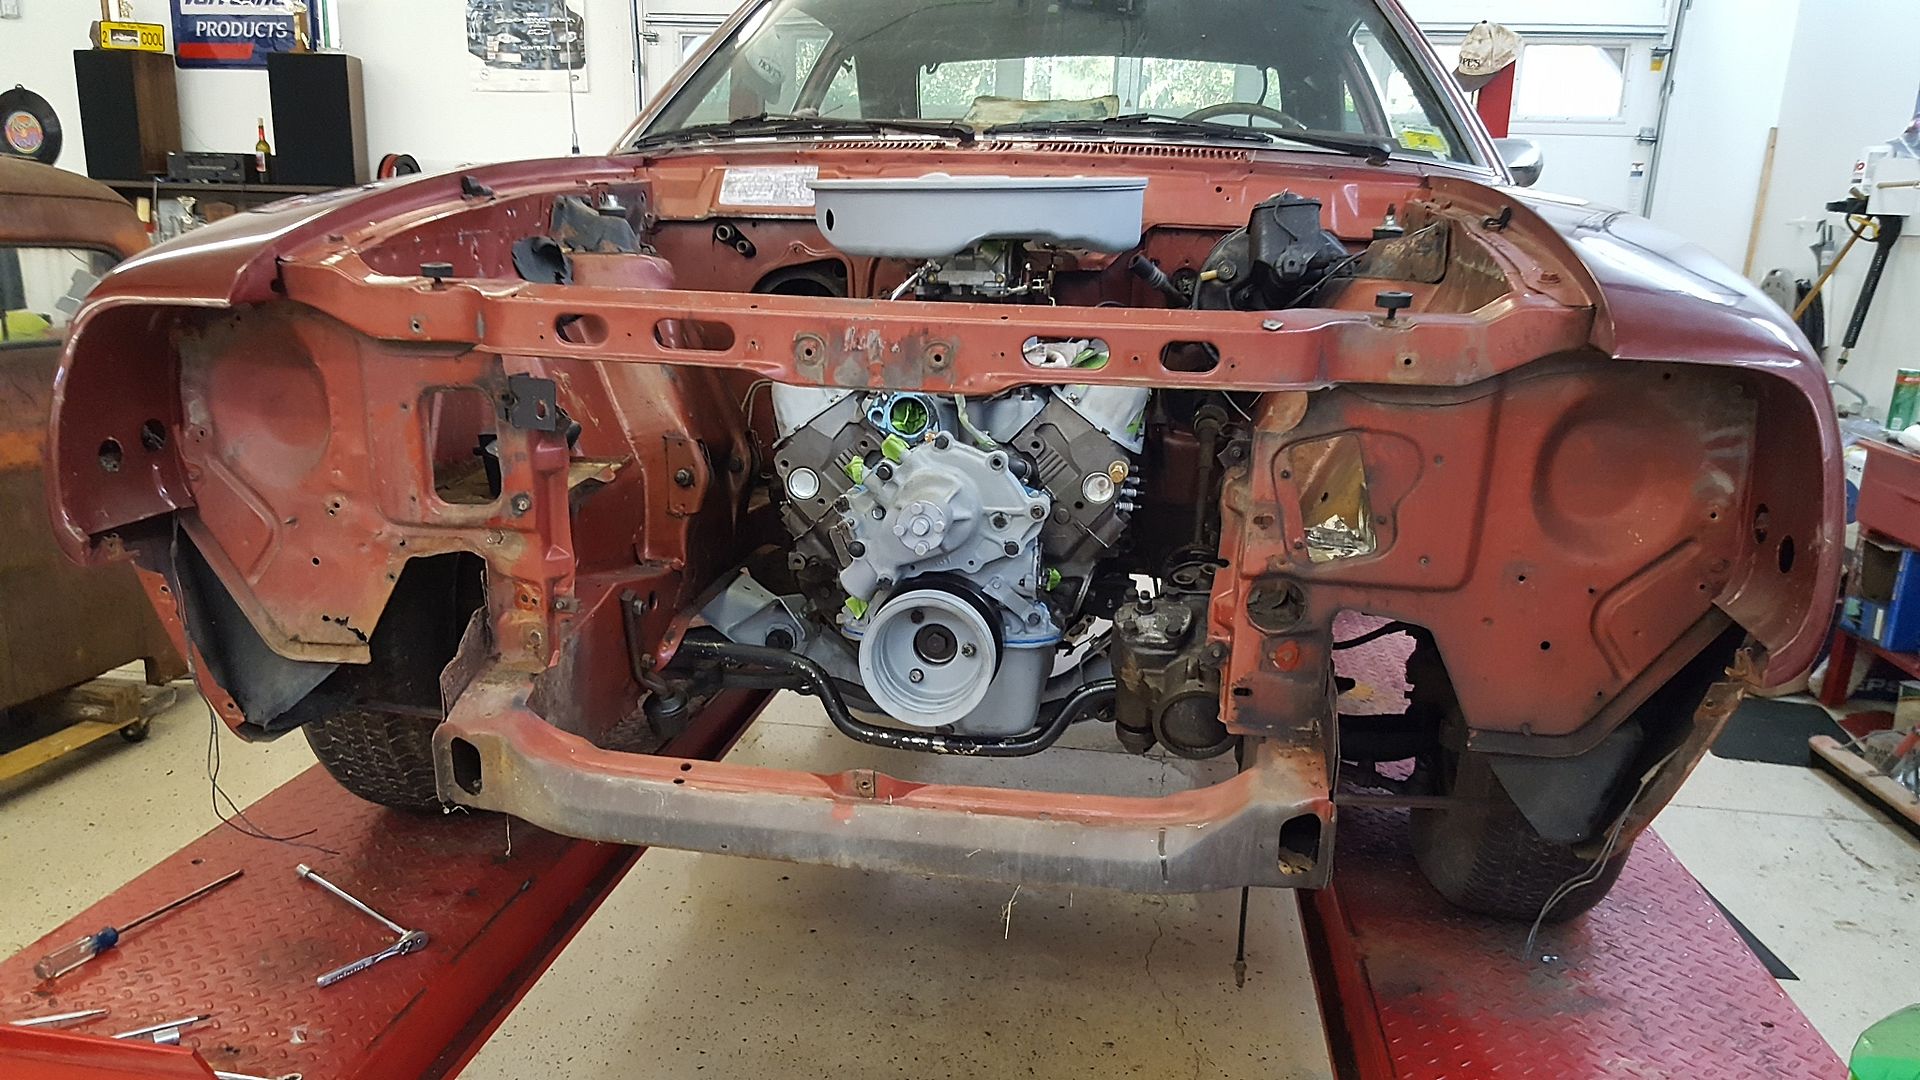
I found that the fenders were in the way of any quality measurements I wanted, so I decided to get them out of my way. It escalated quickly to “strip everything that isn’t a racecar” phase pretty quickly.
[URL=http://s54.photobucket.com/user/dusterbd13/media/amc/20161015_203039_zpsjycbyerm.jpg.html]
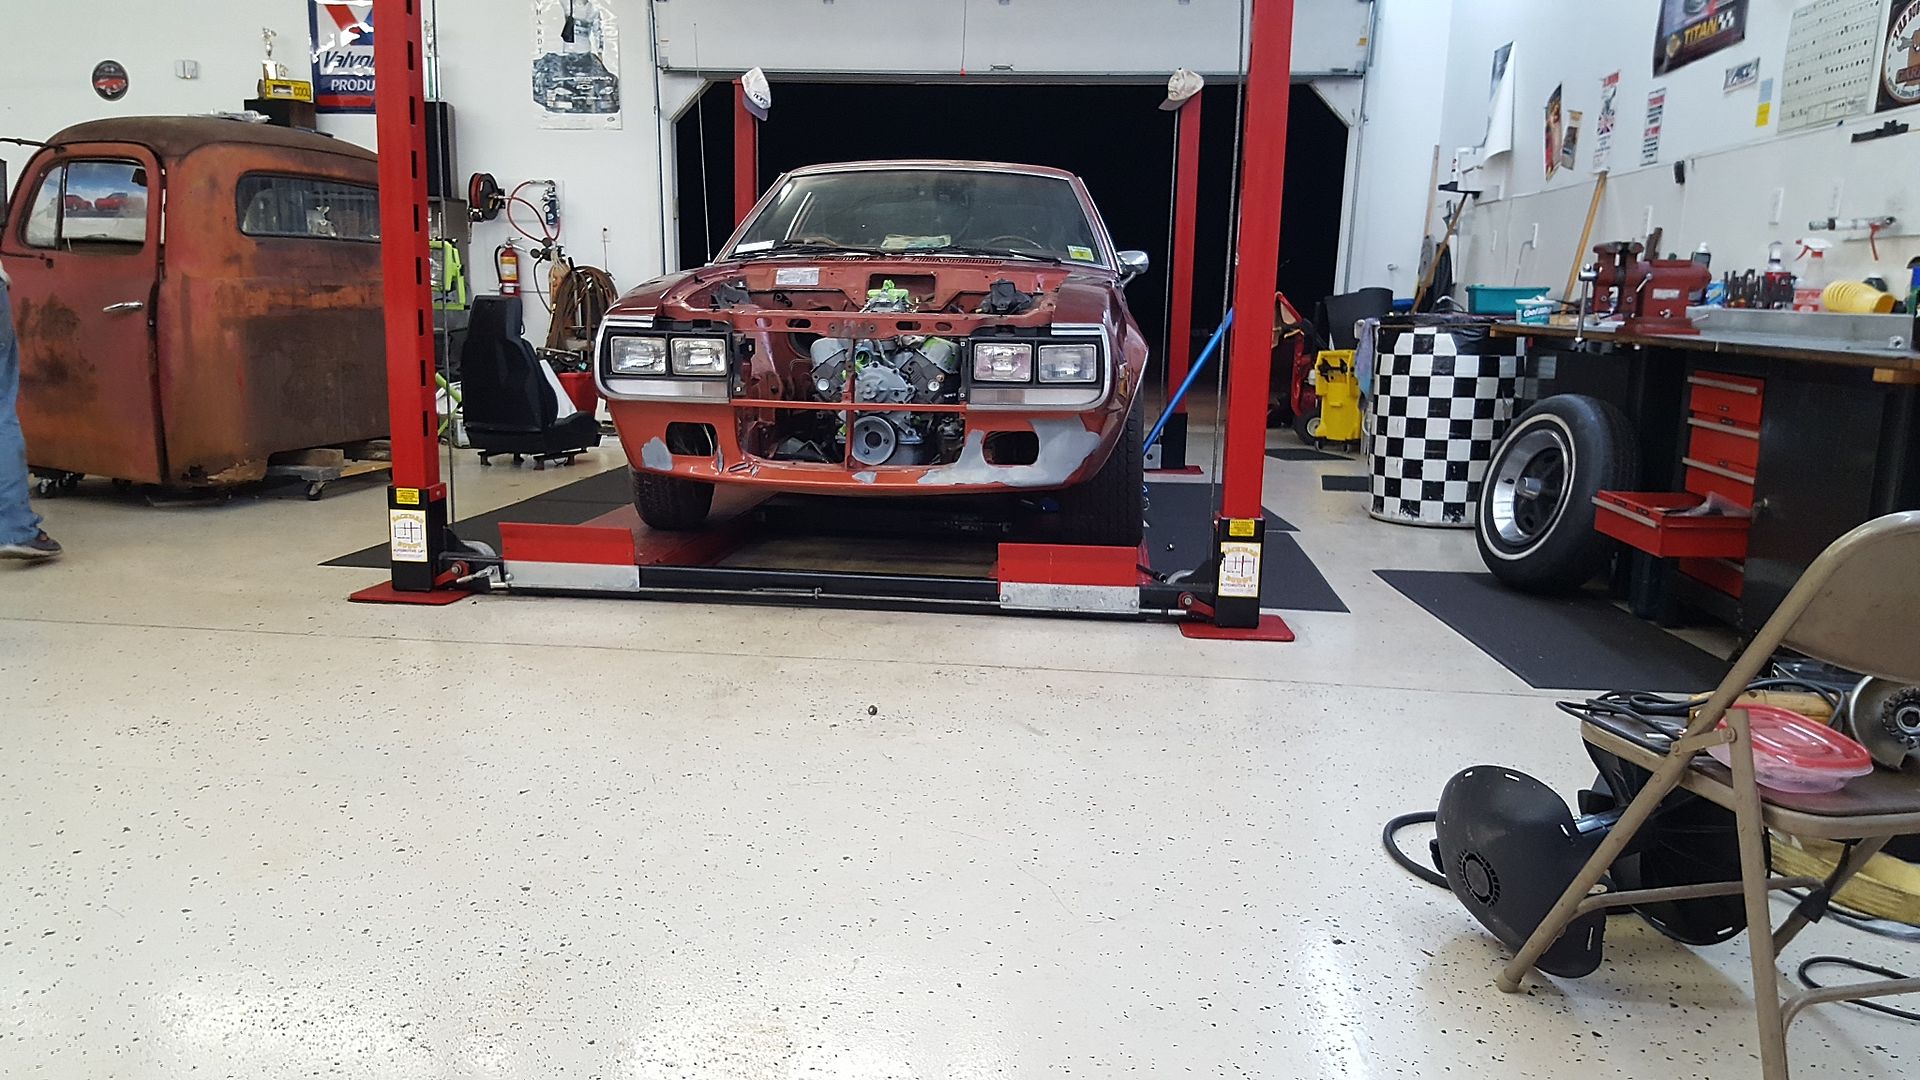 [/URL]
[URL=http://s54.photobucket.com/user/dusterbd13/media/amc/20161024_182527_zpswdyp0ac6.jpg.html]
 [/URL]
[URL=http://s54.photobucket.com/user/dusterbd13/media/amc/20161024_202909_zpsrwawnbb2.jpg.html]
 [/URL]
So, with plenty of access to everything, we could finally finish our assessment of the car. We found busted seams, rust, poor repairs, you name it. But nothing preventing us from building a race car. This thing could never be a restoration or street car candidate again though.
[URL=http://s54.photobucket.com/user/dusterbd13/media/amc/20161024_170839_zps7g311wyl.jpg.html]
 [/URL]
[URL=http://s54.photobucket.com/user/dusterbd13/media/amc/20161024_170830_zps3dshma6c.jpg.html]
 [/URL]
So Steve Stafford (the aforementioned GRM member) brought me 4 tabs for my strut rods. And eyeballed the project. And joined the team. Sweet!!!
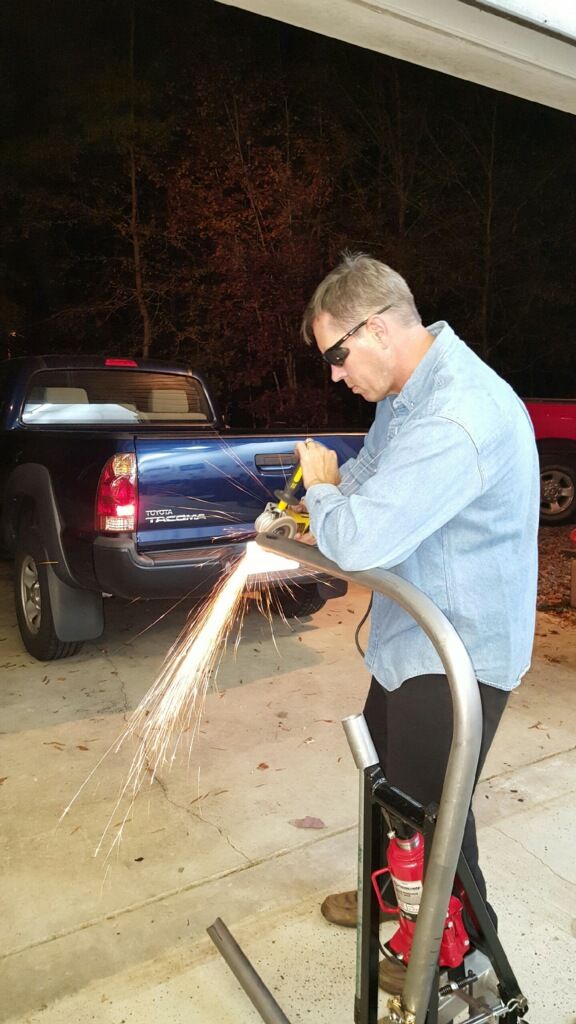
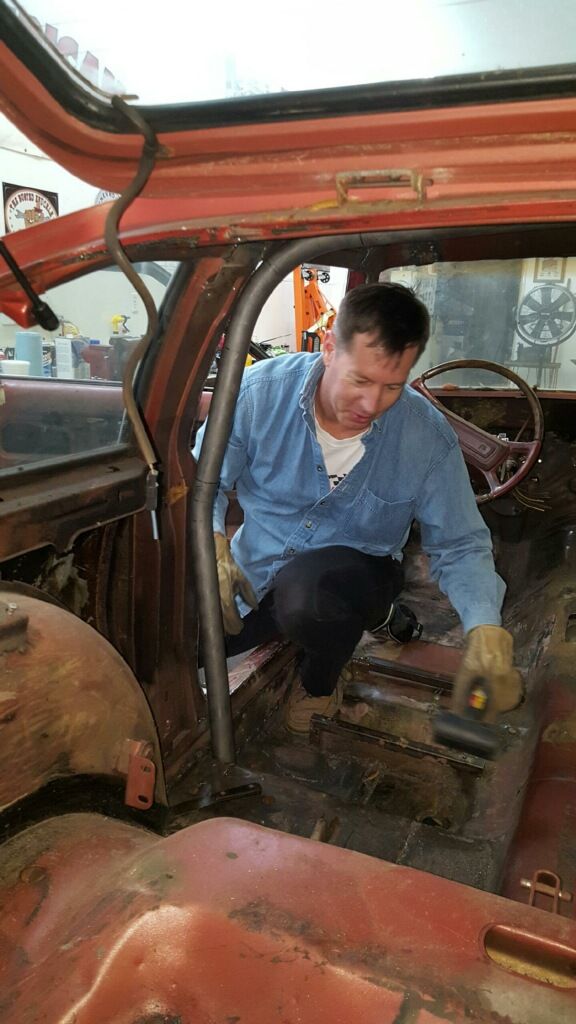
Turned out that he has built a few roll cages, and had the equipment to do it again, along with the engineering background that this redneck doesn’t have. He’s always wanted to do the challenge, but couldn’t commit to being a one man team. So he’s joined us, and were fixing our structural and chassis rigidity issues with a cage. And seam welding. And rust repair. And….
Anyway, we still needed this thing to roll again. There were three things that needed to happen to facilitate this:
1. Strut rods. Not optional.
2. Tires needed to hold air for more than 20 minutes.
3. Engine needed raised for steering linkage and sway bar clearance (cause im a dumbass)
So first, strut rods. I set the spindles at 0.0 caster at roughly intended ride height. Not much caster gain or loss in compression/rebound, so I was happy. Burned the tabs in on my plates, bolted it all together, and double checked my numbers. Dead nuts.
[URL=http://s54.photobucket.com/user/dusterbd13/media/amc/imagejpeg_0_zpszhfliltq.jpg.html]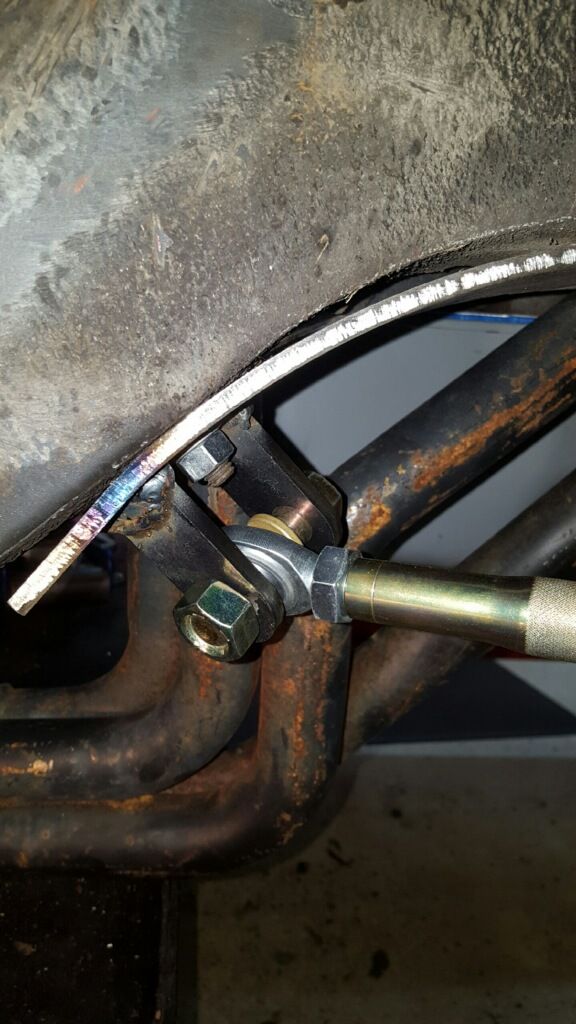 [/URL]
[URL=http://s54.photobucket.com/user/dusterbd13/media/amc/imagejpeg_3_zpswbh4tie4.jpg.html]
 [/URL]
[URL=http://s54.photobucket.com/user/dusterbd13/media/amc/20161028_194646_zpsfilkn1vq.jpg.html]
 [/URL]
Next was tires. See, we’ve been trying to figure out just what to do on this front. Tires are important for chassis. And rolling. And stance. And looks. And brakes, and….
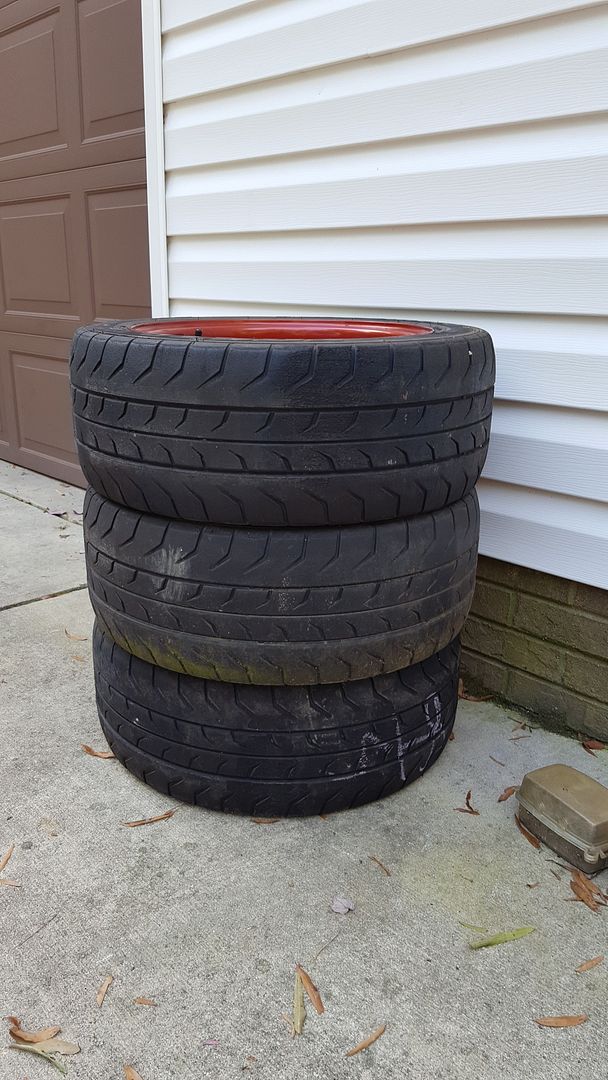
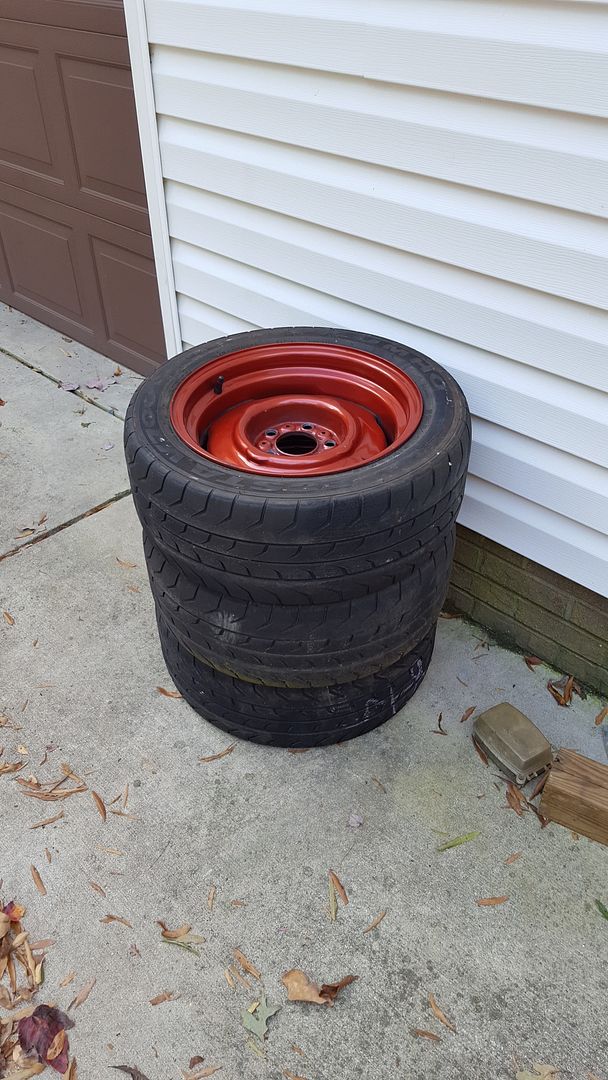
We needed something cheap, readily available, had lots of compound choices, and would fit the 15x7 wheels we painted. I found a spec Miata racer local, and decided to try a set of 205/50/15. He GAVE me 4 kumho R comp tires. Mounted them on the mopar 15x7, and bolted them down. Seemed very short. Still do.
[URL=http://s54.photobucket.com/user/dusterbd13/media/amc/20161027_121933_zpsjxwutq0a.jpg.html]
 [/URL]
[URL=http://s54.photobucket.com/user/dusterbd13/media/amc/20161027_121928_zpsxz3zmvrt.jpg.html]
 [/URL]
[URL=http://s54.photobucket.com/user/dusterbd13/media/amc/20161028_193205_zpsmttkxaxk.jpg.html]
 [/URL]
We then moved on to meddling with coilovers/shocks/ride height/etc for a little bit. When I come up with a solution, I will post it. Just haven’t found it yet….
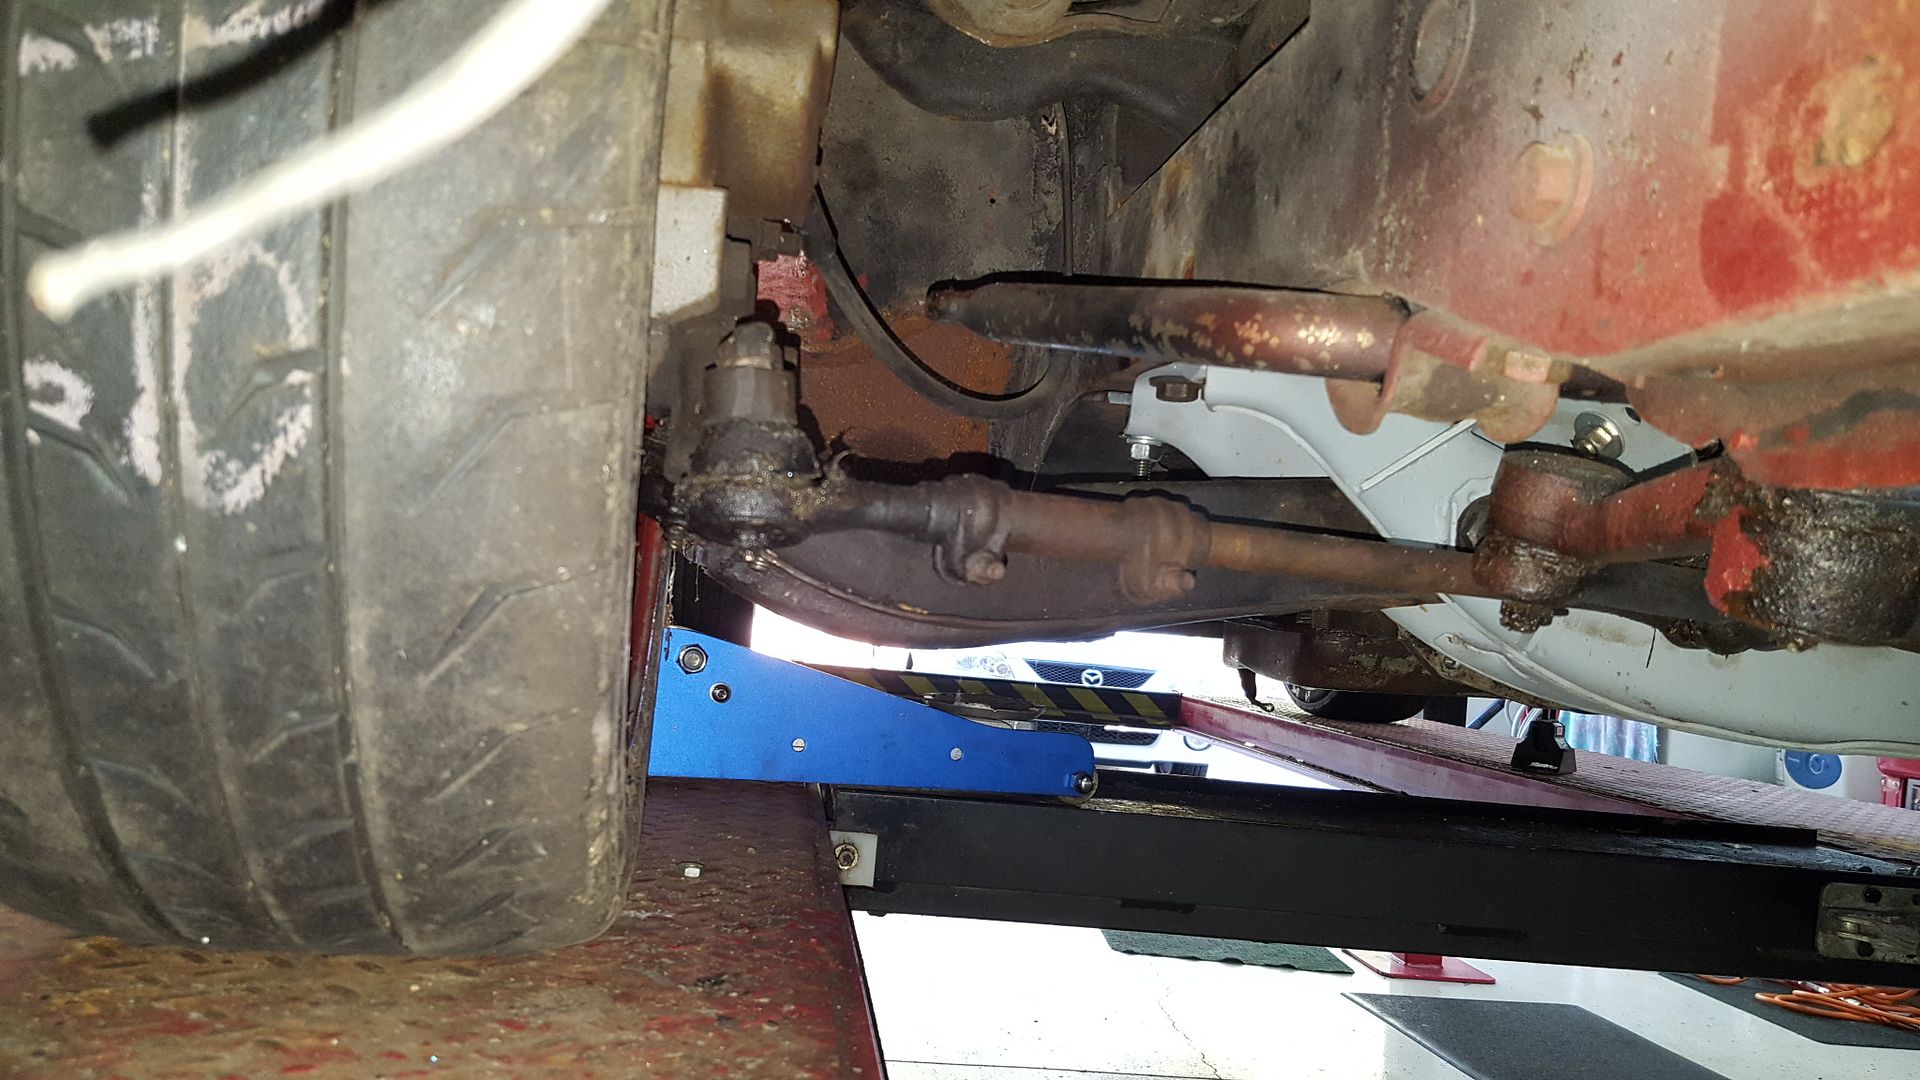
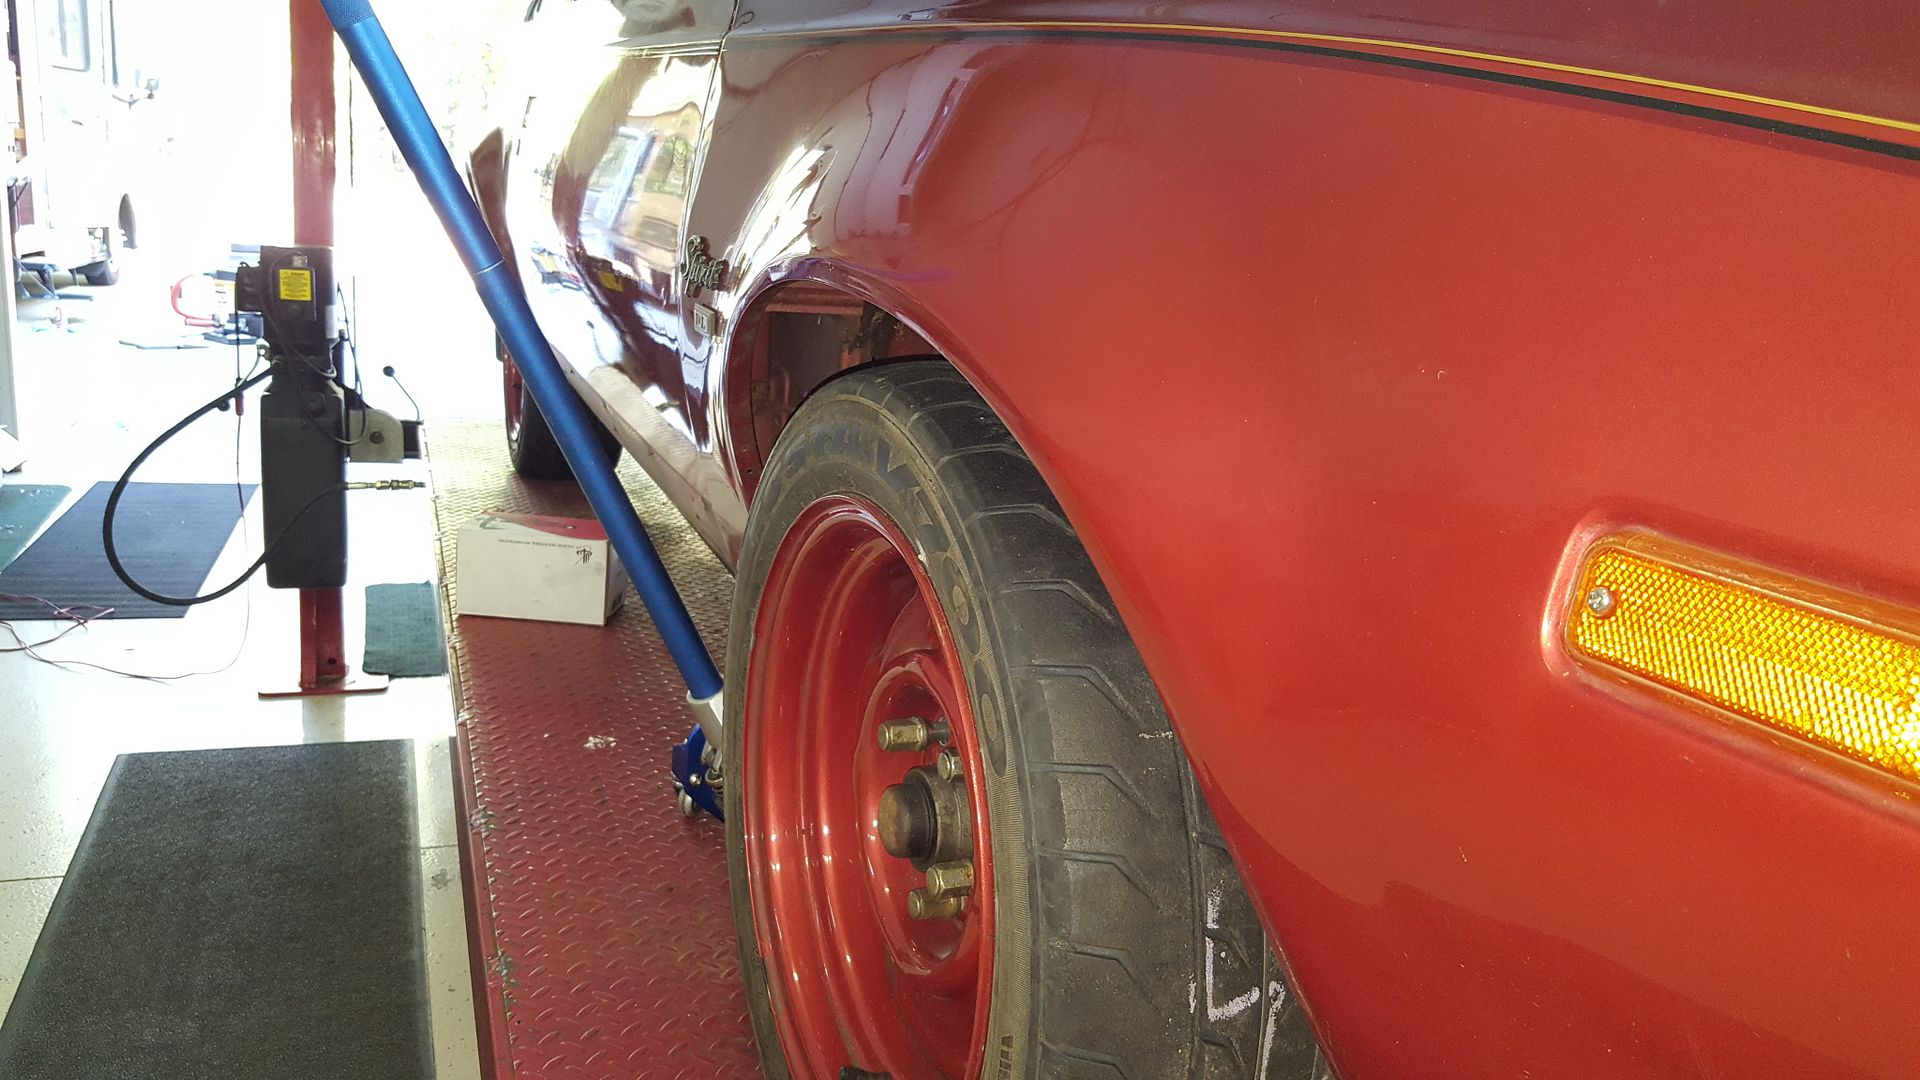
Did find the right stance in the front though!
[URL=http://s54.photobucket.com/user/dusterbd13/media/amc/20161030_152422_zps1vr5dpw2.jpg.html]
 [/URL]
[URL=http://s54.photobucket.com/user/dusterbd13/media/amc/20161030_152405_zpslmop252p.jpg.html]
 [/URL]
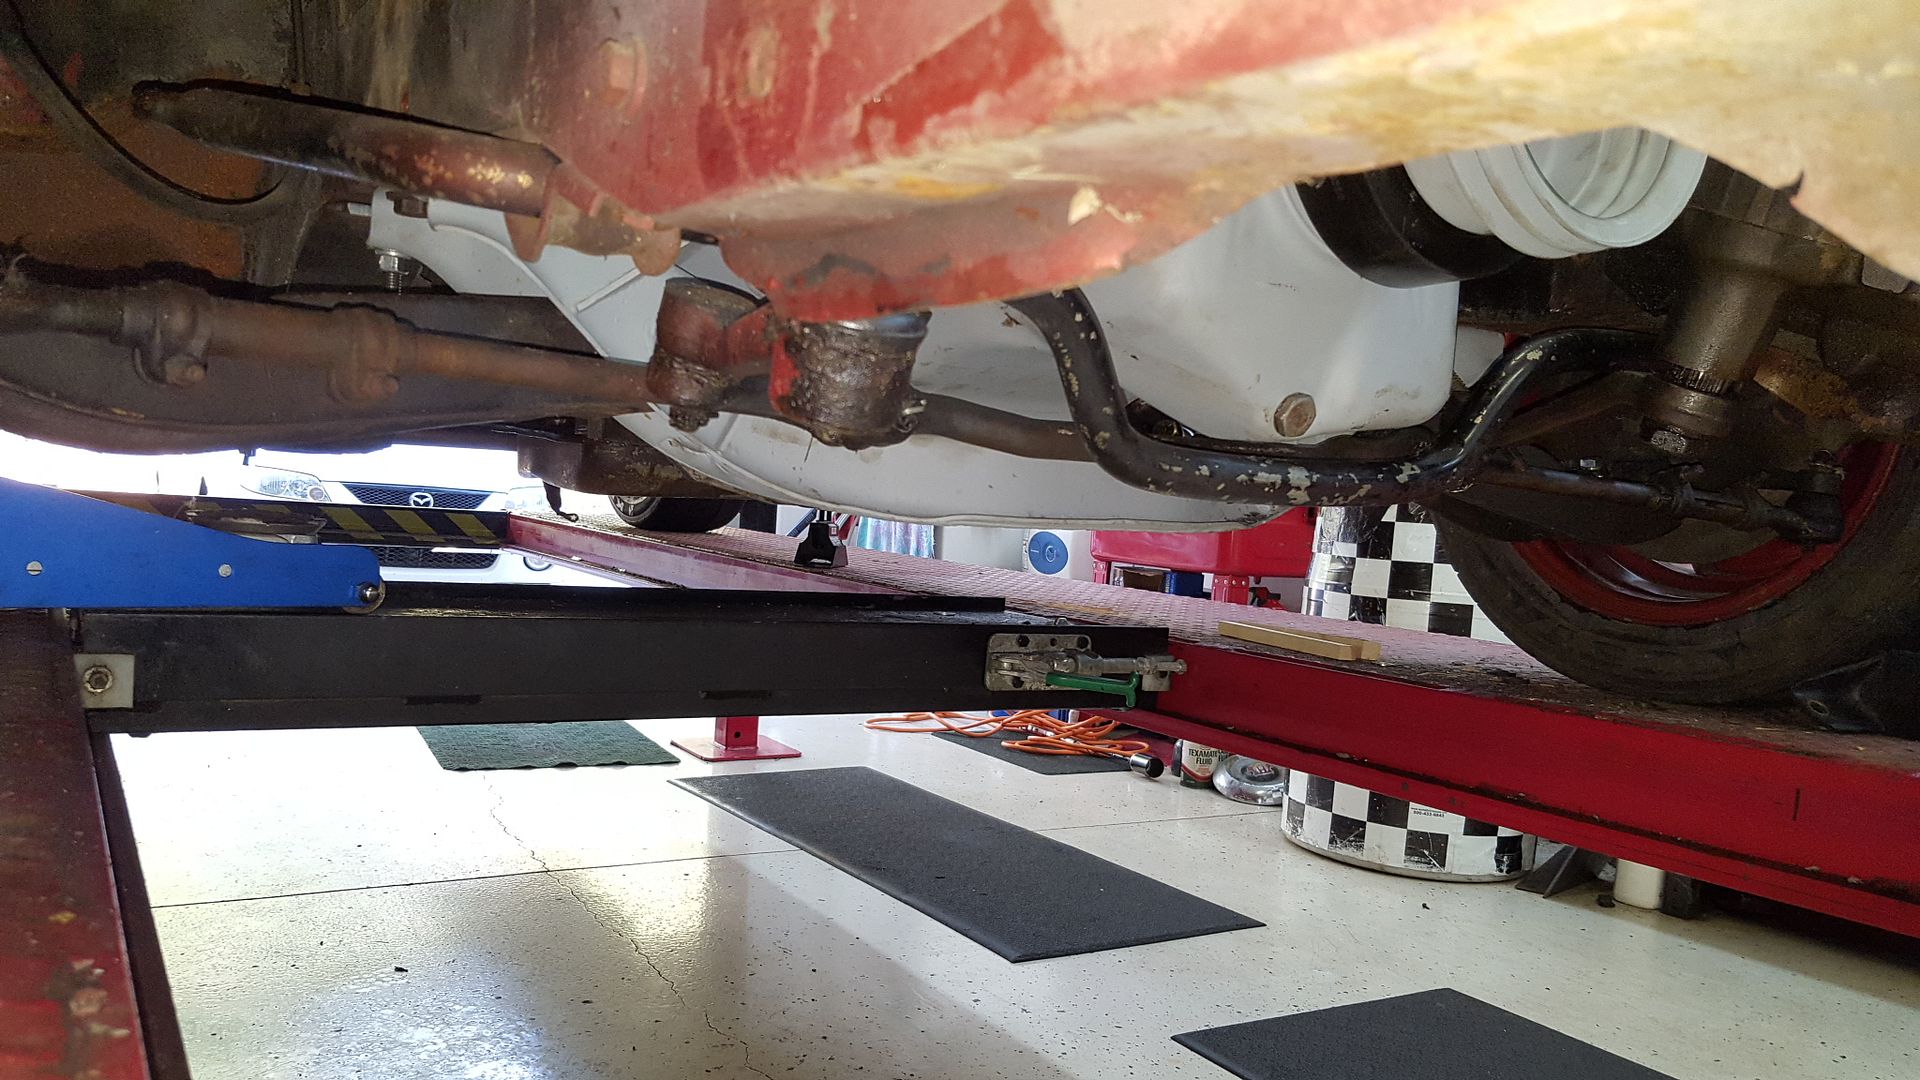
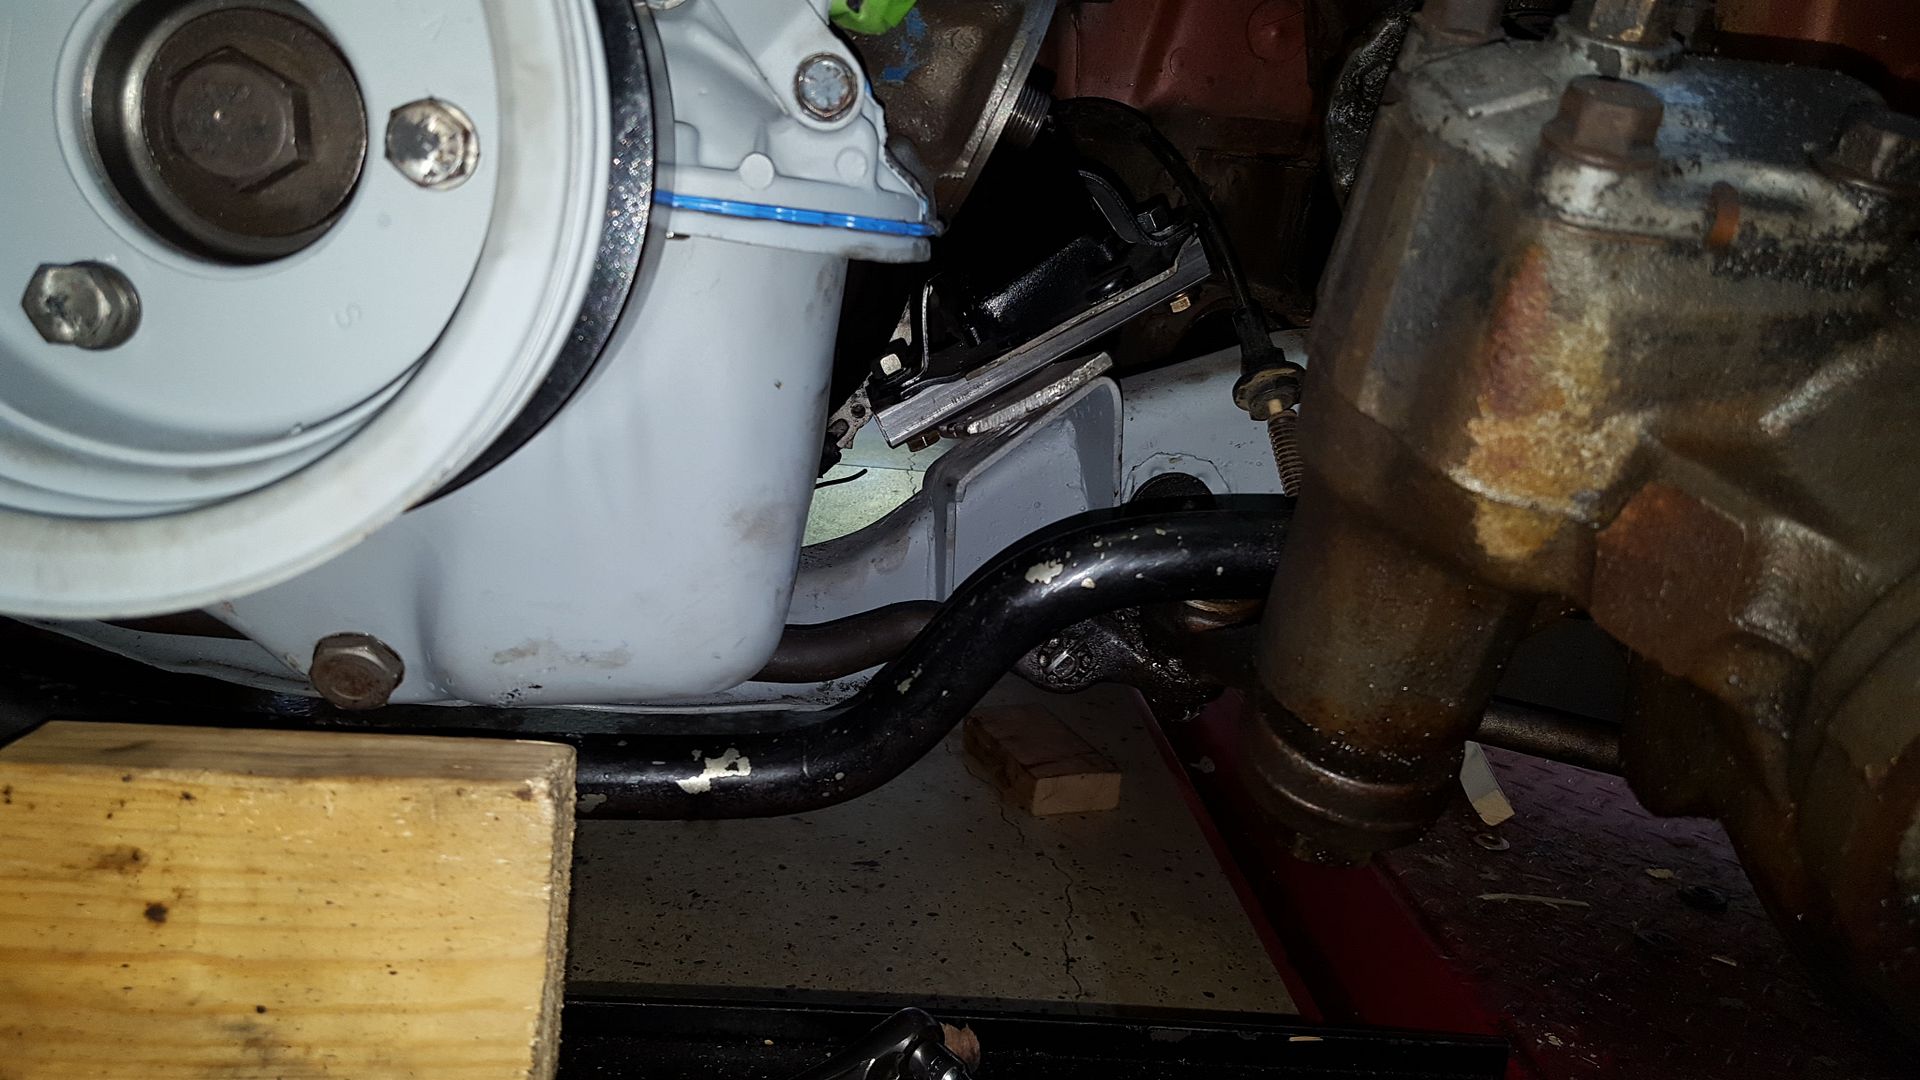
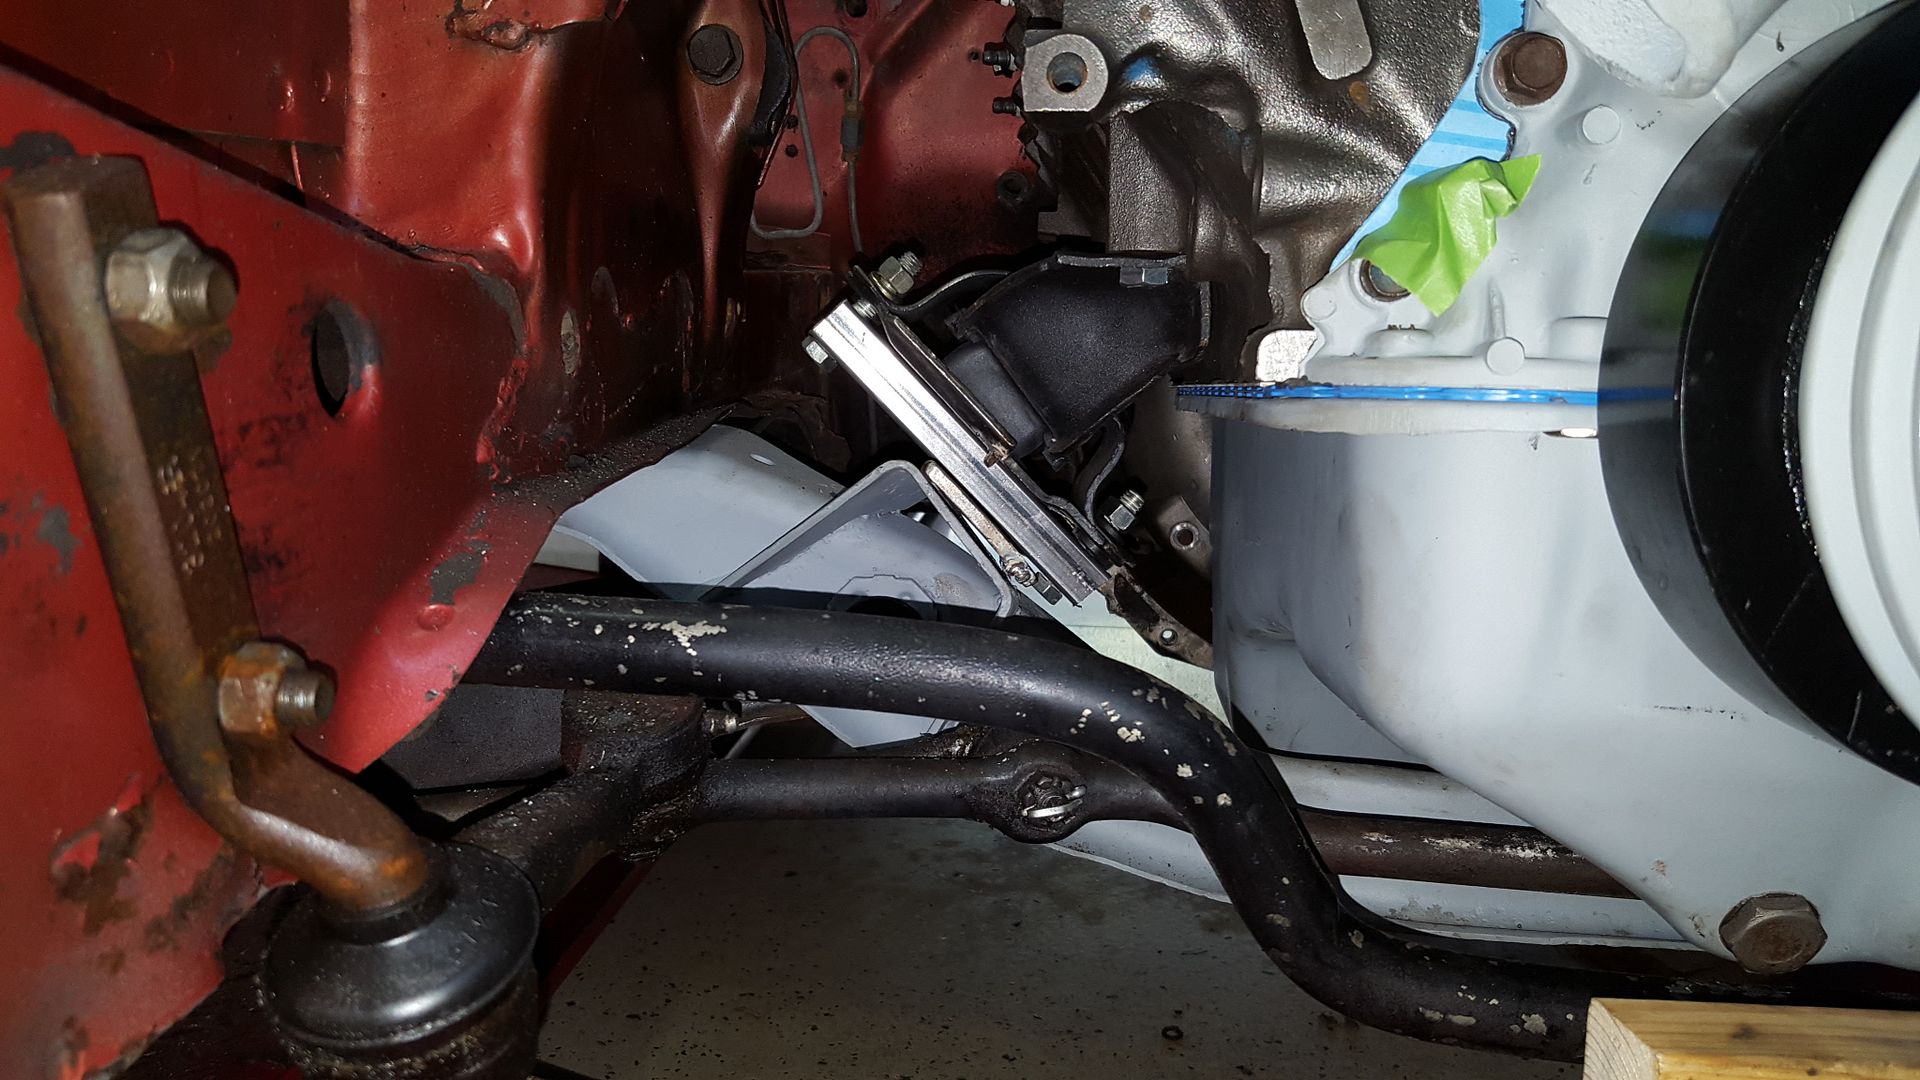
Last but not least was raising the engine and creating better mounts. I pulled the foxbody mustang convertible mounts out of the scrap pile, along with various other mounts I’ve tried. The convertible ones, a few chunks of 1x1 tube, and some 1/8 plate, little weld, and here we go!
[URL=http://s54.photobucket.com/user/dusterbd13/media/amc/20161030_152427_zpsvonf9fe3.jpg.html]
 [/URL]
[URL=http://s54.photobucket.com/user/dusterbd13/media/amc/20161030_140707_zpsn3l5uahg.jpg.html]
 [/URL]
[URL=http://s54.photobucket.com/user/dusterbd13/media/amc/20161030_140701_zpsyln8qpyk.jpg.html]
 [/URL]
Essentially I made a bolt in spacer and plate to adapt the mustang mounts to the 6cyl k-frame mounts. Took a bit of head scratching, but im finally happy with this set.
I have been busier than a one legged man in an ass kicking contest.
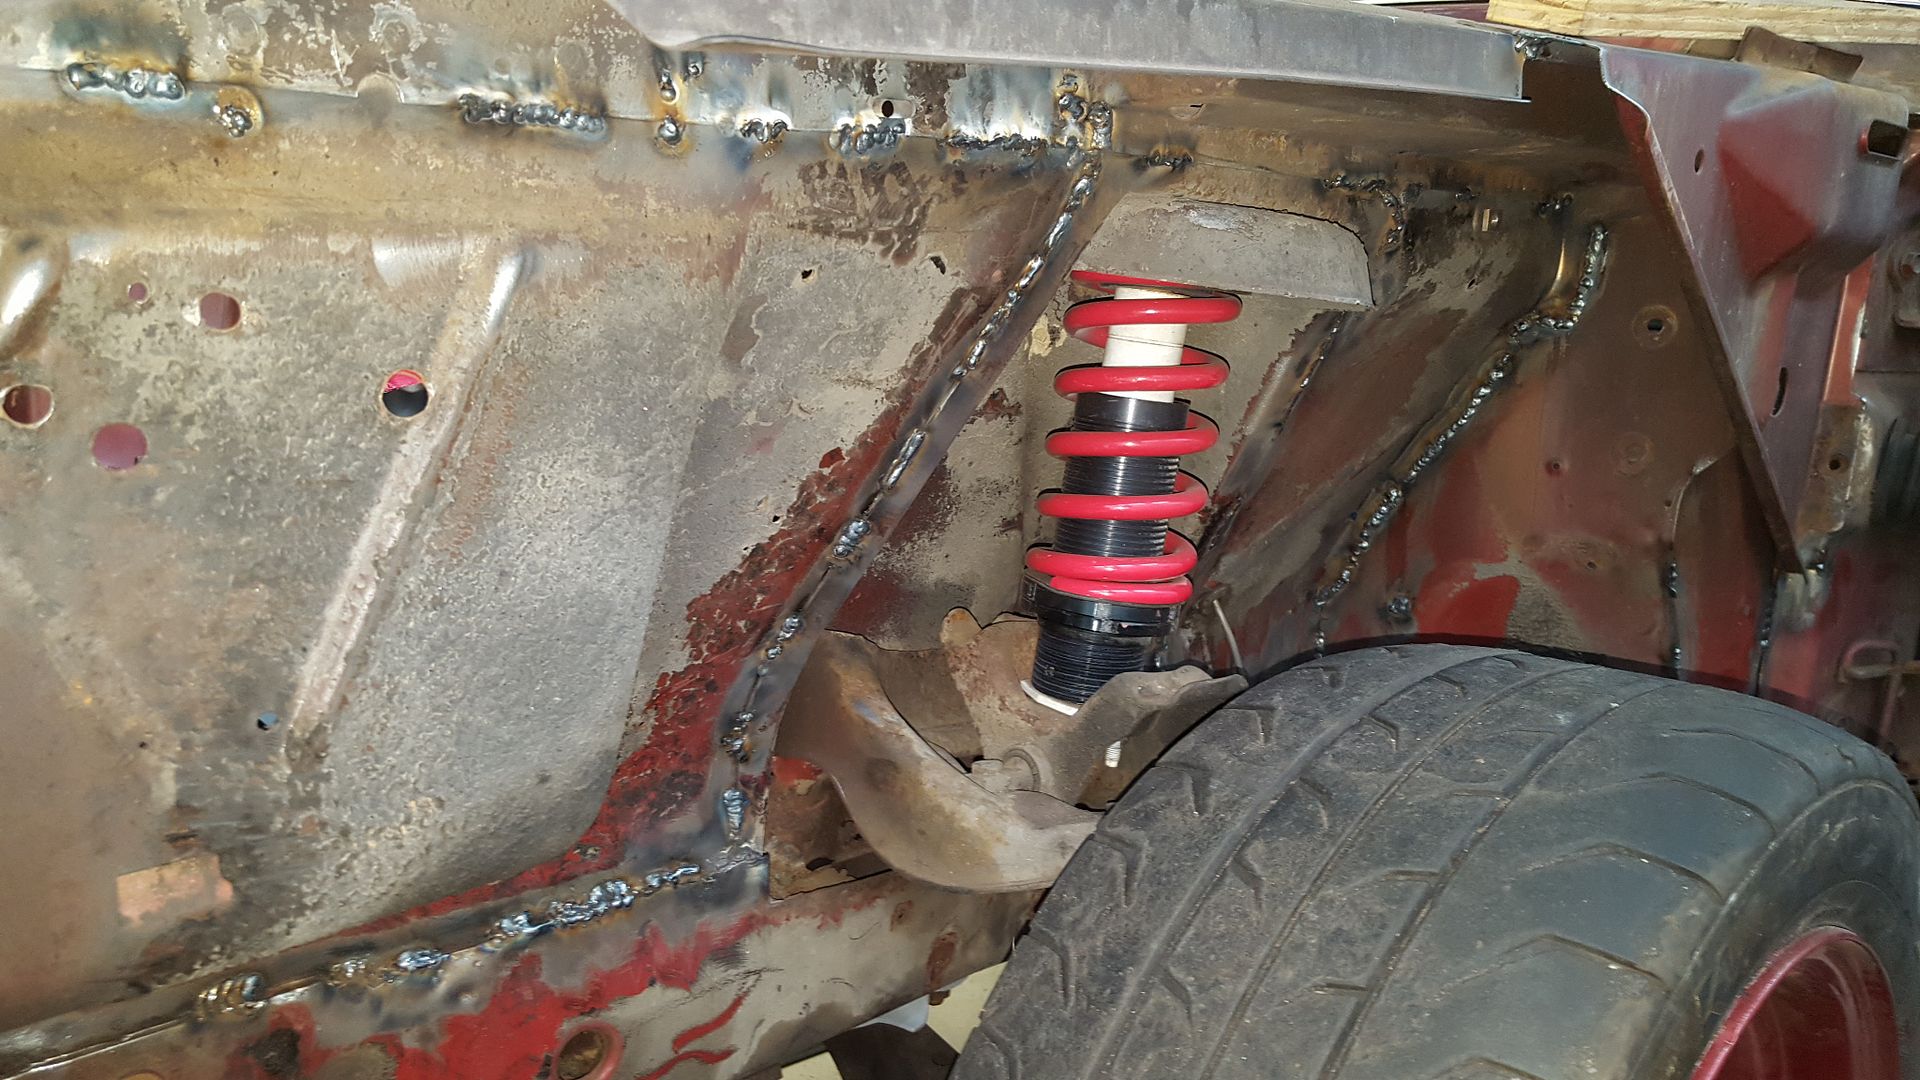
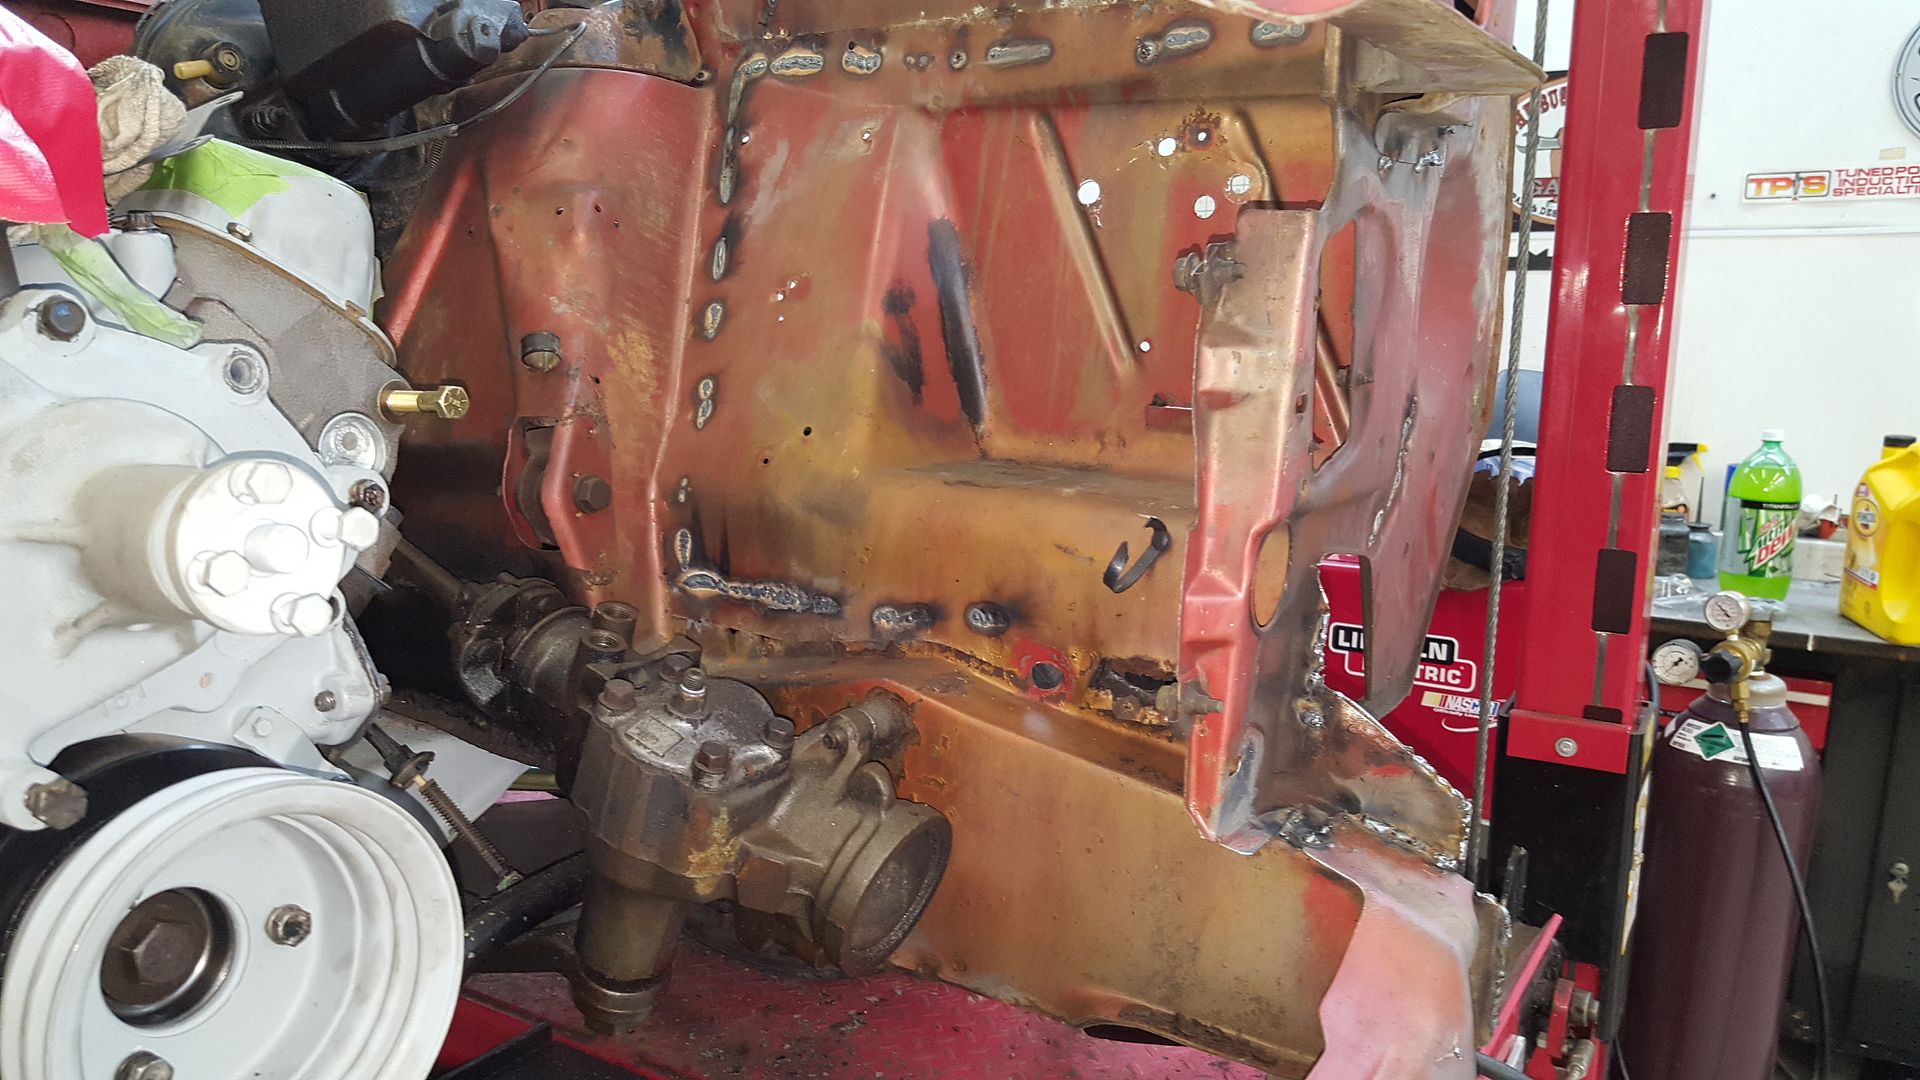
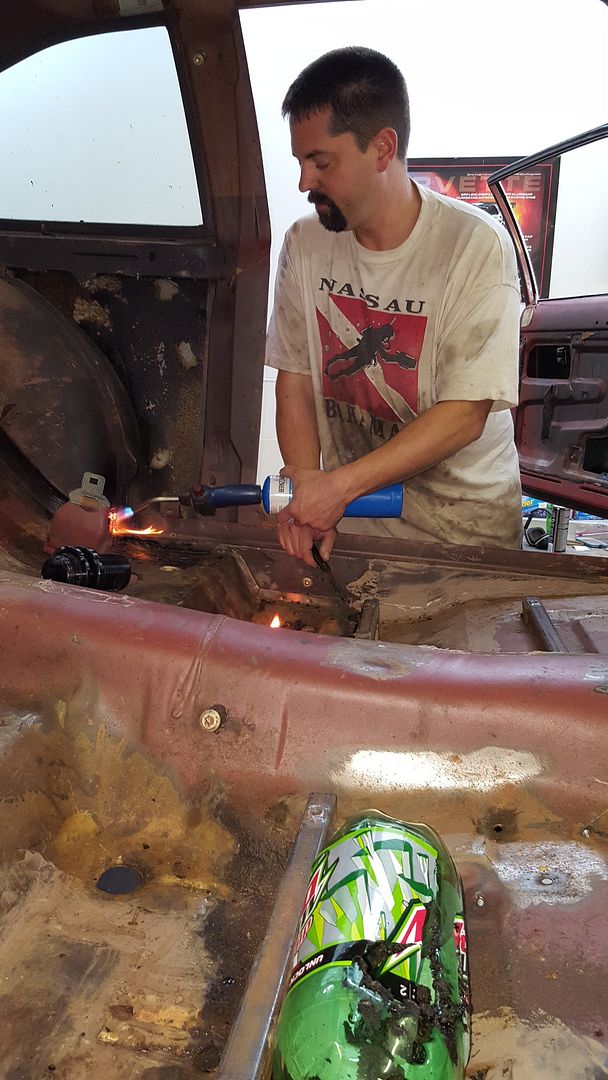
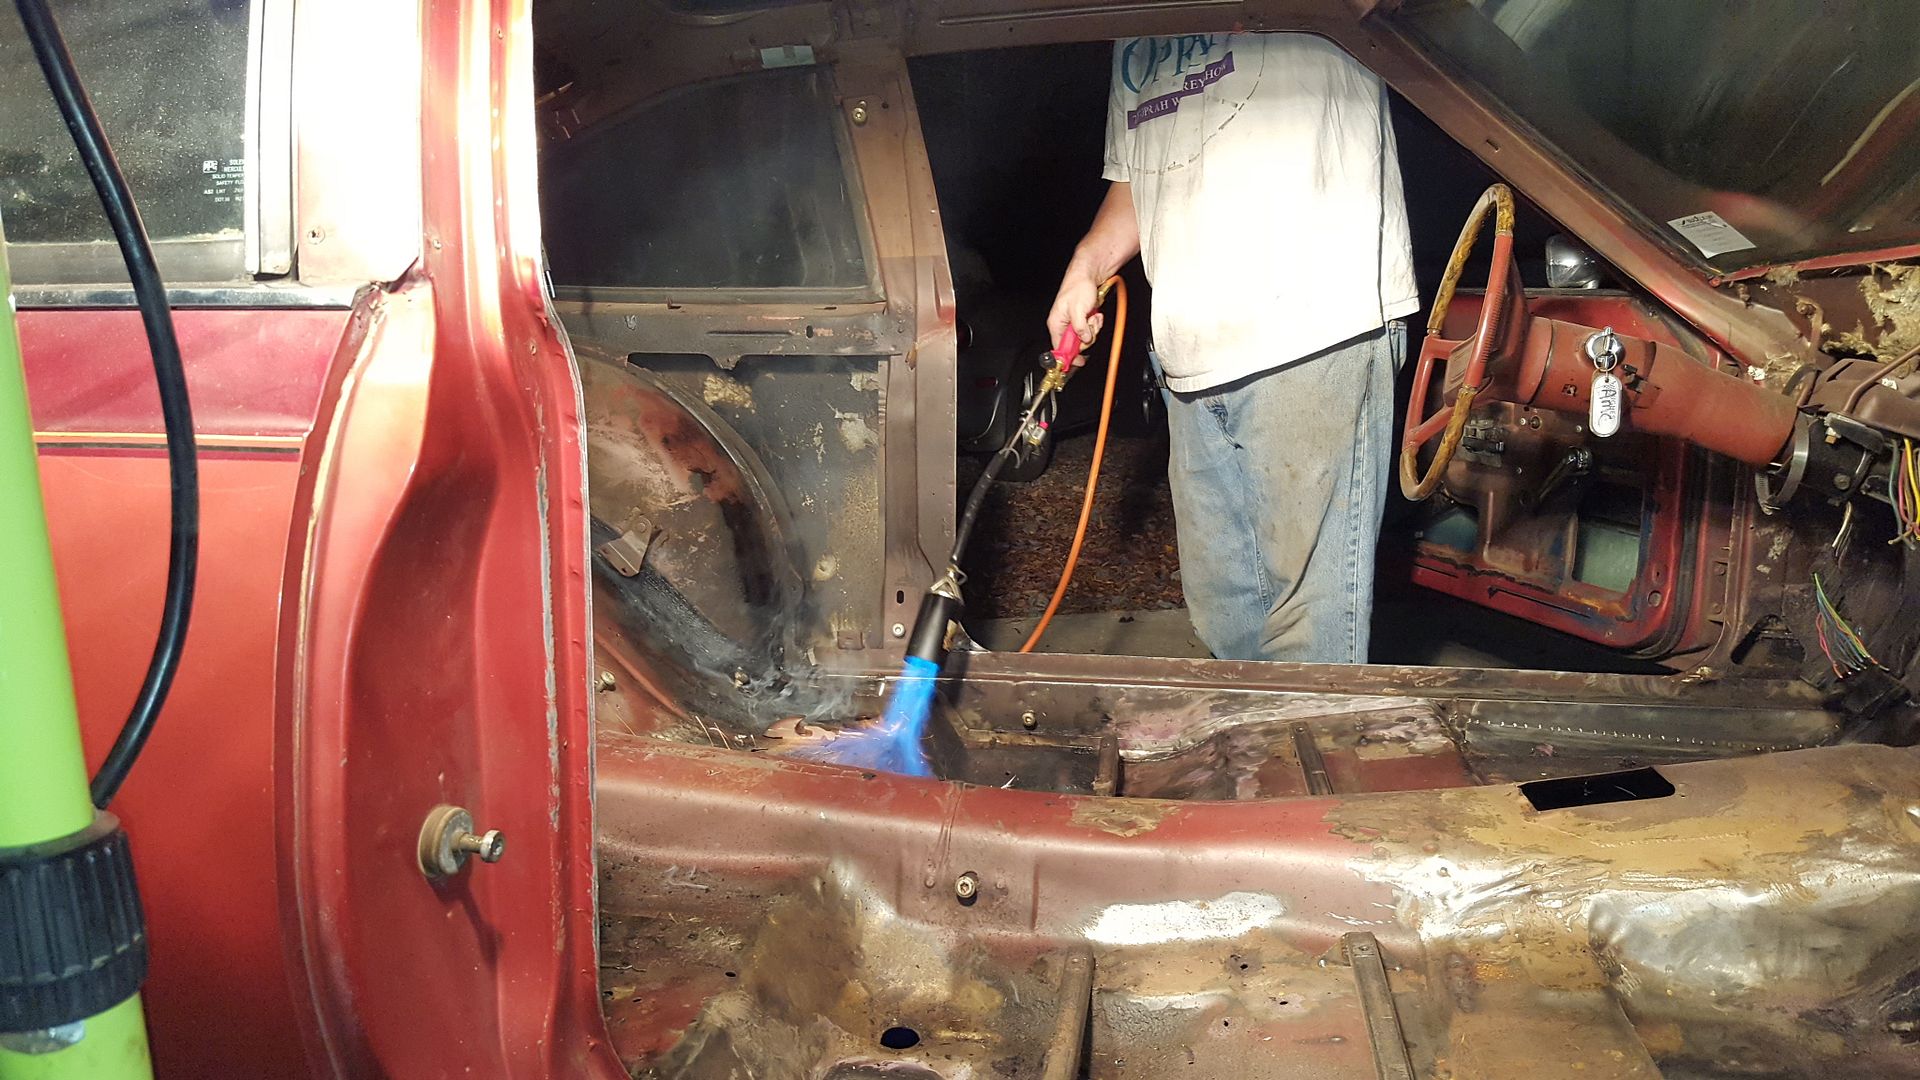
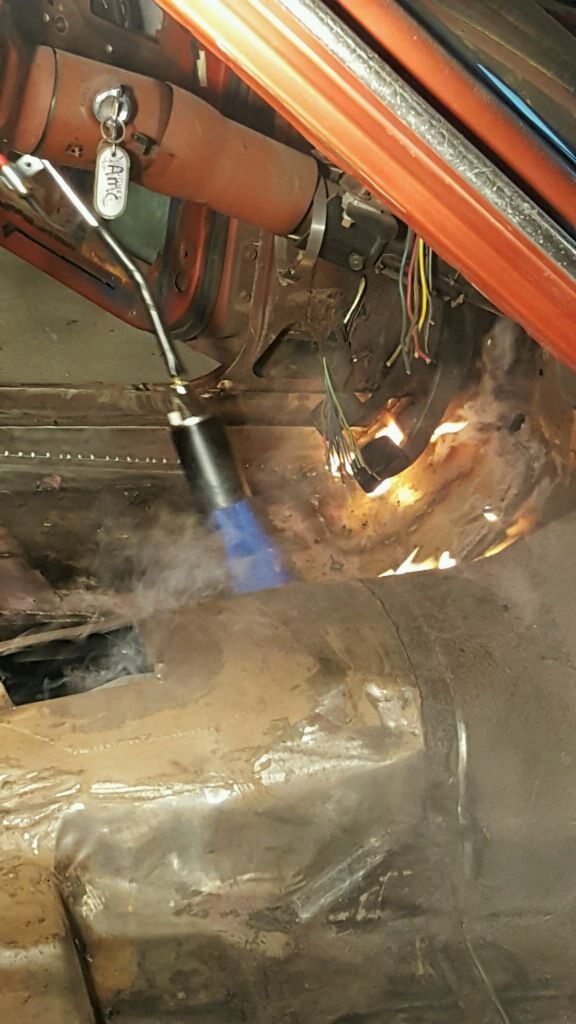
we have ground, torched, scraped, welded, and repeated the process through an entire tank of shielding gas an 15lbs of wire. and were not done yet!!!
[URL=http://s54.photobucket.com/user/dusterbd13/media/amc/20161108_181613_zpses9cwa7k.jpg.html]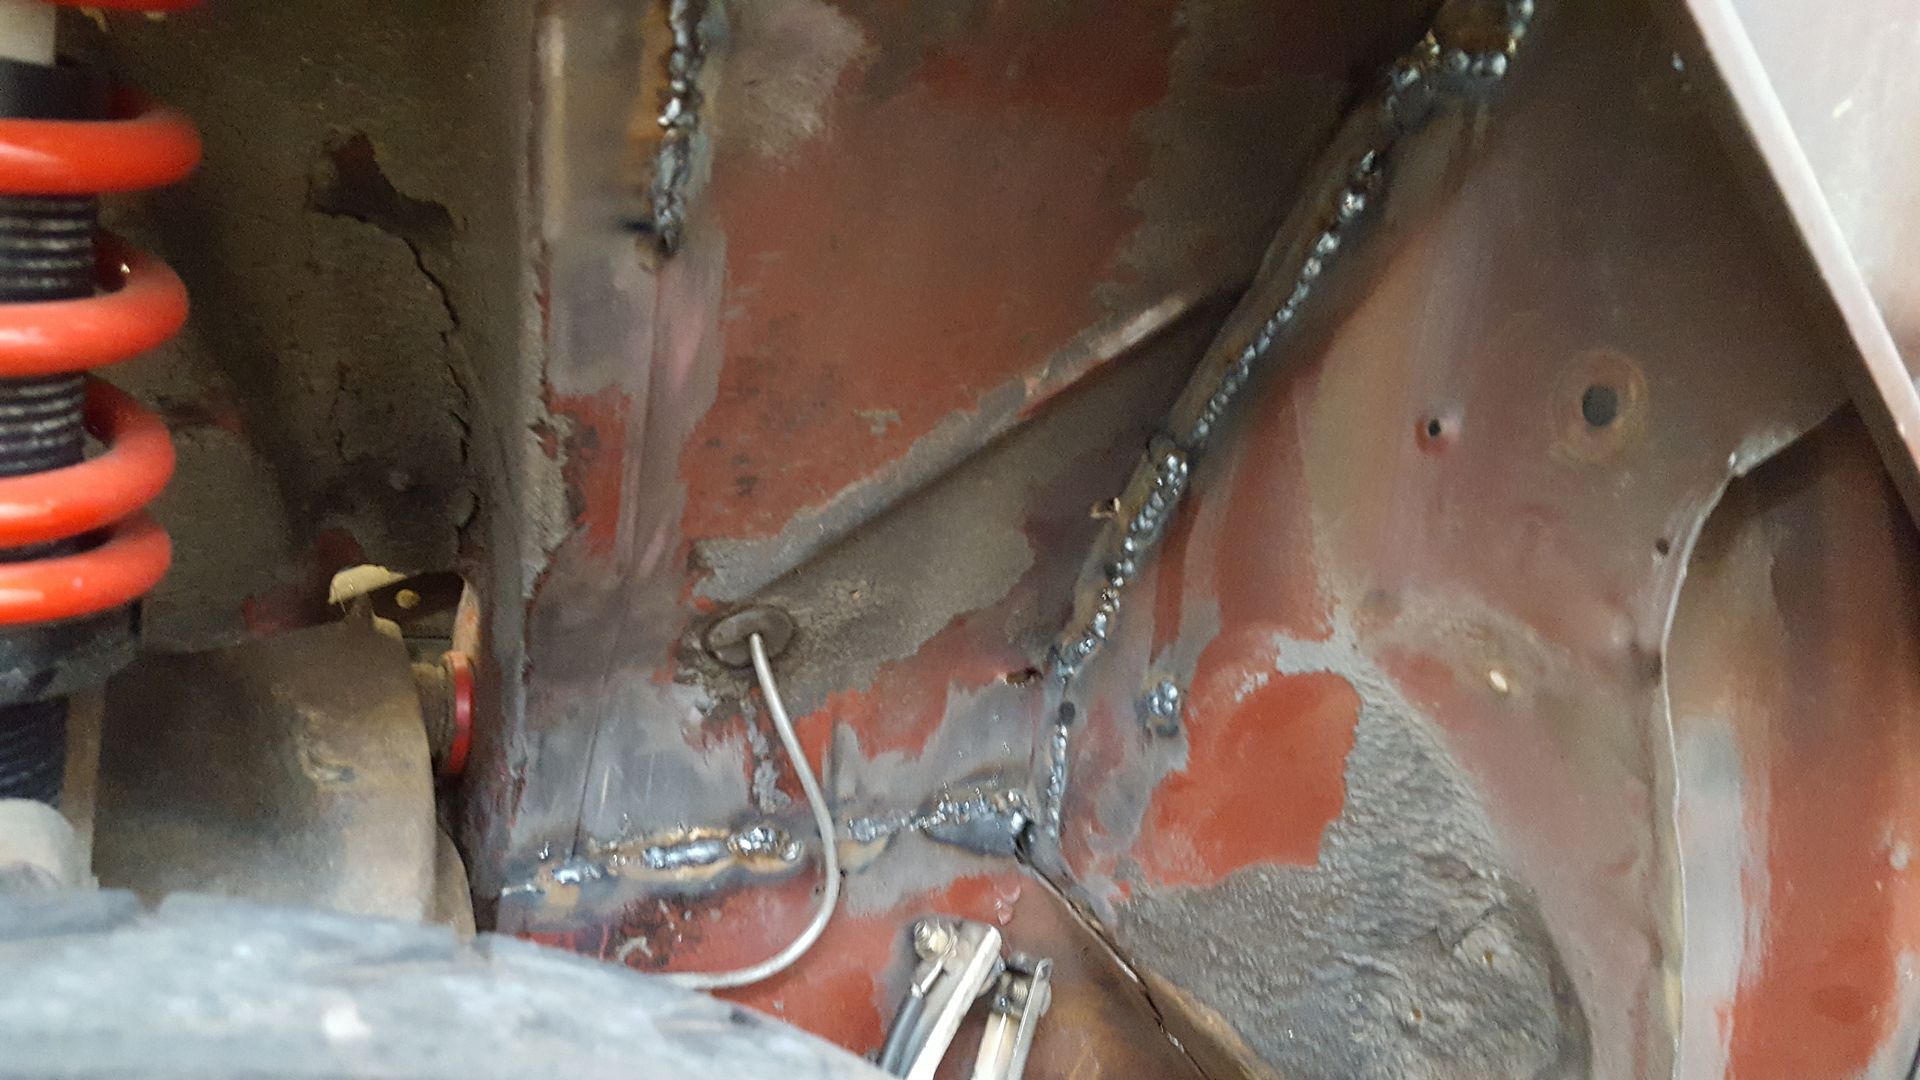 [/URL]
[URL=http://s54.photobucket.com/user/dusterbd13/media/amc/20161108_191320_zpswajsj64v.jpg.html]
 [/URL]
[URL=http://s54.photobucket.com/user/dusterbd13/media/amc/20161108_191329_zpsu3um2lc6.jpg.html]
 [/URL]
[URL=http://s54.photobucket.com/user/dusterbd13/media/amc/20161108_201647_zpsgsqh4mqq.jpg.html]
 [/URL]
[URL=http://s54.photobucket.com/user/dusterbd13/media/amc/20161111_191140_zpsyxfrxzah.jpg.html]
 [/URL]
[URL=http://s54.photobucket.com/user/dusterbd13/media/amc/imagejpeg_2_zps4um6hlo6.jpg.html]
 [/URL]
[URL=http://s54.photobucket.com/user/dusterbd13/media/amc/20161114_144733_zpsfjsbmy2h.jpg.html]
 [/URL]
Expect cage pictures tonight. Steve is supposed to come and start fitting the main parts of the jungle gym.
Every time I think I'm awesome at working on cars I come into a thread like this to remind myself that I'm basically just standing in the garage twirling box end wrenches on my fingers.
You guys are doing incredible work.
You make rebuilding structures look easy. We all have our own skill set.
And at this point, it looks a lot better in pictures.
On another note, we decided on a color change.
so this has happened....
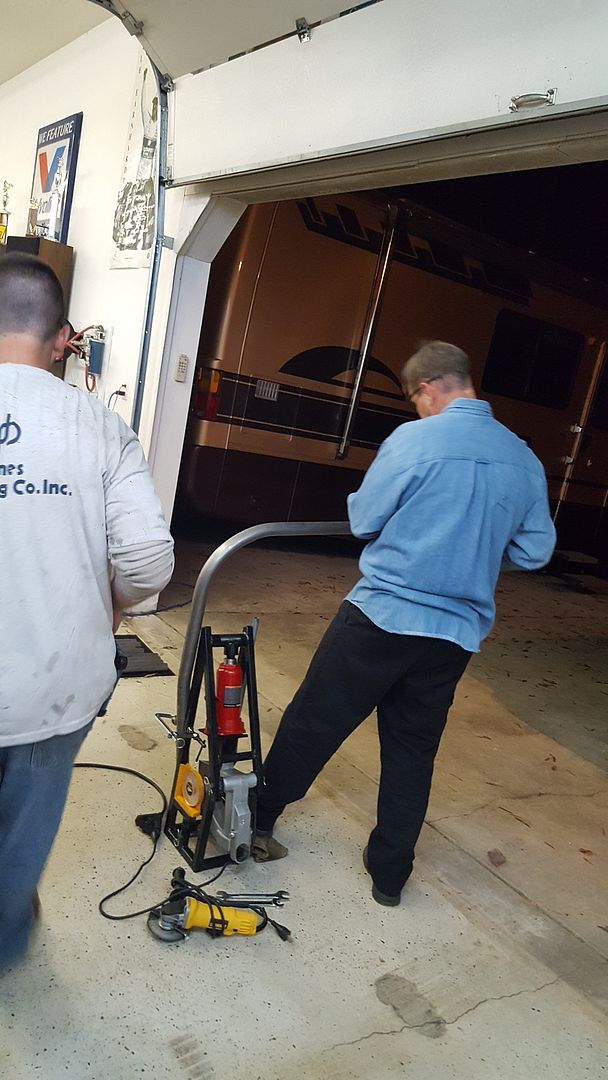
(dark haired guy with goatee is dallas, fat bearded guy is me, intelligent looking guy is steve.
[URL=http://s54.photobucket.com/user/dusterbd13/media/amc/20161117_194622_zpshrsfgjzm.jpg.html]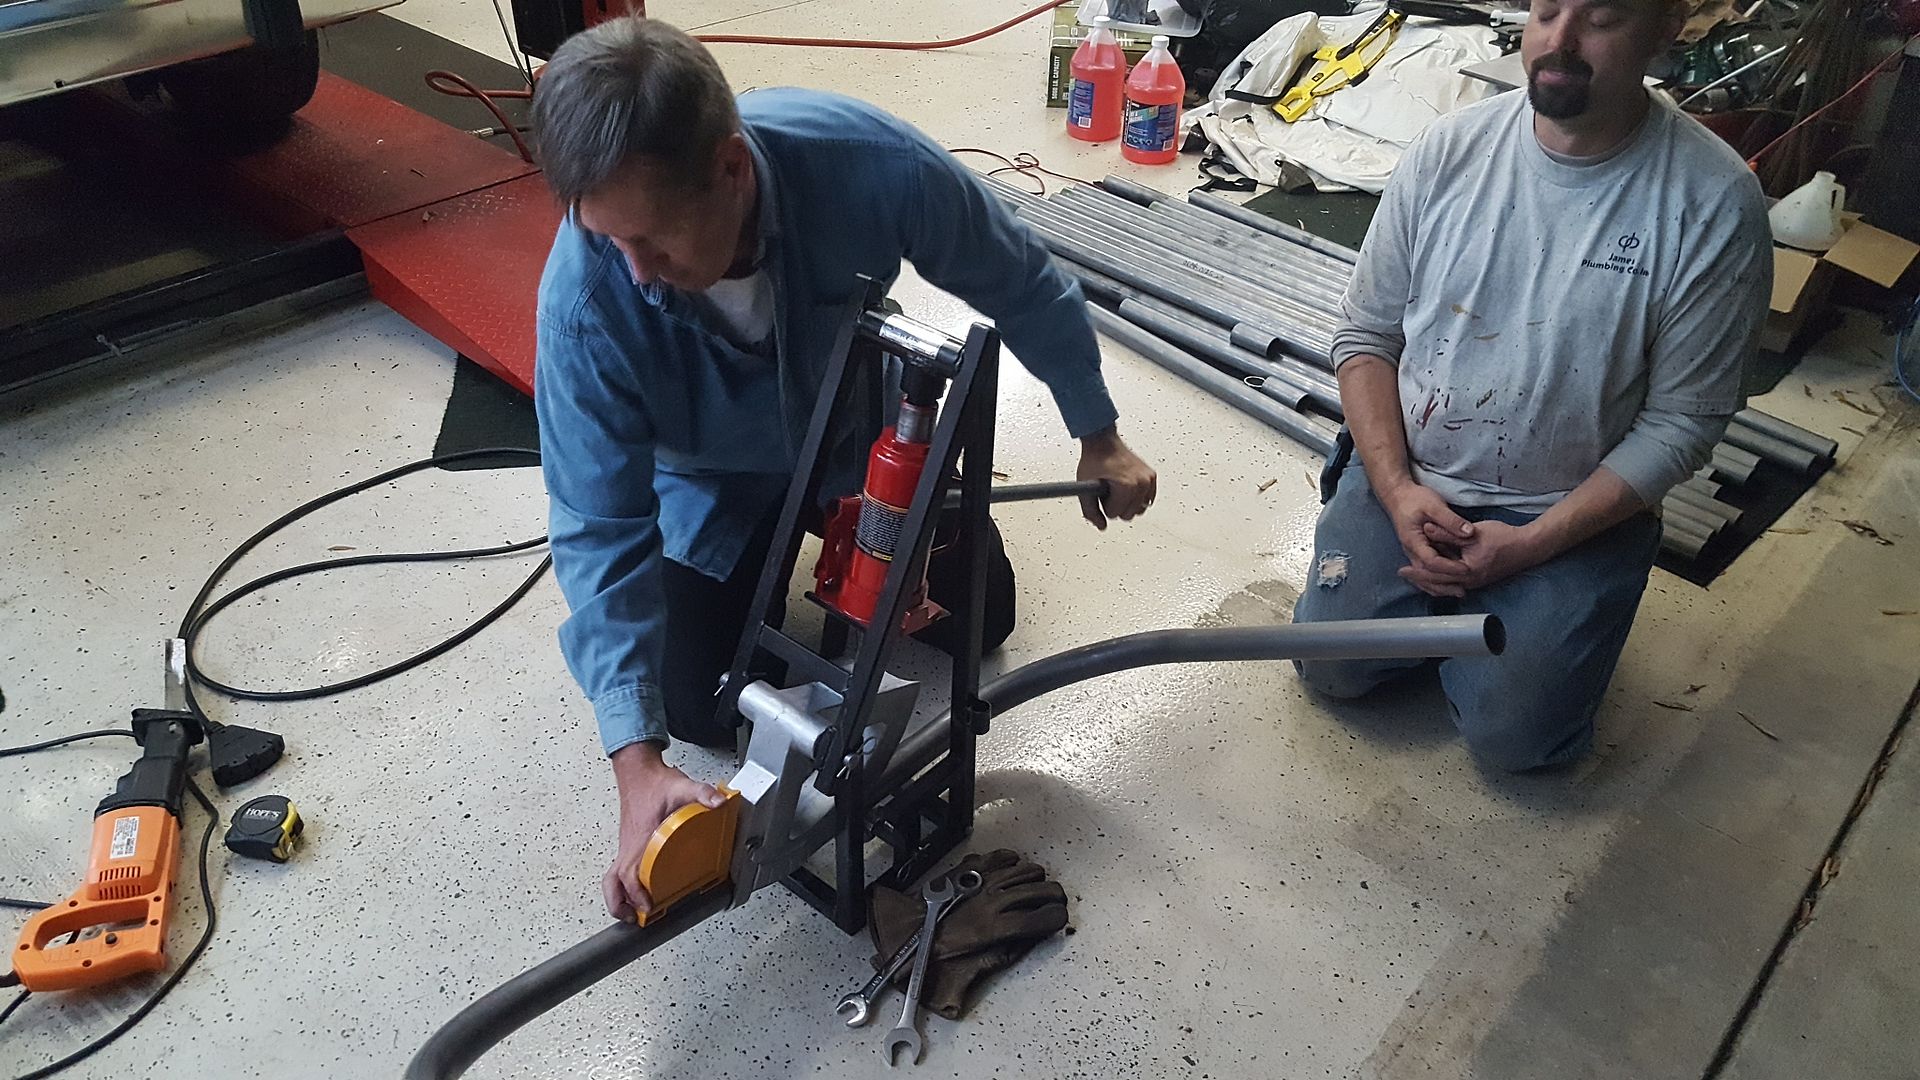 [/URL]
[URL=http://s54.photobucket.com/user/dusterbd13/media/amc/20161117_205338_zps7wwdtoql.jpg.html]
 [/URL]
[URL=http://s54.photobucket.com/user/dusterbd13/media/amc/20161117_210449_zpsontagfgj.jpg.html]
 [/URL]
[URL=http://s54.photobucket.com/user/dusterbd13/media/amc/20161117_210500_zps6aw5i1ue.jpg.html]
 [/URL]
[URL=http://s54.photobucket.com/user/dusterbd13/media/amc/20161117_210510_zpscmvvoepu.jpg.html]
 [/URL]
[URL=http://s54.photobucket.com/user/dusterbd13/media/amc/3_zpskjtchlrj.jpg.html]
 [/URL]
[URL=http://s54.photobucket.com/user/dusterbd13/media/amc/4_zpsizexta23.jpg.html]
 [/URL]
[URL=http://s54.photobucket.com/user/dusterbd13/media/amc/6_zps49wdwilp.jpg.html]
 [/URL]
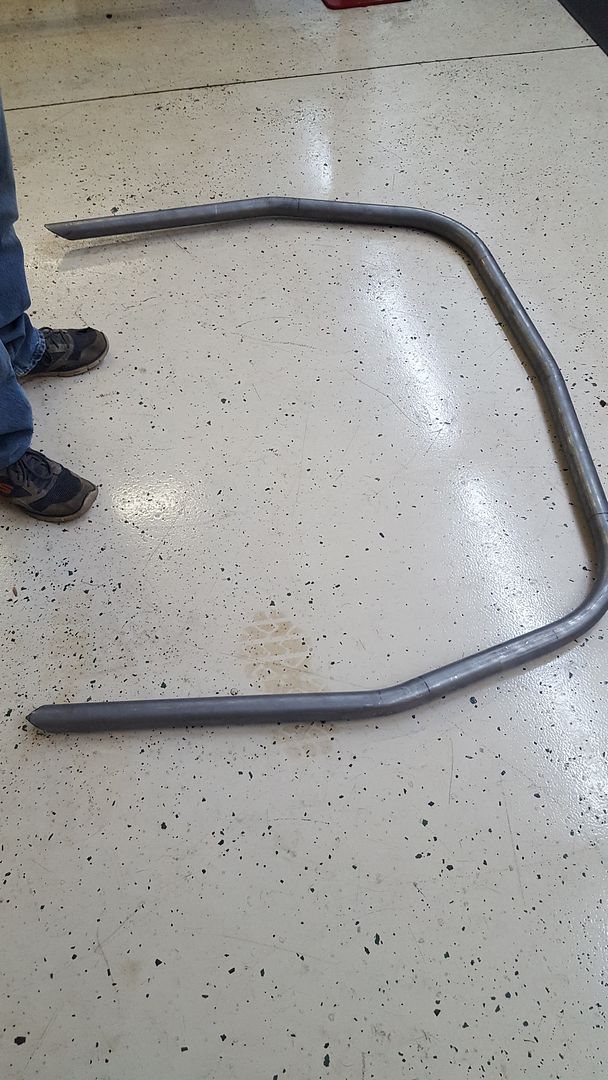
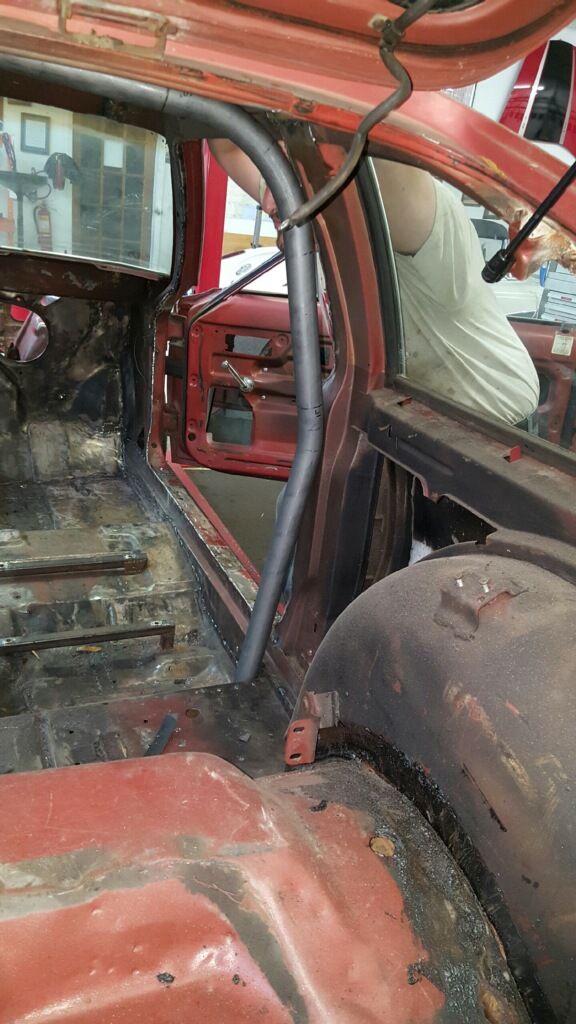
we have the main hoop and halo fitted and notched, and after the holiday will get the main structure all welded up. exciting!!!
Challenge Budget: Car/parts $200
Donor Lincoln town car: 410
Engine crossmember: 120
Sold transmission crossmember from Lincoln: 10 Sold rear axle from lincoln: -50 Scrapped what was left of lincoln: -89
trans cooler: 2
Engine swap: 5.0 plus 300 boot
Sold kelstar wheels-200 (cant recoup more than we spent)
2x2 angle iron, tractor supply 12.05
Brand new Watkins glen nascar slicks and wheels, which were bought for $50, and promptly sold to Dallas dad for $50 and some weld wheels with really old drag slicks. So, slicks were $0, but $50 taken out of the recoup limit.
$5 grant wheel and hub (smaller diameter wheel gives more feedback. Well see if it stays.
BOOM TUBES!!!! ($25, with brackets)
6 5/8 heim and jamb nuts, as well as threaded tube for the front suspension: $65
Pair of aluminum seats, $40.
Sheet of flame retardant high density foam $10
Fire suppression system parts (not included in challenge budget. But ive had 2nd degree burns on the boys before, so were getting safety gear come hell or high water)
Long tube headers for 66-67 mustang 10
Solid steel lowering blocks, with the holes drilled to offset the rear axle rearwards. $5
1/4 plate, scrap metal yard: 7.50
Mustang convertible mounts 22
Bending plate cost 25
Swedged tubing, ebay: 31.90
Threaded adjusters and 650lb springs, SRI performance: 65
4 used nillstein shocks, pull-a-part: 28
New challenge budget total: 1034.453
Were back!!
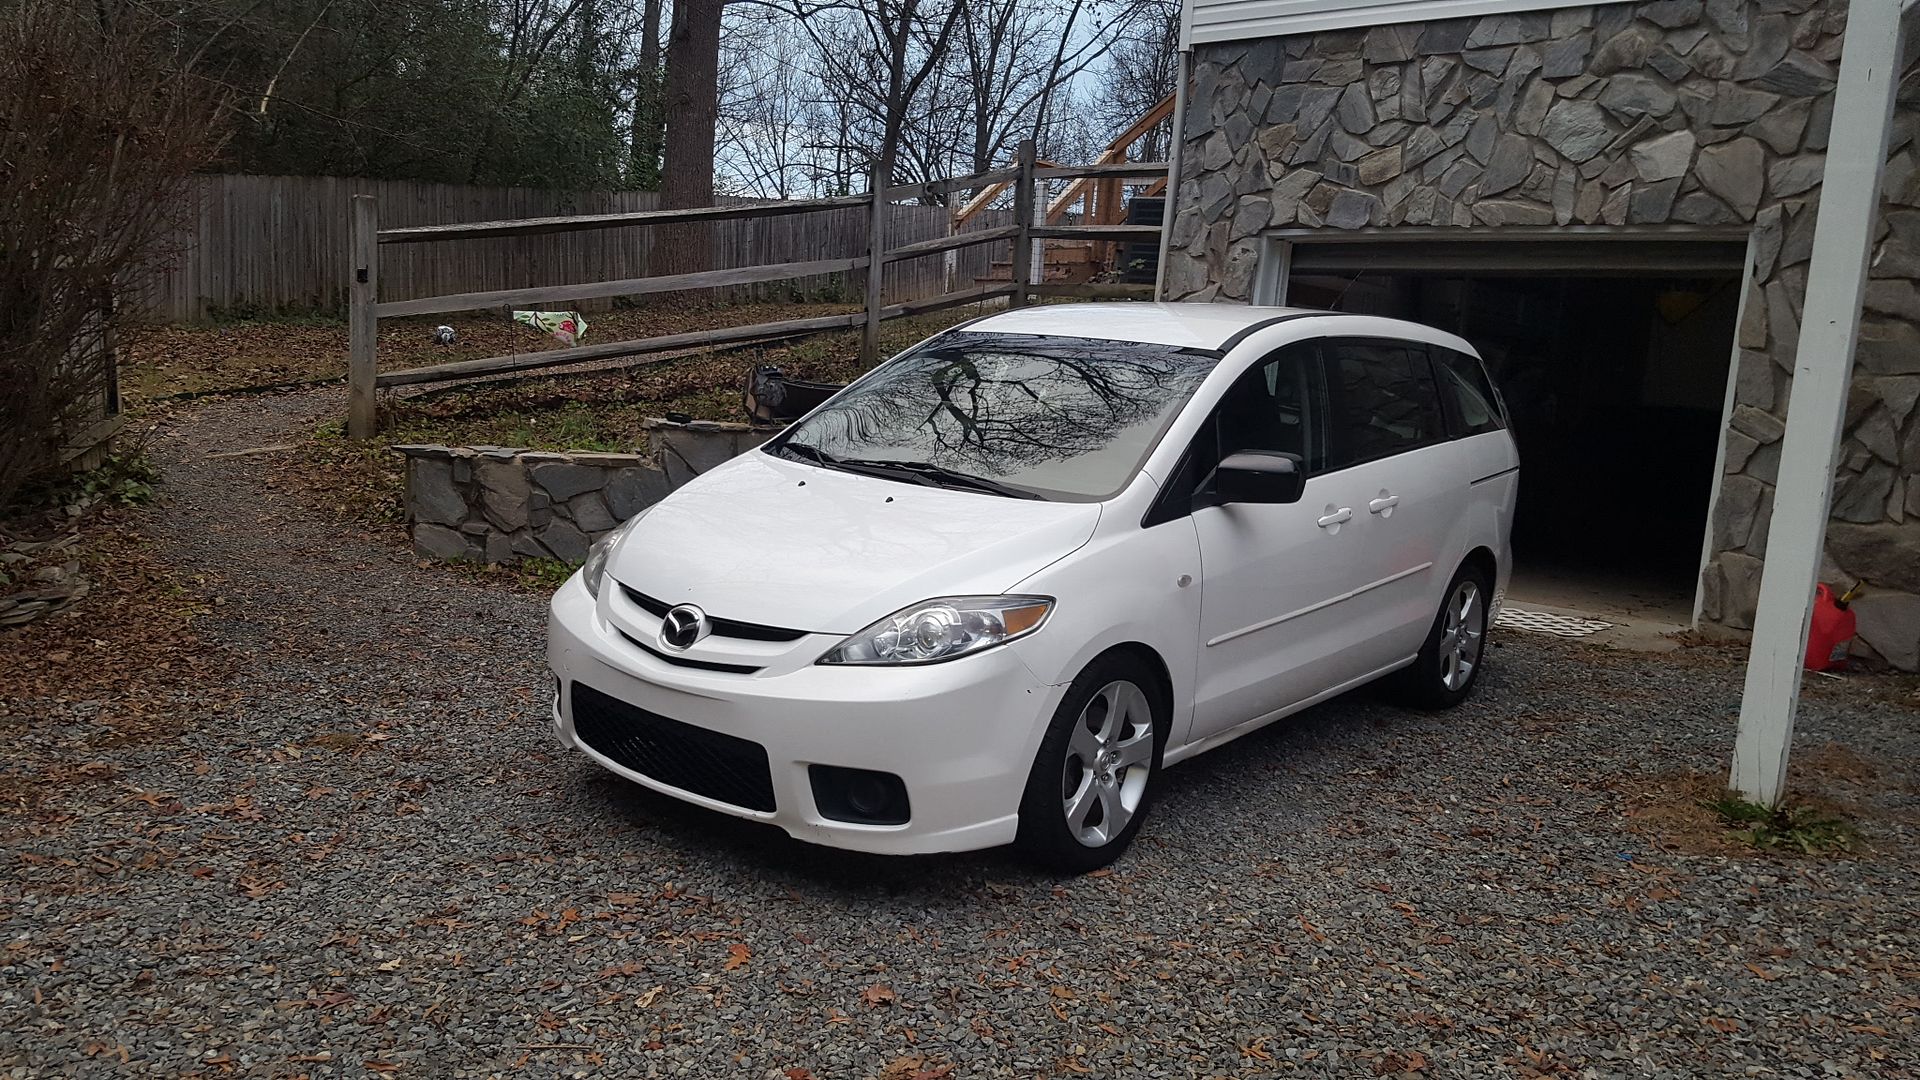
In my brief hiatus, I decided to take it easy. I brought an 01 miata back from the brink, built a mazda5 for my wife's Christmas present, and changed jobs. Oh, and gutted and rebuilt the laundry room.
[URL=http://s54.photobucket.com/user/dusterbd13/media/miata/20161205_134013_zpsqfaix7ji.jpg.html]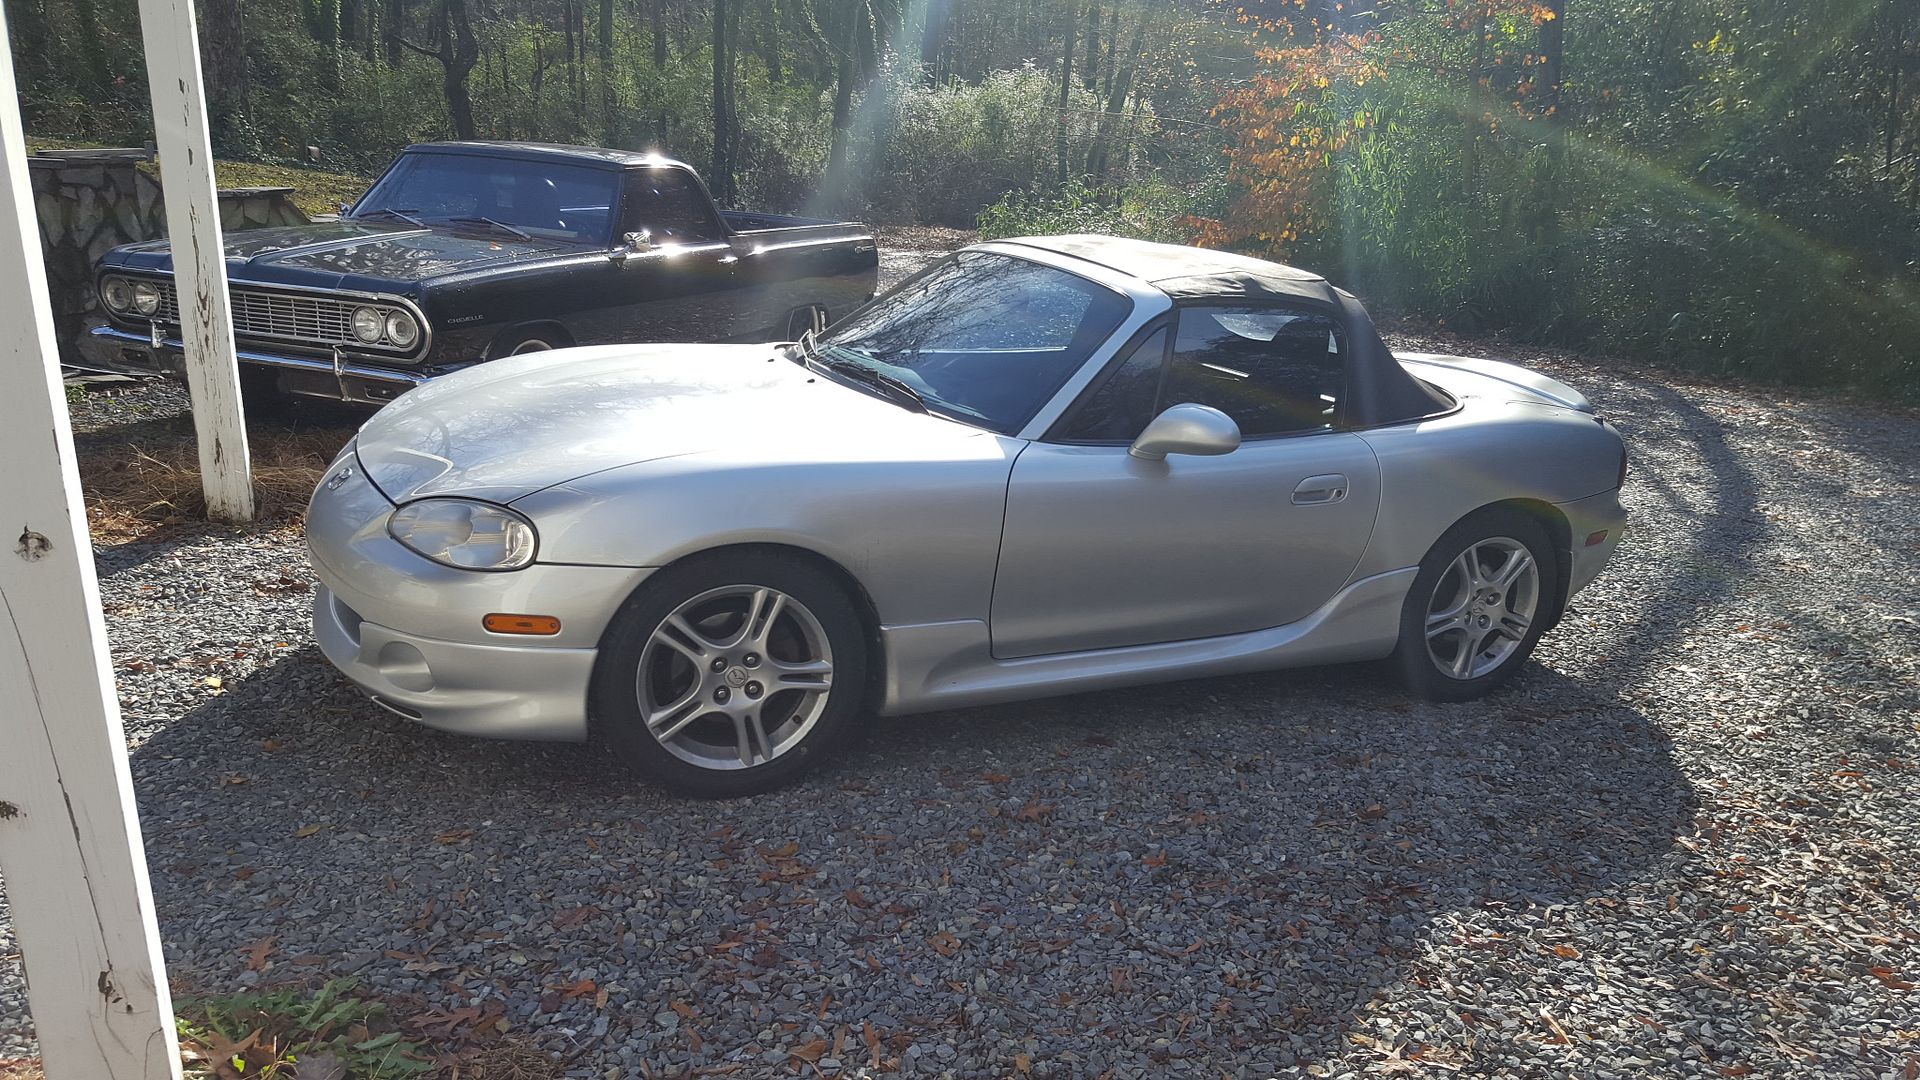 [/URL]
[URL=http://s54.photobucket.com/user/dusterbd13/media/20161214_165139_zpsovx0isxy.jpg.html]
 [/URL]
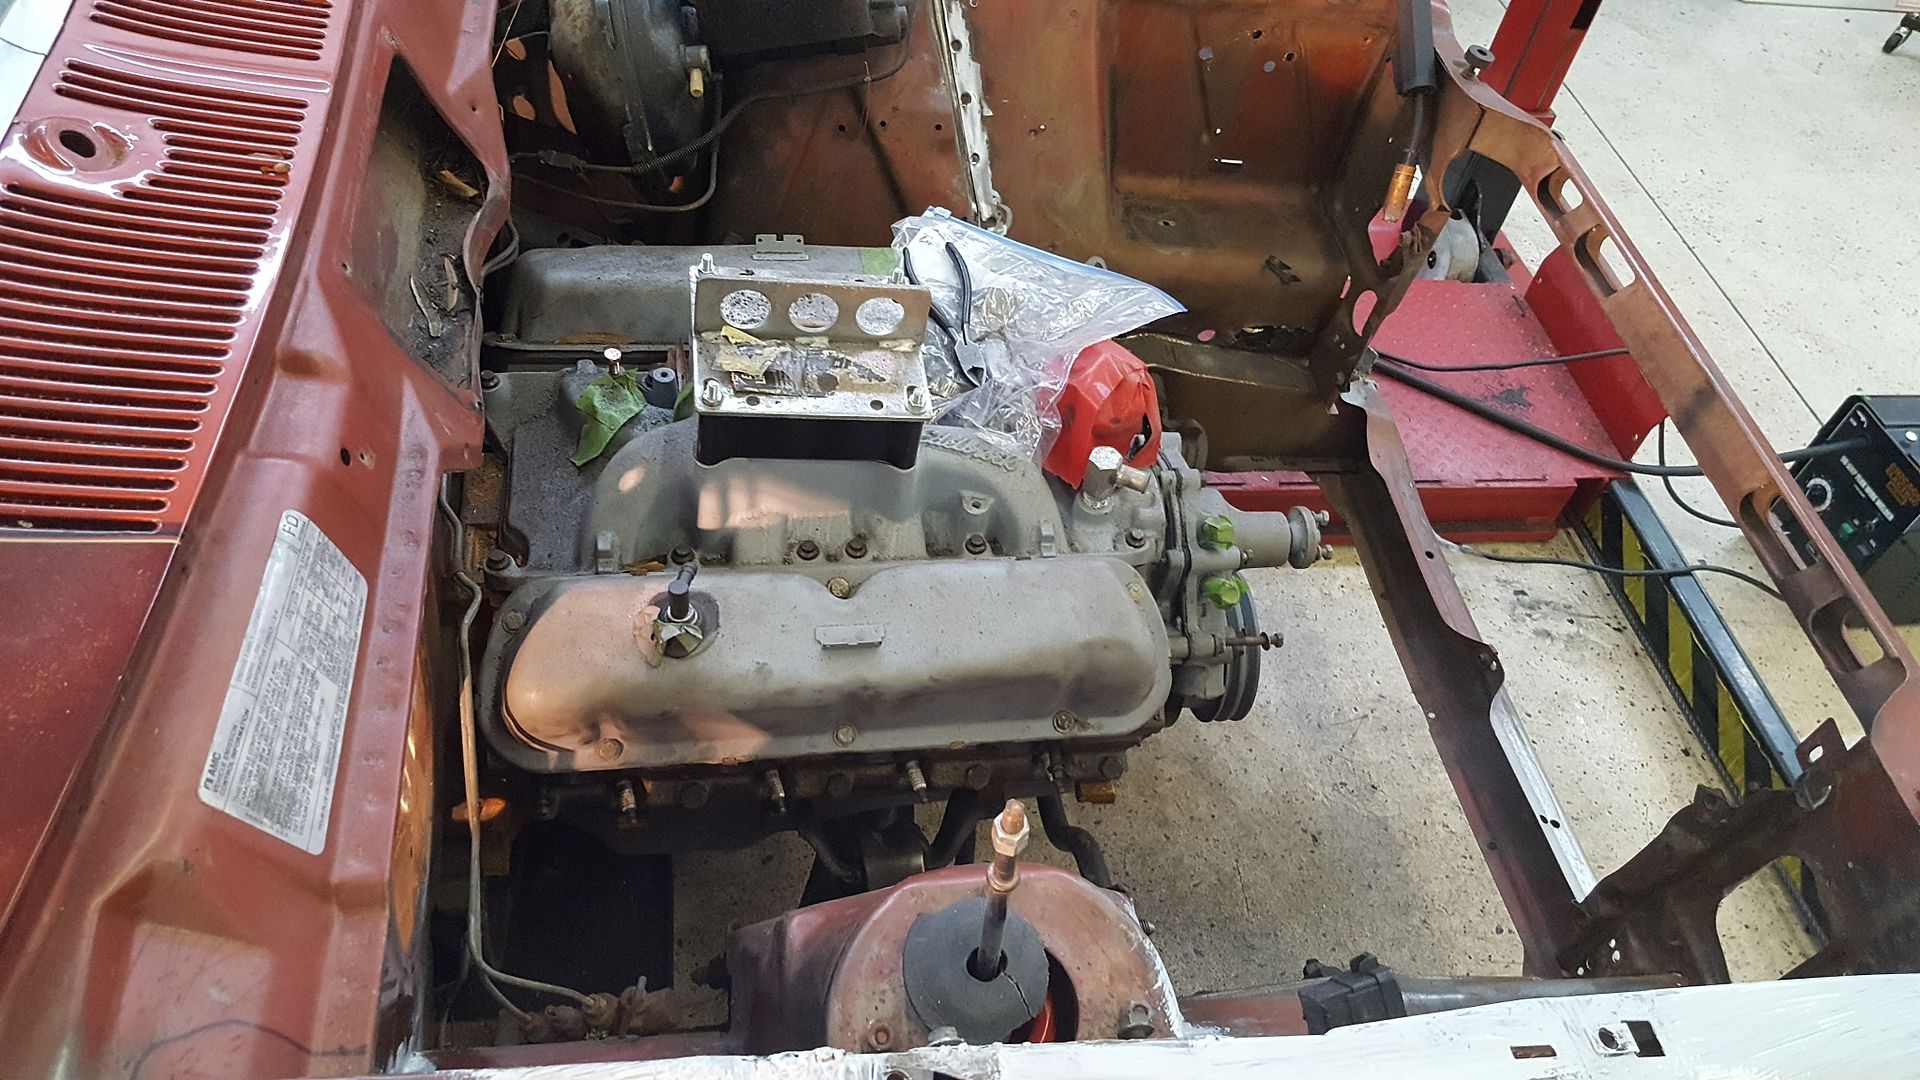
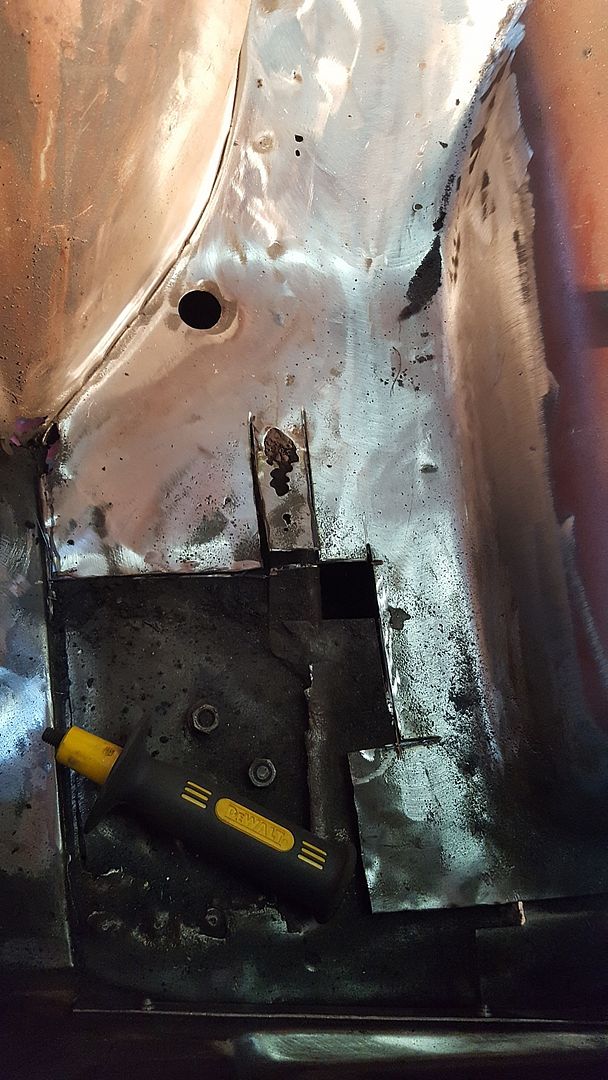
So, we pushed the car back in the shop Friday after work, soaked the water up off the floor pans, and proceeded to bust our butts for the rest of the year. We started with cleaning, organizing, and getting rust/dirt cleaned up.
[URL=http://s54.photobucket.com/user/dusterbd13/media/amc/20161230_232912_zps2jhpx1xo.jpg.html]
 [/URL]
[URL=http://s54.photobucket.com/user/dusterbd13/media/amc/20161231_121956_zps9redt5se.jpg.html]
 [/URL]
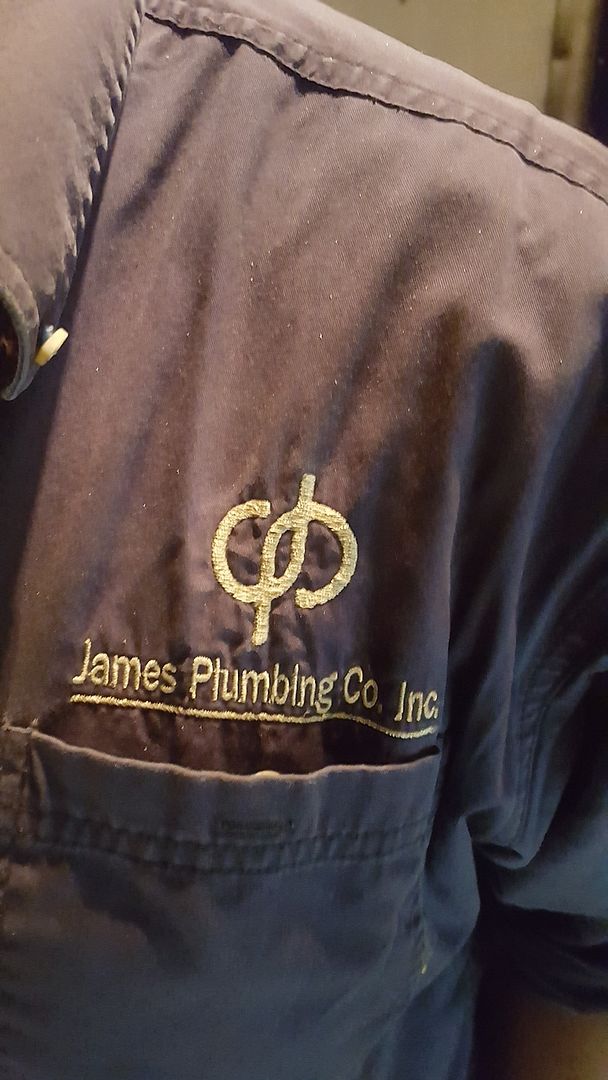
While doing this, I made the comment to Dallas that we needed to find a cheap source of sheet metal to use for patching holes, filling firewall, etc. He pointed to his shirt while saying “water heater.”
[URL=http://s54.photobucket.com/user/dusterbd13/media/amc/20161230_221831_zpso0nnggwe.jpg.html]
 [/URL]
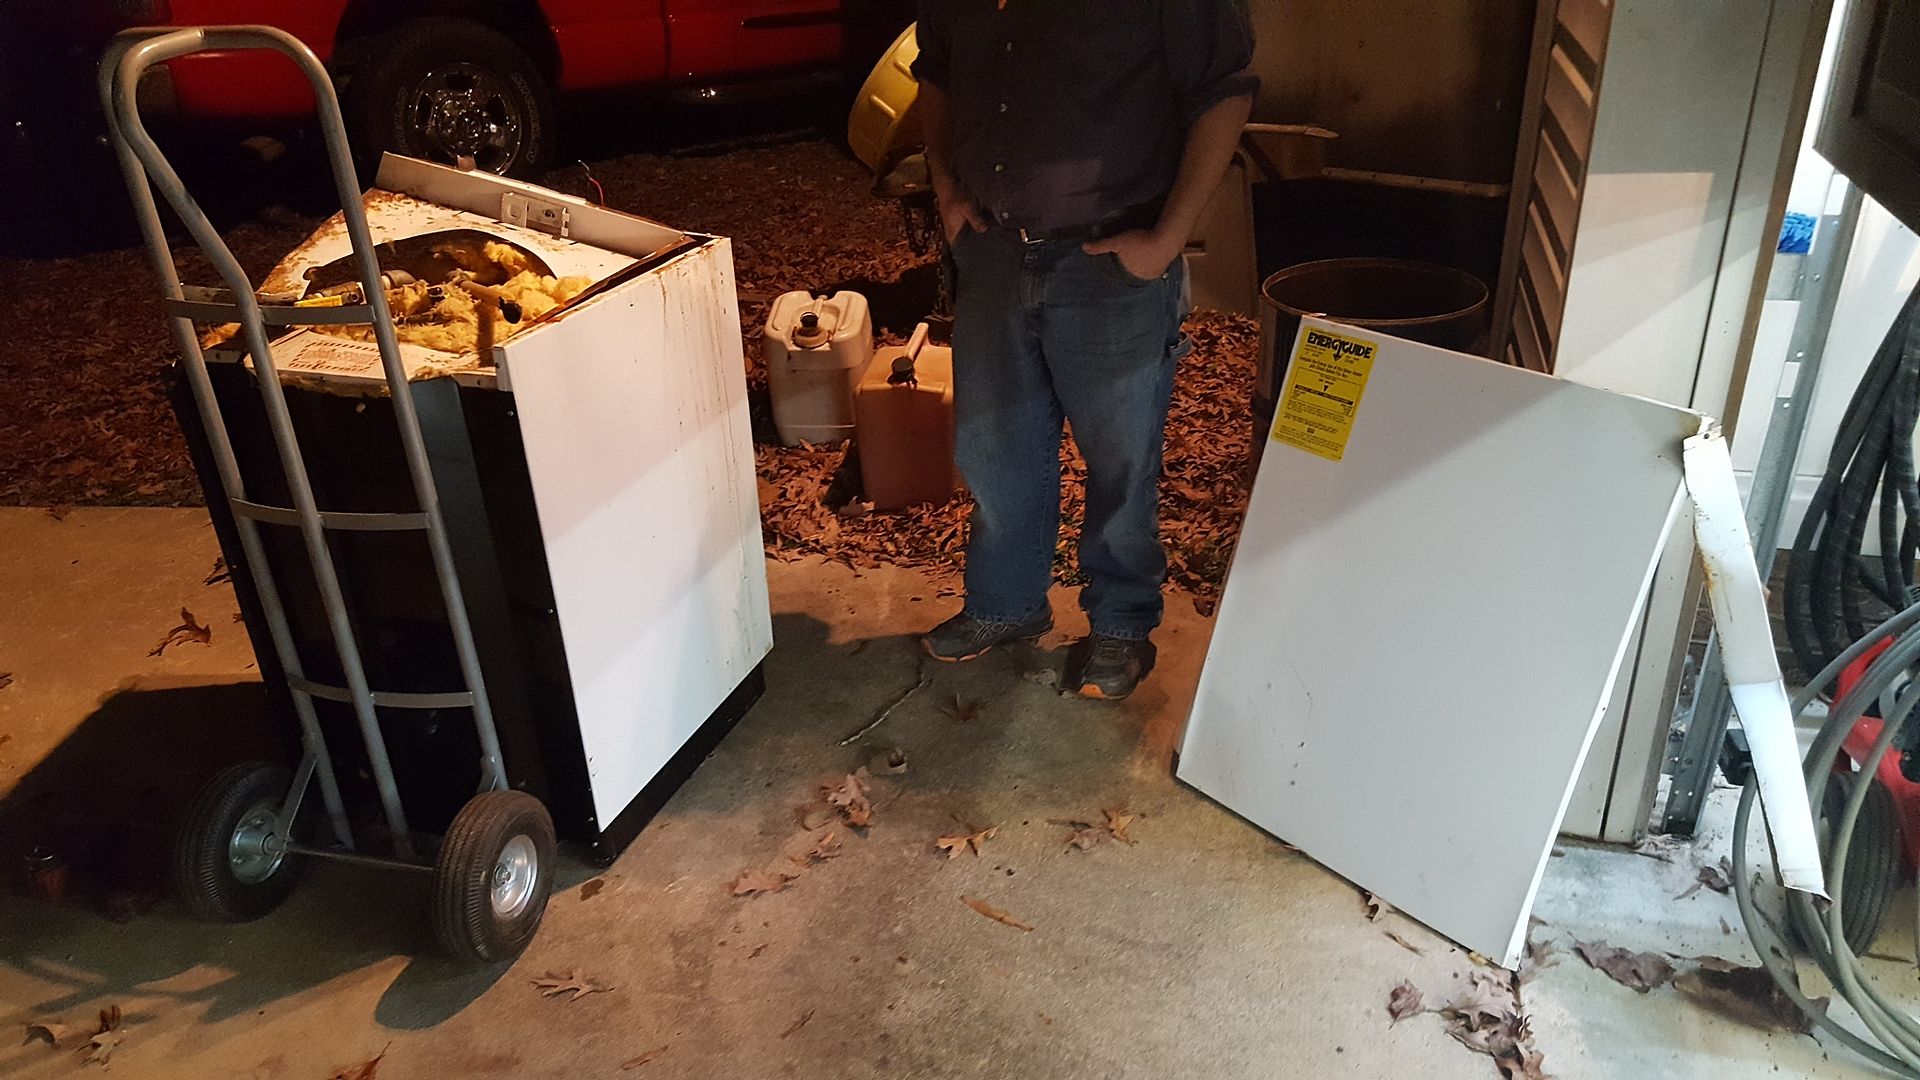
He then went to the truck, and pulled out what he called a counter-top water heater that he had replaced earlier in the day and hadn't hauled off to the dump yet. We stripped all the sheet metal off it, and out it back on the truck. I think we got plenty. If we didn't, Dallas said he normally changes two a week, so more is readily available.
[URL=http://s54.photobucket.com/user/dusterbd13/media/amc/20161230_221821_zpsqa6th1hx.jpg.html]
 [/URL]
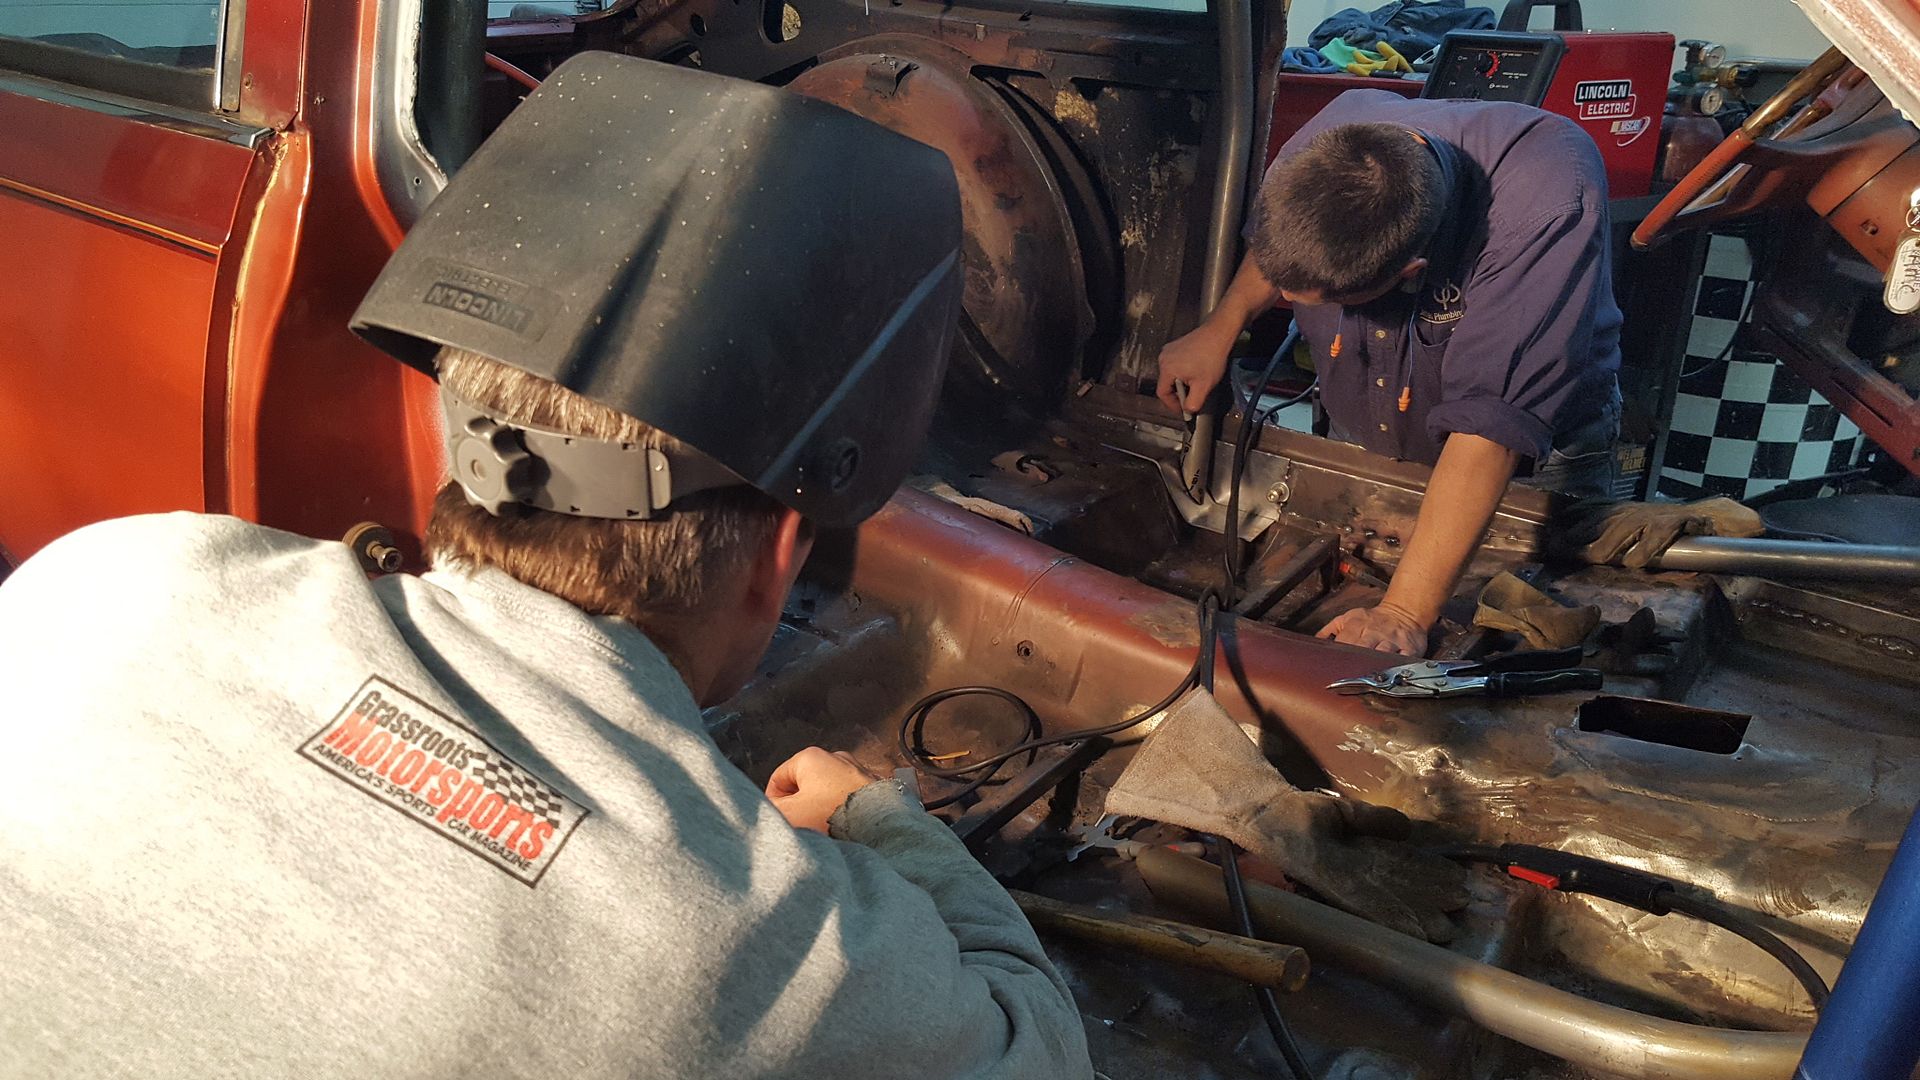
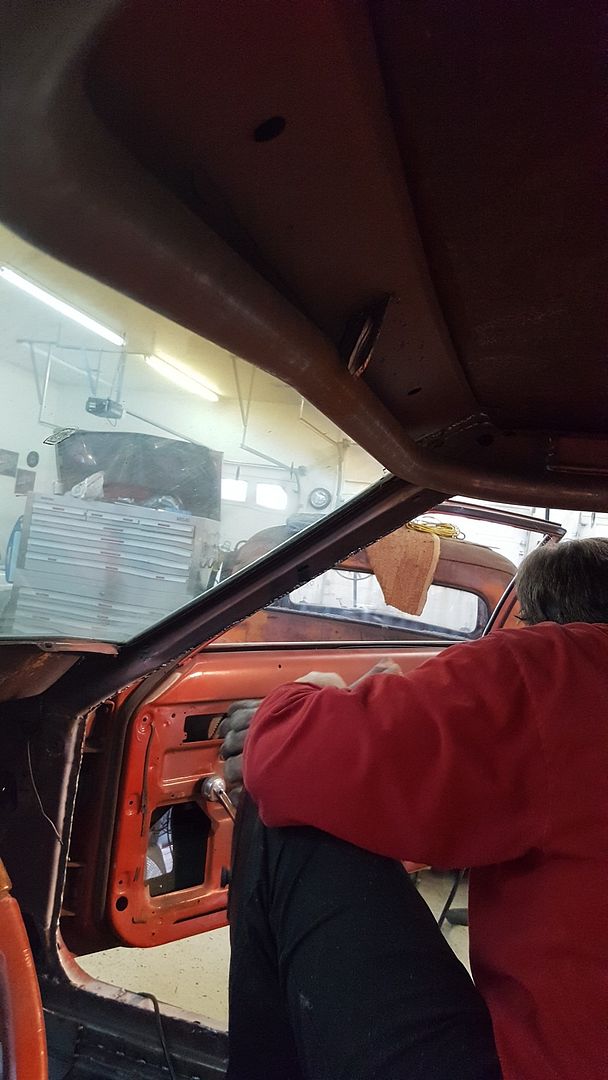
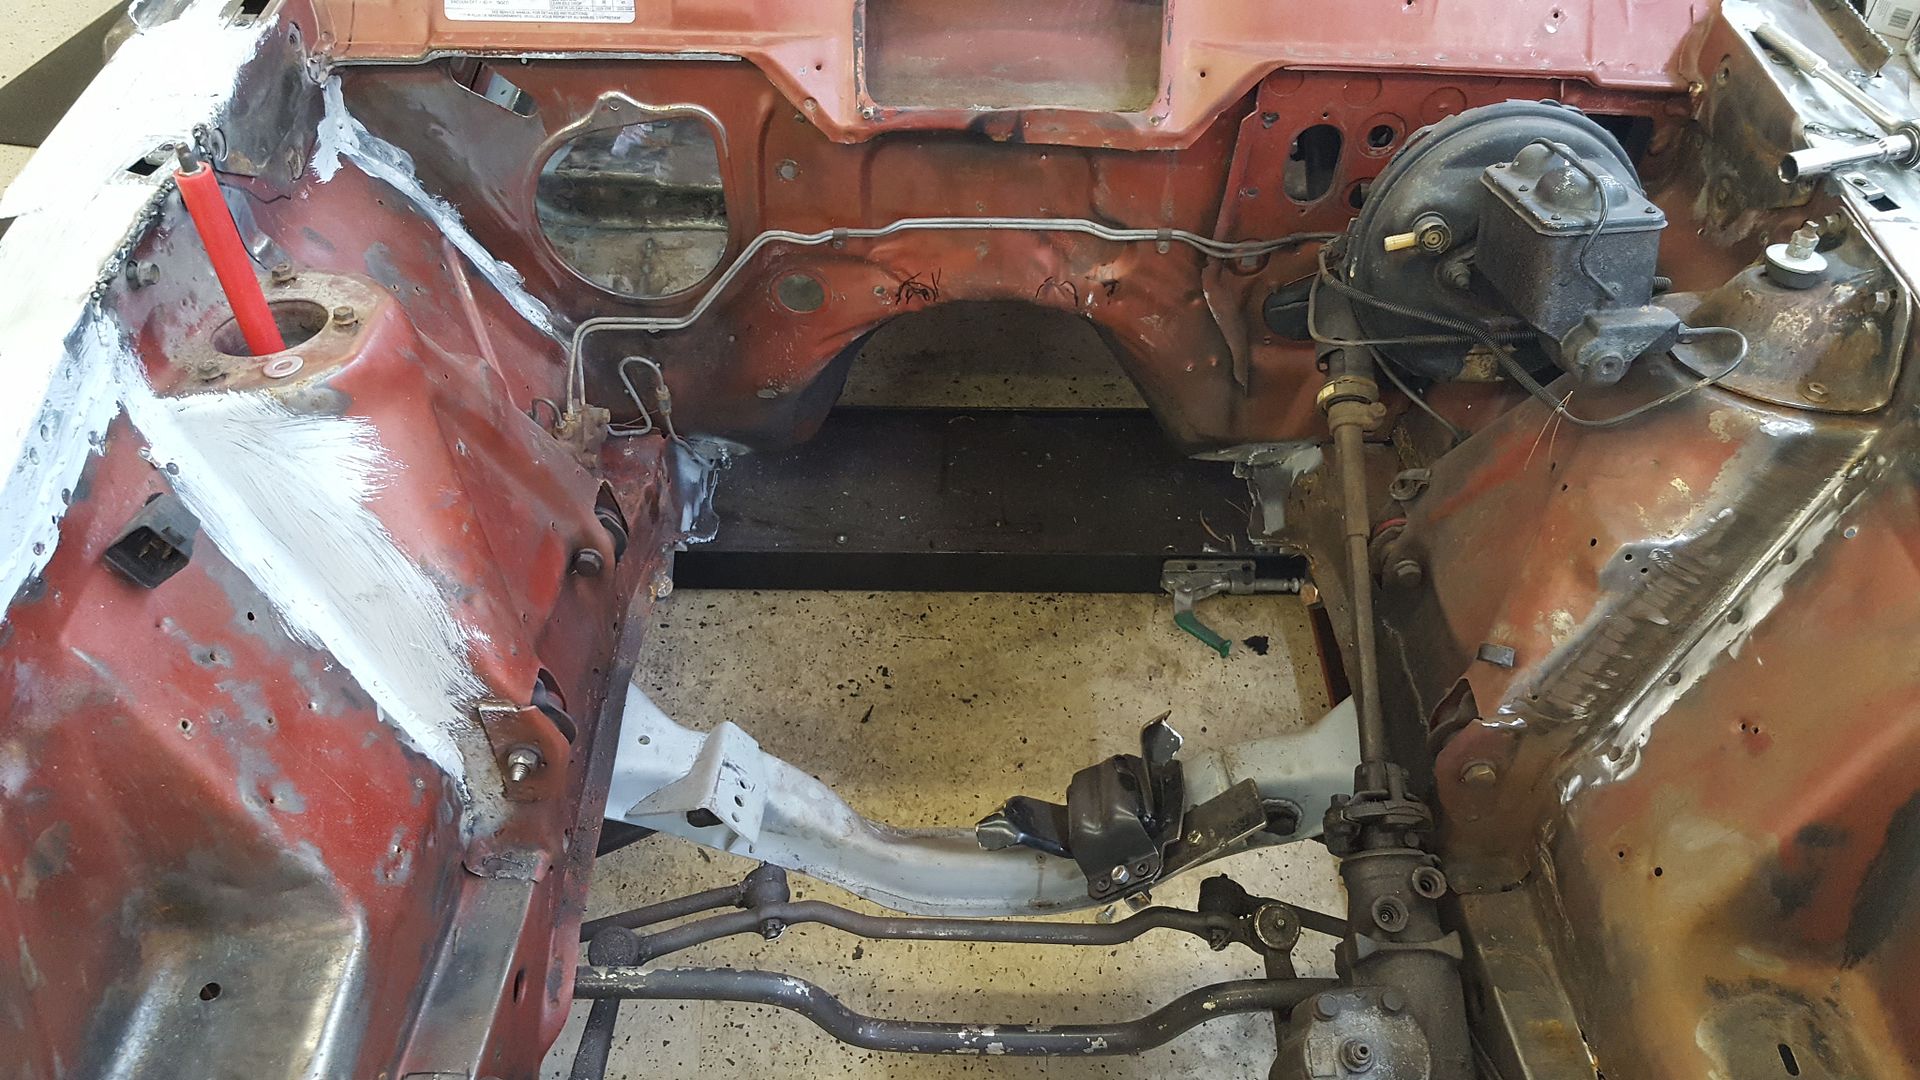
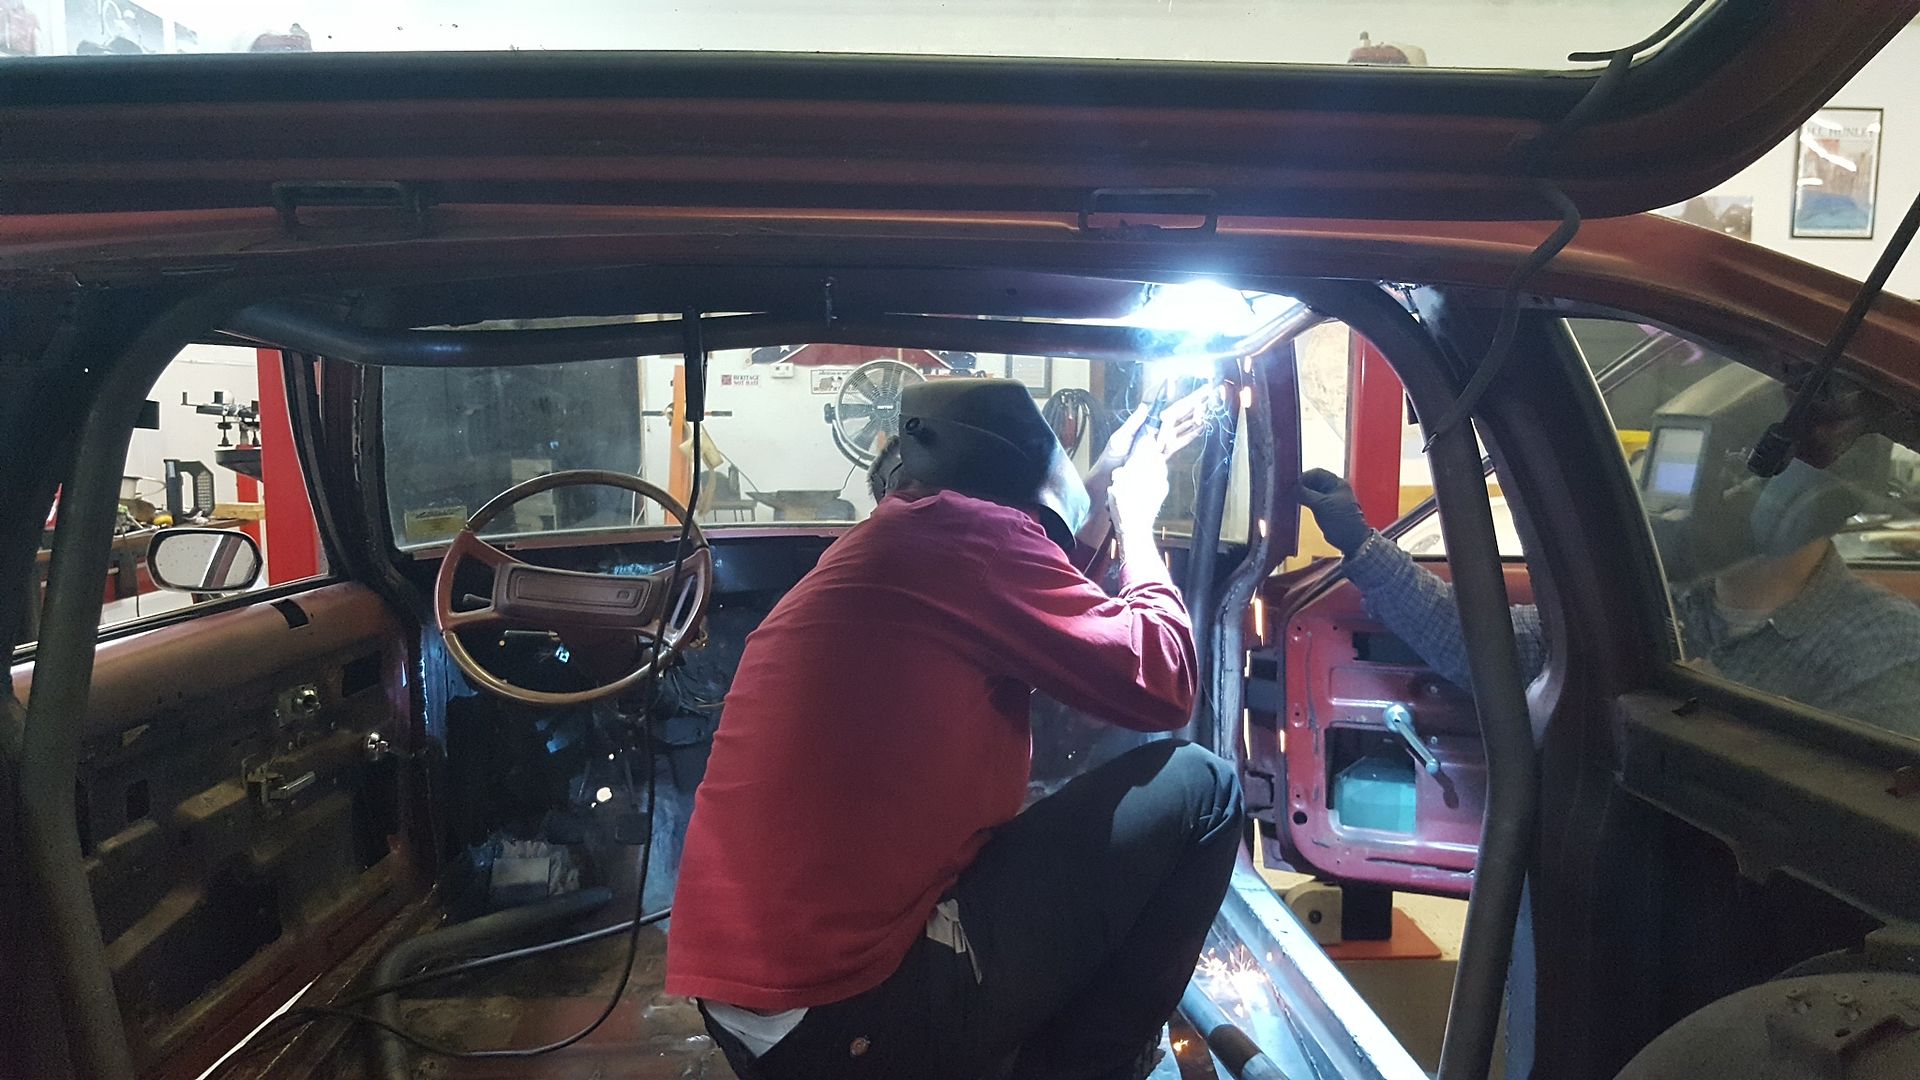
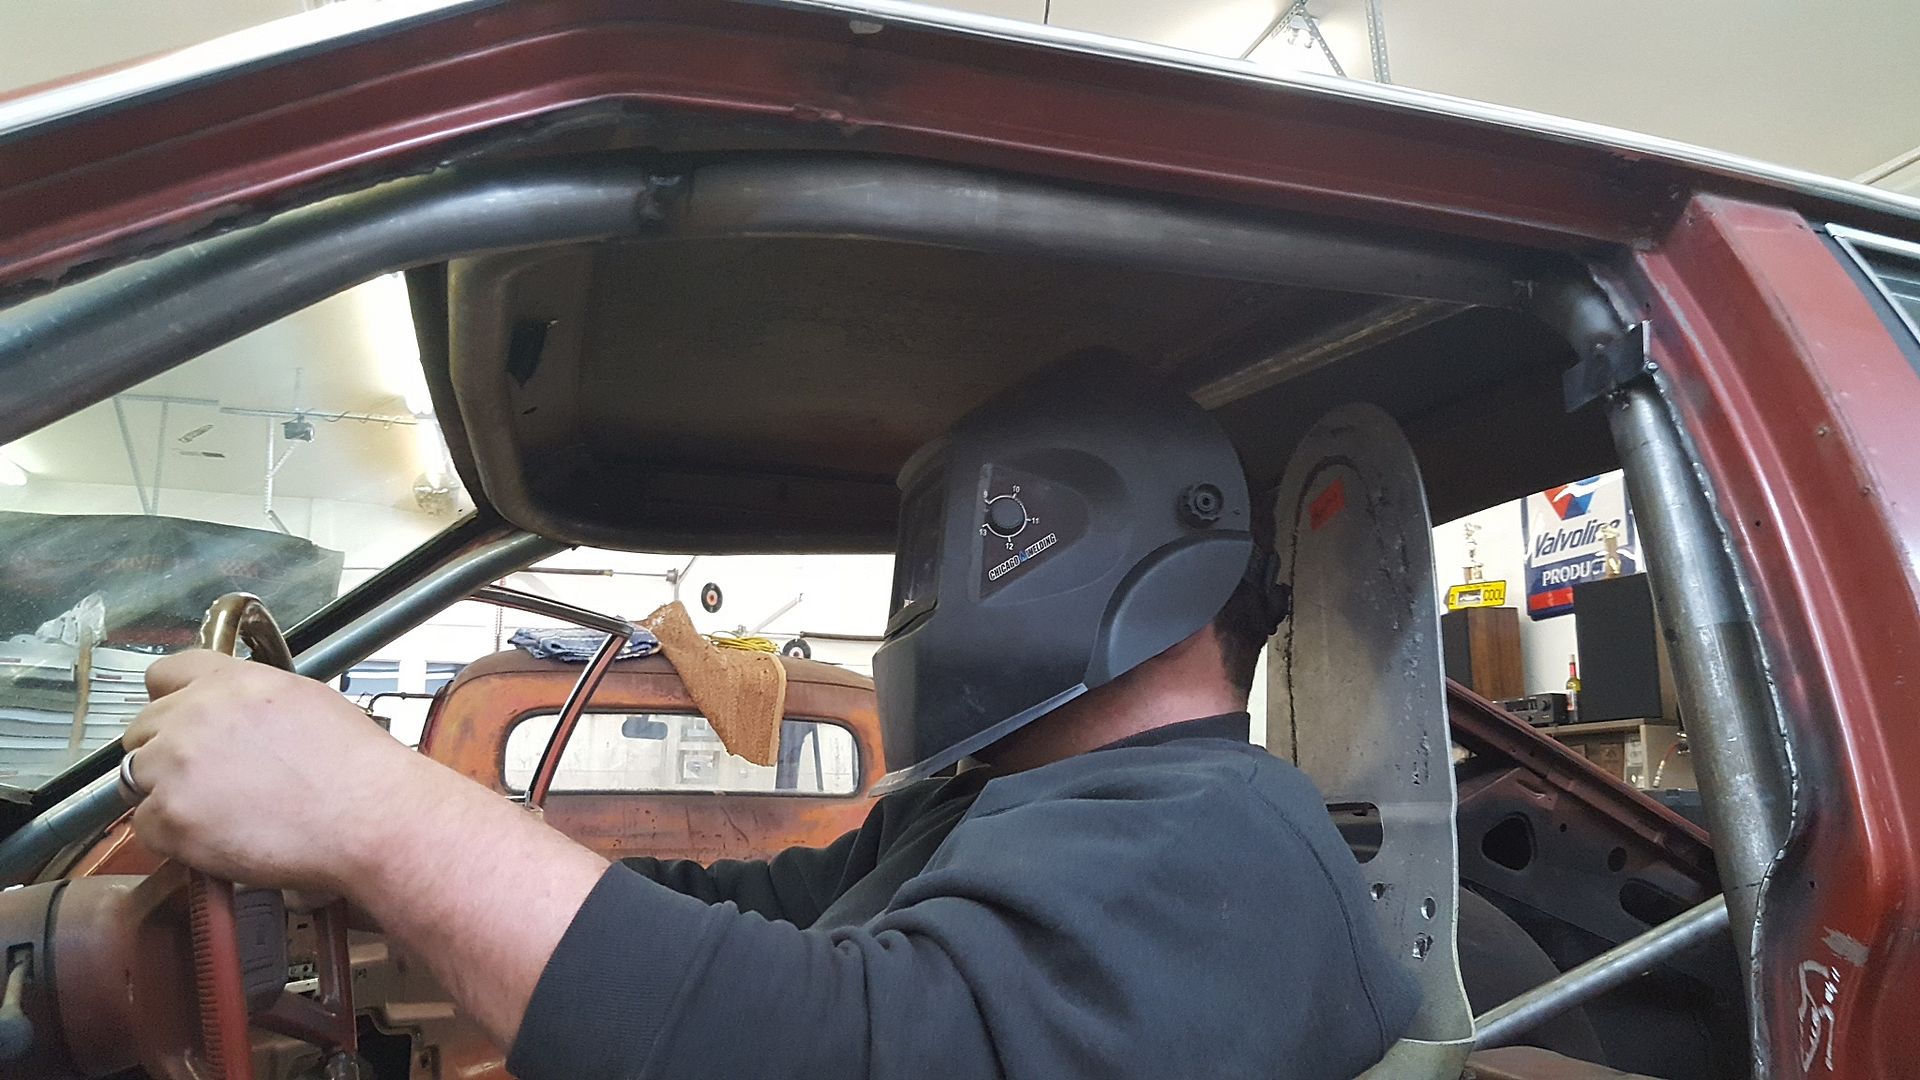
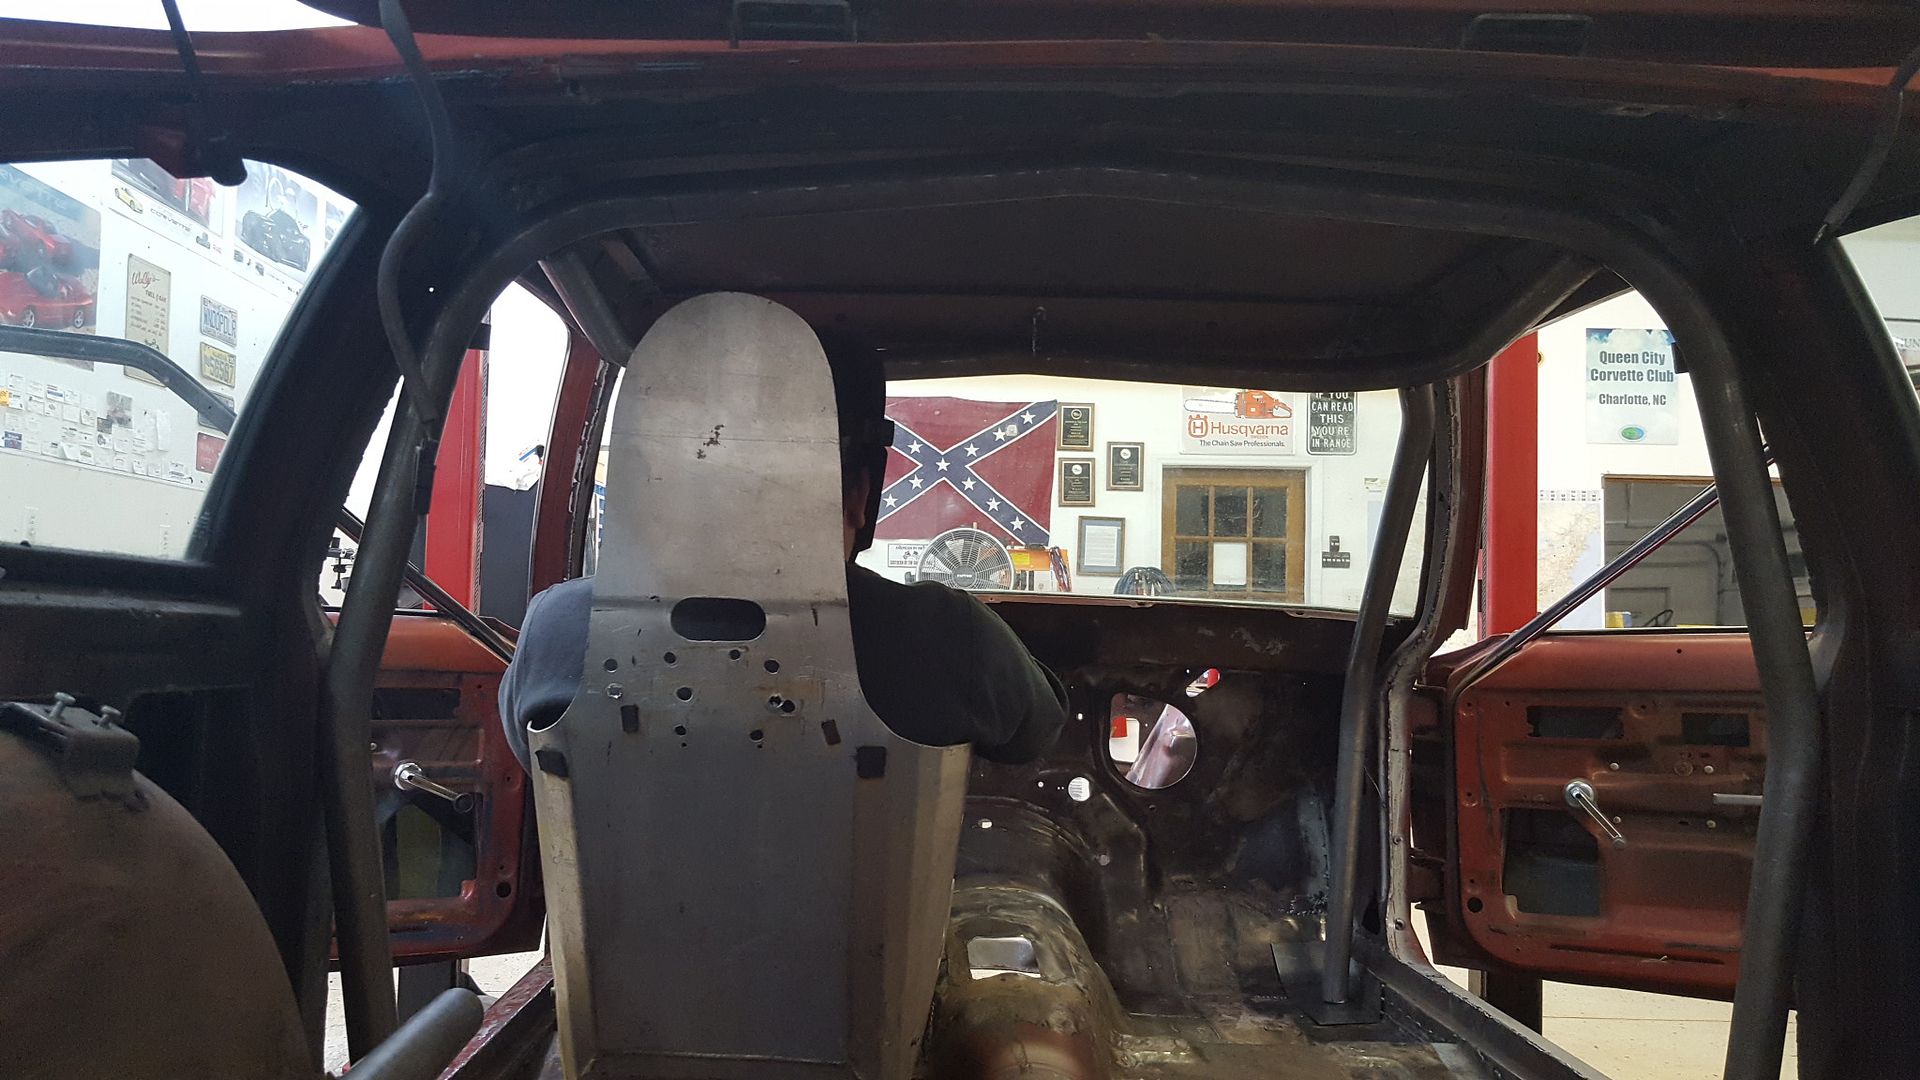
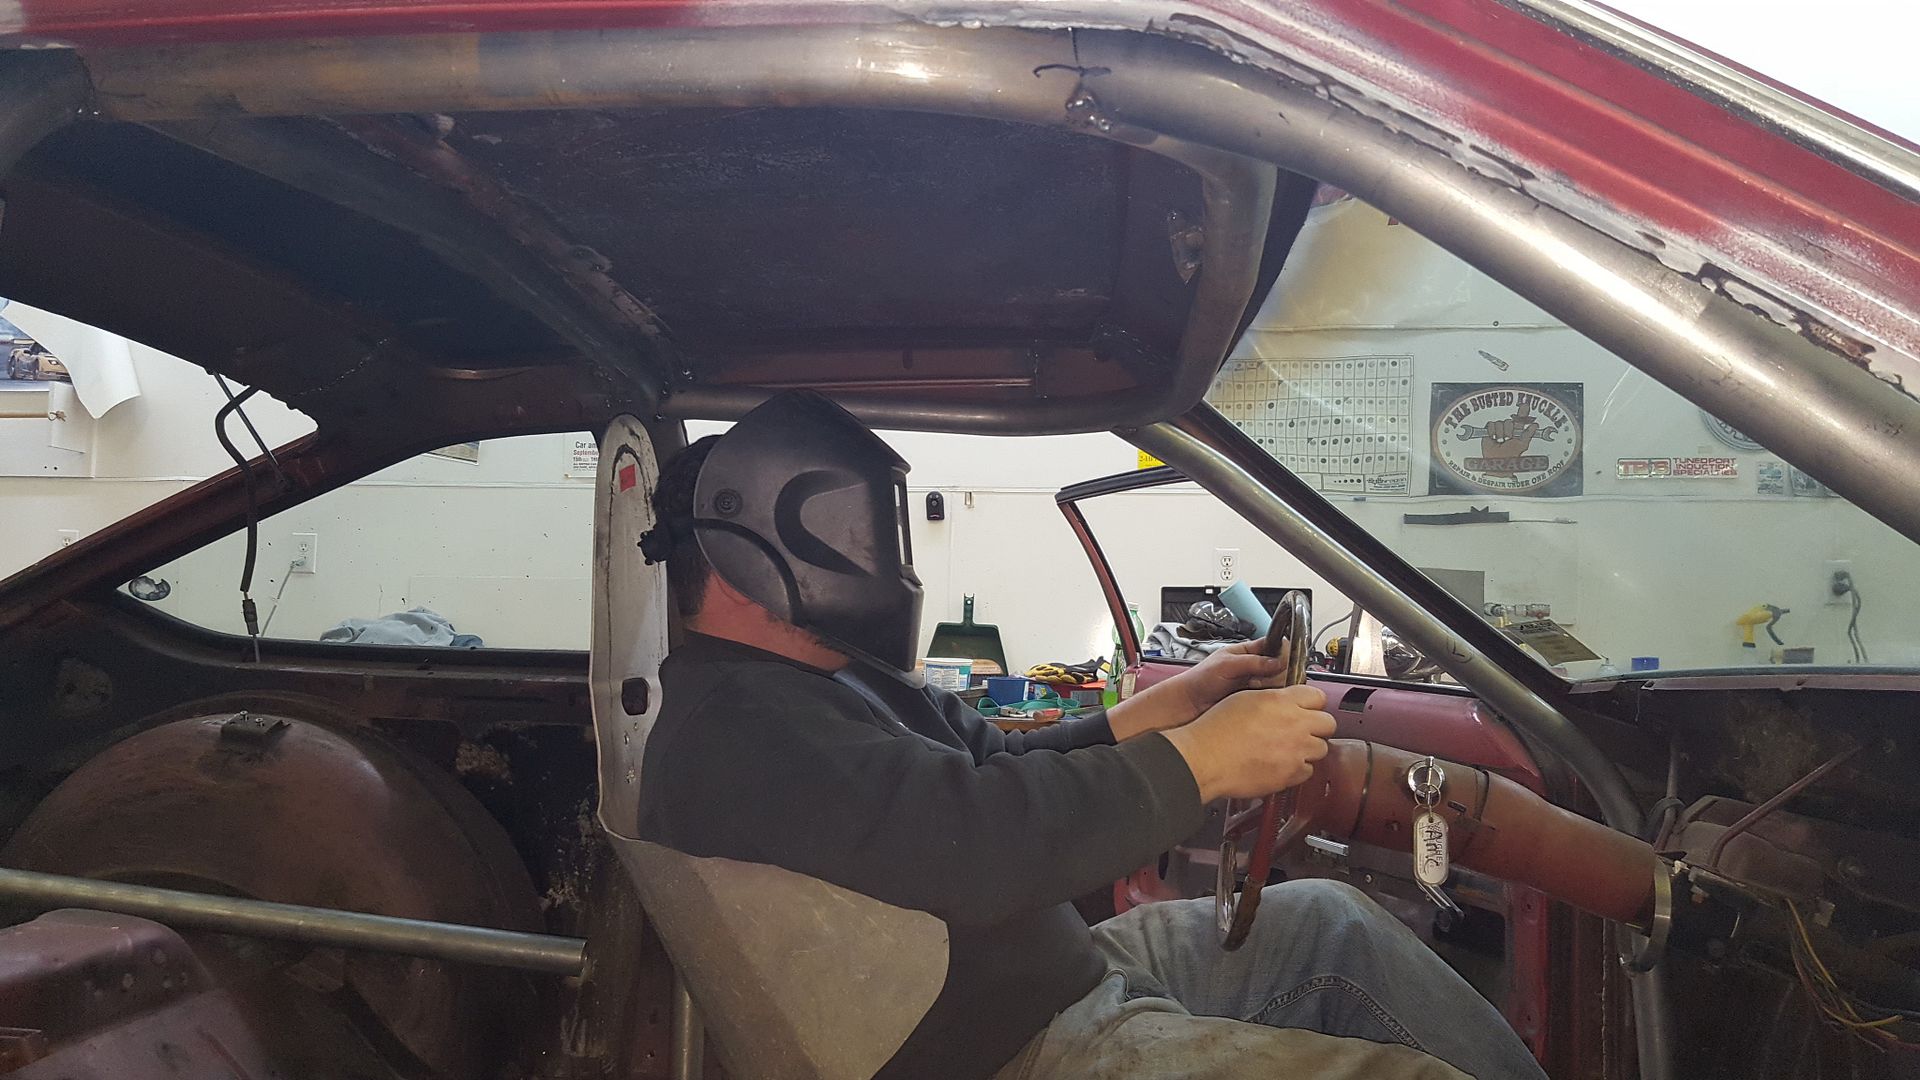
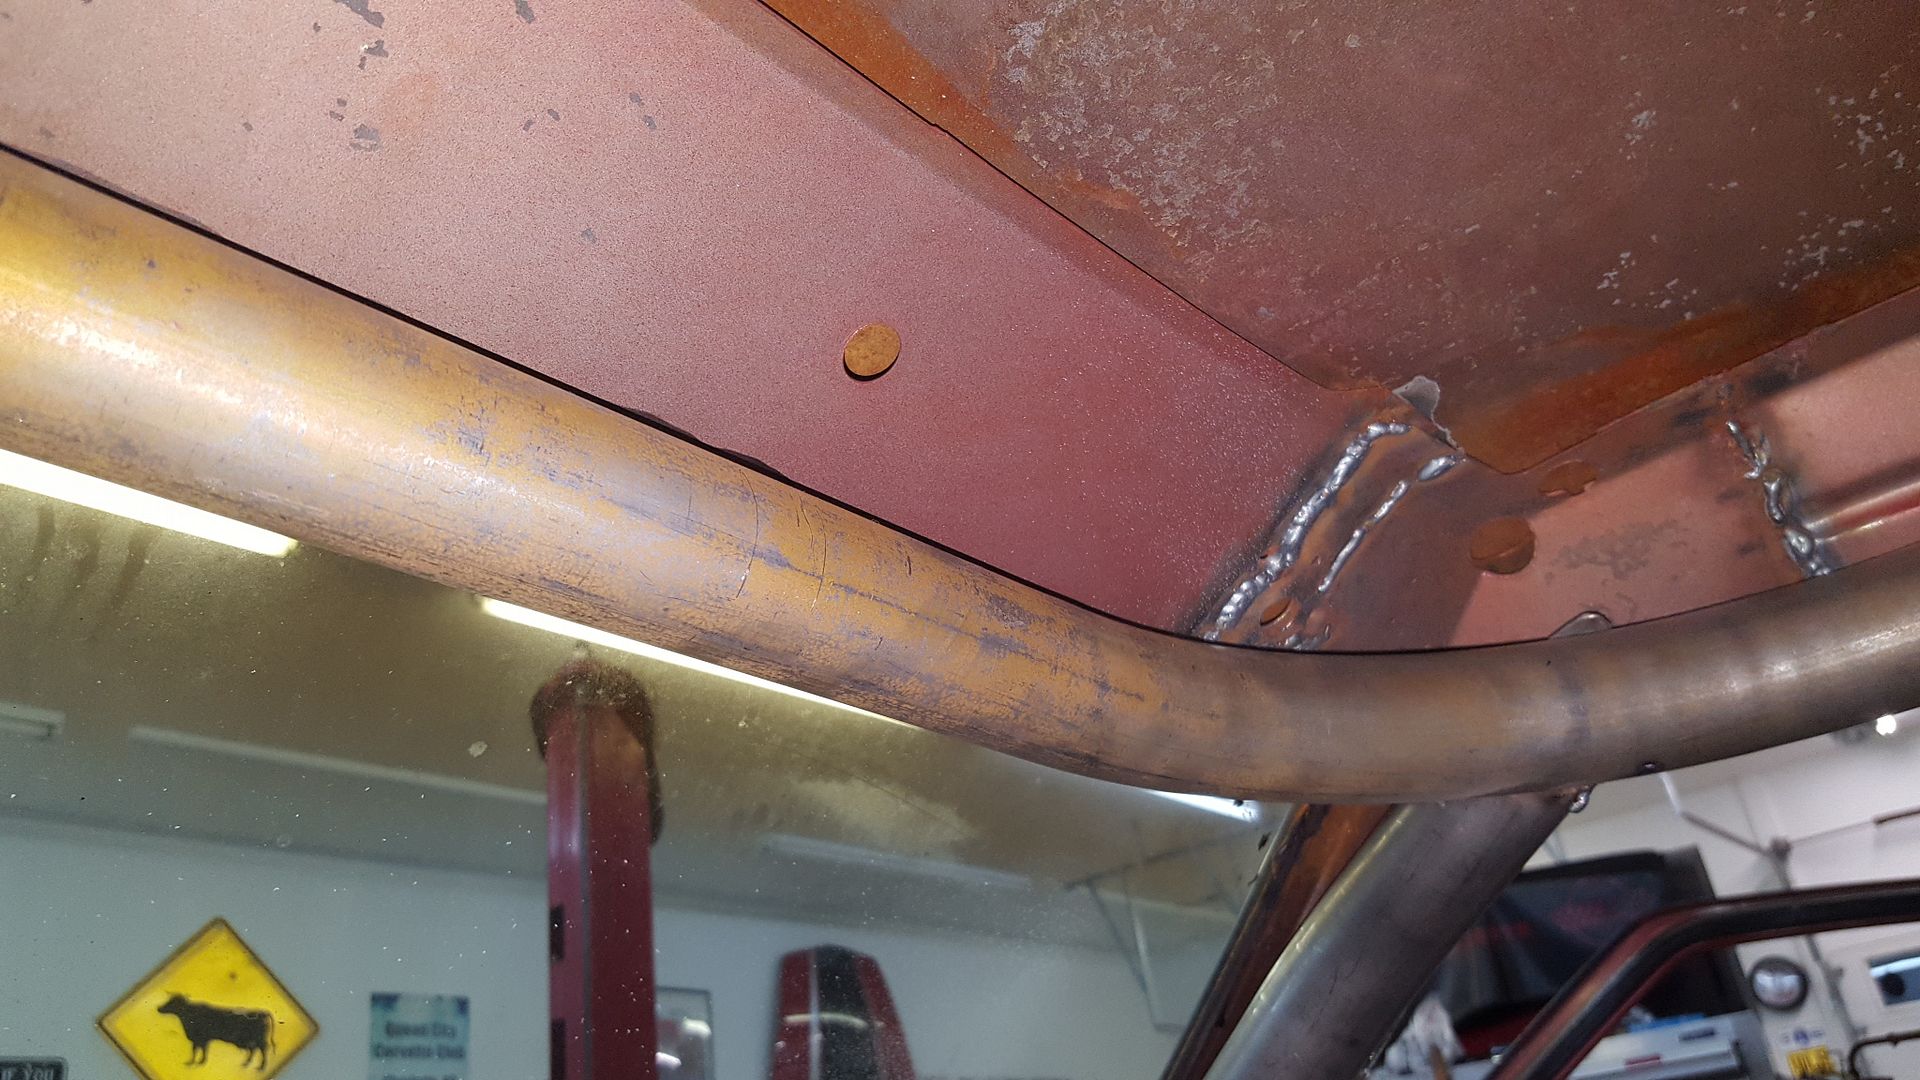
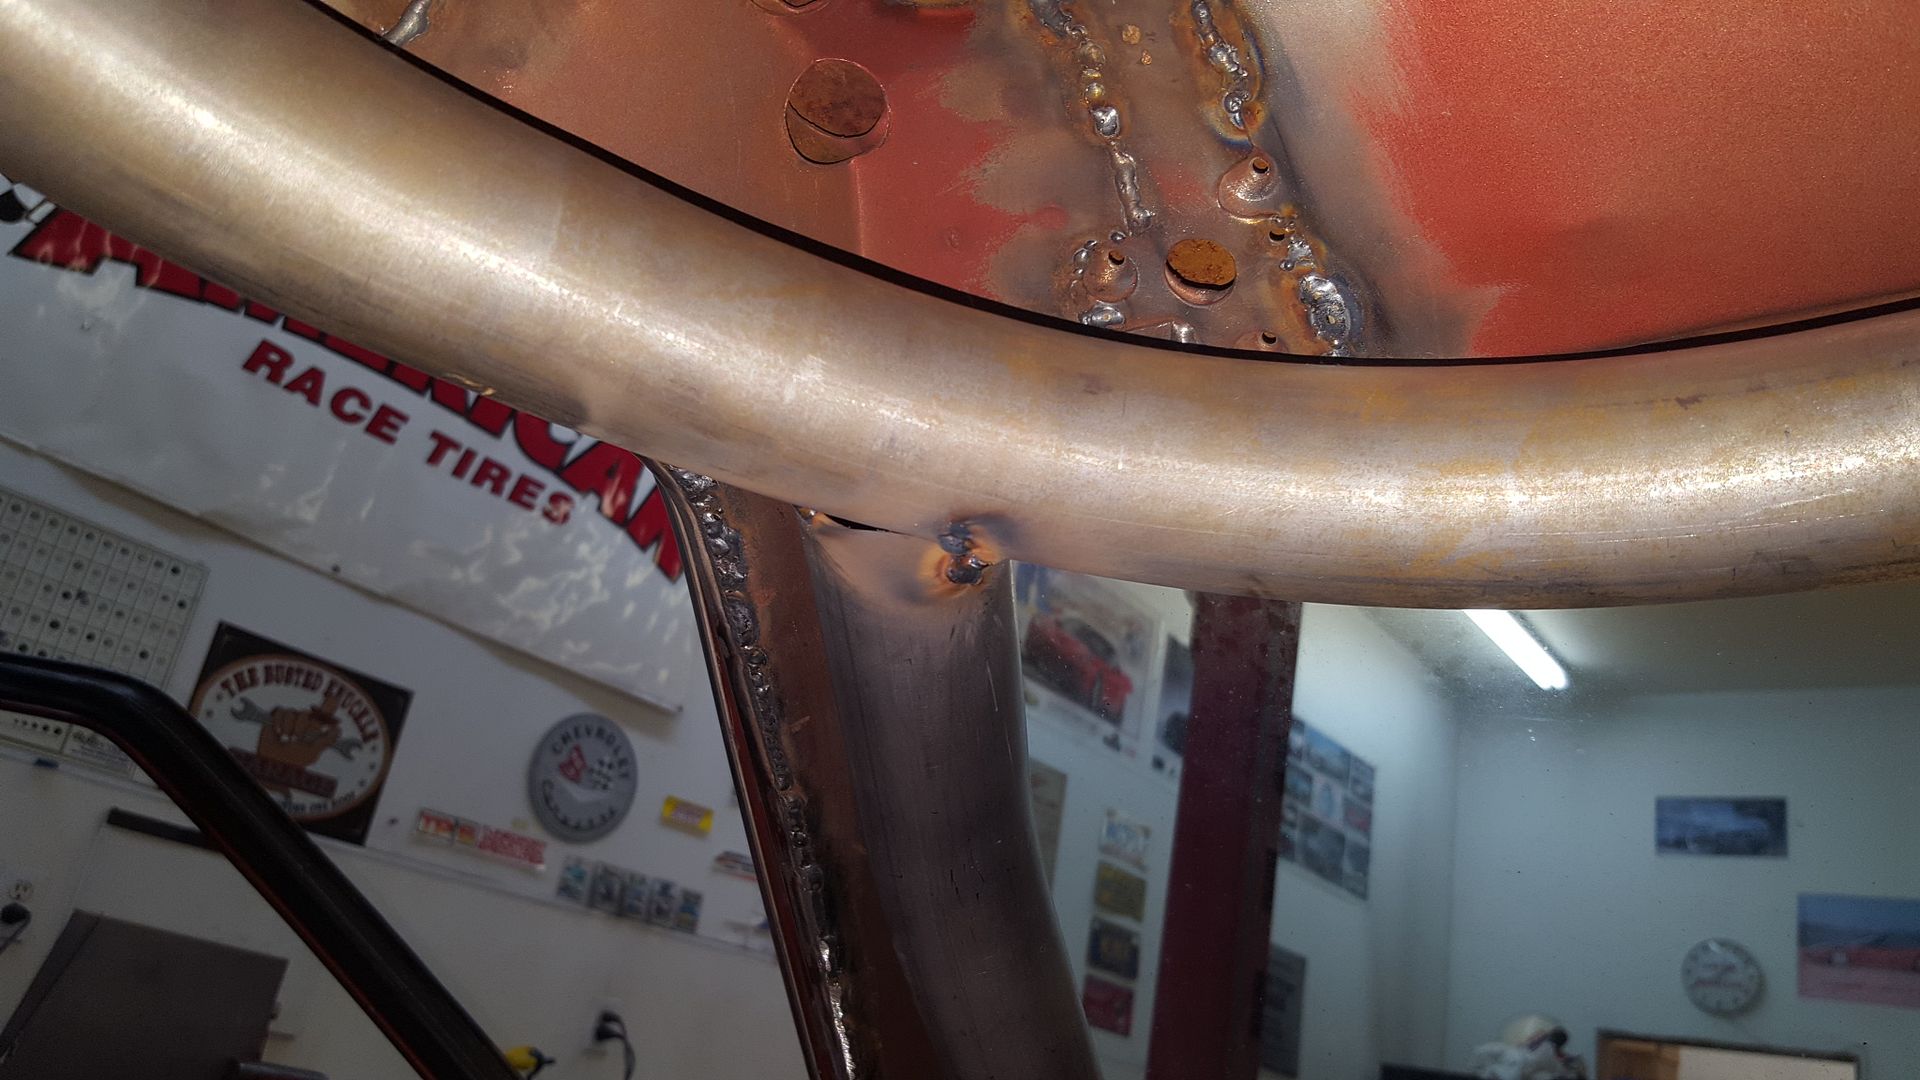
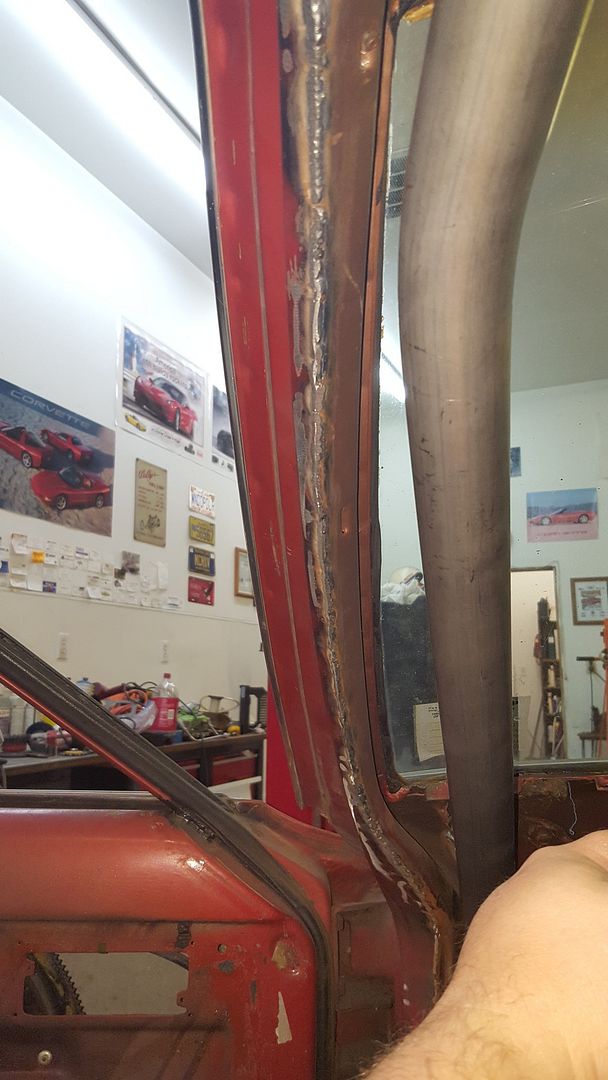
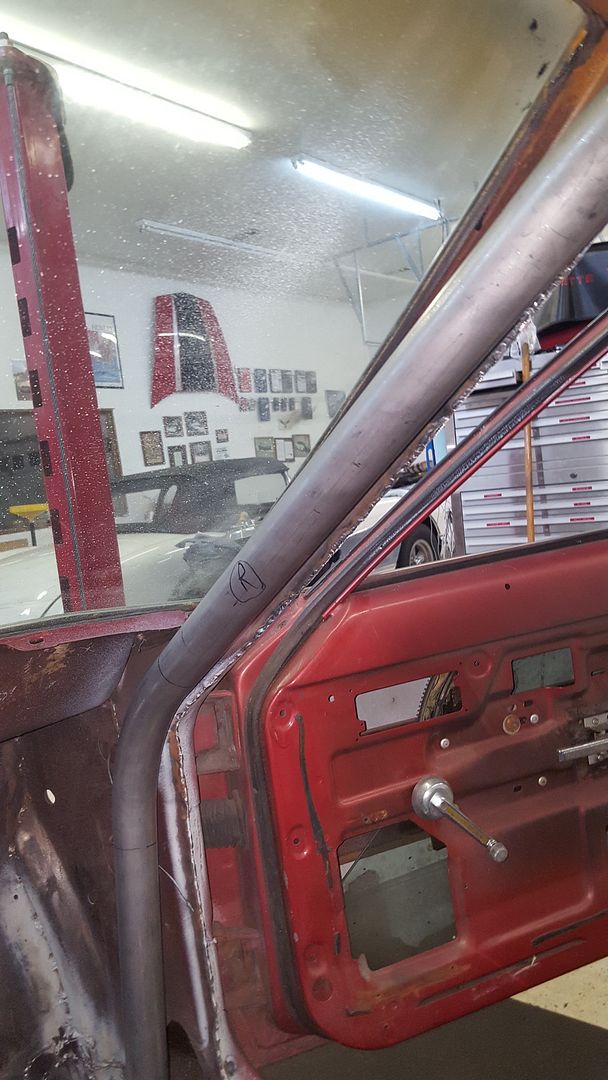
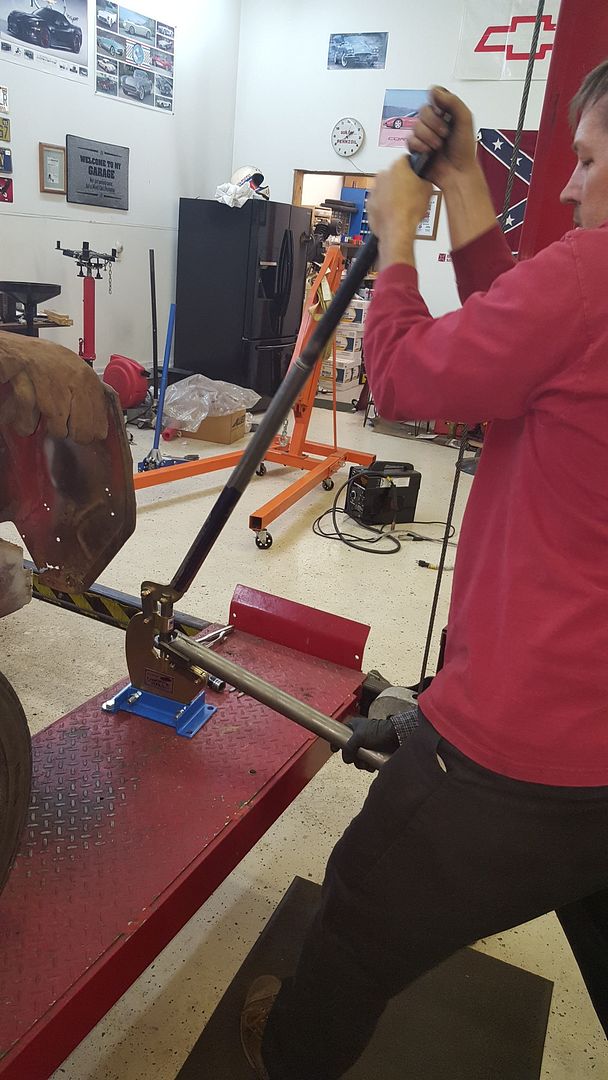
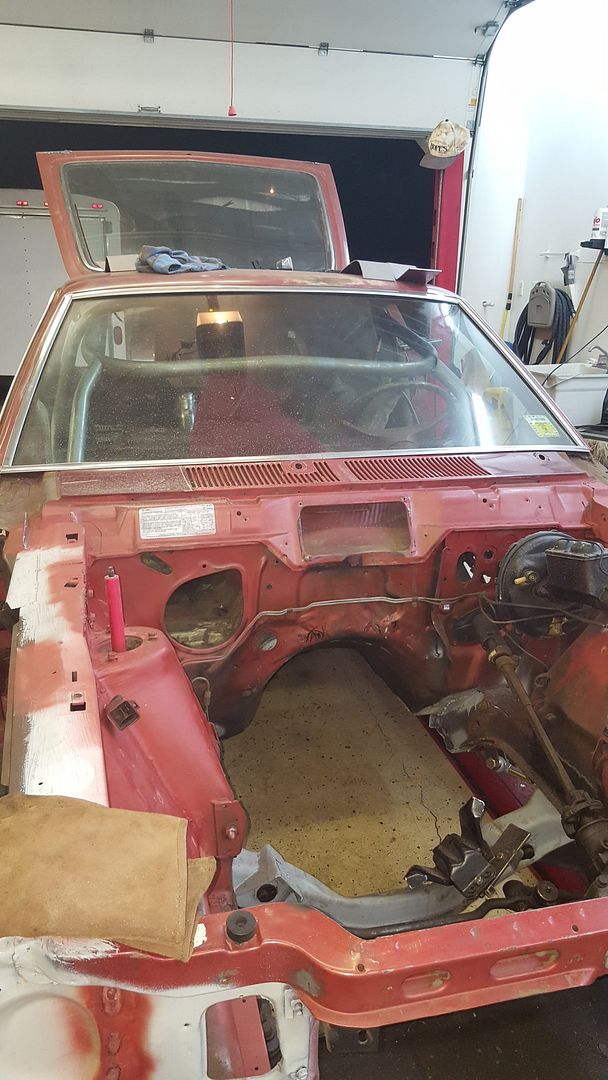
So, whule I worked on pulling the motor and trans, as well as finishing seam welding the engine bay, Steve and dallas got to work on the cage. We started at five Friday, quit at midnight. Saturday was 8am to 2am, and ill let the pictures tell the story. (theres some missing in here, because we were too busy working)
[URL=http://s54.photobucket.com/user/dusterbd13/media/amc/20161230_232904_zpsmpzuyiv5.jpg.html]
 [/URL]
[URL=http://s54.photobucket.com/user/dusterbd13/media/amc/20161231_121936_zpstaioxtmq.jpg.html]
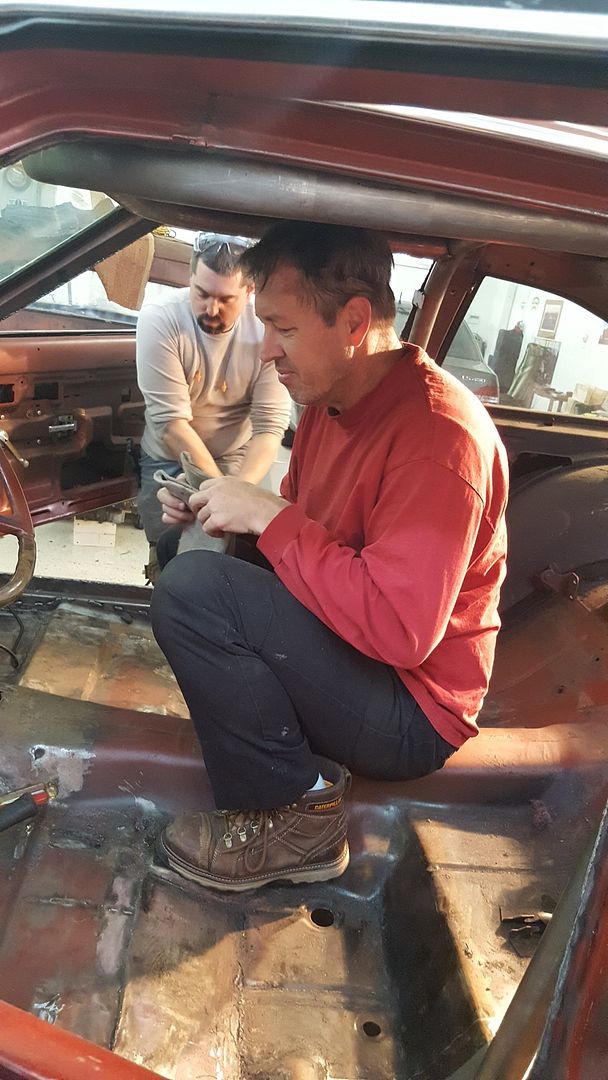 [/URL]
[URL=http://s54.photobucket.com/user/dusterbd13/media/amc/20161231_121938_zpsv7sdi9xh.jpg.html]
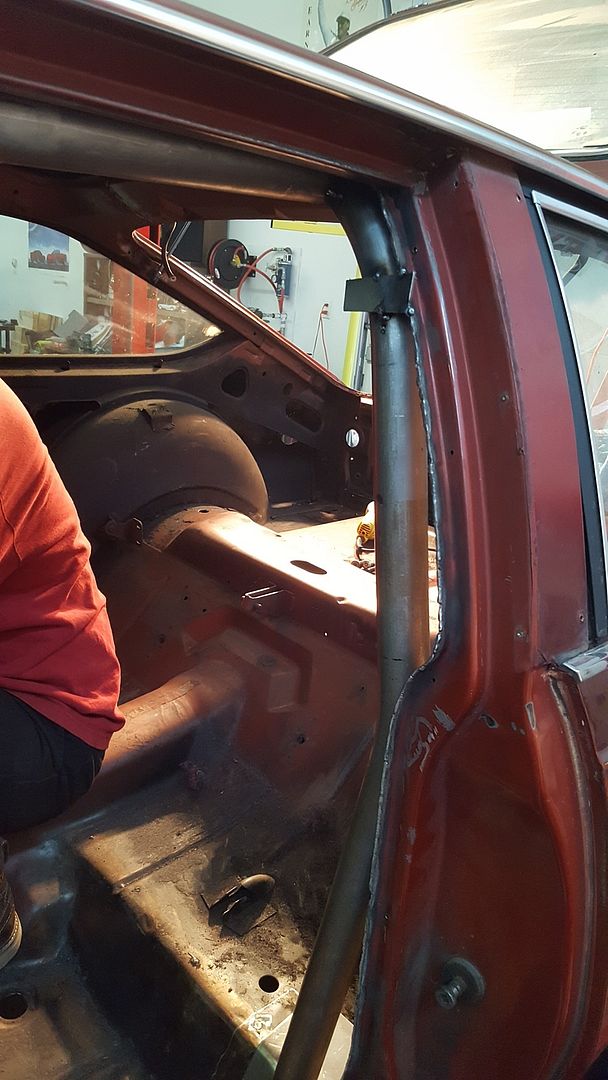 [/URL]
[URL=http://s54.photobucket.com/user/dusterbd13/media/amc/20161231_121942_zps4jqhgtbk.jpg.html]
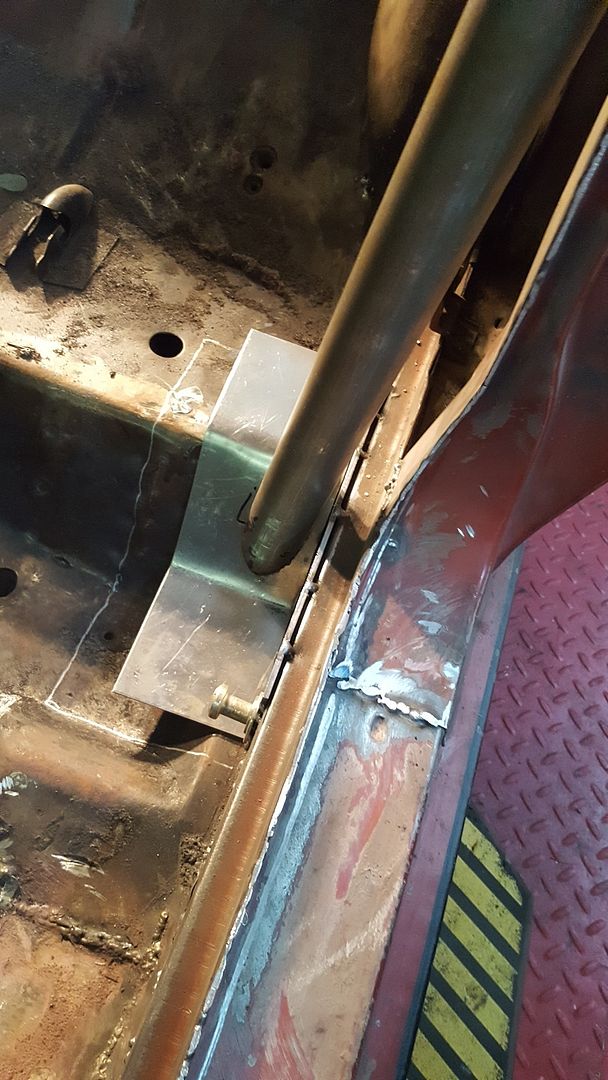 [/URL]
[URL=http://s54.photobucket.com/user/dusterbd13/media/amc/20161231_121945_zpsb58z1w8c.jpg.html]
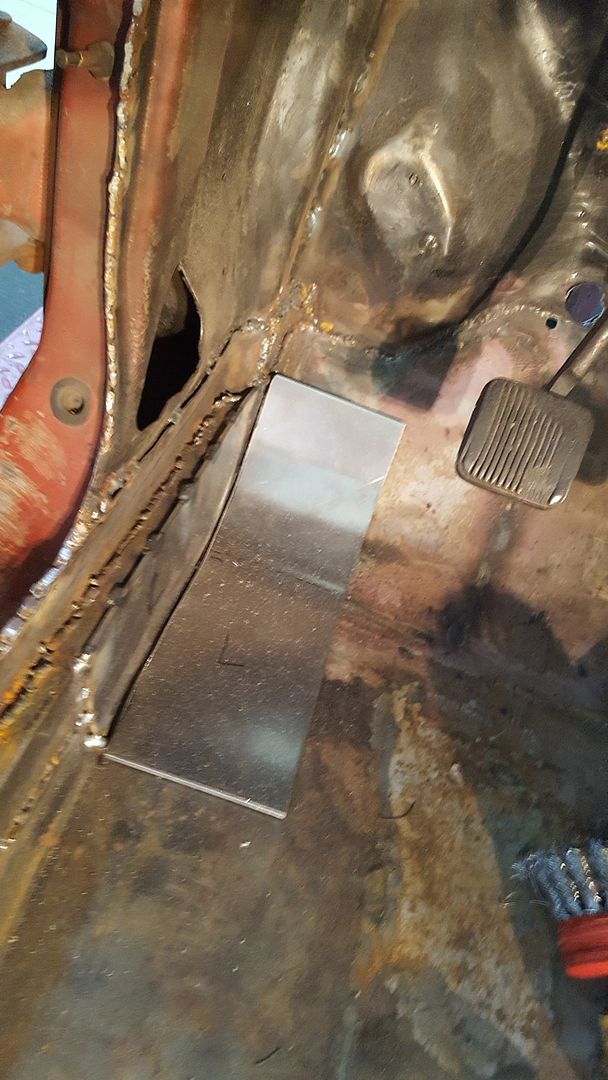 [/URL]
[URL=http://s54.photobucket.com/user/dusterbd13/media/amc/20161231_121948_zpsdpyx4ud7.jpg.html]
 [/URL]
[URL=http://s54.photobucket.com/user/dusterbd13/media/amc/20161231_145551_zps3xvguzpj.jpg.html]
 [/URL]
[URL=http://s54.photobucket.com/user/dusterbd13/media/amc/20161231_173925_zpsoz5iclmu.jpg.html]
 [/URL]
[URL=http://s54.photobucket.com/user/dusterbd13/media/amc/20161231_175840_zps2bzfken9.jpg.html]
 [/URL]
[URL=http://s54.photobucket.com/user/dusterbd13/media/amc/20161231_175856_001_zpsgdilqfnq.jpg.html]
 [/URL]
[URL=http://s54.photobucket.com/user/dusterbd13/media/amc/20161231_175942_zpsdmiekiut.jpg.html]
 [/URL]
[URL=http://s54.photobucket.com/user/dusterbd13/media/amc/20161231_180042_zpsrozfhup3.jpg.html]
 [/URL]
[URL=http://s54.photobucket.com/user/dusterbd13/media/amc/20161231_180046_zpsoaxfnzlc.jpg.html]
 [/URL]
[URL=http://s54.photobucket.com/user/dusterbd13/media/amc/20161231_180057_zpsxjxatcpg.jpg.html]
 [/URL]
[URL=http://s54.photobucket.com/user/dusterbd13/media/amc/20161231_180103_zpsn9yqzjbp.jpg.html]
 [/URL]
[URL=http://s54.photobucket.com/user/dusterbd13/media/amc/20161231_190138_zpsiqrvxbwc.jpg.html]
 [/URL]
[URL=http://s54.photobucket.com/user/dusterbd13/media/amc/20161231_204556_zpsxut071oz.jpg.html]
 [/URL]
[URL=http://s54.photobucket.com/user/dusterbd13/media/amc/20161231_204605_zps8b051zj6.jpg.html]
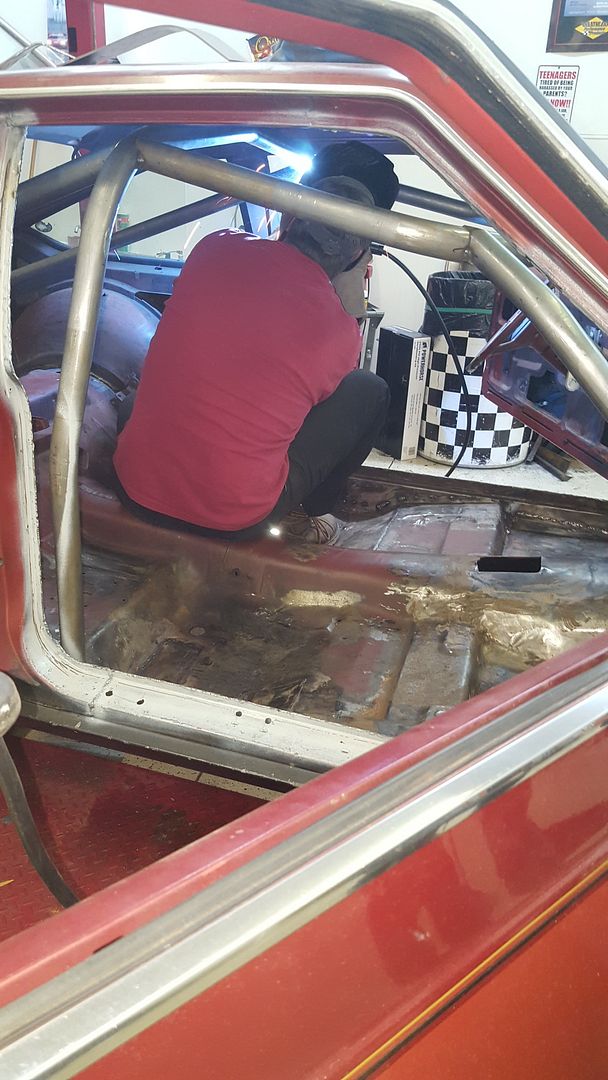 [/URL]
[URL=http://s54.photobucket.com/user/dusterbd13/media/amc/20161231_204614_zpsjd1hxnzr.jpg.html]
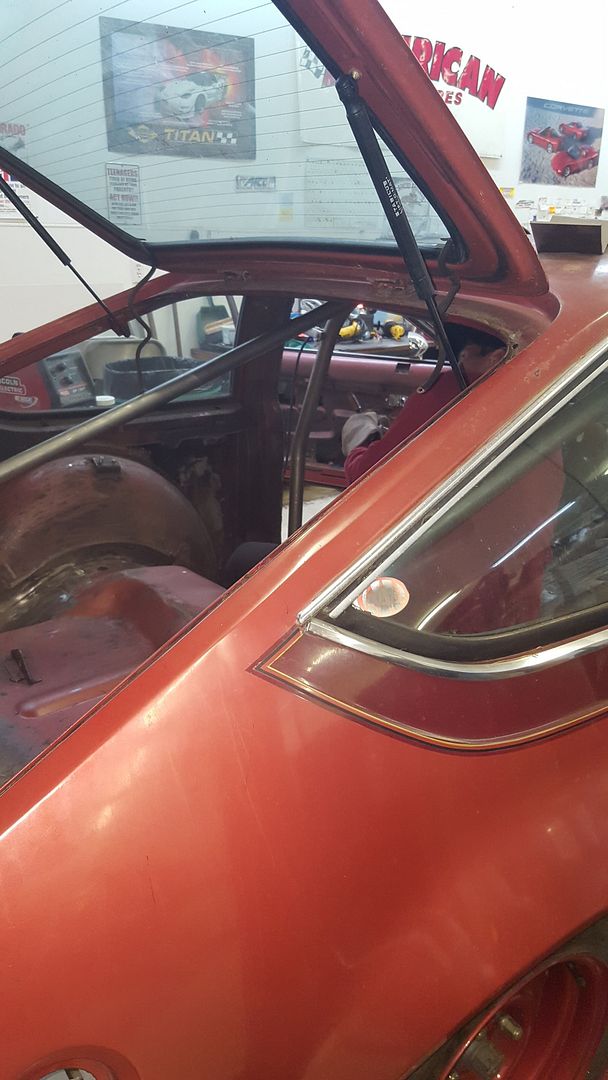 [/URL]
[URL=http://s54.photobucket.com/user/dusterbd13/media/amc/20161231_214535_zpsjtpfrqzm.jpg.html]
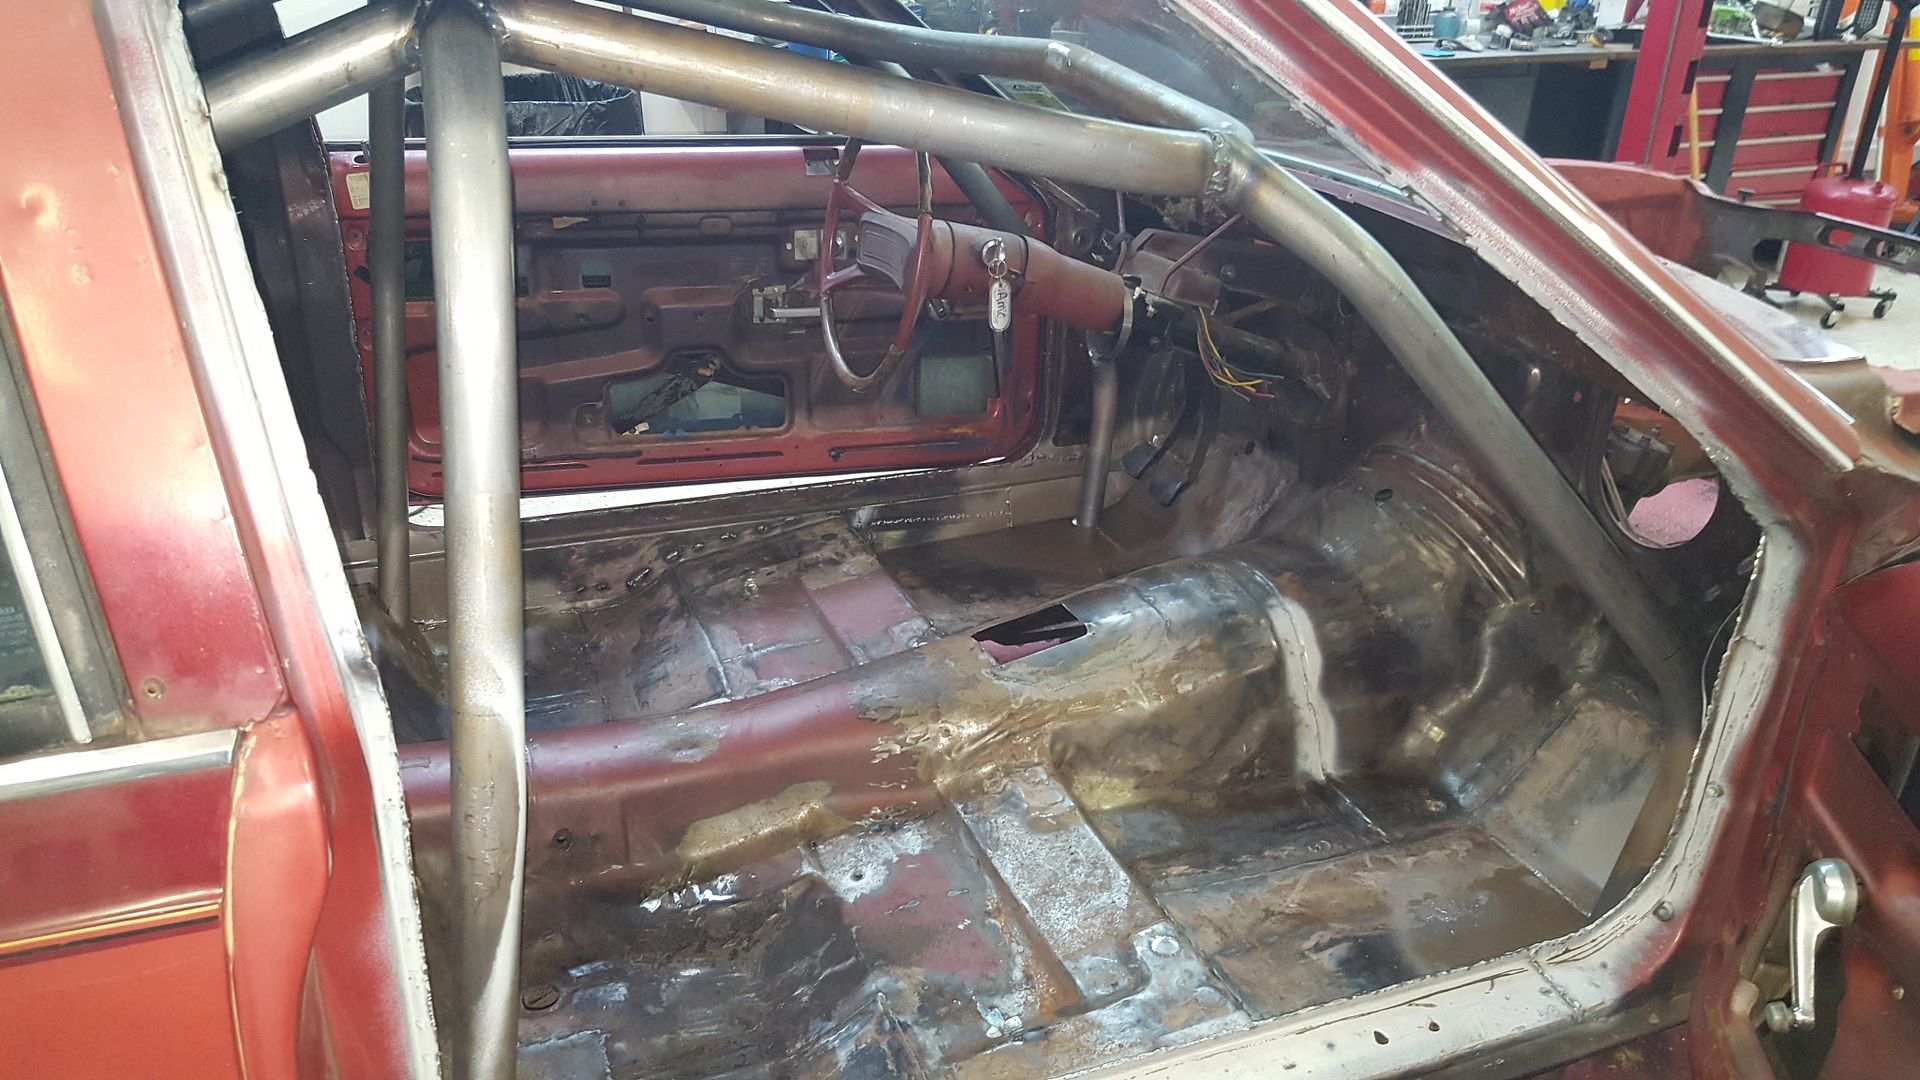 [/URL]
I stopped taking pictures around here, because it was just more welding. But heres a picture of the third sweeping of the night.
[URL=http://s54.photobucket.com/user/dusterbd13/media/amc/20170101_011246_zpssjwmgjz9.jpg.html]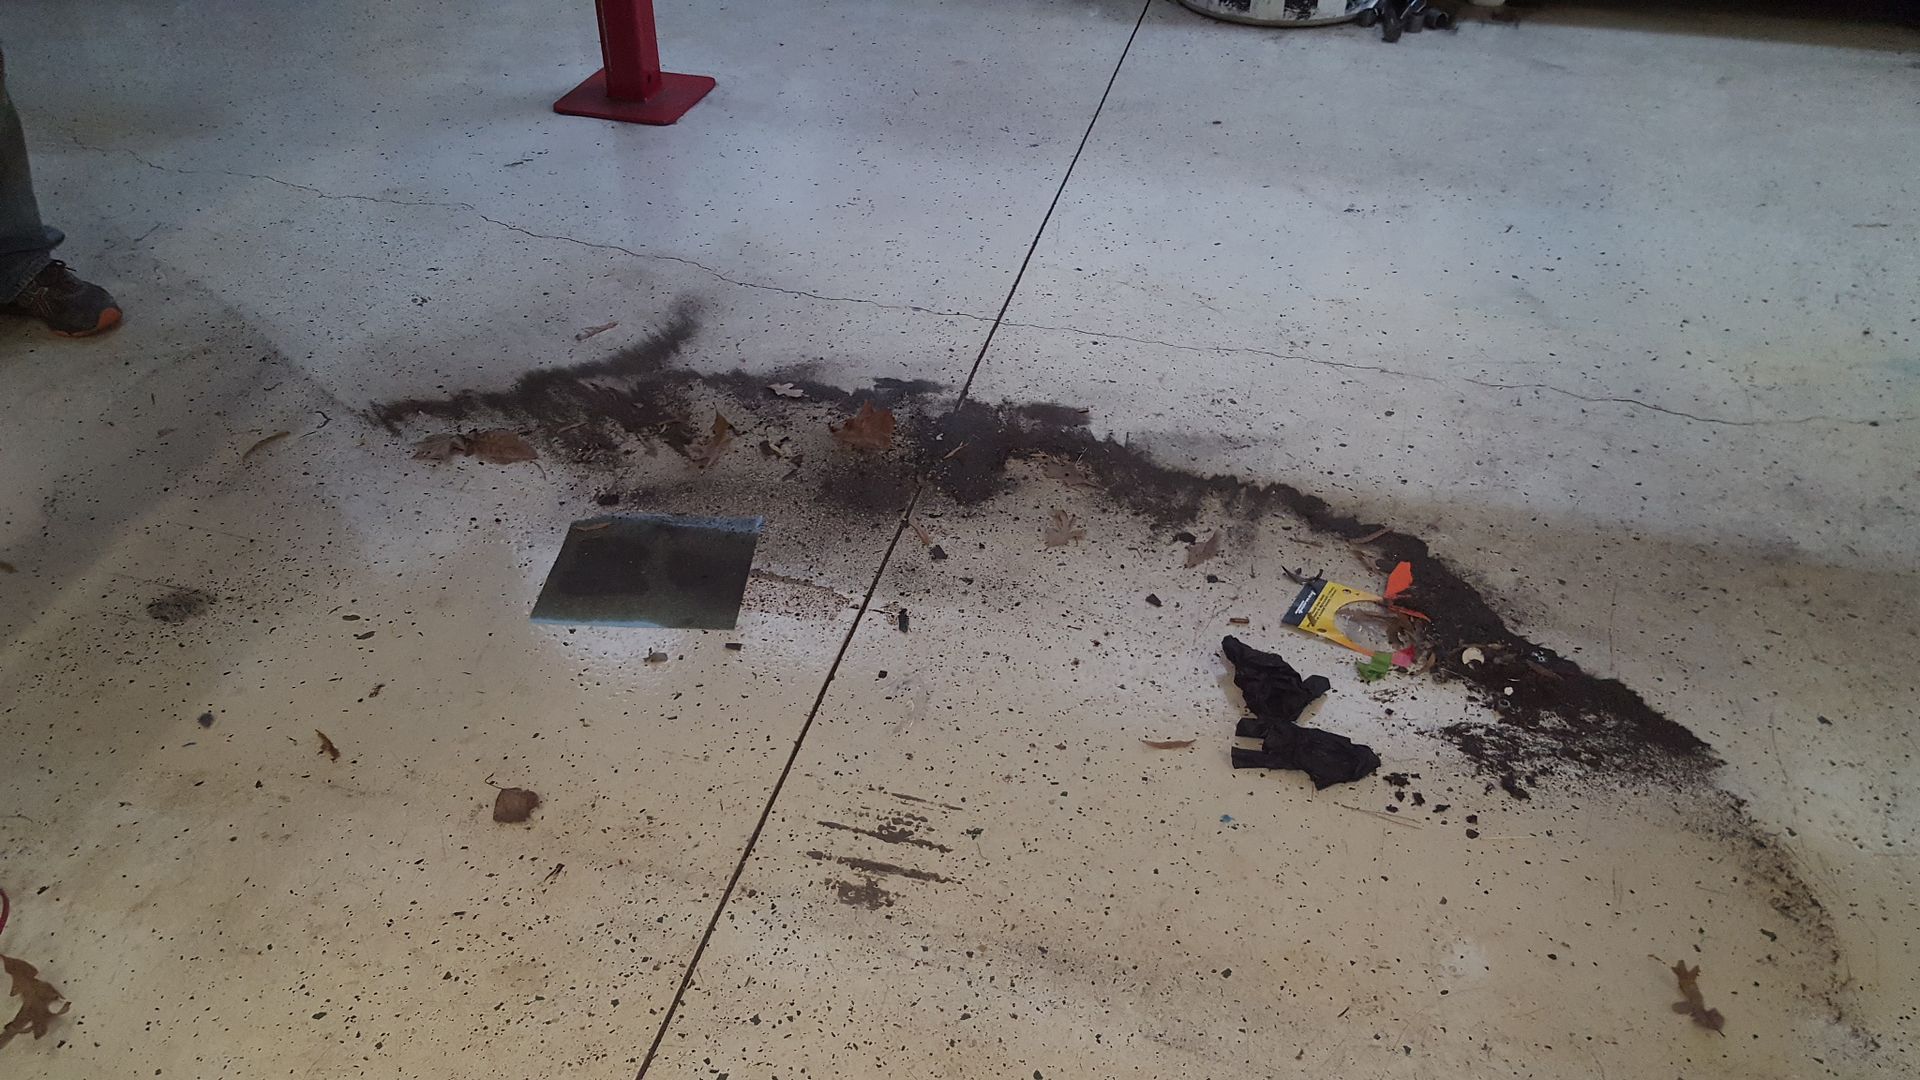 [/URL]
We cleaned shop, and called it a year.
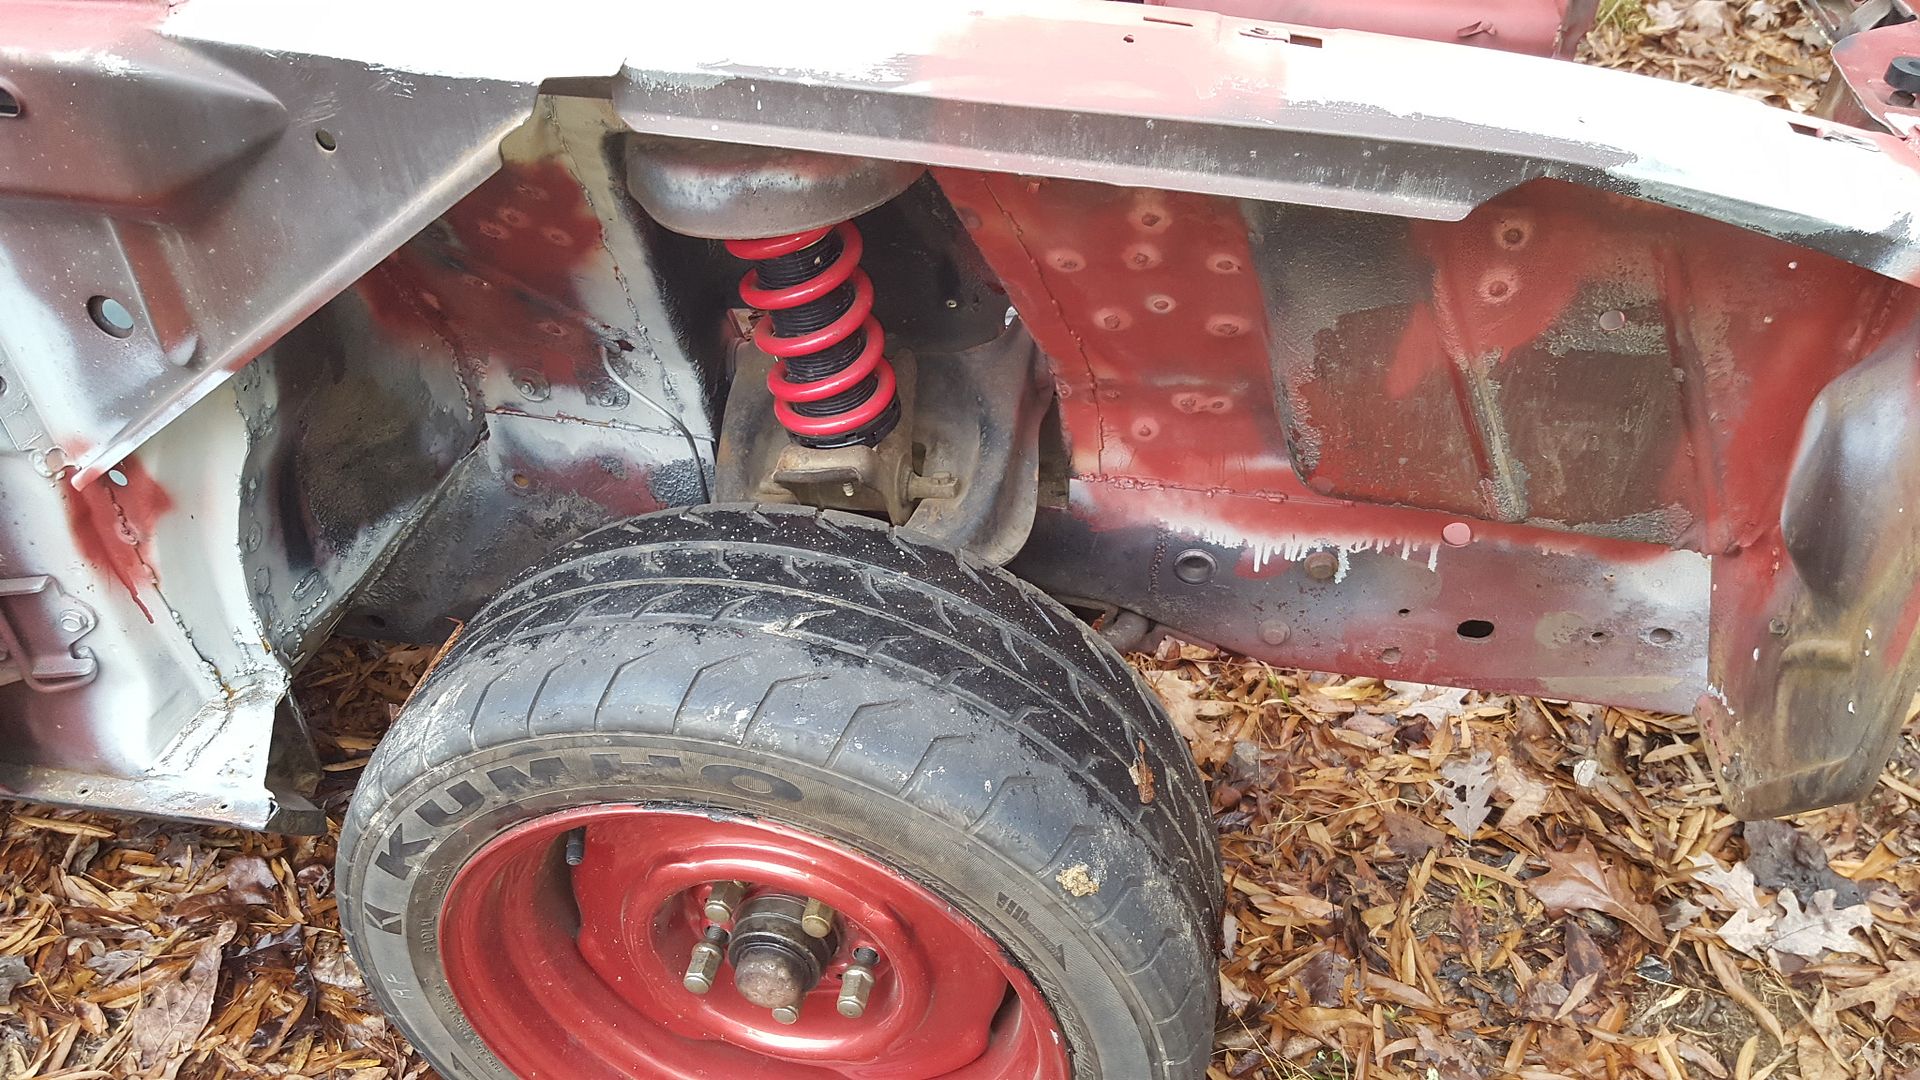
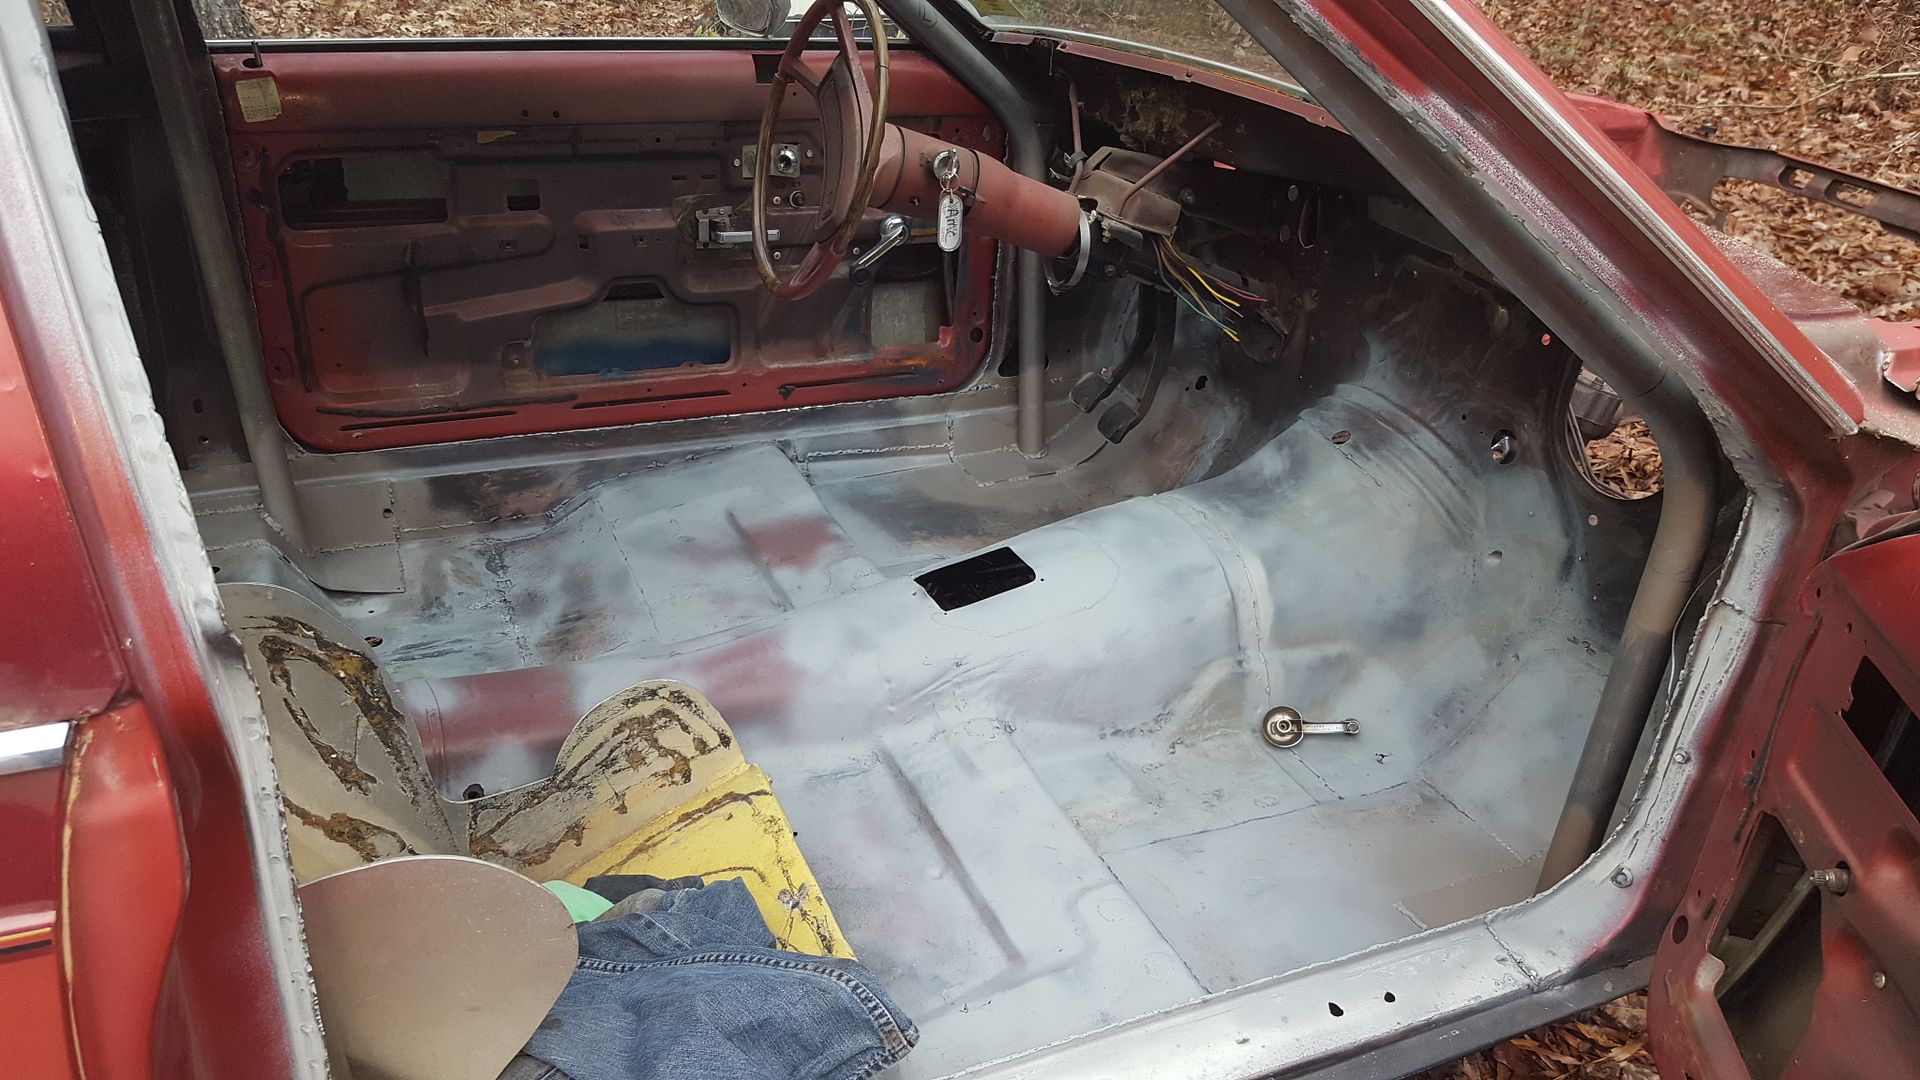
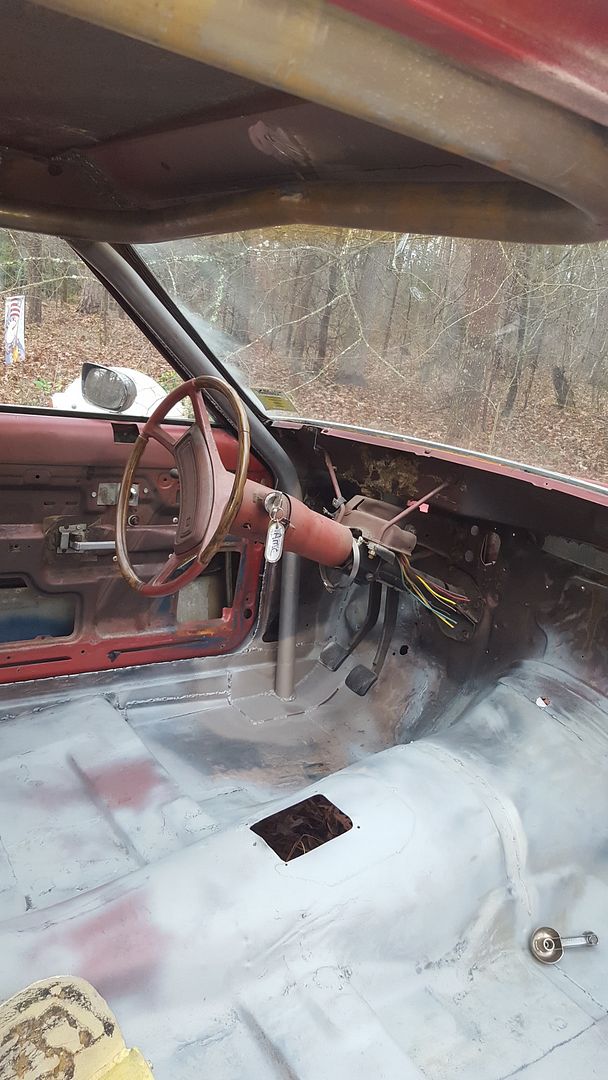
Heres where we left off in the wee hours of 2017.
[URL=http://s54.photobucket.com/user/dusterbd13/media/amc/20170101_143905_zpsuvrzl1ci.jpg.html]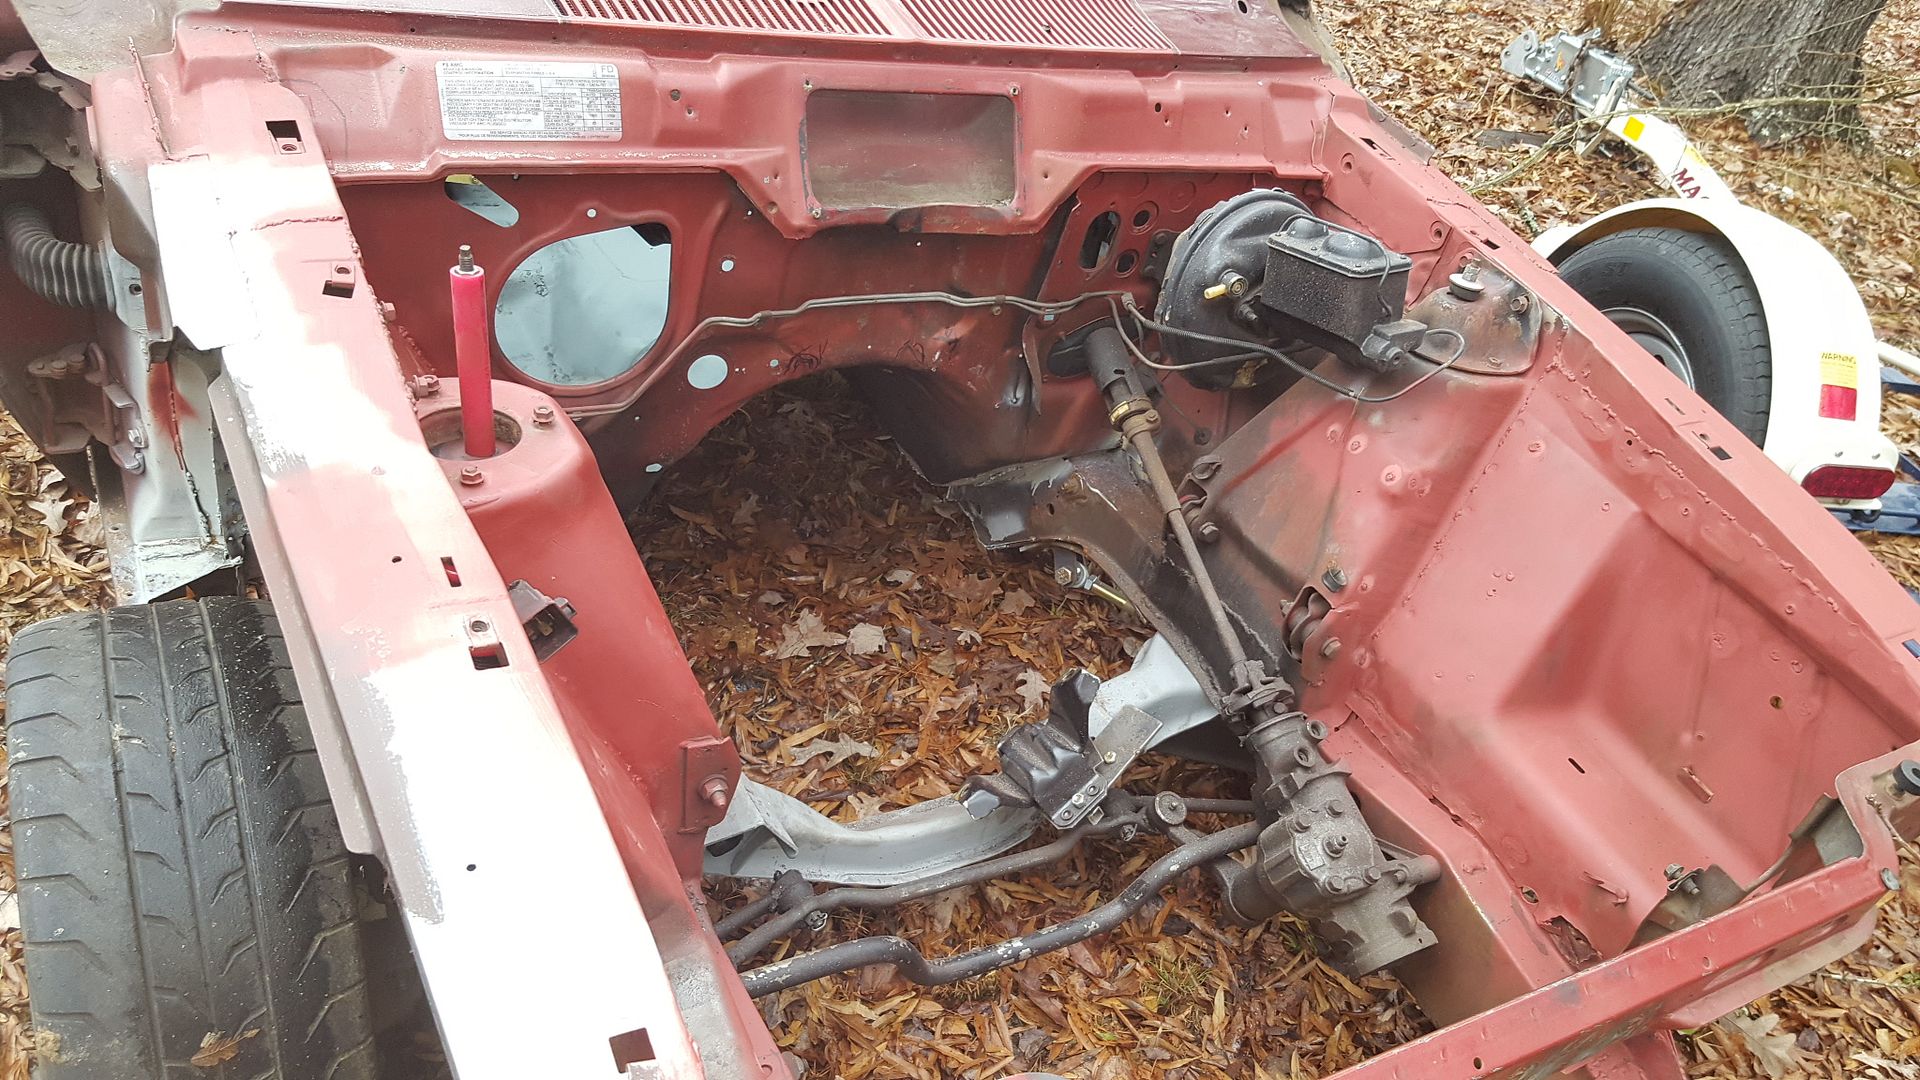 [/URL]
[URL=http://s54.photobucket.com/user/dusterbd13/media/amc/20170101_143911_zpsq17pbdag.jpg.html]
 [/URL]
[URL=http://s54.photobucket.com/user/dusterbd13/media/amc/20170101_143921_zpswoalbprx.jpg.html]
 [/URL]
[URL=http://s54.photobucket.com/user/dusterbd13/media/amc/20170101_143933_zpshqflr8o6.jpg.html]
 [/URL]
[URL=http://s54.photobucket.com/user/dusterbd13/media/amc/20170101_143940_zpsomoqlvfc.jpg.html]
 [/URL]
[URL=http://s54.photobucket.com/user/dusterbd13/media/amc/20170101_143944_zpswlvai2bx.jpg.html]
 [/URL]
[URL=http://s54.photobucket.com/user/dusterbd13/media/amc/20170101_143950_zpsrunwhu3h.jpg.html]
 [/URL]
[URL=http://s54.photobucket.com/user/dusterbd13/media/amc/20170101_144008_zpswozyco30.jpg.html]
 [/URL]
[URL=http://s54.photobucket.com/user/dusterbd13/media/amc/20170101_144015_zpsfqnra1bd.jpg.html]
 [/URL]
[URL=http://s54.photobucket.com/user/dusterbd13/media/amc/20170101_144023_zpsc2ng8xg1.jpg.html]
 [/URL]
Challenge Budget: Car/parts $200
Donor Lincoln town car: 410
Engine crossmember: 120
Sold transmission crossmember from Lincoln: 10 Sold rear axle from lincoln: -50 Scrapped what was left of lincoln: -89
trans cooler: 2
Engine swap: 5.0 plus 300 boot
Sold kelstar wheels-200 (cant recoup more than we spent)
2x2 angle iron, tractor supply 12.05
Brand new Watkins glen nascar slicks and wheels, which were bought for $50, and promptly sold to Dallas dad for $50 and some weld wheels with really old drag slicks. So, slicks were $0, but $50 taken out of the recoup limit.
$5 grant wheel and hub (smaller diameter wheel gives more feedback. Well see if it stays.
BOOM TUBES!!!! ($25, with brackets)
6 5/8 heim and jamb nuts, as well as threaded tube for the front suspension: $65
Pair of aluminum seats, $40.
Sheet of flame retardant high density foam $10
Fire suppression system parts (not included in challenge budget. But ive had 2nd degree burns on the boys before, so were getting safety gear come hell or high water)
Long tube headers for 66-67 mustang 10
Solid steel lowering blocks, with the holes drilled to offset the rear axle rearwards. $5
1/4 plate, scrap metal yard: 7.50
Mustang convertible mounts 22
Bending plate cost 25
Swedged tubing, ebay: 31.90
Threaded adjusters and 650lb springs, SRI performance: 65
4 used billstein shocks, pull-a-part: 28
Cage materials: 271.40
Spool welding wire: 33
Leaf spring sliders: 40
Gauge cluster: 32 ebay
New challenge budget total: 1410.85
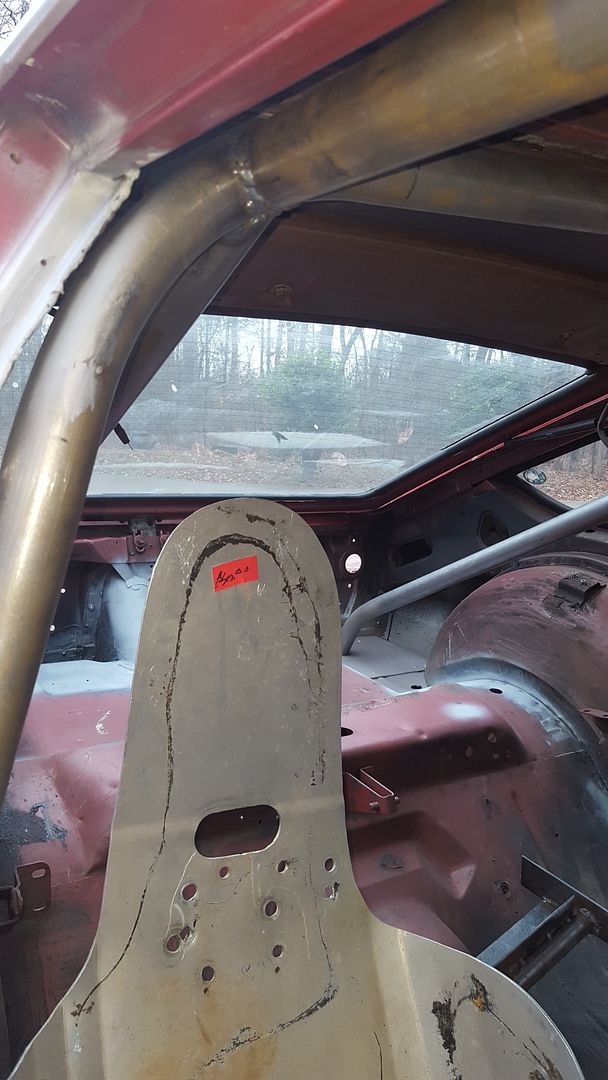
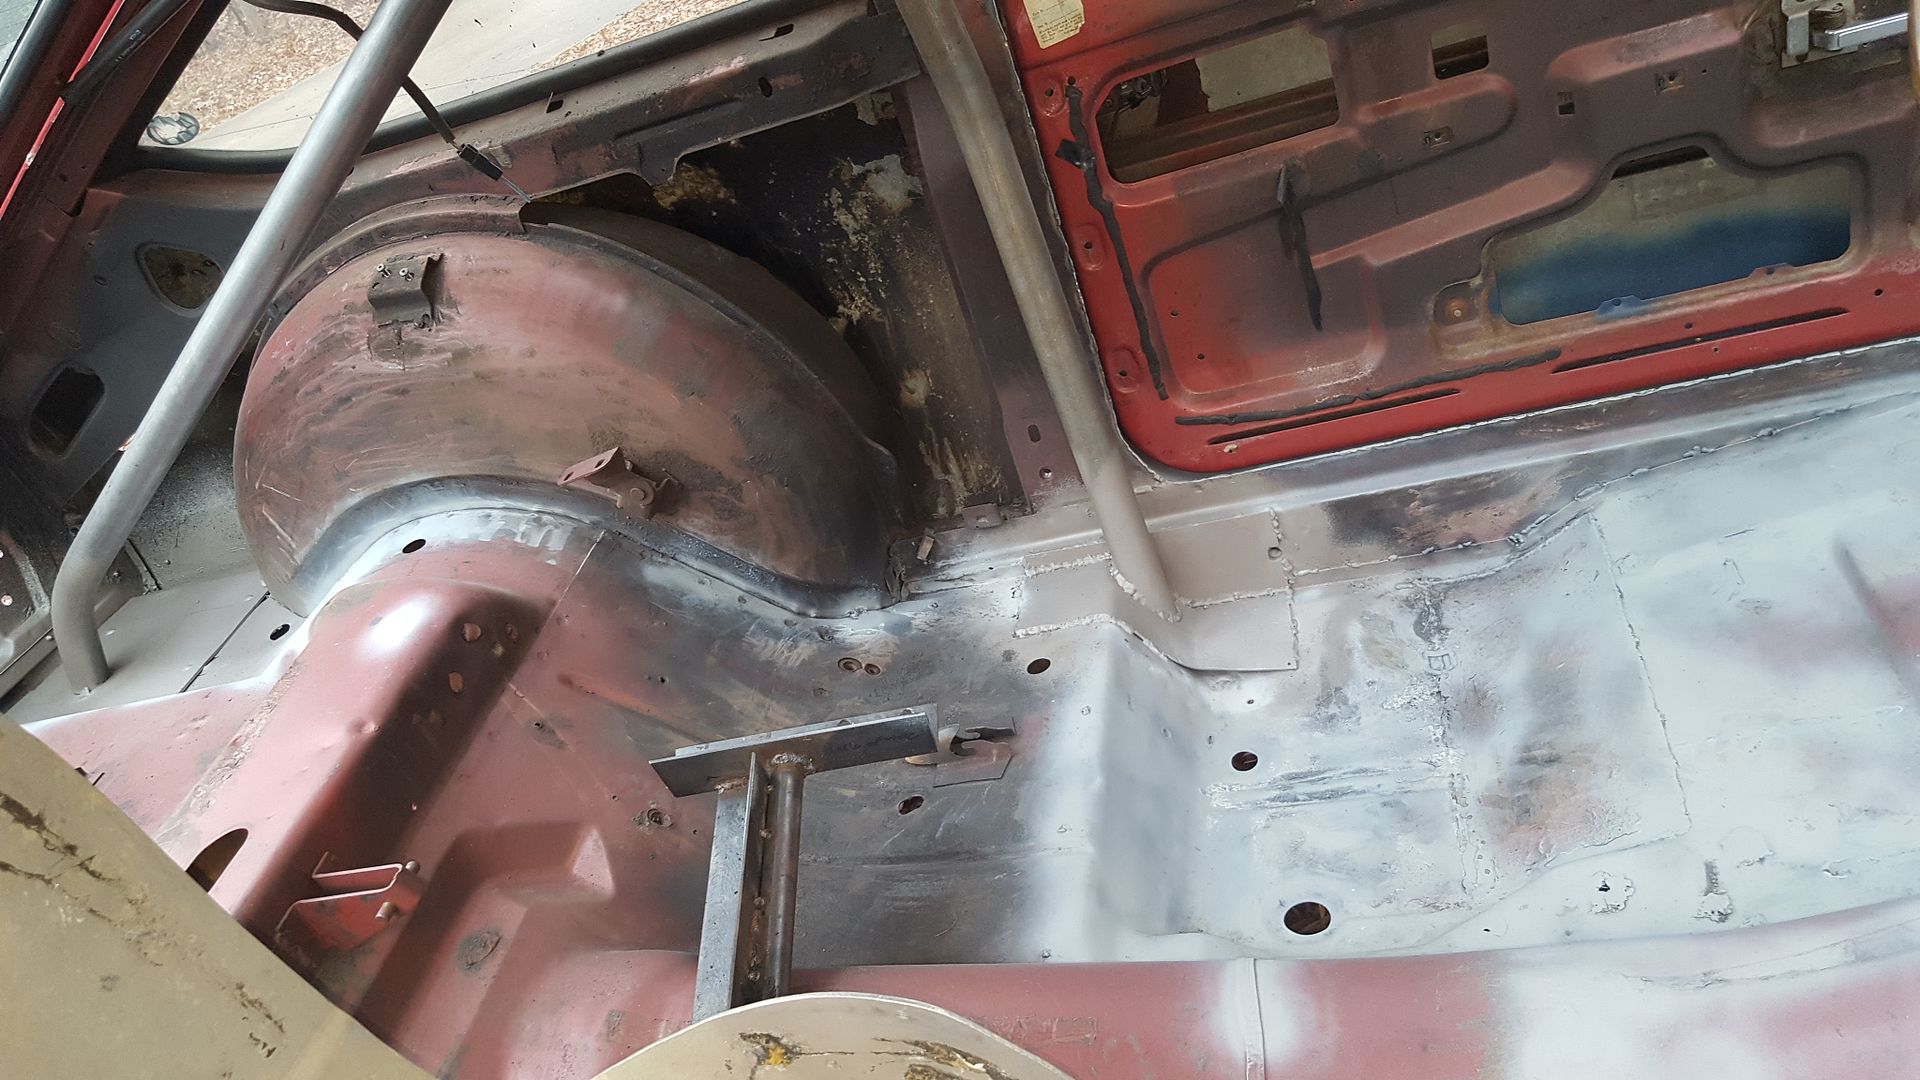
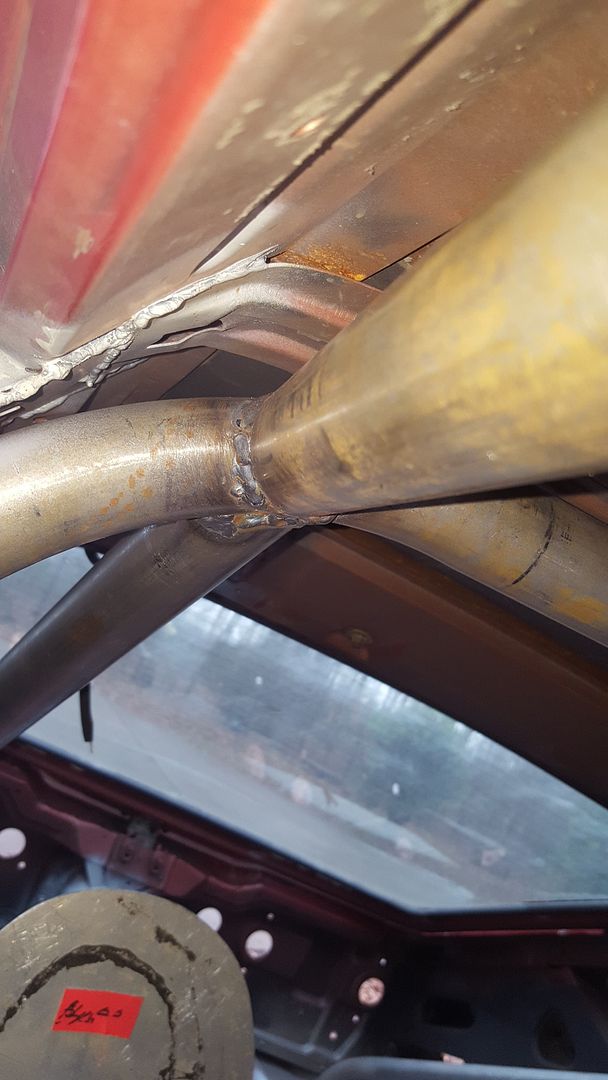
SHORT VERSION: Where we got to this time is all 8 points on the cage, most holes filled, rust repaired, and front suspension figured out. Also, insanely low ride height.
LONG VERSION:
Friday night, dallas and I got a late start. Between work, etc, it just didnt happen.
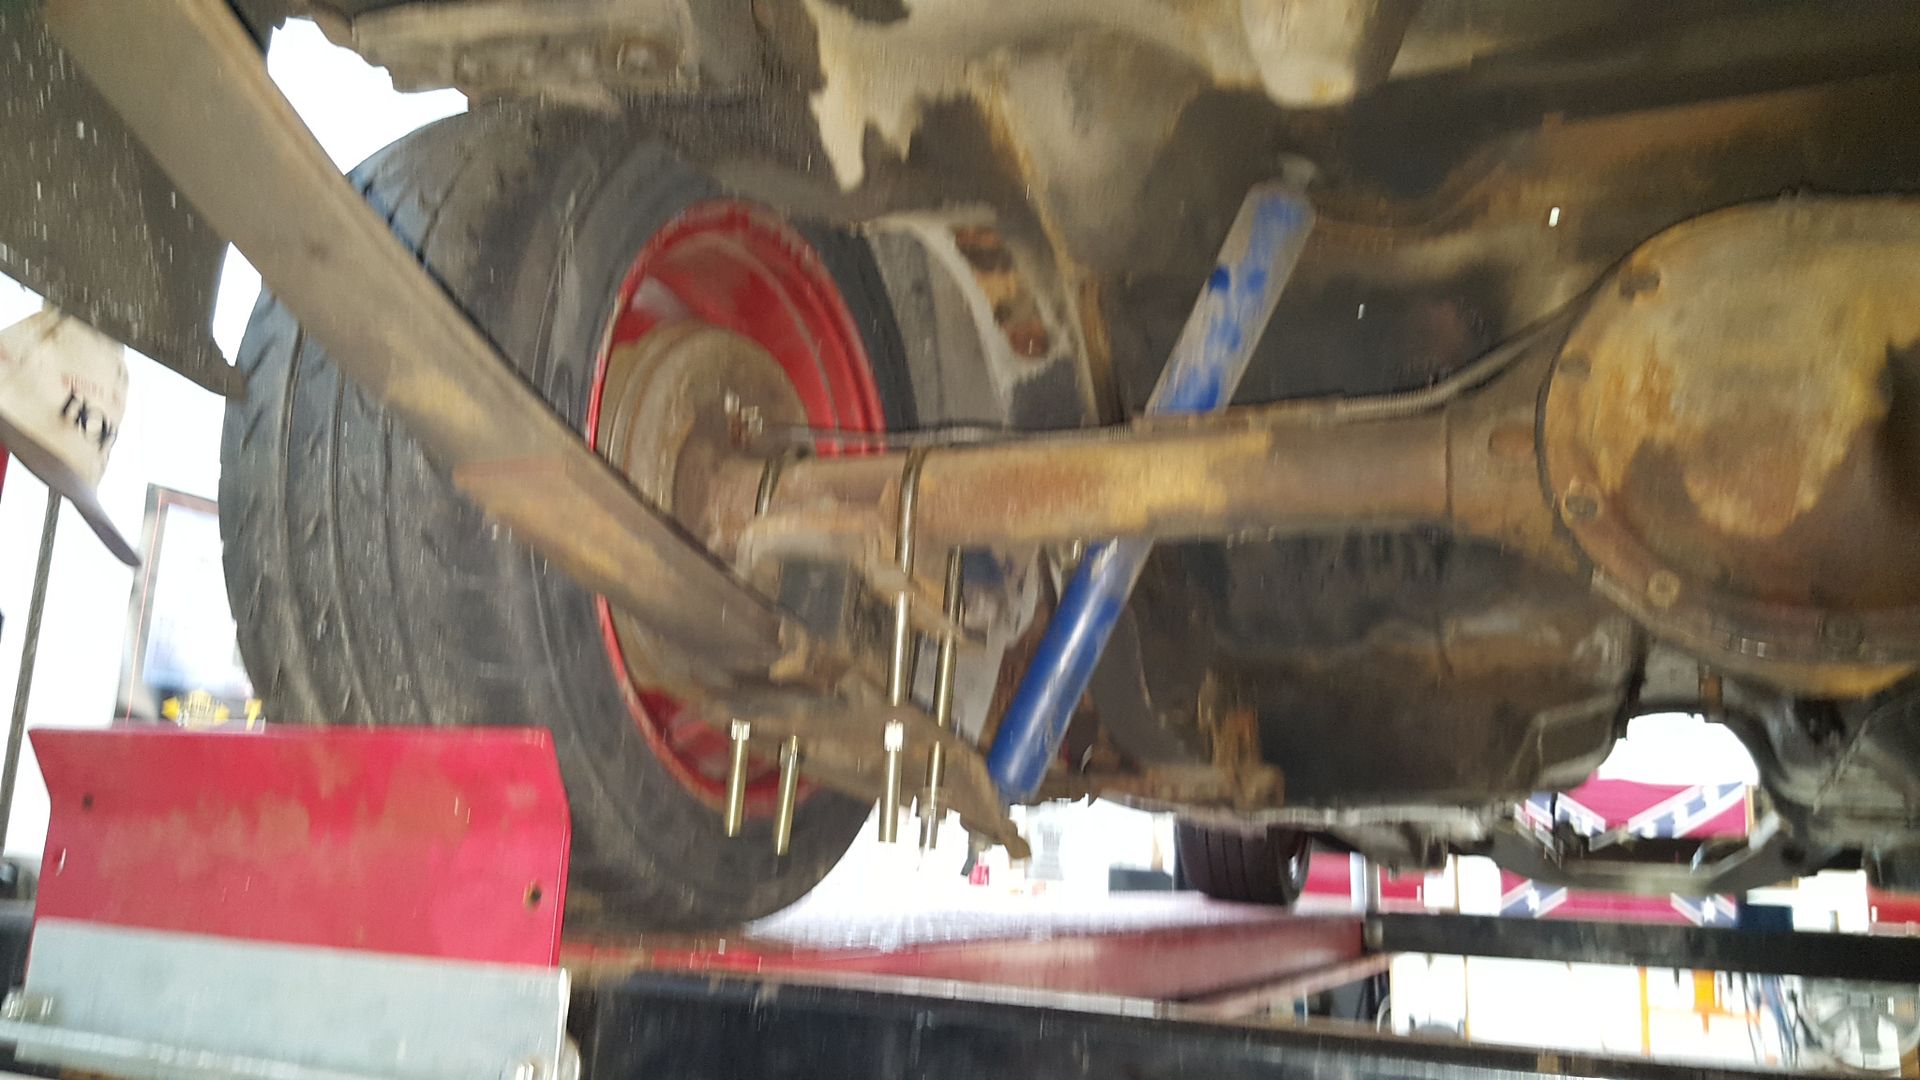
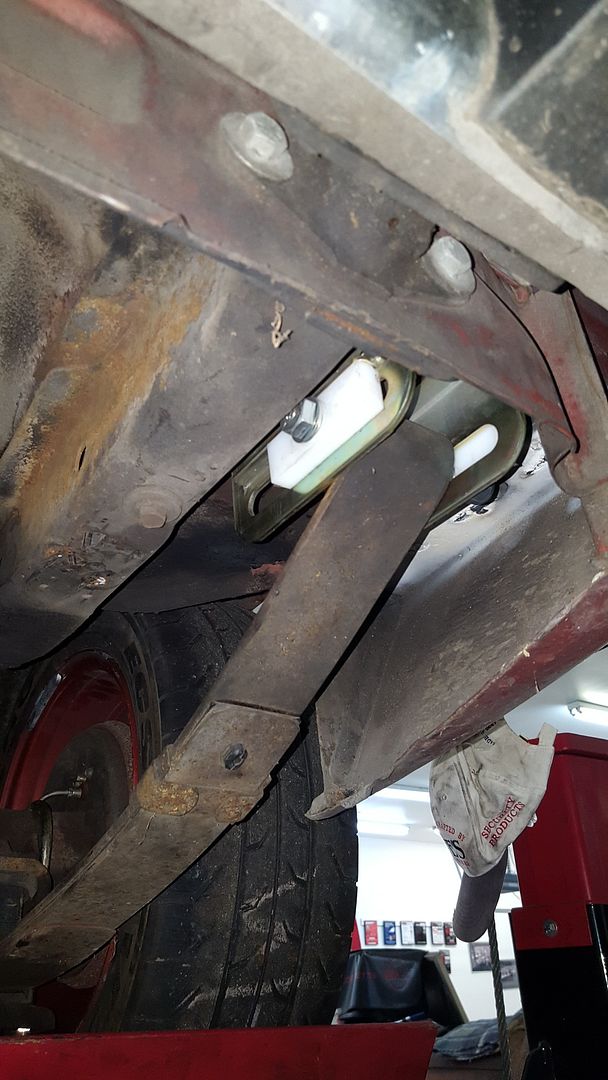
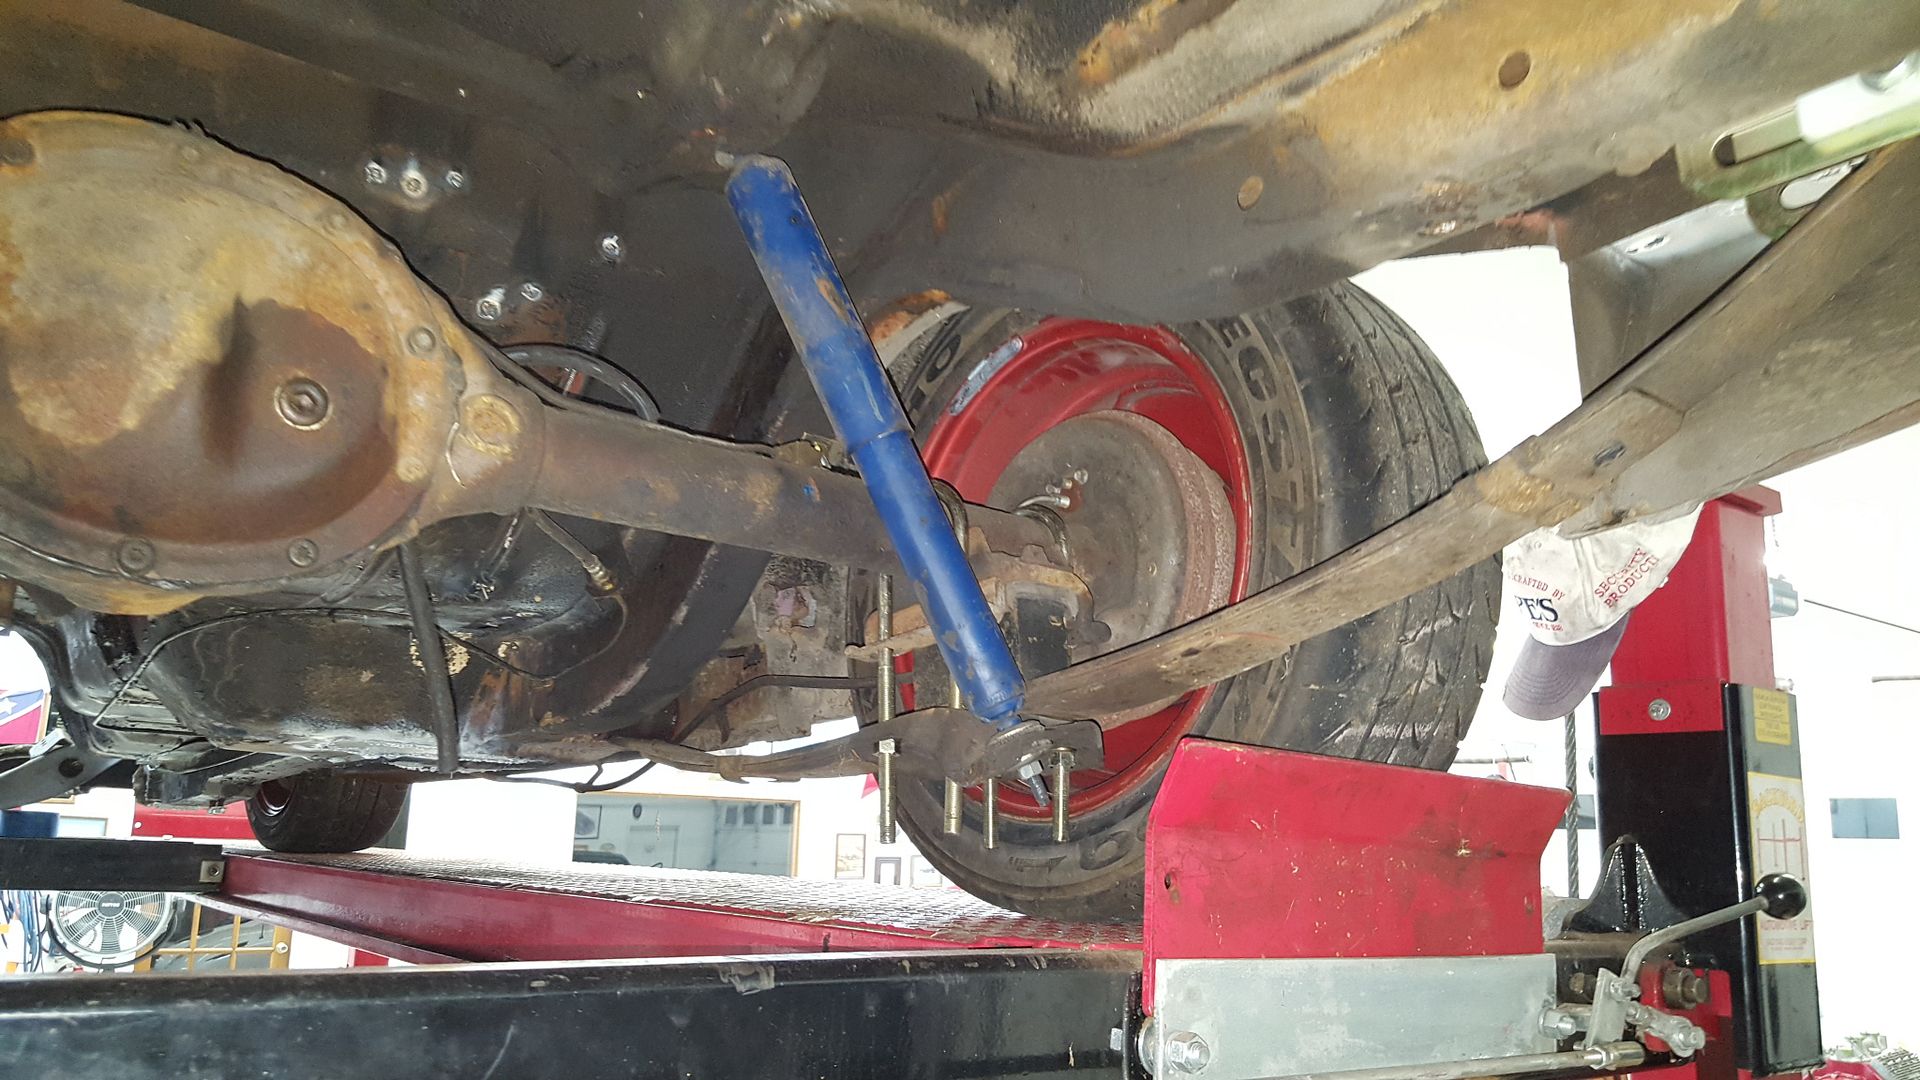
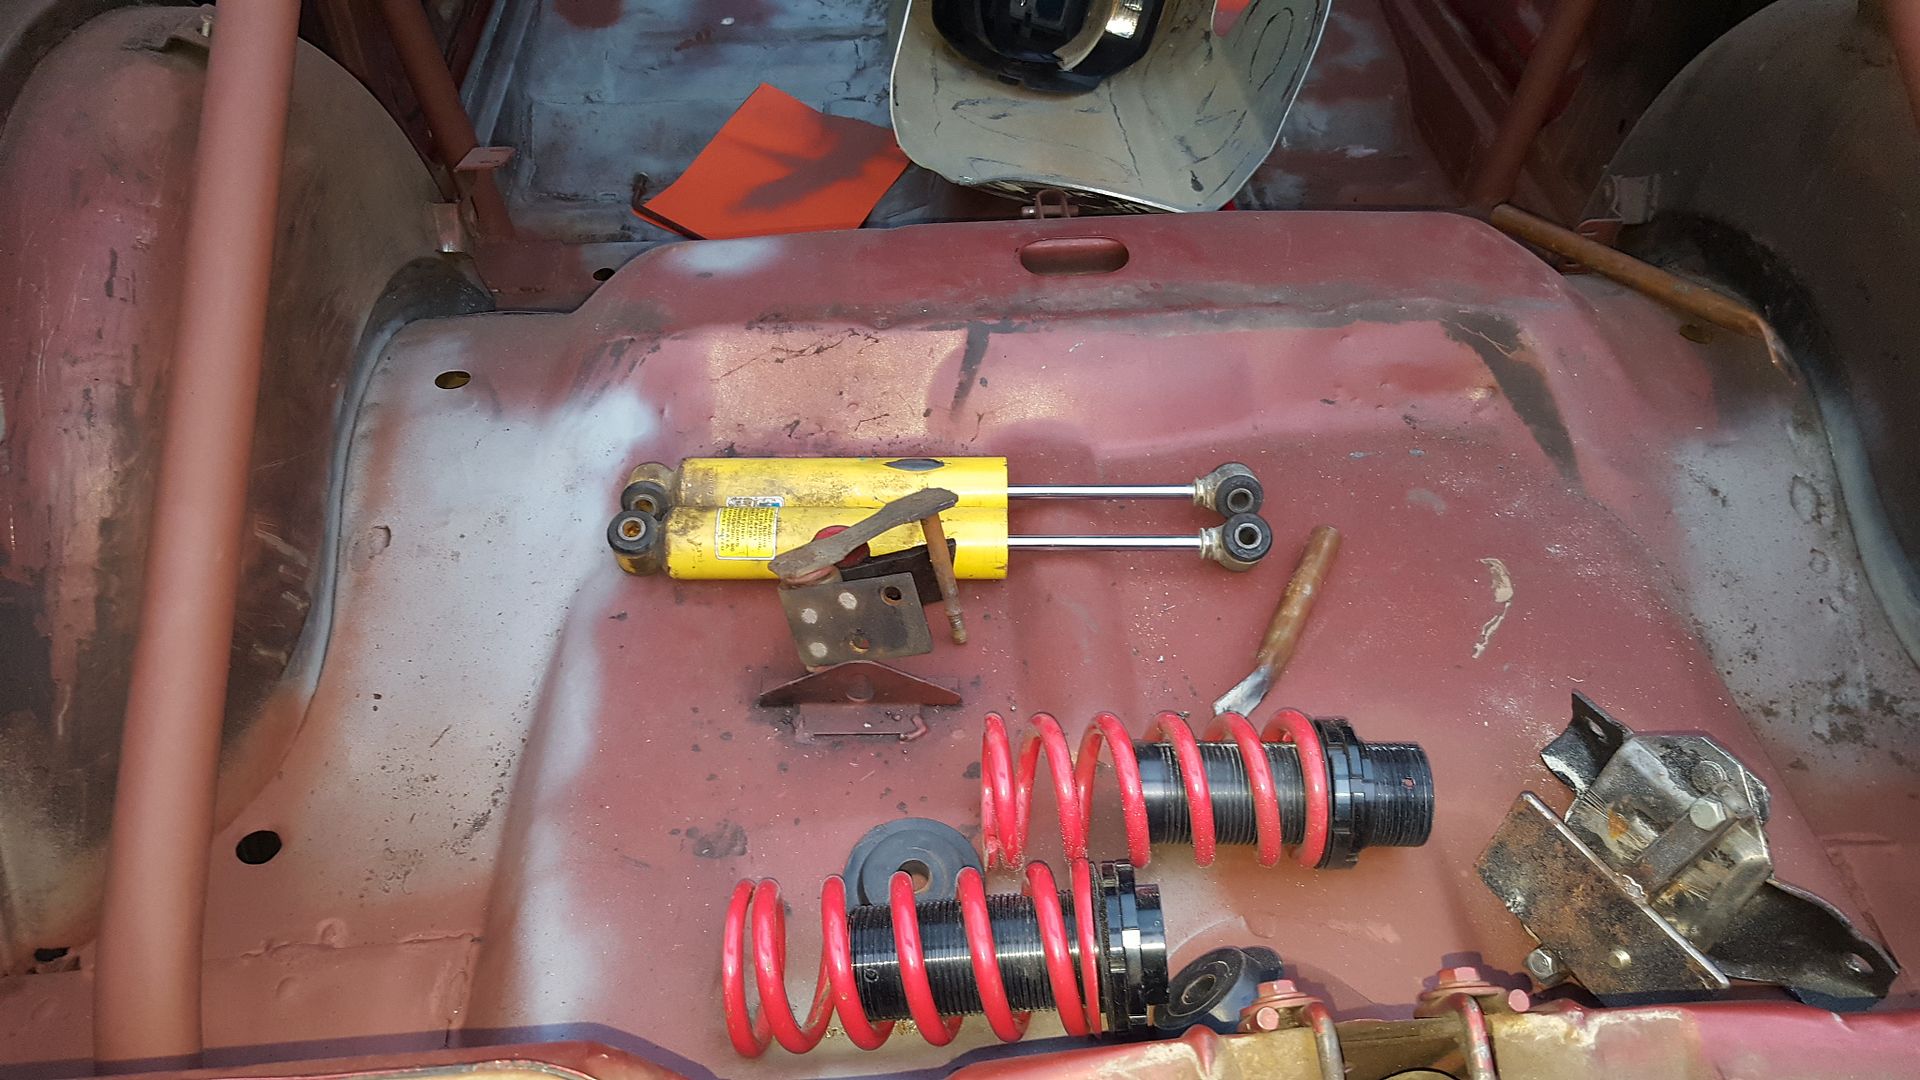
But our goal was to get the suspension mostly sorted out. On the rear, we decided that we are staying leaves for simplicity and cost. We looked at truck arms, 3 link, and all the other options. But leaves won out for out purpose. So, we picked up a set of leaf spring sliders that were briefly used on a street car, but were deemed too noisy. These serve to free up the rear suspension movement, make the rear susupension more consistent, replace the rotted and bent shackles, and lower it. We also finally put in the $5 lowering blocks from the autofair. Found that the car already had 1 inch blocks in it, and that the isoclamp system was fully intact. To eliminate the isoclamp is going to take some light fab work, and bring the back of the car up about 1/2 inch. We haven't done that yet. We also need to get new u-bolts, as the free used ones had one strip out on me. Dammit. I'm also debating rear shocks. The unknown blue ones on the back seem good enough at this point, and fit. The suburban bilstein shocks I have will require fab work. Well see what we think when it gets tested.
[URL=http://s54.photobucket.com/user/dusterbd13/media/amc/20170115_012607_zpsfkny3ctb.jpg.html]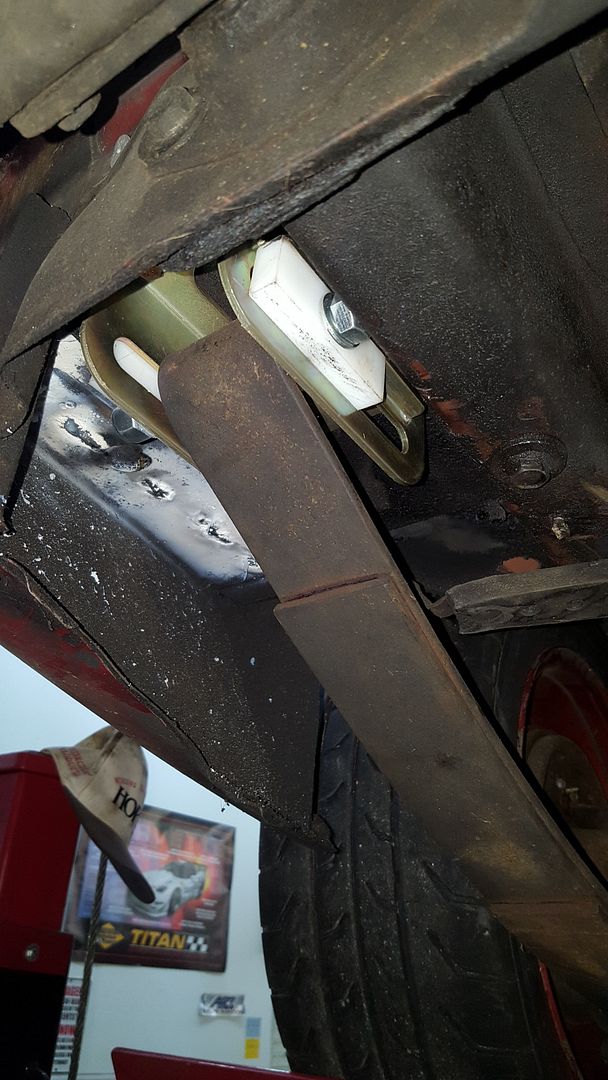 [/URL]
[URL=http://s54.photobucket.com/user/dusterbd13/media/amc/20170115_012543_zpst80ph75c.jpg.html]
 [/URL]
[URL=http://s54.photobucket.com/user/dusterbd13/media/amc/20170115_012559_zpscqcxlolu.jpg.html]
 [/URL]
[URL=http://s54.photobucket.com/user/dusterbd13/media/amc/20170115_012548_zps3ip1jvky.jpg.html]
 [/URL]
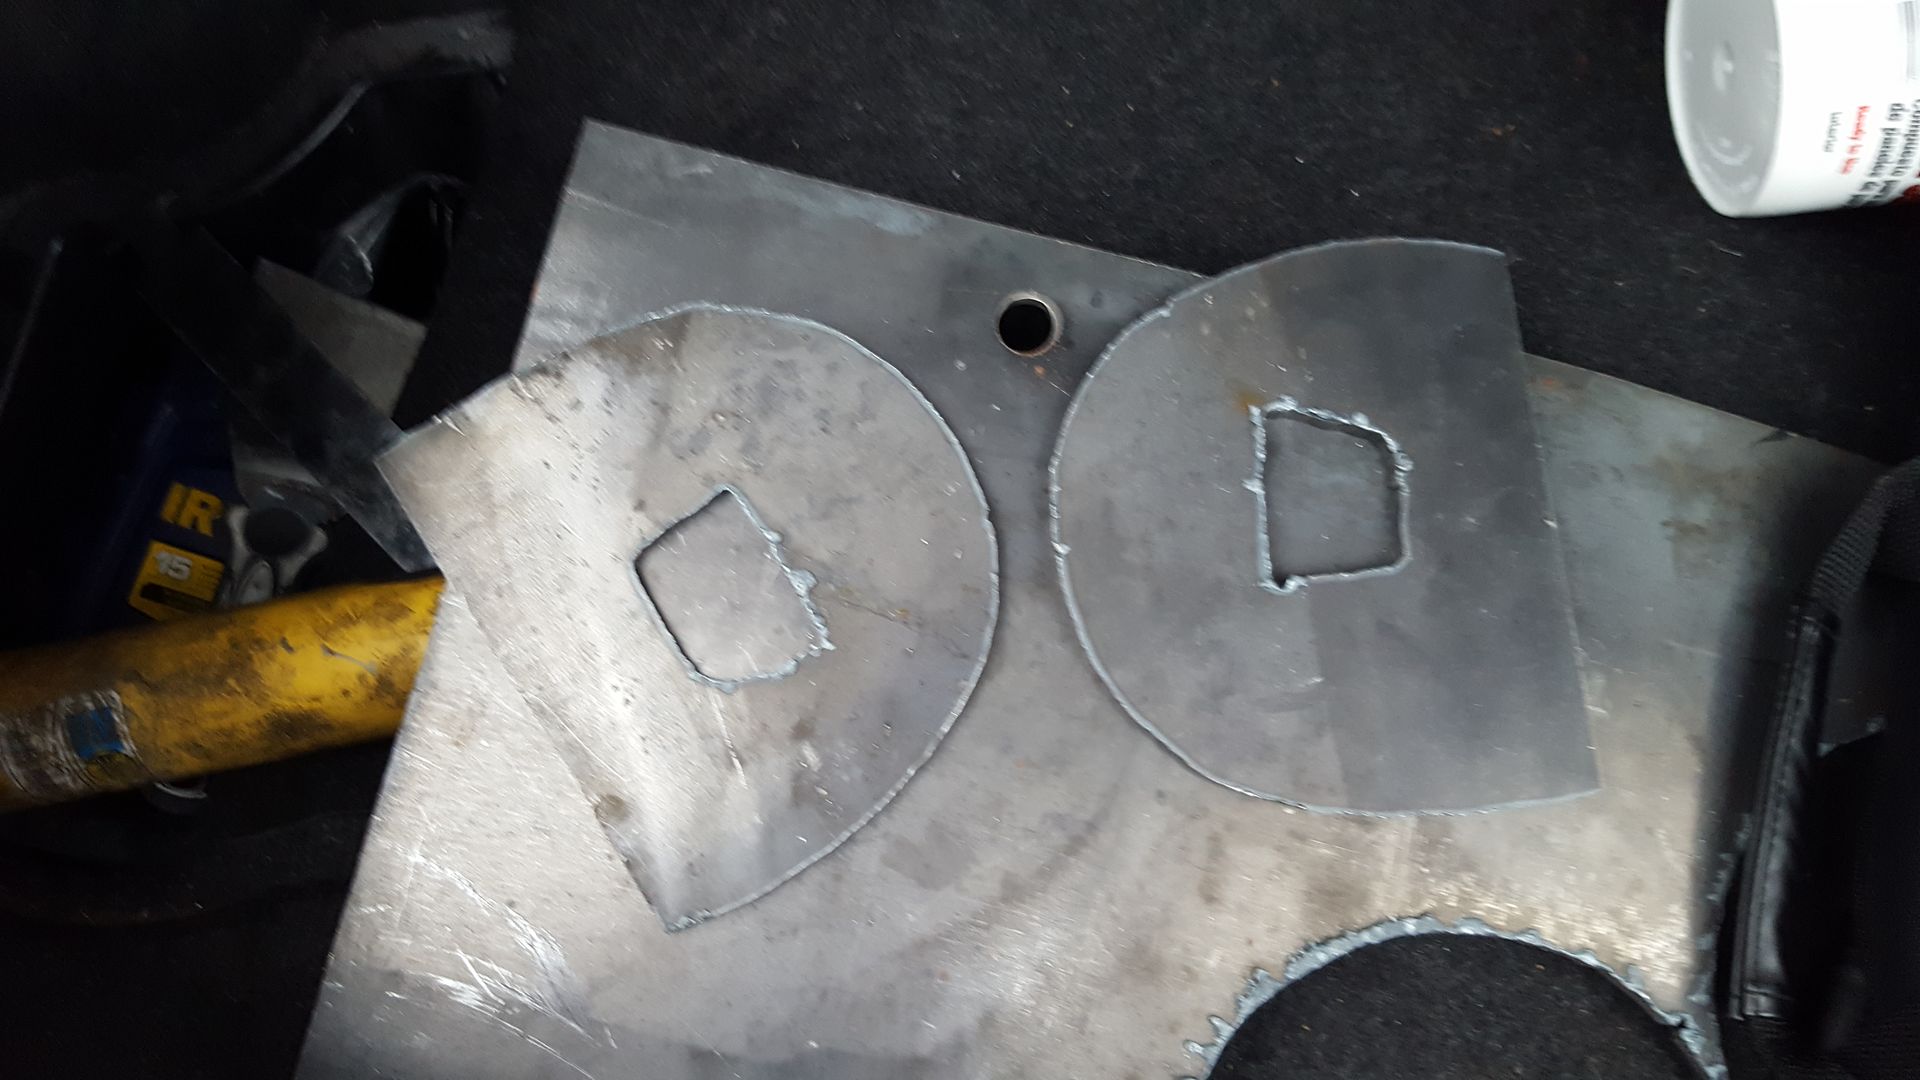
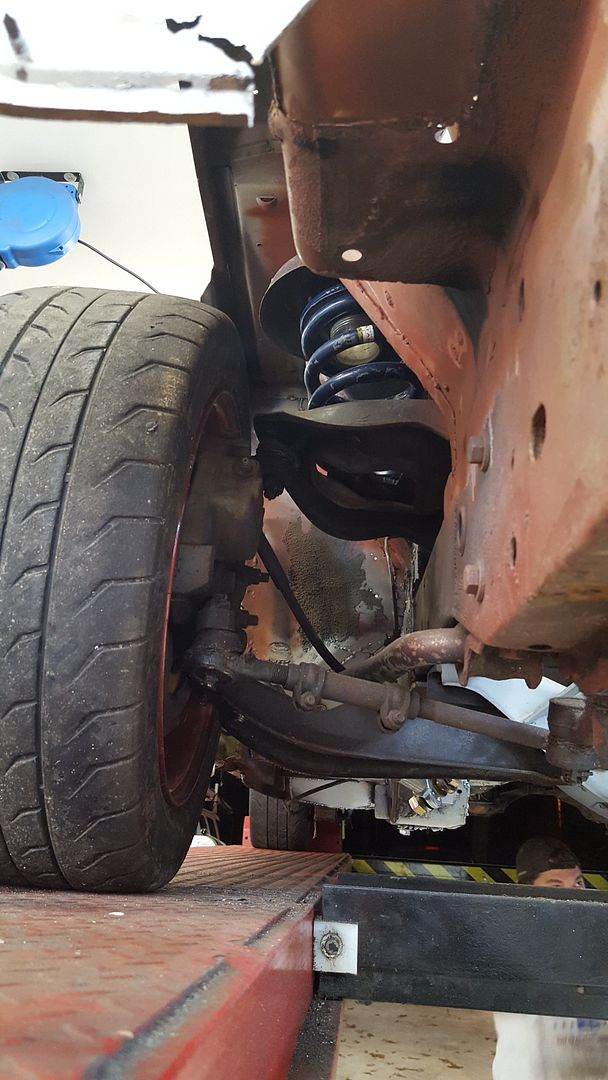
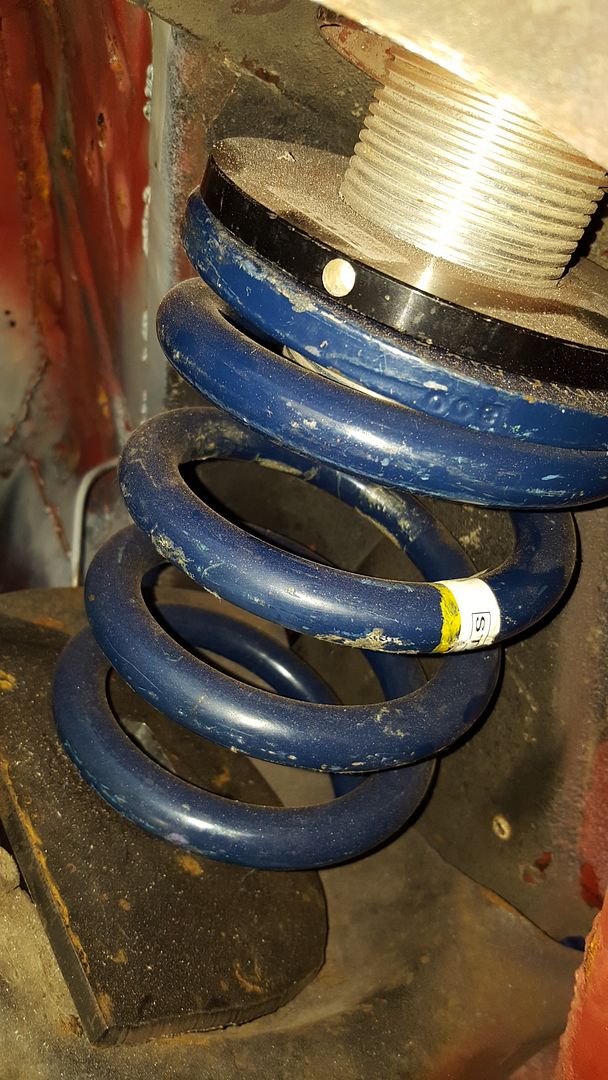
We then moved on to the front. Using the coils and adjusters, along with the 1/4 inch plate and 4x4 suburban bilstein shocks, we came up with a good solution. Should give us the ability to corner weight, readily available circle track springs (650in/lb to start), and a readily available shock design all while reducing weight. At least in theory. Still have some welding to do, and a few little parts to get, but rolling right along.
[URL=http://s54.photobucket.com/user/dusterbd13/media/amc/20170102_162909_zps9yfwhe3s.jpg.html]
 [/URL]
[URL=http://s54.photobucket.com/user/dusterbd13/media/amc/20170115_012321_zpshpkqwyl7.jpg.html]
 [/URL]
[URL=http://s54.photobucket.com/user/dusterbd13/media/amc/20170116_171528_zpslqbtnybg.jpg.html]
 [/URL]
[URL=http://s54.photobucket.com/user/dusterbd13/media/amc/20170116_171512_zps0uh1aqgh.jpg.html]
 [/URL]
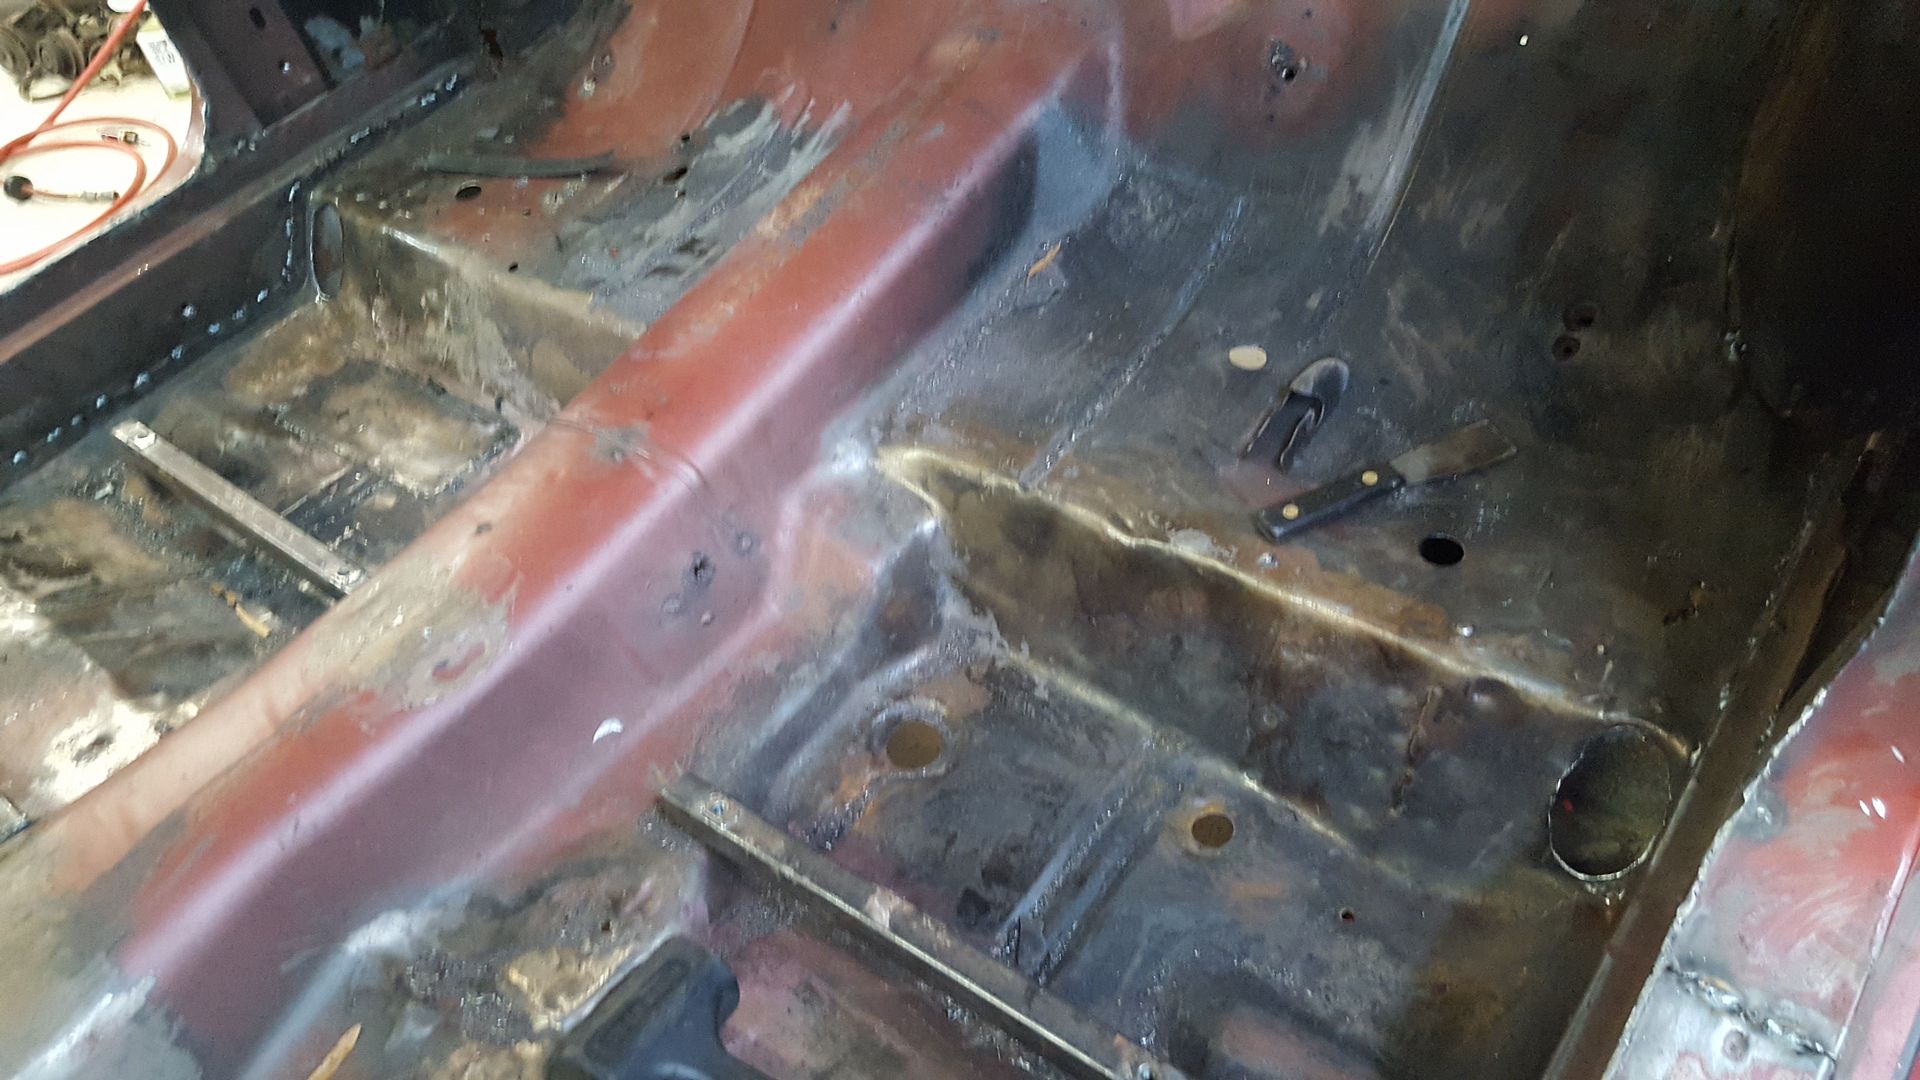
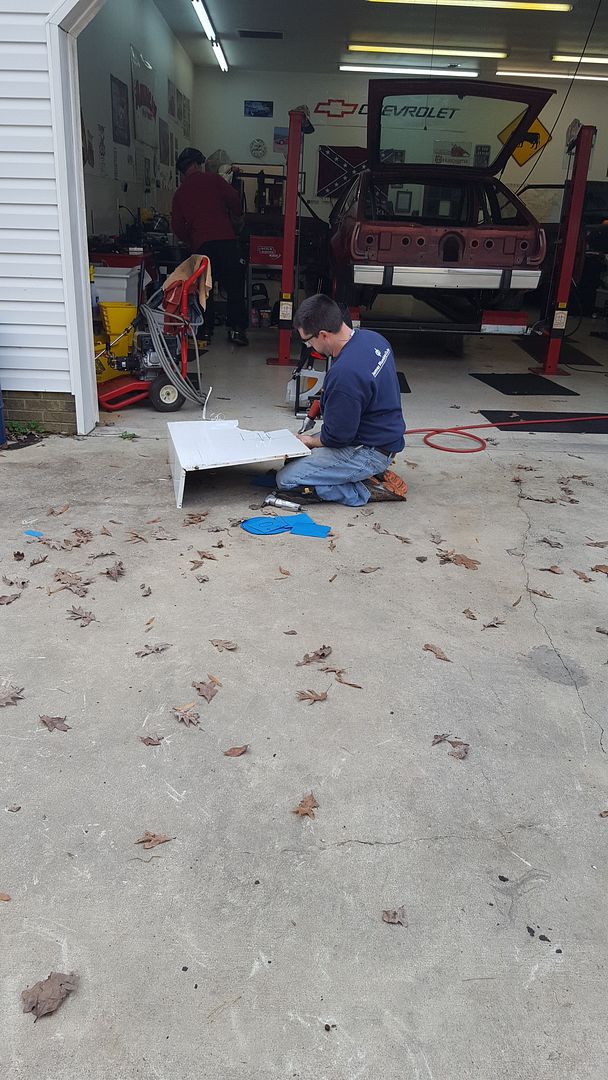
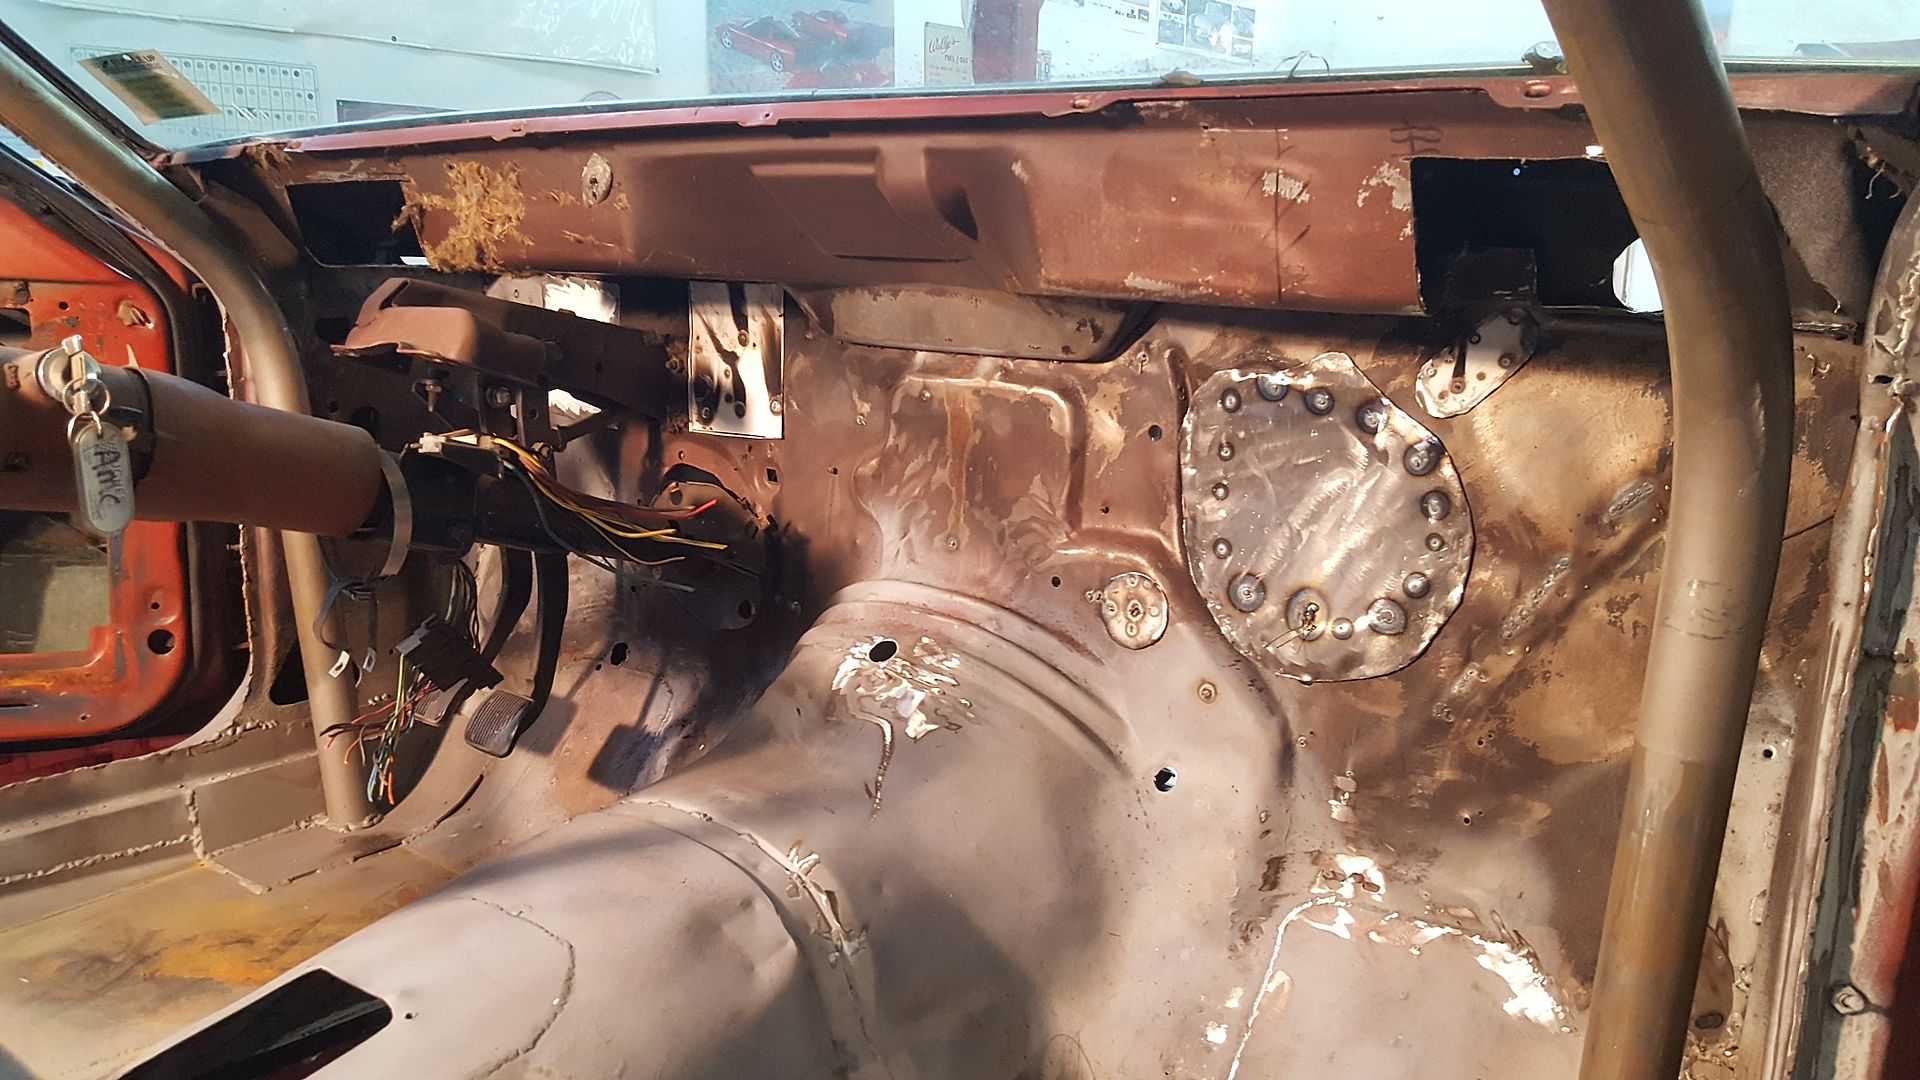
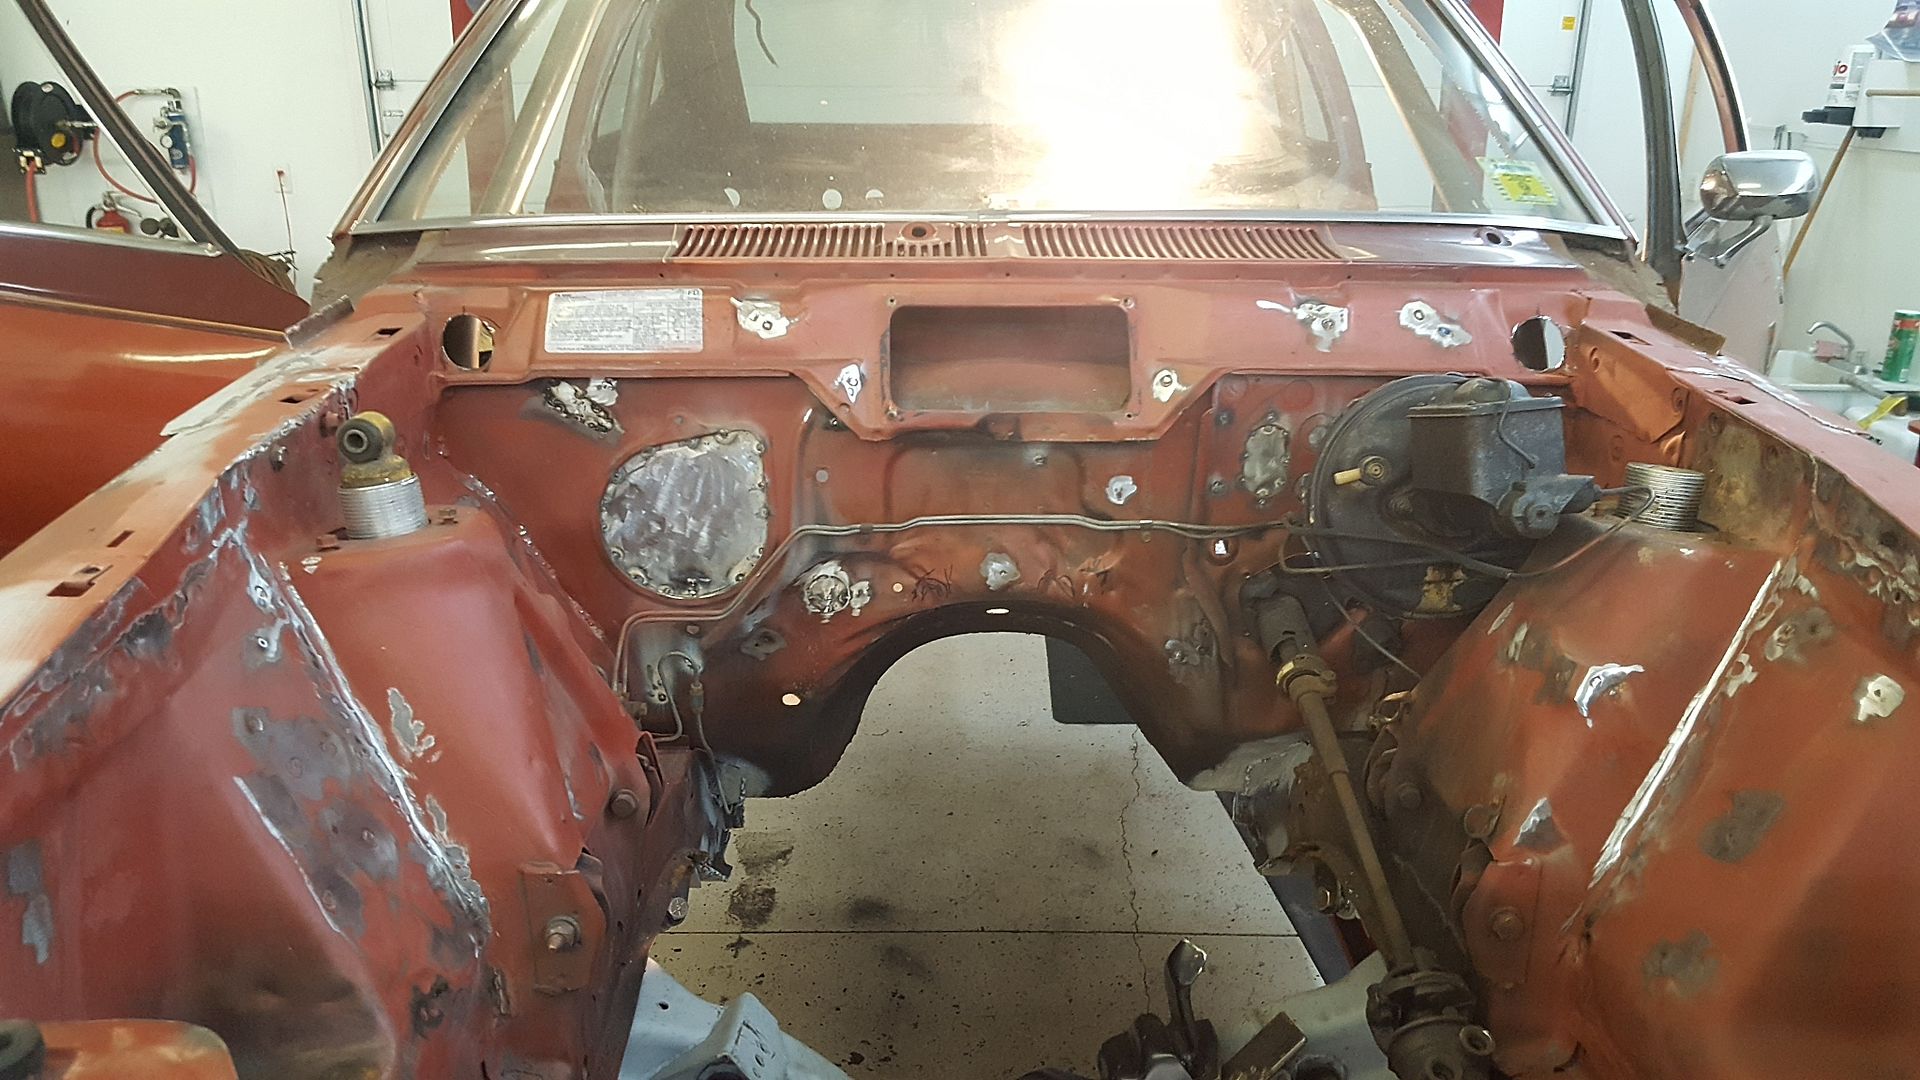
So, Saturday morning saw me and dallas back at it, making firewall hole plugs, welding up holes in the floorpan and sheetmetal, etc. Steve joined us after lunch, and got cracking on finishing the cage after swapping out the welder spool. We have officially used 10lbs of wire on this thing.
So, dallas got the water heater metal from behind the building, some CAD supplies, and went to work.
[URL=http://s54.photobucket.com/user/dusterbd13/media/amc/20170114_153342_zps1bqtjmsk.jpg.html]
 [/URL]
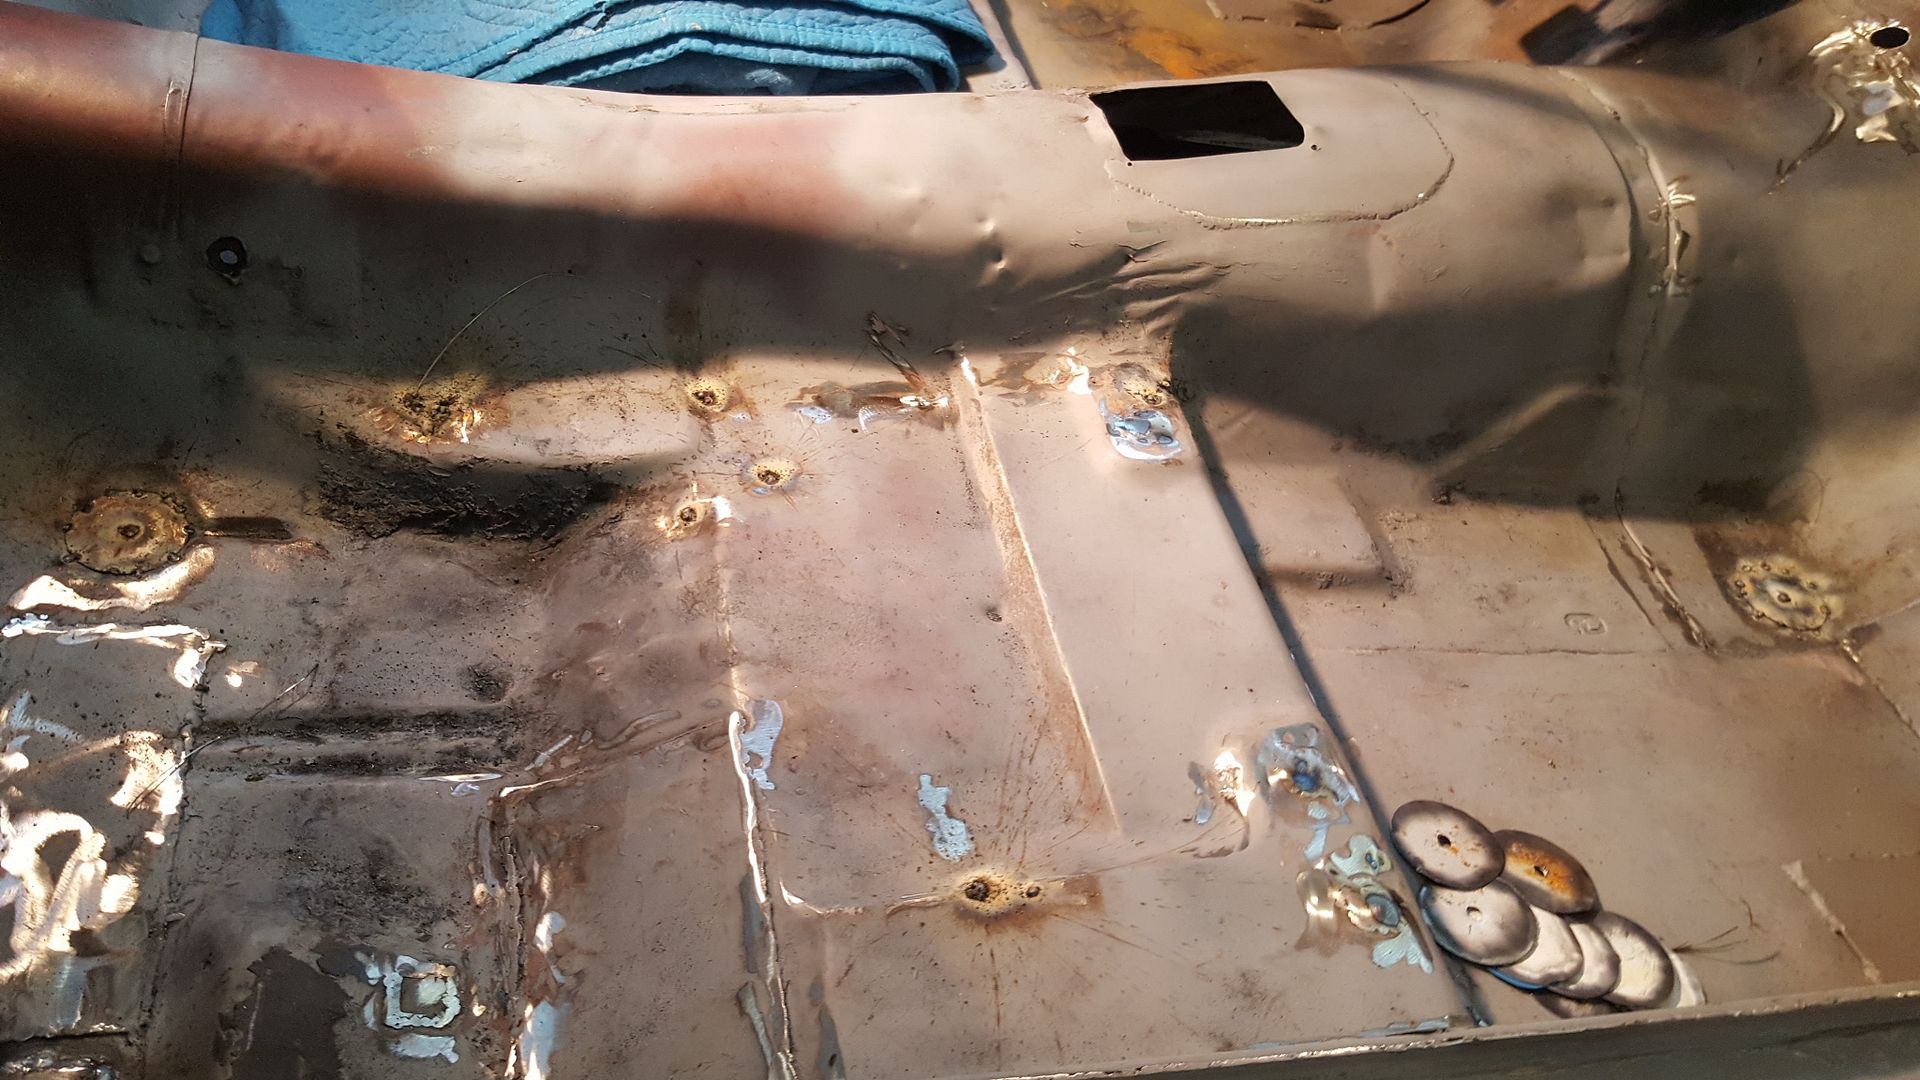
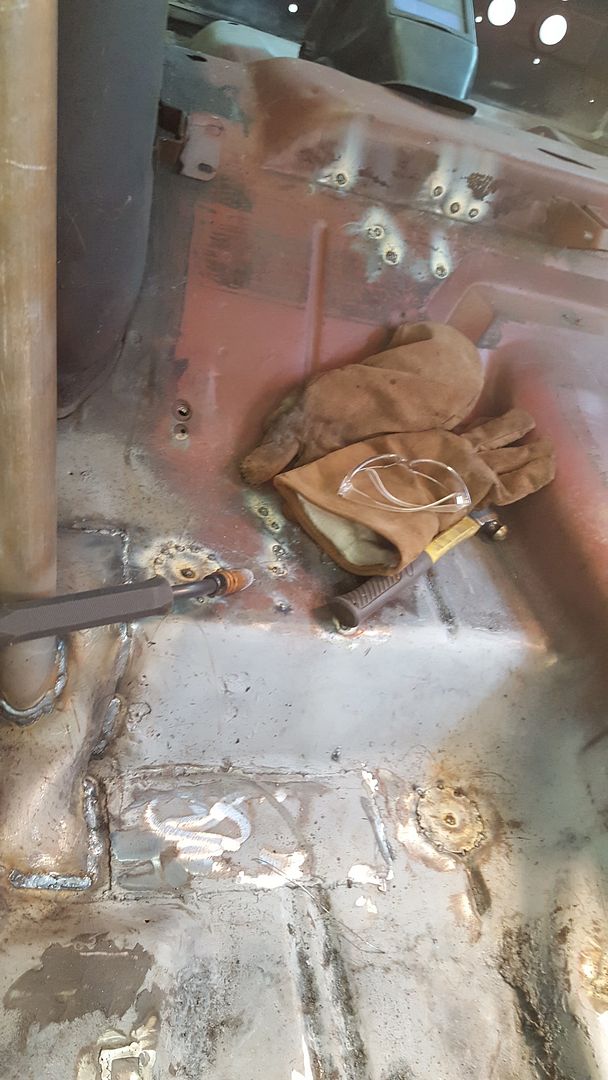
I started with the flux core on welding up the million holes, using water heater metal that we cut out with a hole saw to plug drain holes and suce, and a scrap of flattened copper pipe as a backer on the smaller holes.
[URL=http://s54.photobucket.com/user/dusterbd13/media/amc/20170114_211552_zpssy603w93.jpg.html]
 [/URL]
[URL=http://s54.photobucket.com/user/dusterbd13/media/amc/20170114_211556_zpsptlflpyf.jpg.html]
 [/URL]
[URL=http://s54.photobucket.com/user/dusterbd13/media/amc/20170114_211559_zpswsrfmv7h.jpg.html]
 [/URL]
[URL=http://s54.photobucket.com/user/dusterbd13/media/amc/20170114_211611_zpsqs6qgh0s.jpg.html]
 [/URL]
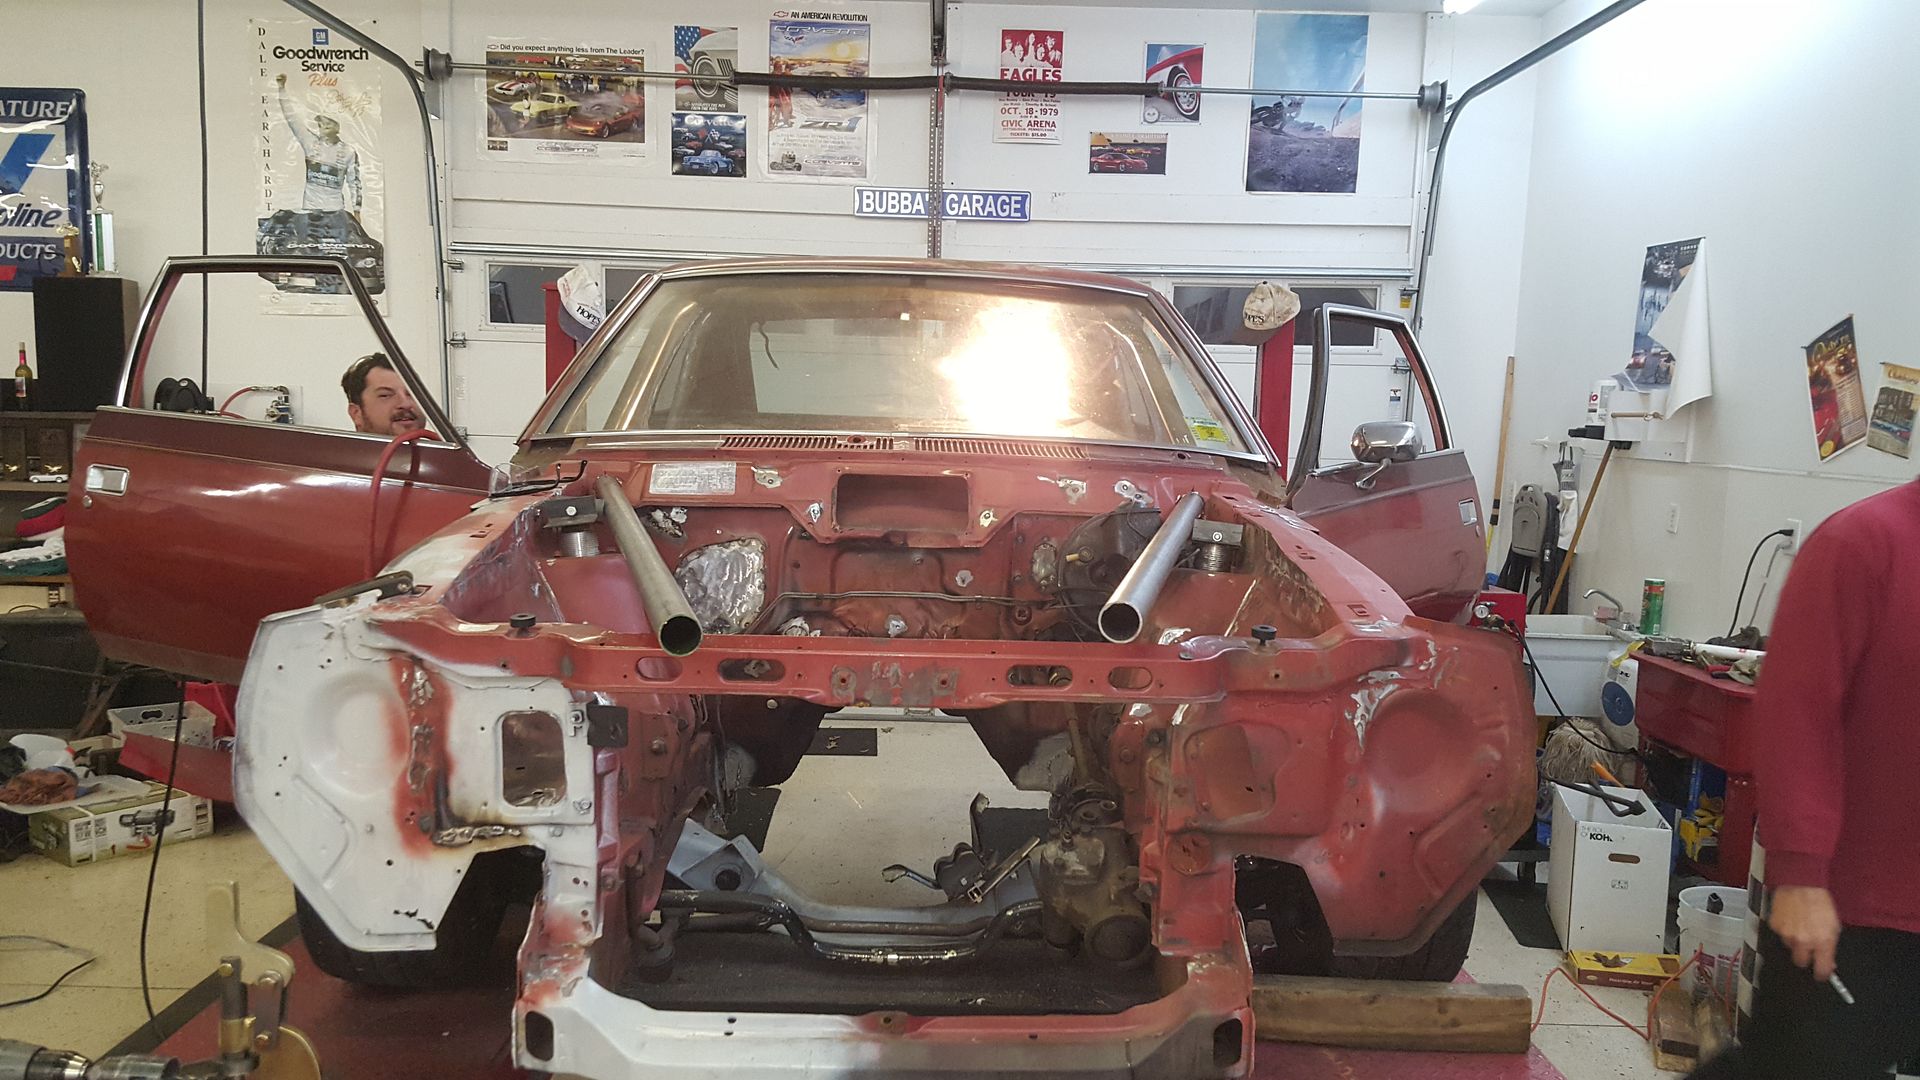
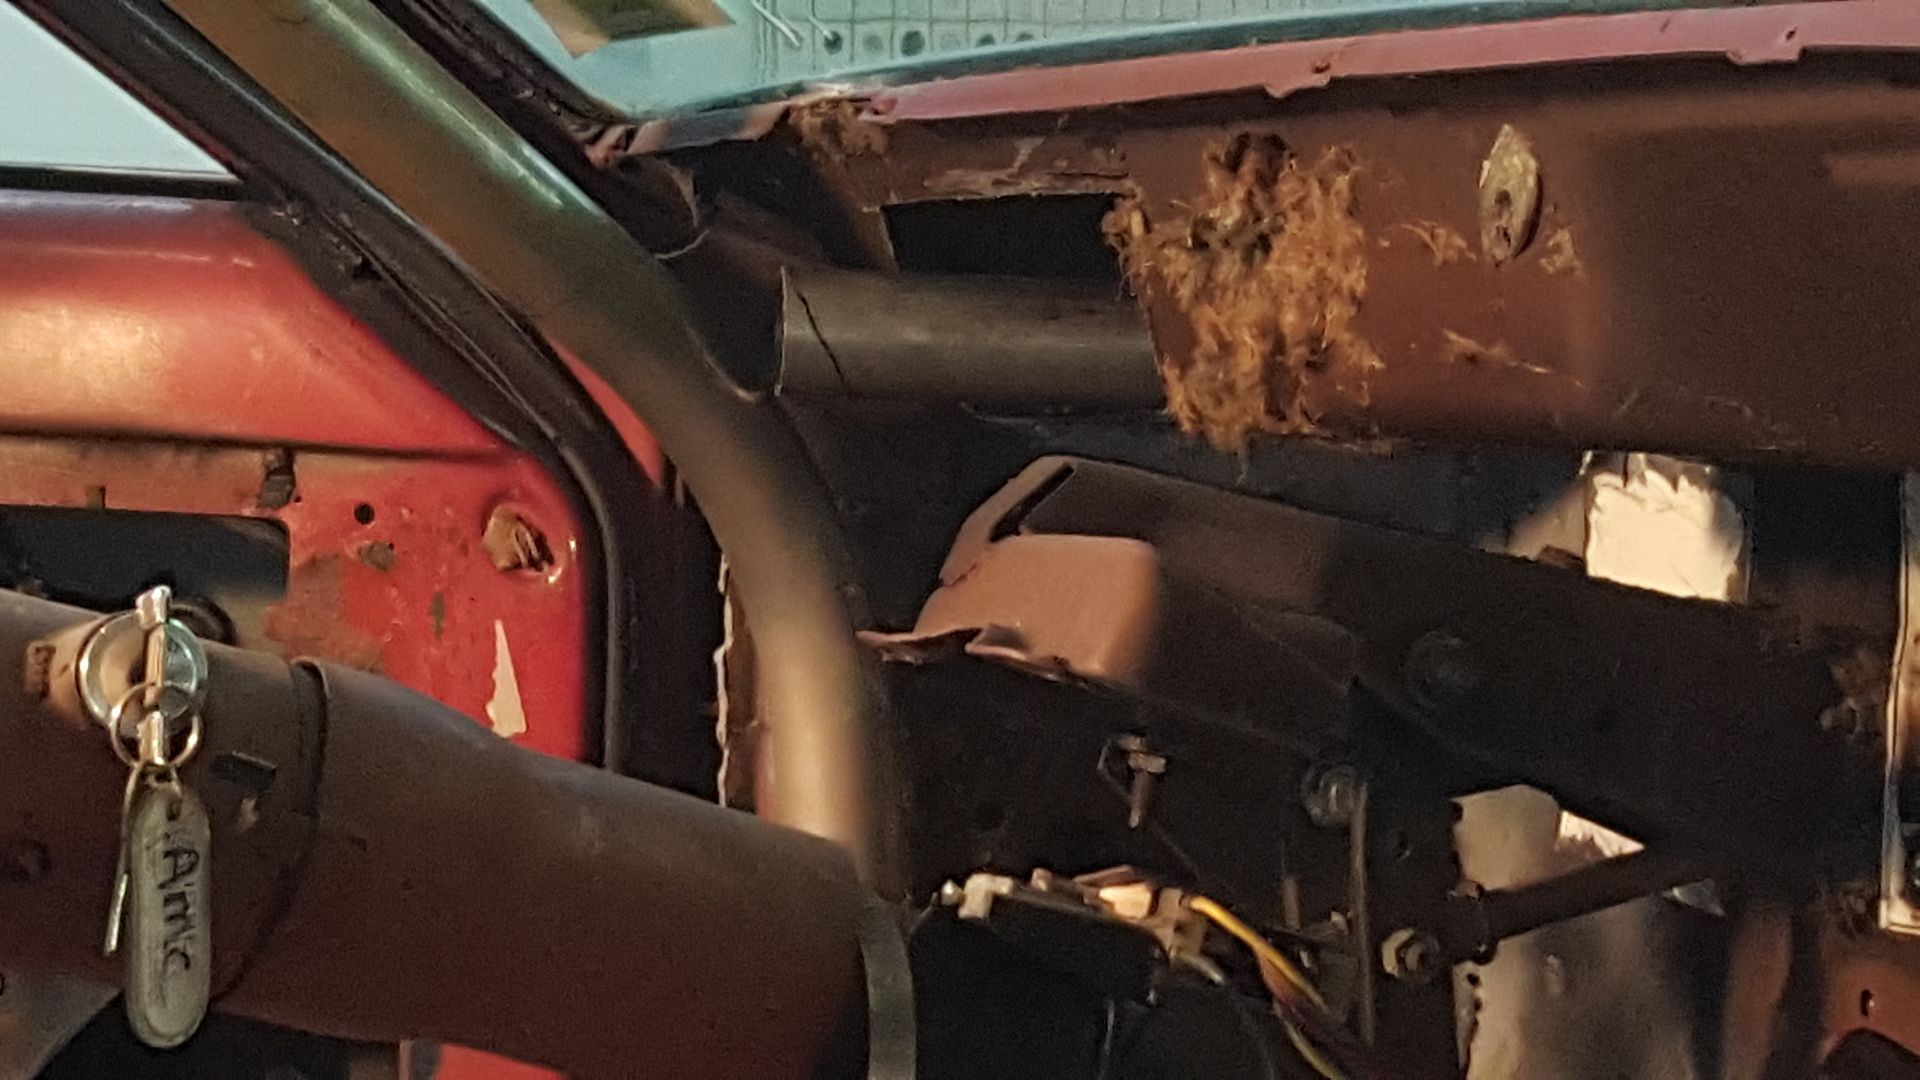
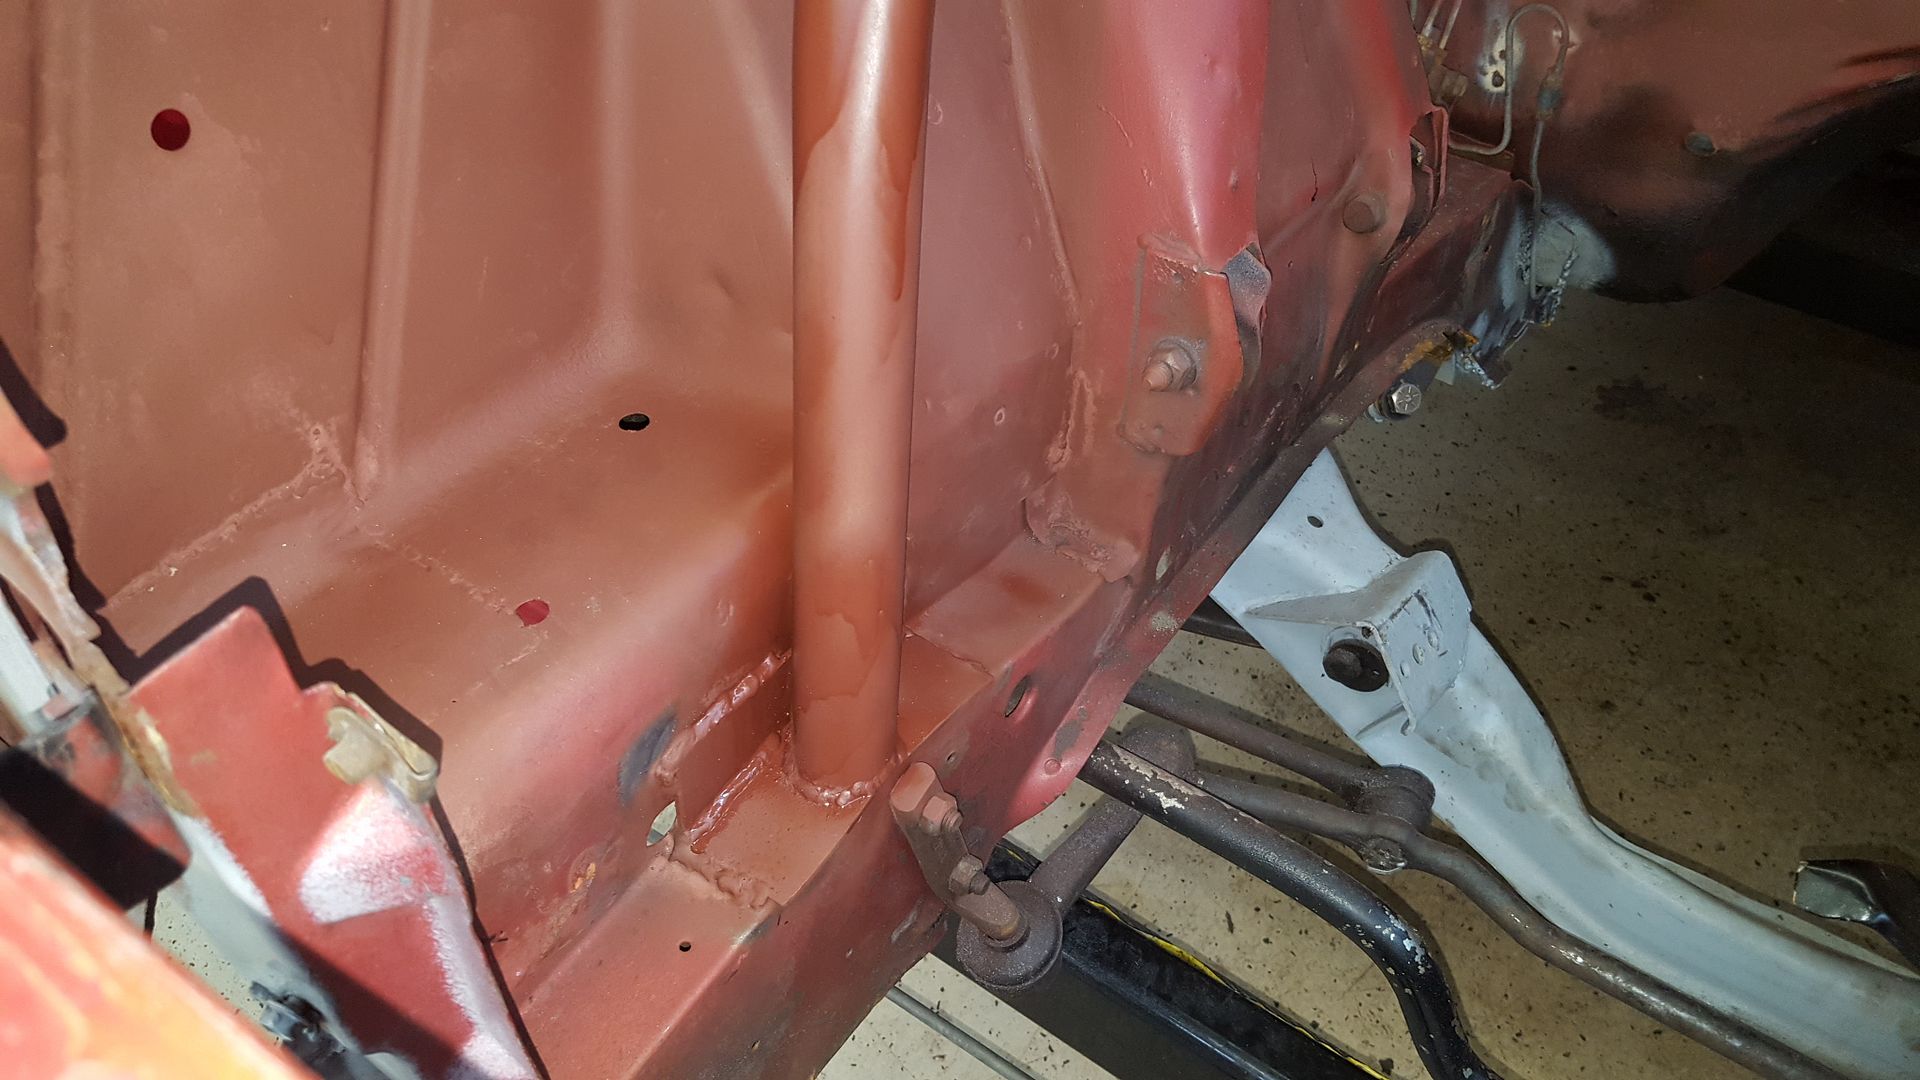
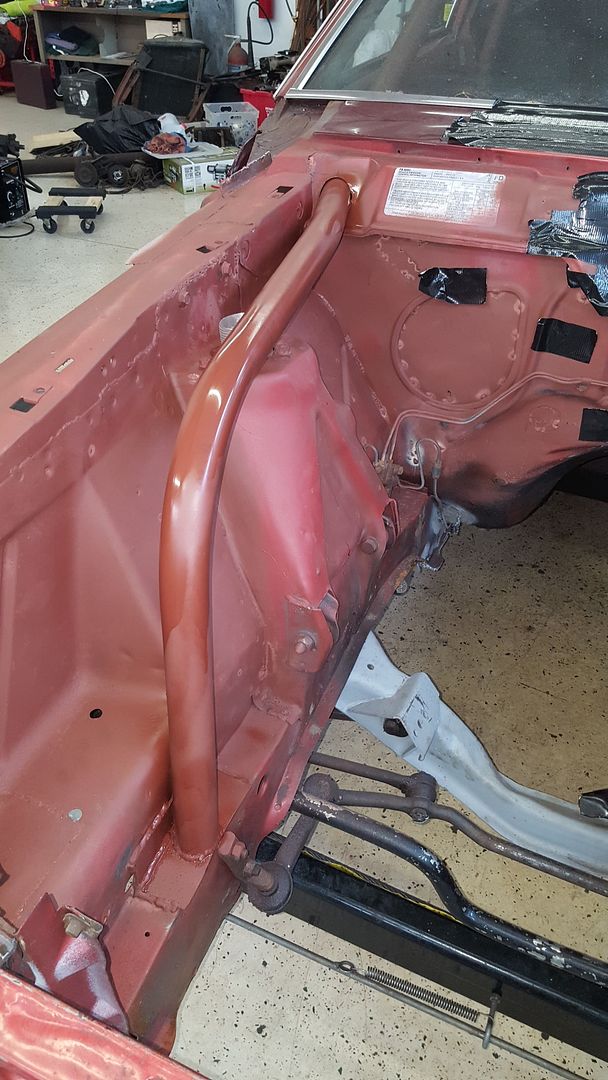
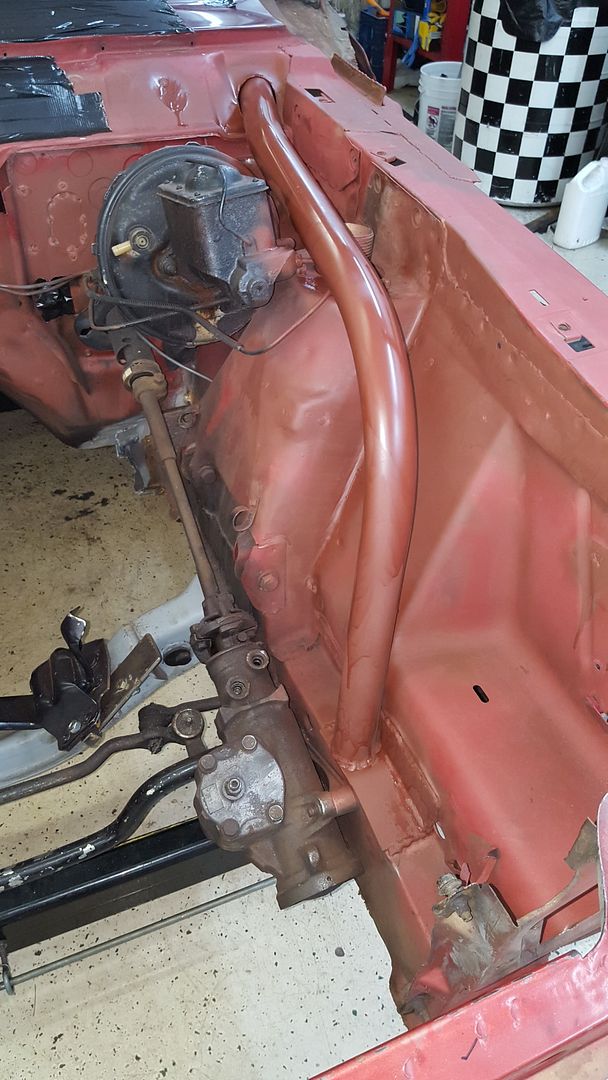
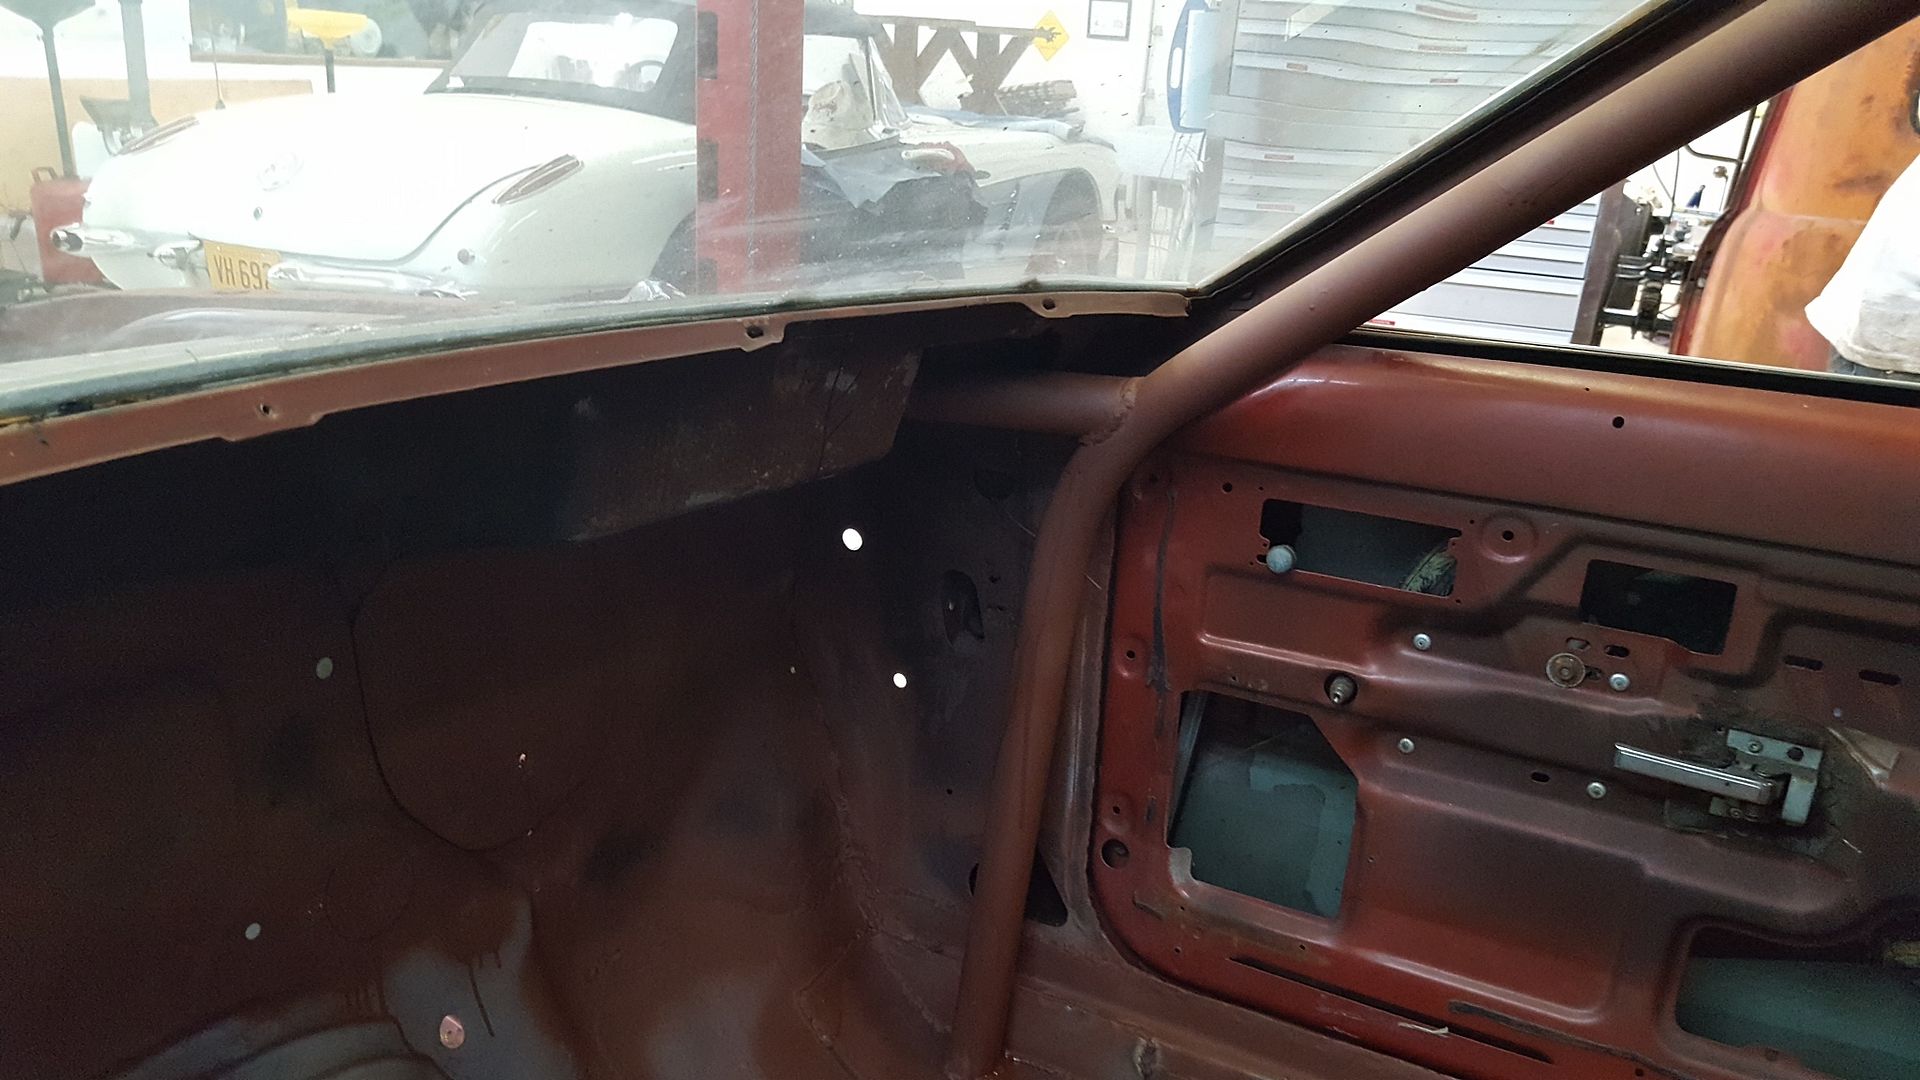
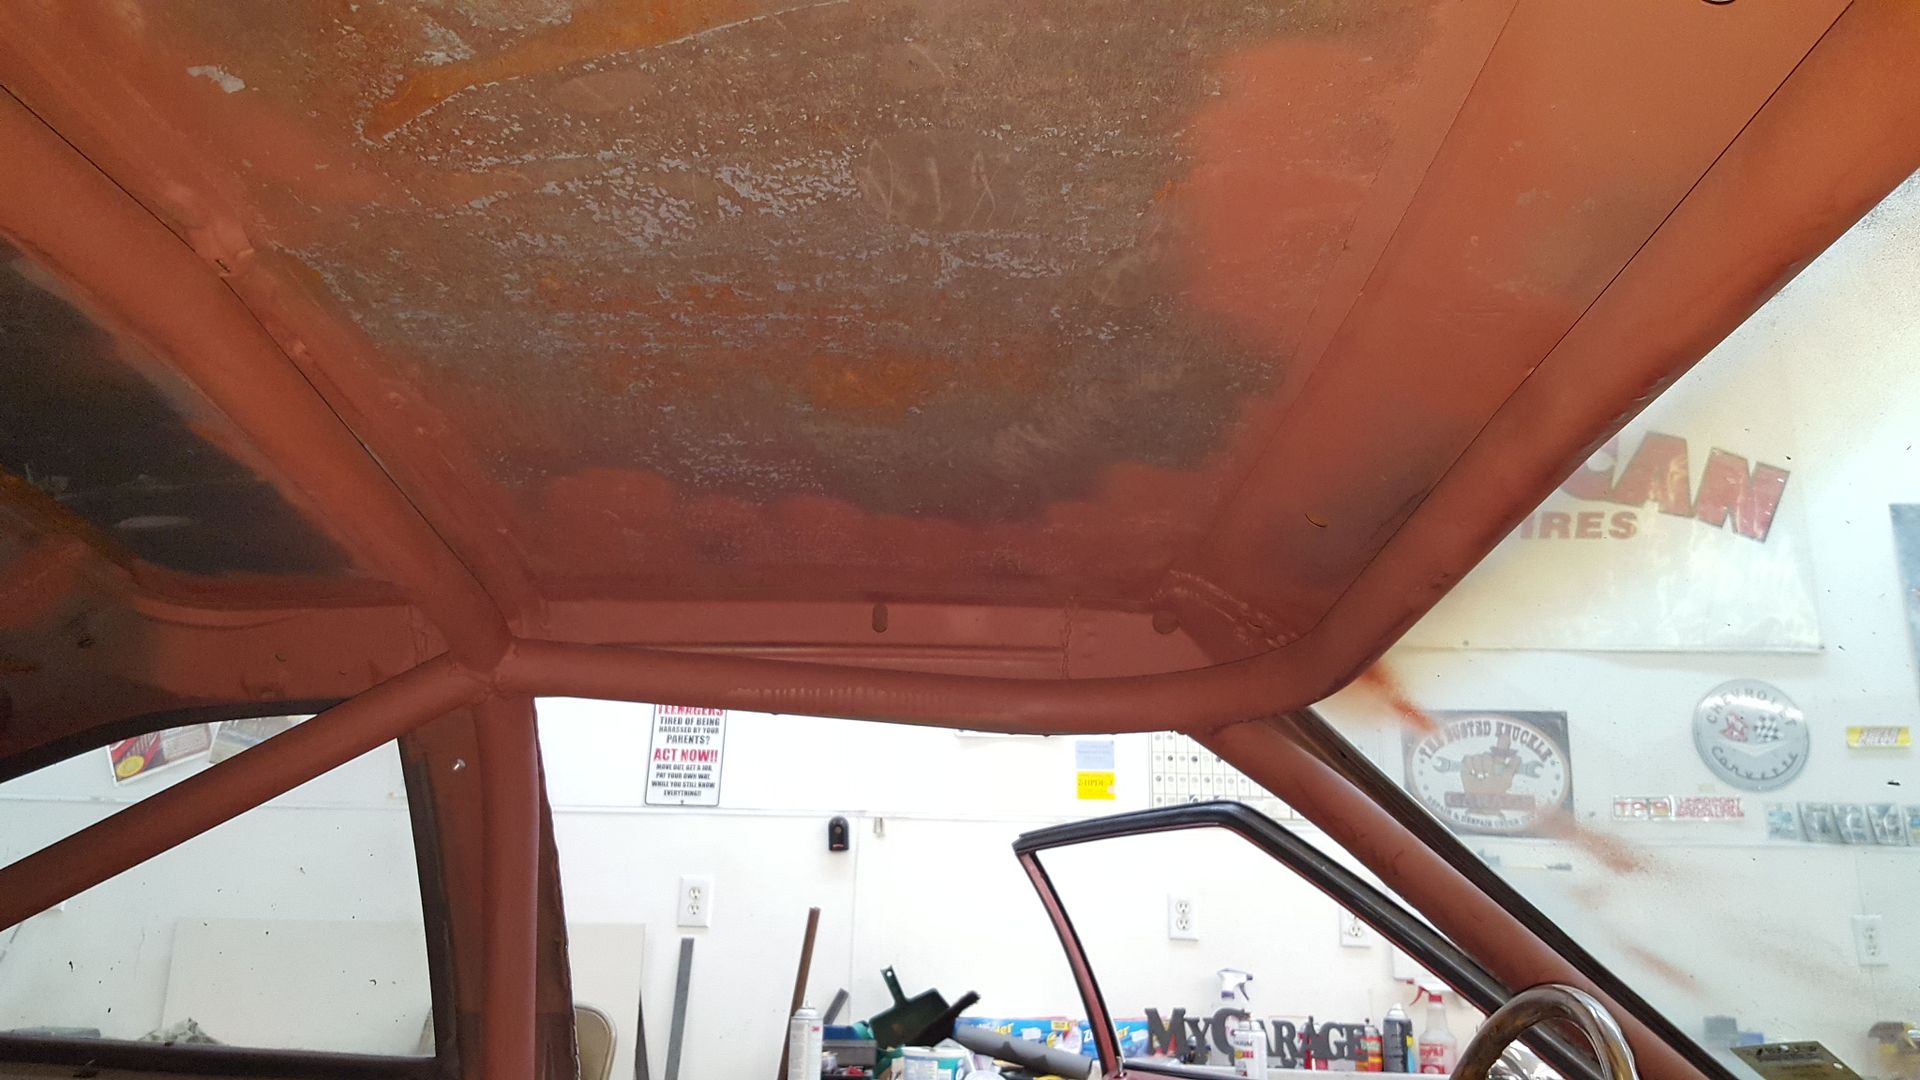
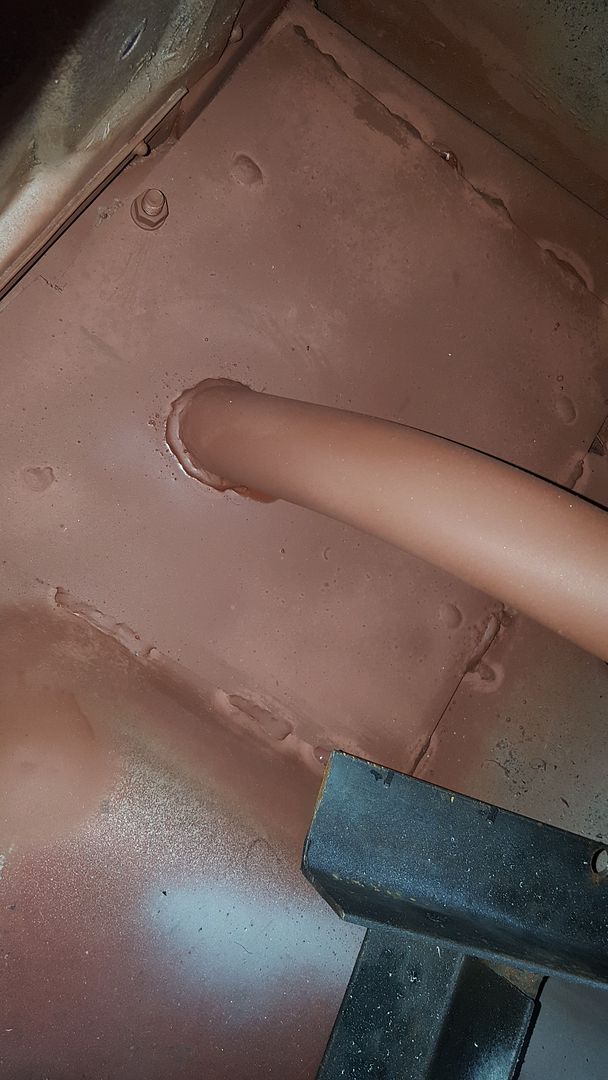
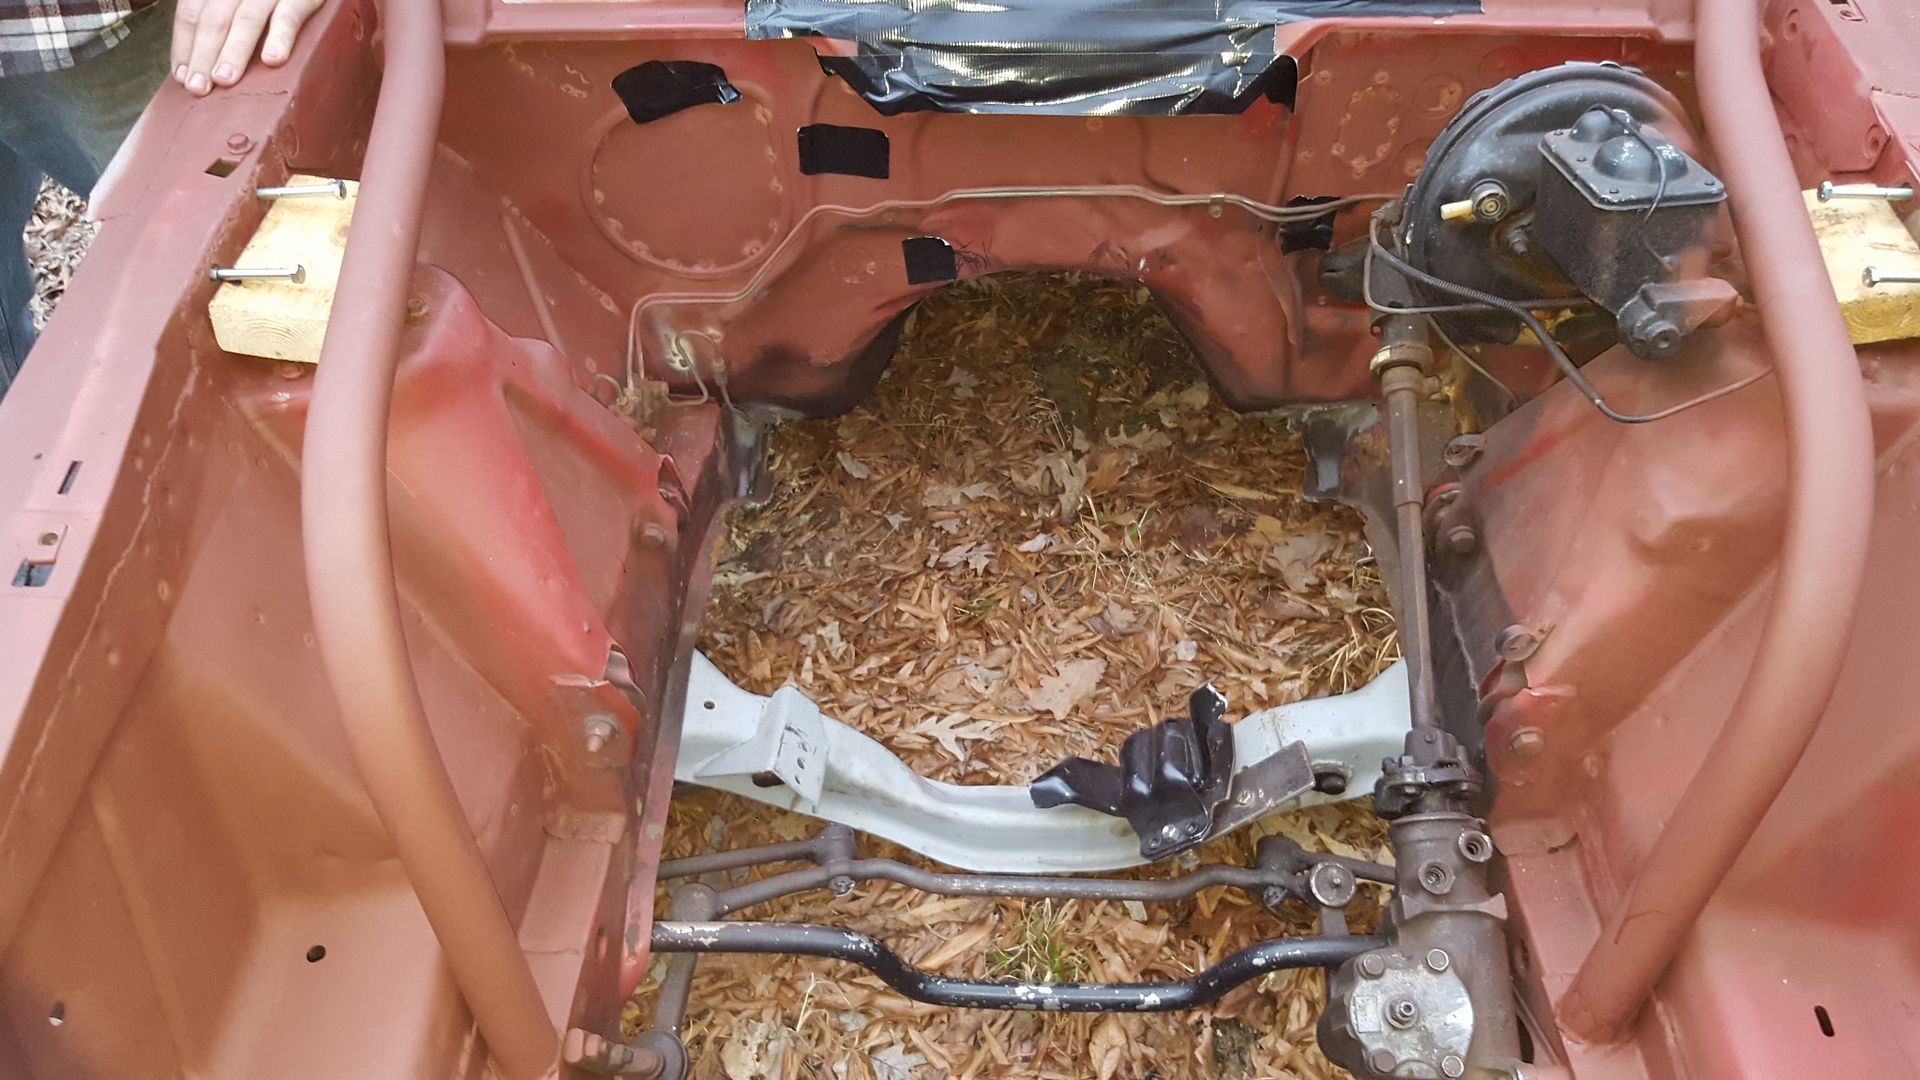
Steve finished the cage welding from last time, and started in on the front downtubes. Plan is to mount the upper shock mounts directly to the tubes, and triangulate to the factry inner fender points. The threaded collar from the spring adjusters will land there, and all the loads from the front suspension will go through the downtubes into the main cage structure.
[URL=http://s54.photobucket.com/user/dusterbd13/media/amc/20170114_201039_zpswah3muoy.jpg.html]
 [/URL]
[URL=http://s54.photobucket.com/user/dusterbd13/media/amc/20170114_201059_zpsxt2qjlkx.jpg.html]
 [/URL]
[URL=http://s54.photobucket.com/user/dusterbd13/media/amc/20170115_012845_zpsb5yv1g8u.jpg.html]
 [/URL]
[URL=http://s54.photobucket.com/user/dusterbd13/media/amc/20170115_012851_zpschhcavss.jpg.html]
 [/URL]
[URL=http://s54.photobucket.com/user/dusterbd13/media/amc/20170115_012856_zpsc7a8teze.jpg.html]
 [/URL]
[URL=http://s54.photobucket.com/user/dusterbd13/media/amc/20170115_013025_zpsmts8b7qw.jpg.html]
 [/URL]
[URL=http://s54.photobucket.com/user/dusterbd13/media/amc/20170115_013124_zpskkgjr2gq.jpg.html]
 [/URL]
[URL=http://s54.photobucket.com/user/dusterbd13/media/amc/20170115_013233_zpsc4rbi0zw.jpg.html]
 [/URL]
[URL=http://s54.photobucket.com/user/dusterbd13/media/amc/20170116_171300_zpsp3xod03e.jpg.html]
 [/URL]
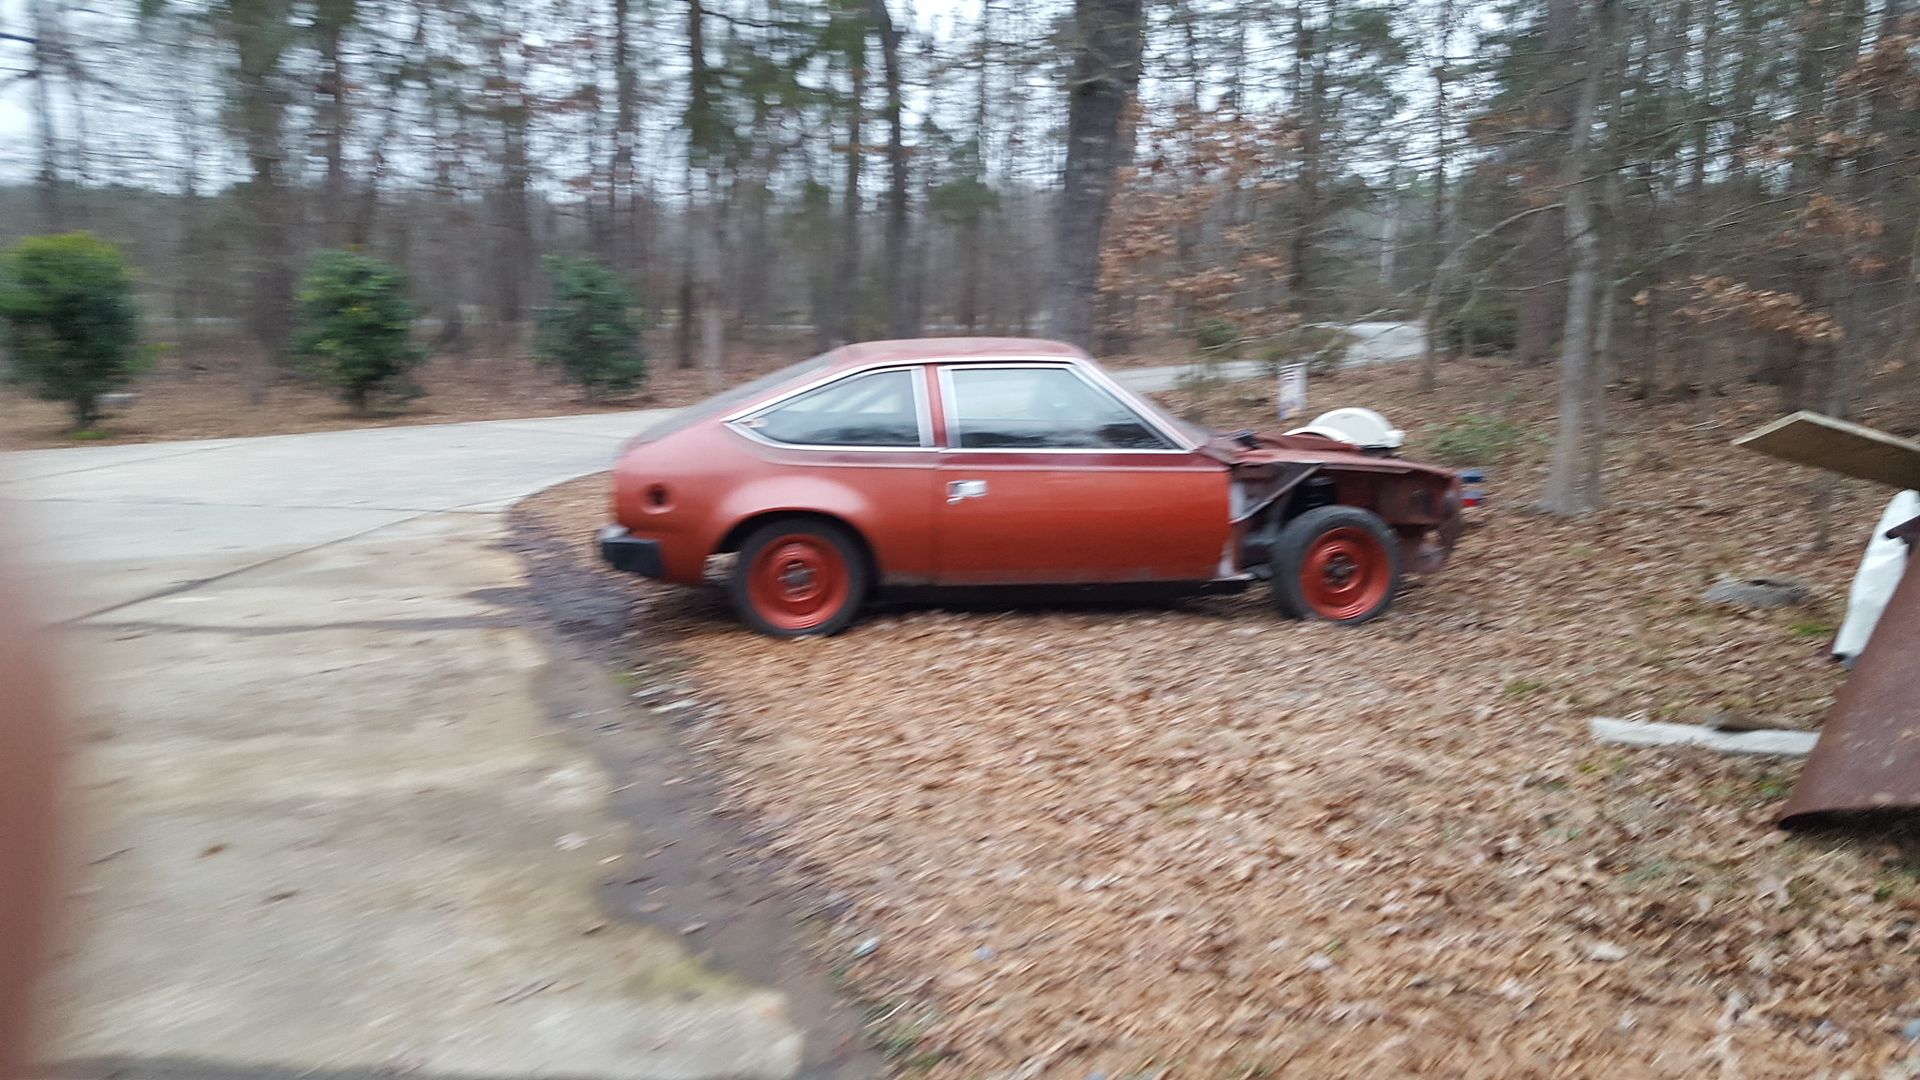
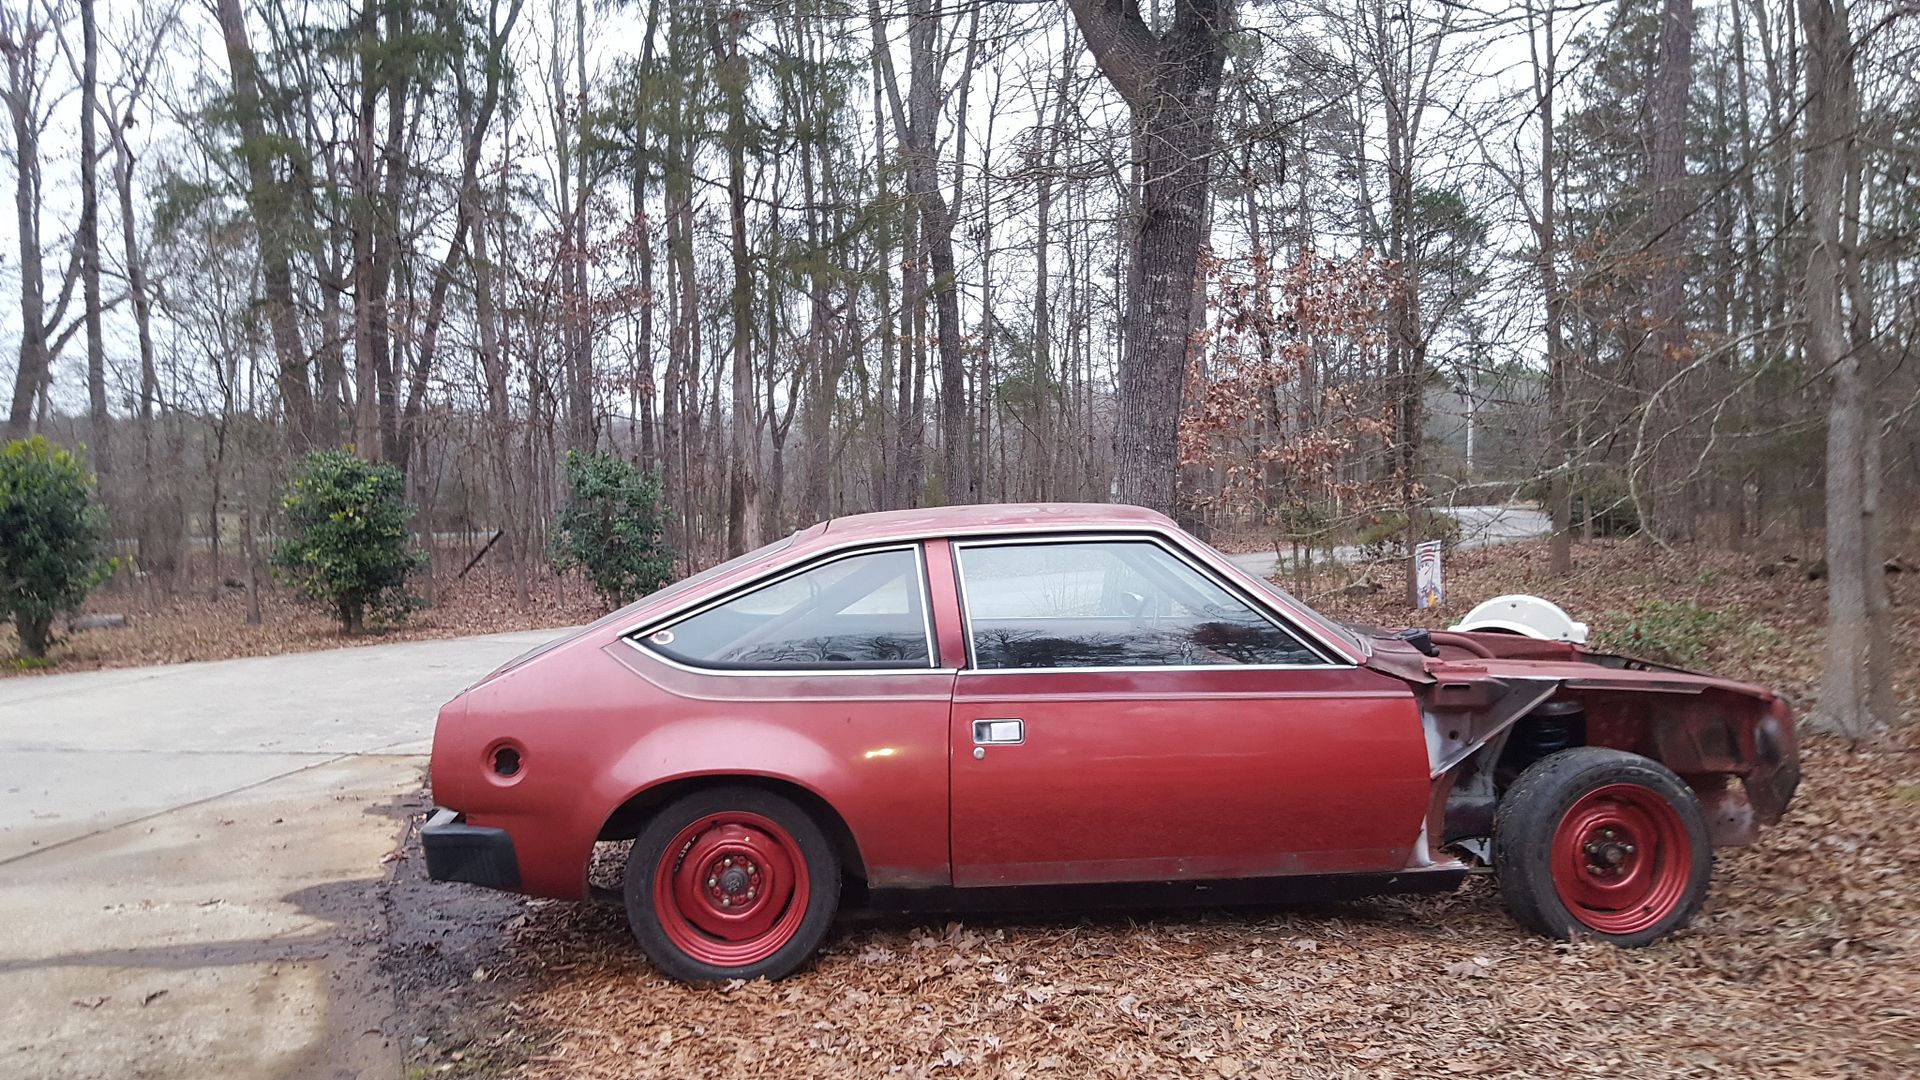
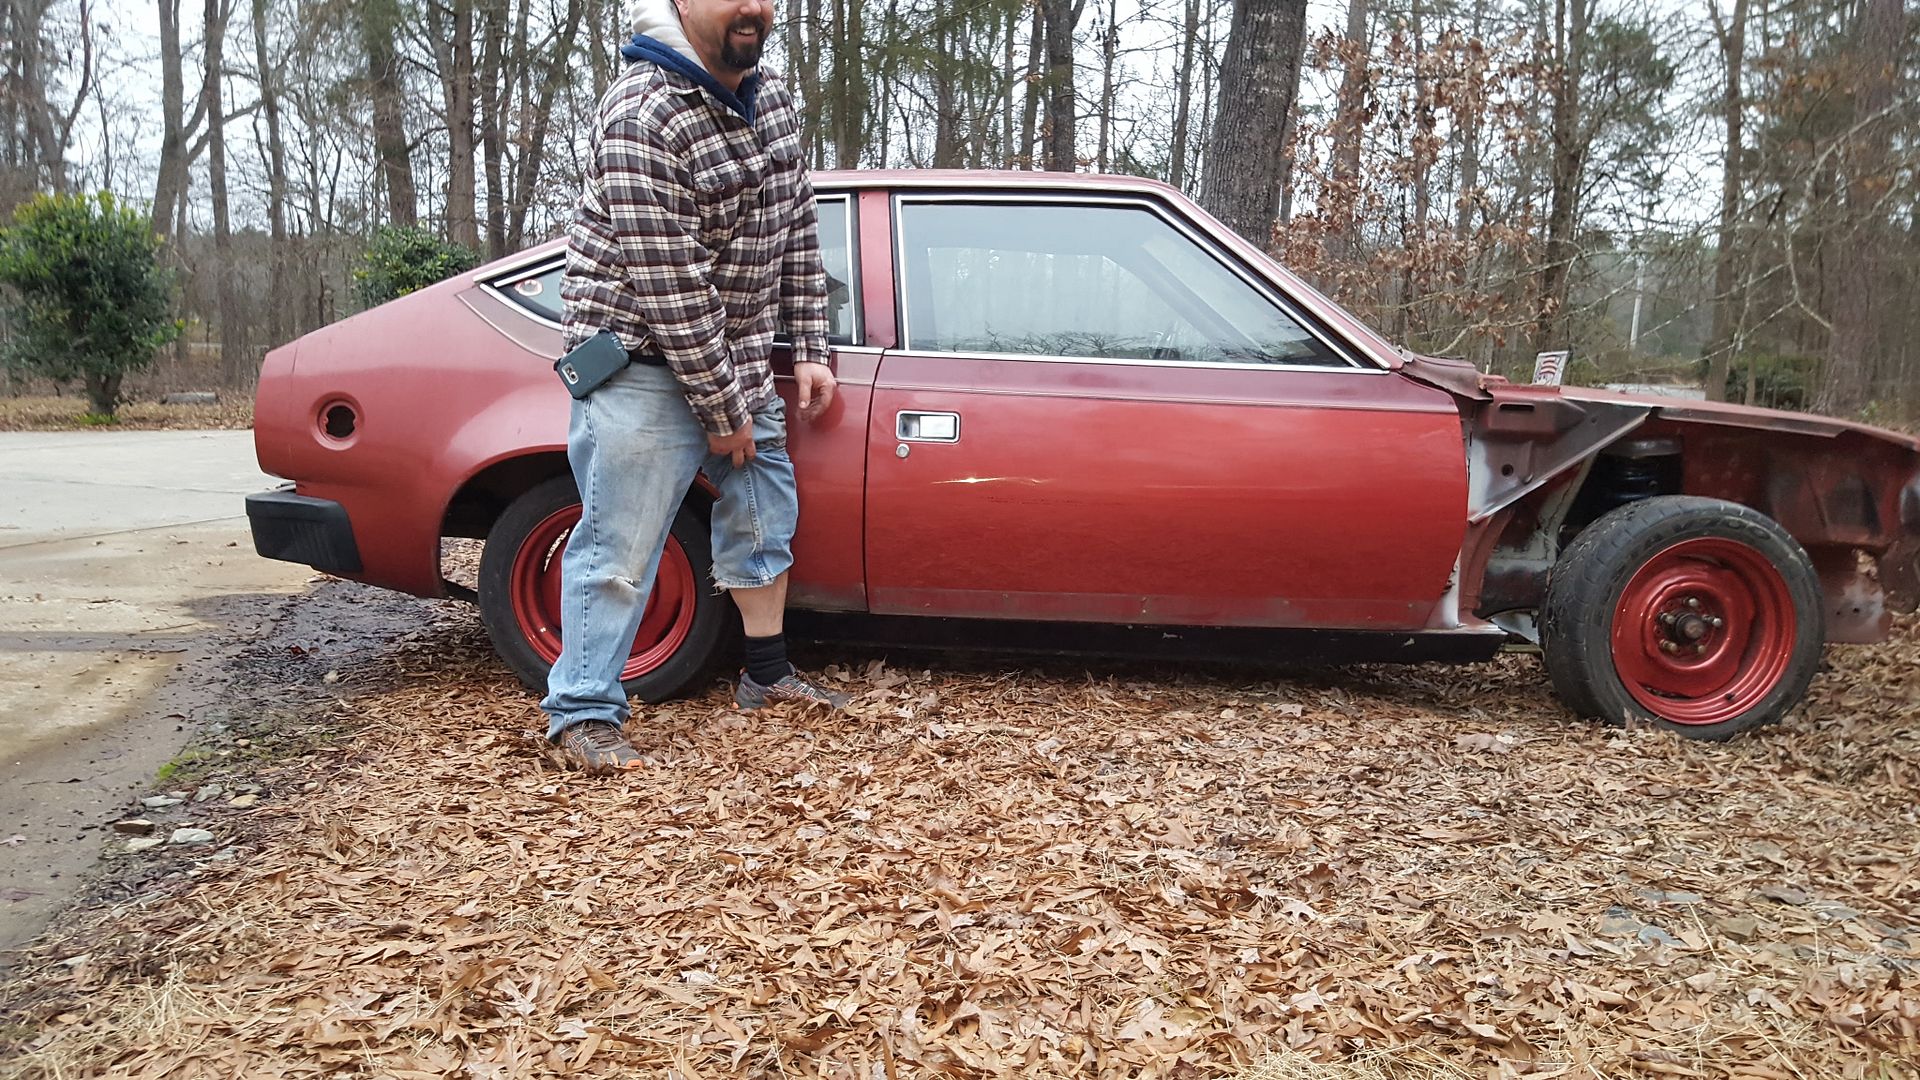
Rolled outside at general ride height. Plus or minus a couple of inches on either end....
[URL=http://s54.photobucket.com/user/dusterbd13/media/amc/20170116_171203_001_zpsjx7w93ww.jpg.html]
 [/URL]
[URL=http://s54.photobucket.com/user/dusterbd13/media/amc/20170116_171206_zpsubhzhybq.jpg.html]
 [/URL]
[URL=http://s54.photobucket.com/user/dusterbd13/media/amc/20170116_171228_zps7s8phfwb.jpg.html]
 [/URL]
And a gratuitous picture of the new gauge cluster. Hopefully I can make it work.
[URL=http://s54.photobucket.com/user/dusterbd13/media/amc/20170115_160111_zpsbftreu5t.jpg.html]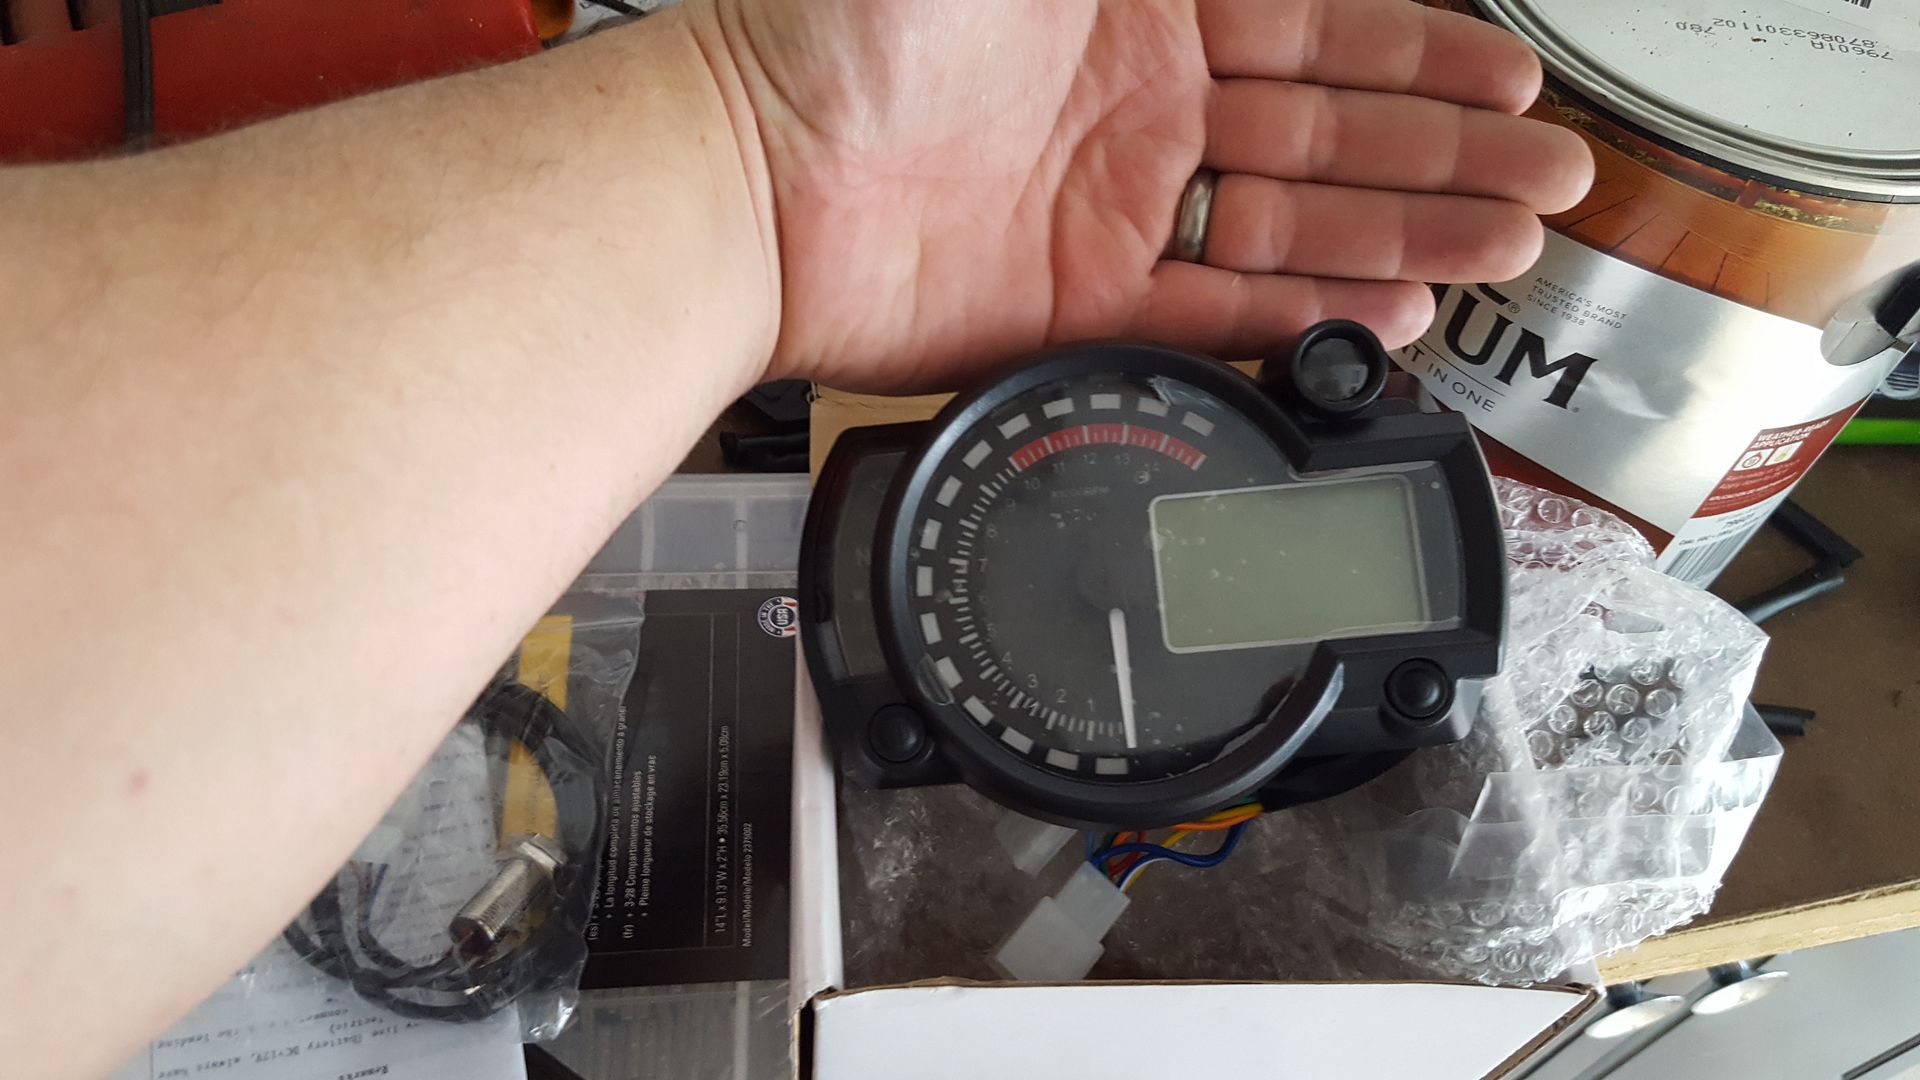 [/URL]
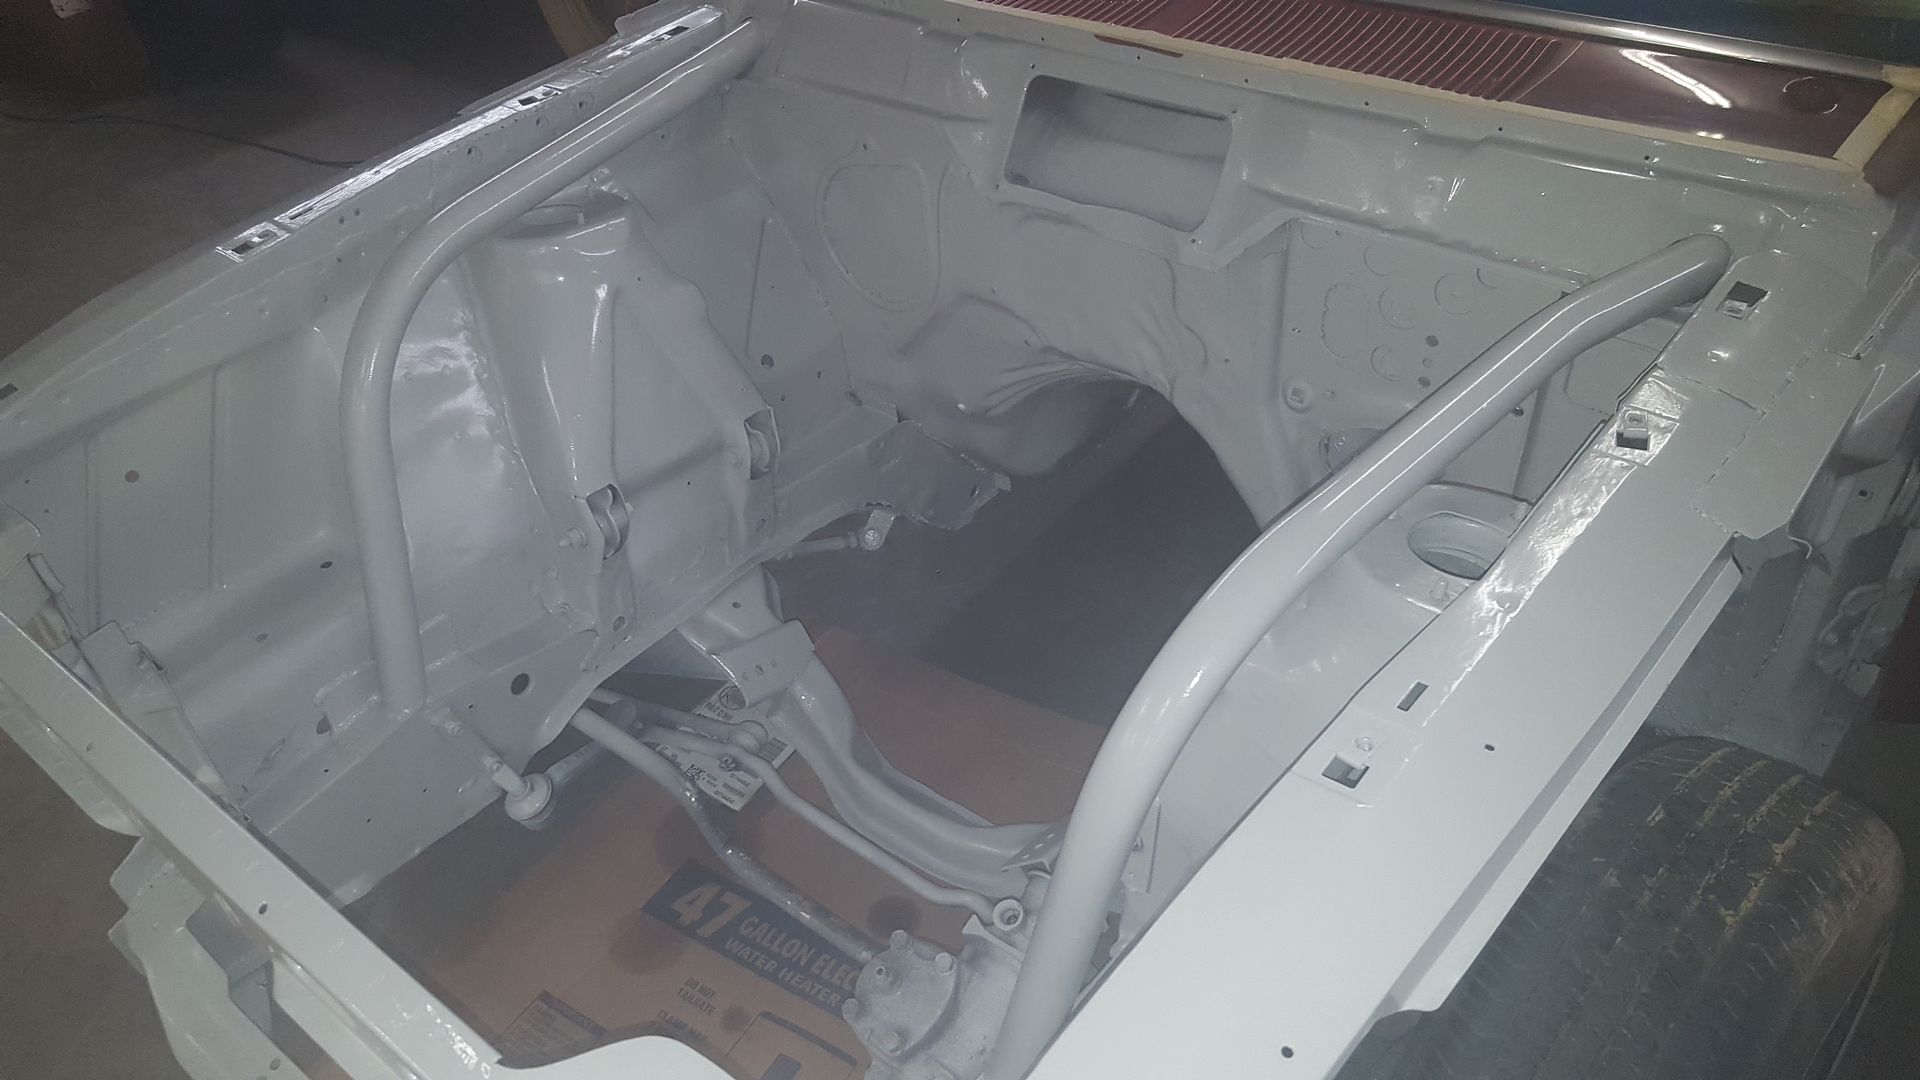
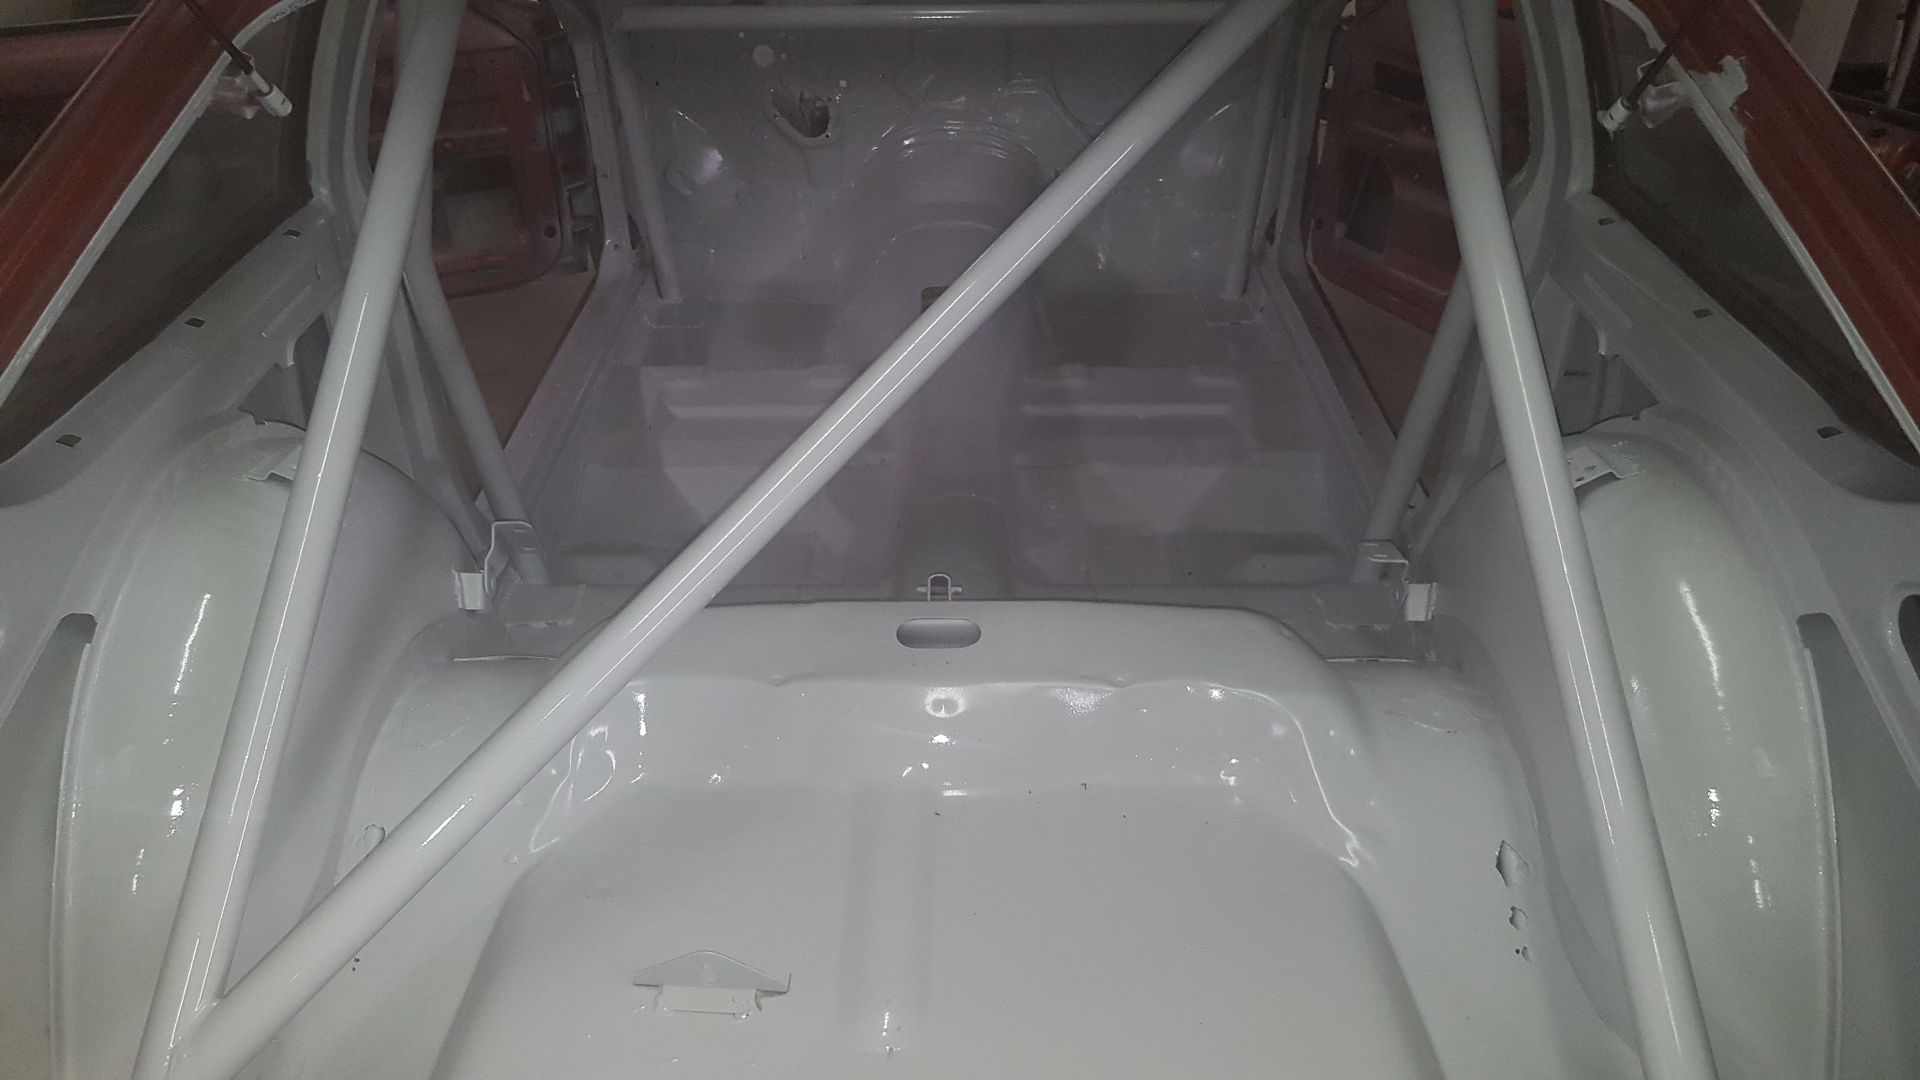
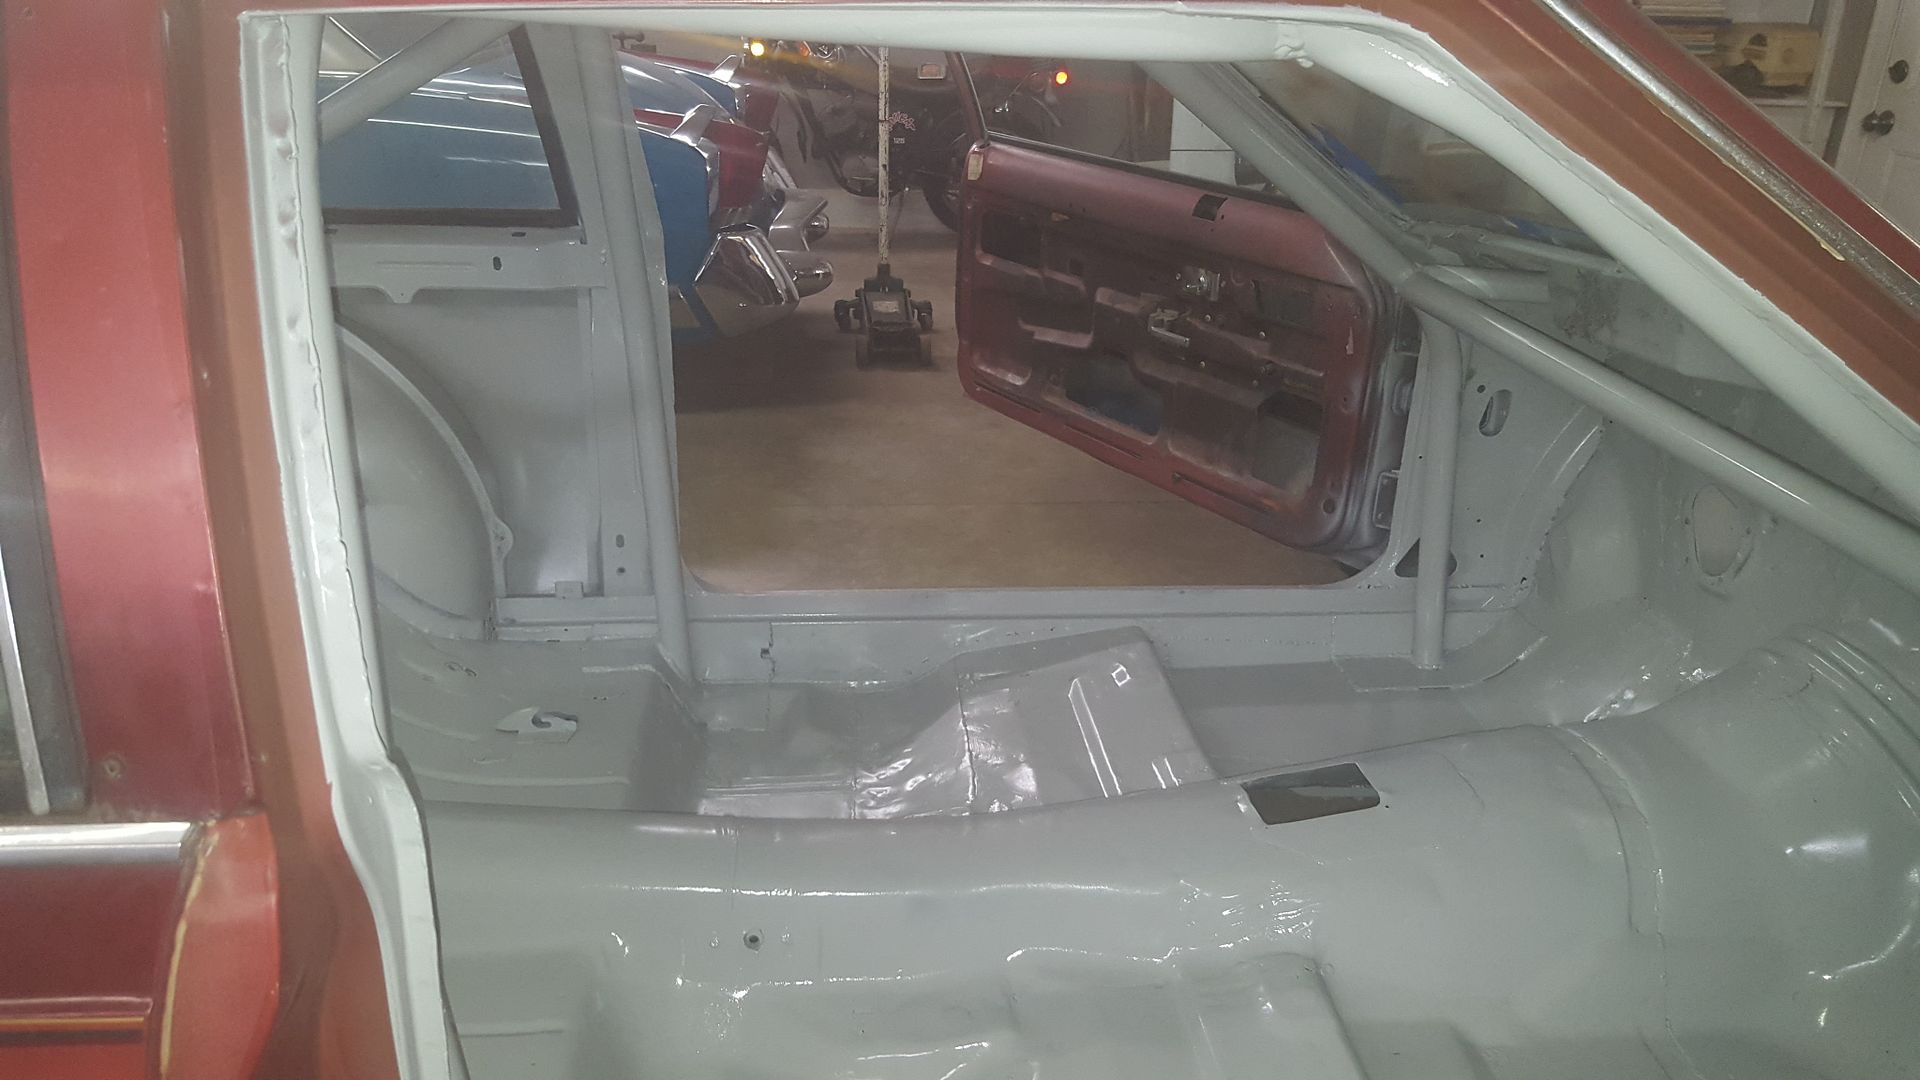
In other news, we ran the numbers on getting the built 302 into the car and working properly. It will put us over budget. Therefore, dallas is working on undoing the swap with the guy we got it from. It will leave us enough money to actually finish the car, and possibly add the $125 vortech supercharger.
[URL=http://s54.photobucket.com/user/dusterbd13/media/amc/20170128_185438_zpsmjdvep0l.jpg.html]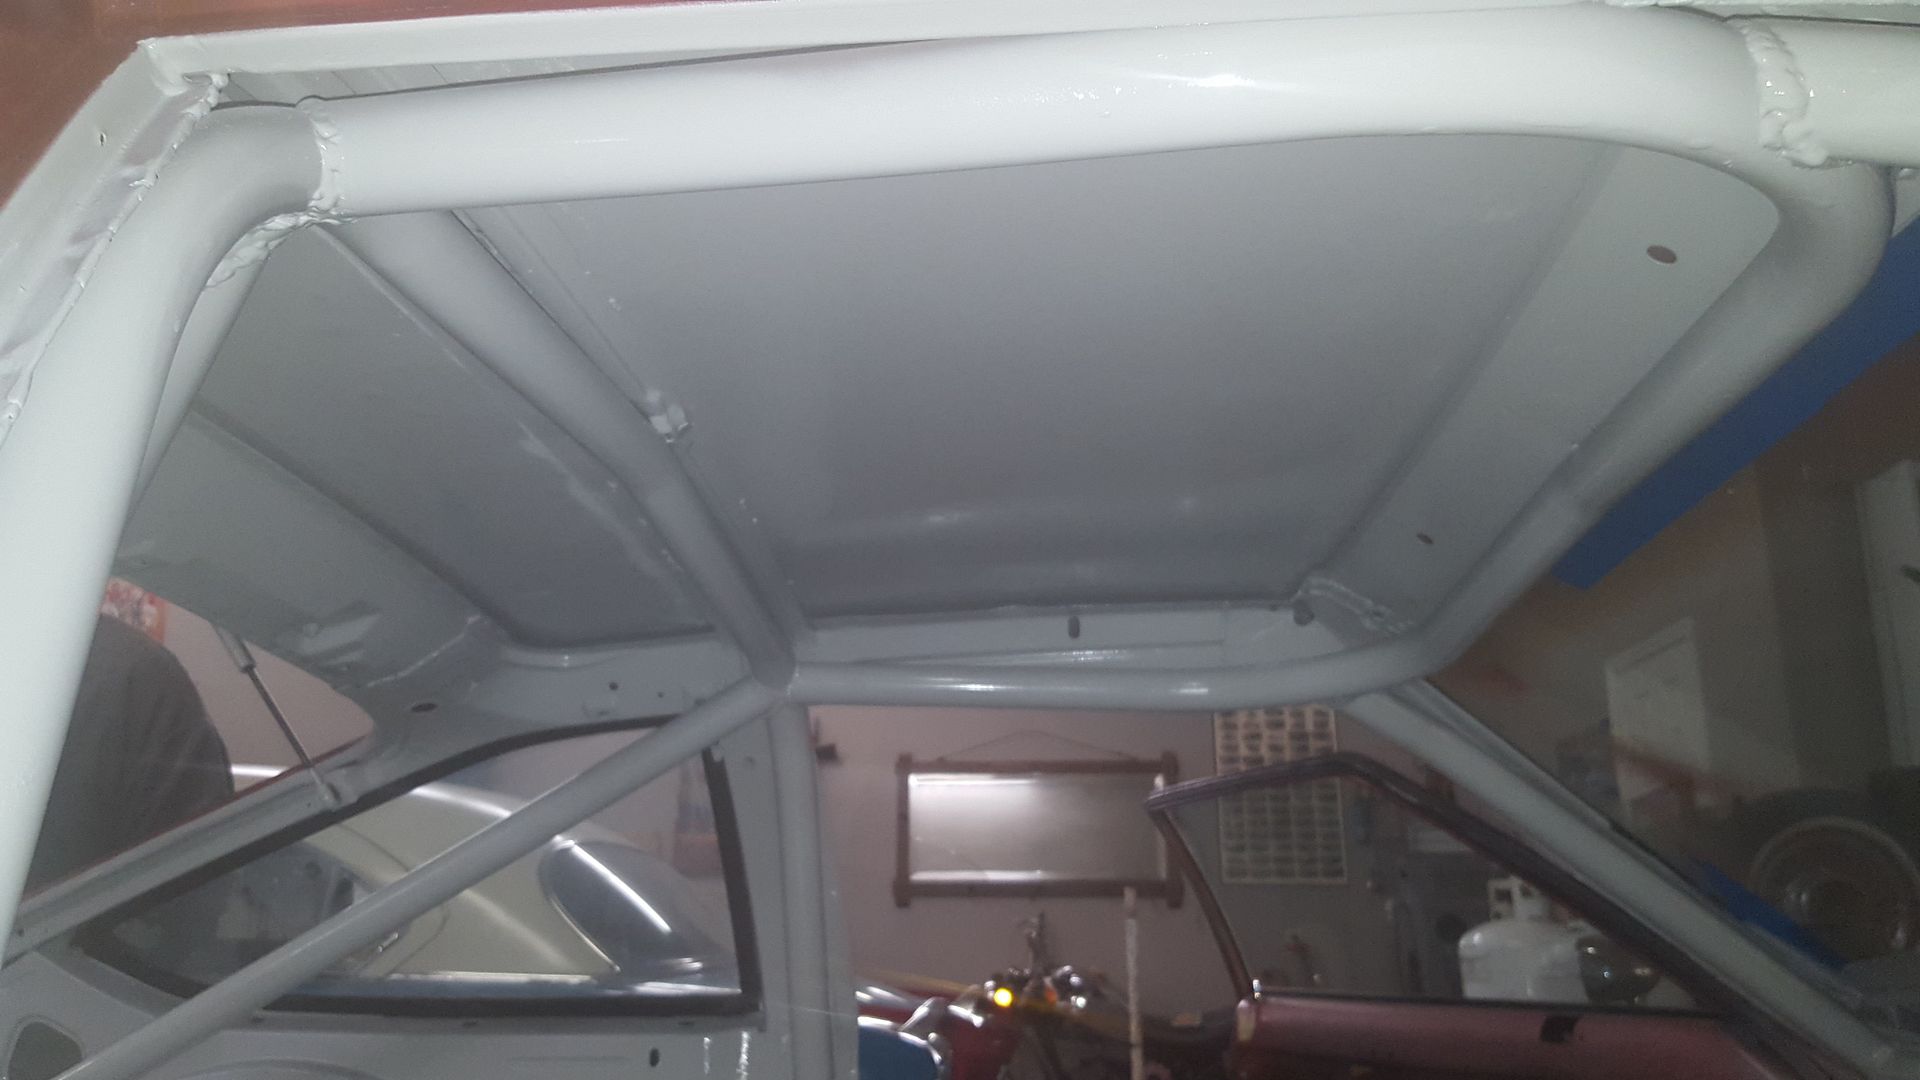 [/URL]
[URL=http://s54.photobucket.com/user/dusterbd13/media/amc/20170128_180903_zps7znr3pcf.jpg.html]
 [/URL]
[URL=http://s54.photobucket.com/user/dusterbd13/media/amc/20170128_185414_zpsf3ode1ln.jpg.html]
 [/URL]
[URL=http://s54.photobucket.com/user/dusterbd13/media/amc/20170128_185431_zps4tvnpdhz.jpg.html]
 [/URL]
[URL=http://s54.photobucket.com/user/dusterbd13/media/amc/20170128_172856_zpsvfcvfiyw.jpg.html]
 [/URL]
[URL=http://s54.photobucket.com/user/dusterbd13/media/amc/20170128_172921_zpsd9inoseb.jpg.html]
 [/URL]
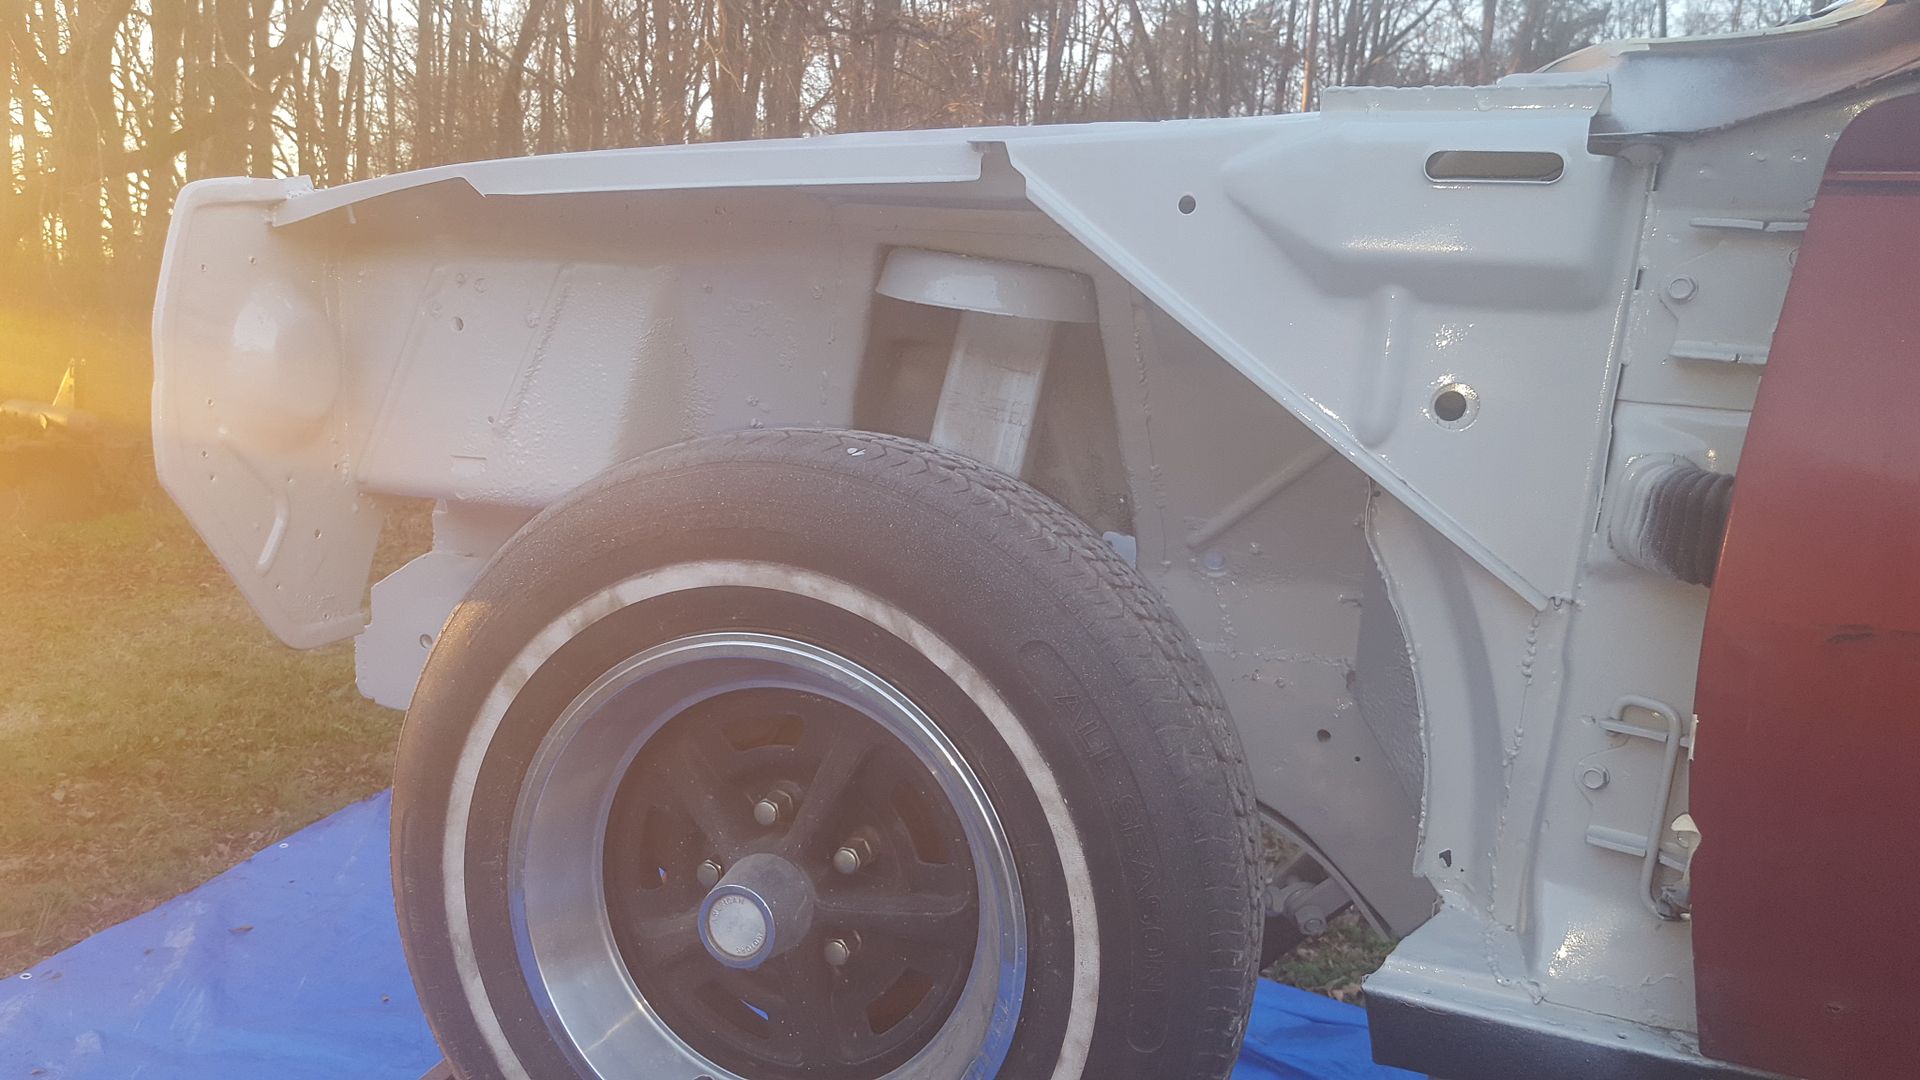
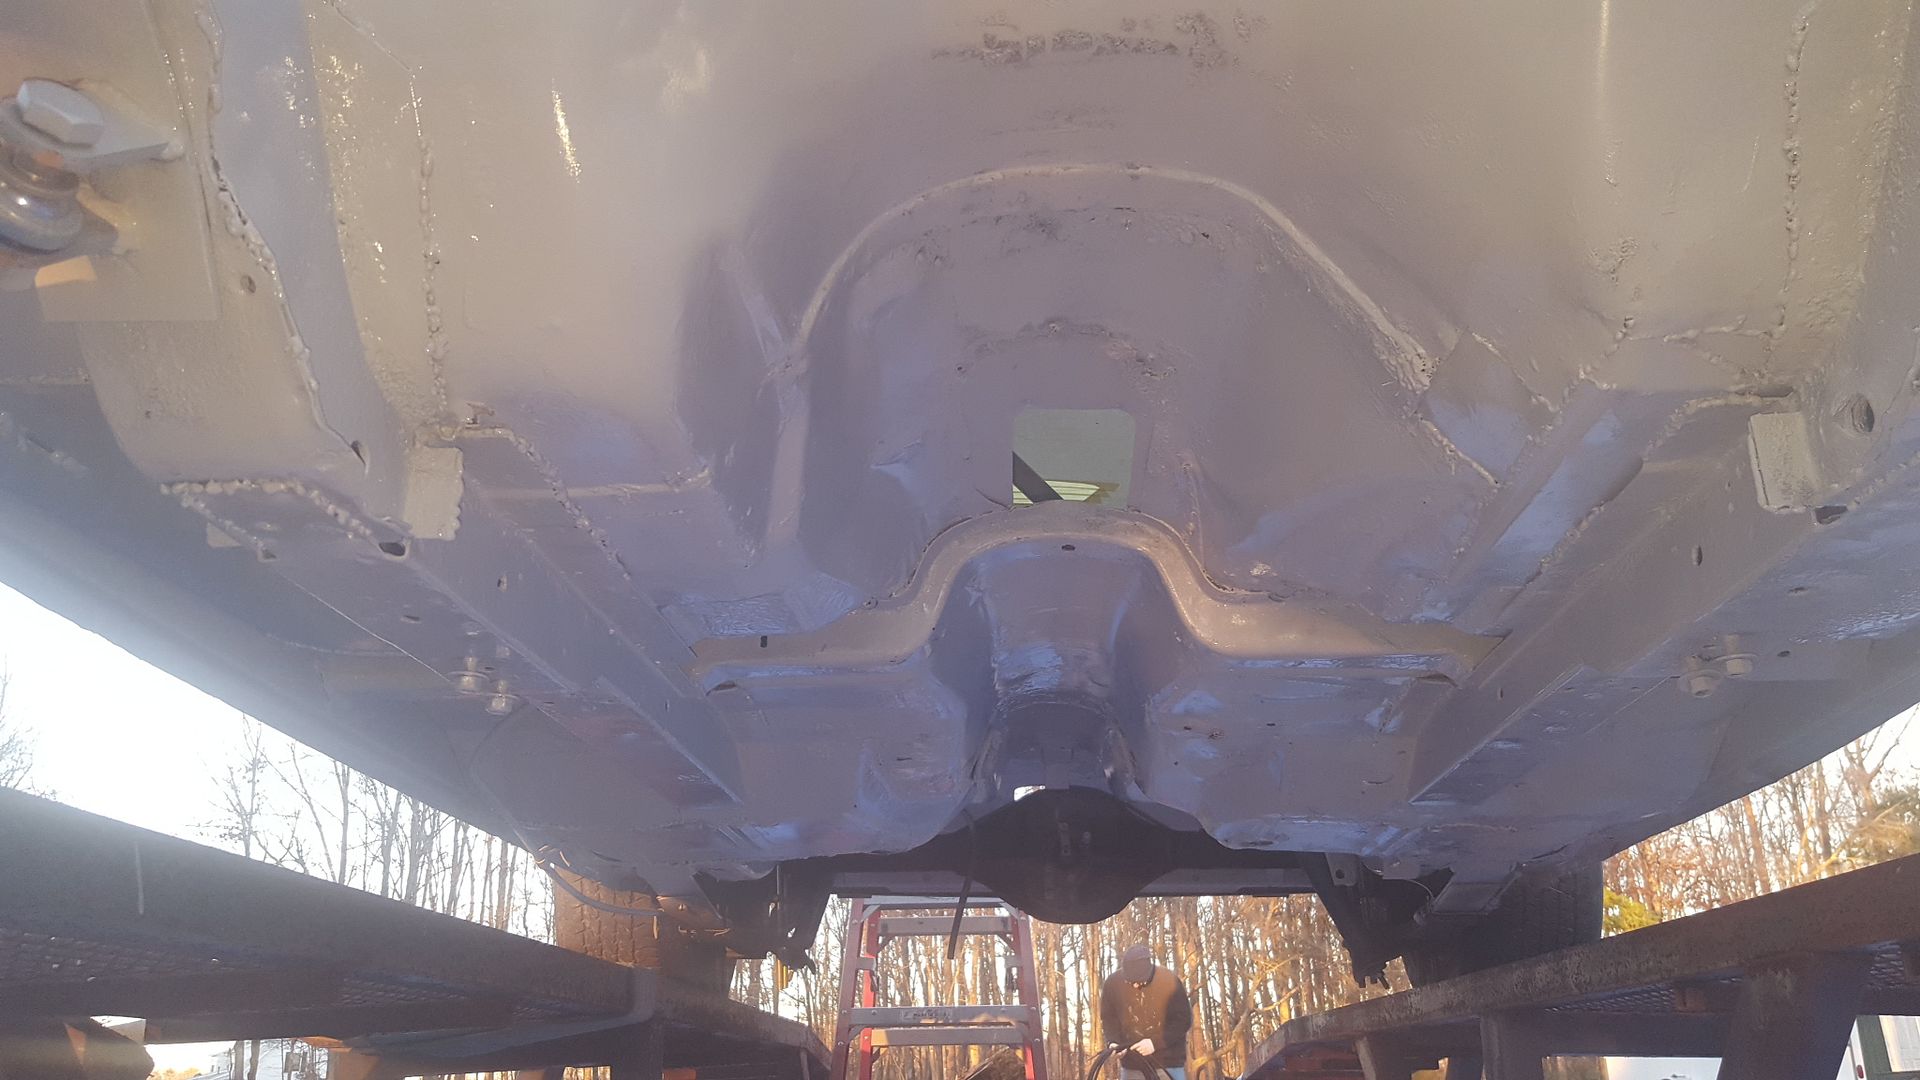
Full normal update later. Im beat.
You'll need to log in to post.