I packed up my tools and we drove up to Ouray and set up camp.
So, after months of work and preparation, we towed our Bronco all the way to Colorado only to end up renting a Jeep...

I packed up my tools and we drove up to Ouray and set up camp.
So, after months of work and preparation, we towed our Bronco all the way to Colorado only to end up renting a Jeep...

Today I finished the fuel pump replacement I started in a Home Depot parking lot 500 miles from home. I couldn't get the feed line fitting to release with the cheapo tools I was able to buy in that location.
My temporary access hole cover panel...
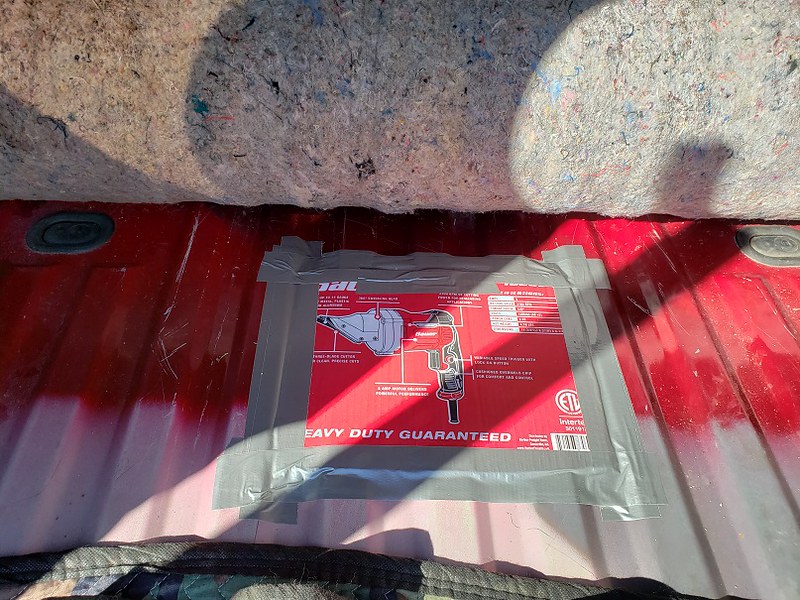
Of course, once I was able to use my good tools at home, the fitting came right off...

Pump may have been original... marked Walbro with a Ford part number F8UU-9350-AA. The sock filter definitely looked like it could be 28 years old...

Back up and running, and I ordered a cover panel from the Bronco Graveyard that matches the floor corrugations for a more permanent solution than my cardboard box.
Back to the trip report...
Our next few days, we would be based in Ouray, CO, on Highway 550. The pic in the post above with the Jeep is our campsite in the RV park. Not as picturesque as the Forest Service campground we were previously in, but now we had cell and internet service. And we were just a few steps from consistently hot showers!
We spent the first day wandering around Ouray, which is a very popular tourist town. Our RV site was on the North side, only about a mile walk from downtown.
Ouray from the south side...

Looking South from the river path that ran from our RV park into town.

On day two, we rented the Jeep, a 2019 Rubicon named "Goldi". She had the turbo 4 with hybrid assist, 8 speed auto, and 35" tires. Goldi had no problem getting us around, though I elected to pass on a couple of the more difficult trails since we were driving a rental.
Our first destination was Governor Basin, a fairly easy run out of Ouray. The first portion is dirt county road, and easy traveling, although there are some interesting rock overhangs on the way.

Then it was time for more tight switchbacks to make the climb to Governor Basin at 12,000ft. Low range often made the climbs and descents much easier, but 4WD was rarely a necessity.
Governor Basin was spectacular, as was just about every drive on this trip.

A helpful fellow traveler snapped a pic for us.

Panoramic pics aren't at their best when viewed on small screens, but it's really the only way to accurately convey this kind of scenery....

For the second half of the day we drove a little further South on 550, and turned off on a county road that meanders through the Red Mountain Mining area. The roads were almost always easy through here, but this trip was about the scenery. We took about 100 pics that afternoon, so there's no way I can post them all. Here's a few...


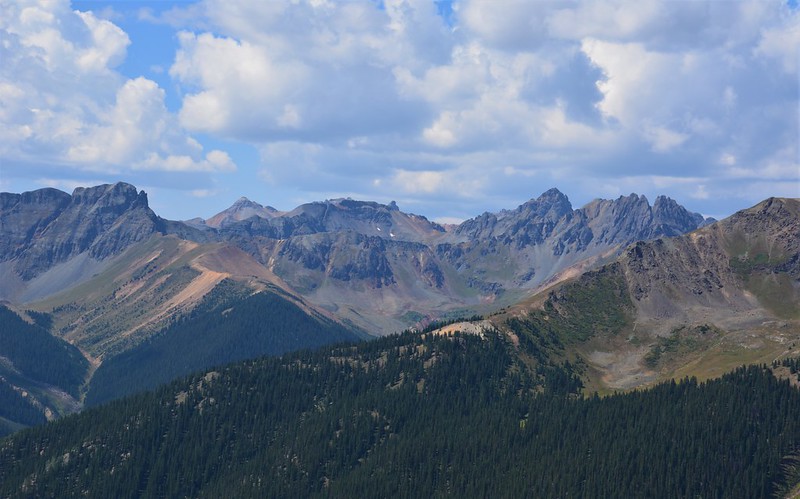

Again, it really takes a panoramic shot to do justice to the views...

Absolutely beautiful! Going on trips like this is on the bucket list for my wife and I.
I'm glad you were able to get the truck towed and that a suitable rental was available so the sightseeing could continue.
Well, I should be popping the top on a beer under the awning of our camper in the Willow Springs pits right about now. Unfortunately, our event this weekend was canceled at the last minute, so I'm sitting at home, having not made the 440 mile tow to Willow. ![]()
I still popped the top on the beer, though... ![]()
In reply to ShawneeCreek (Forum Supporter) :
Thanks. It was a wonderful trip, even with the minor problems.
Sorry I haven't posted more pics from the third leg of the trip. Life kind of got in the way this week. I should have time this weekend, though... ![]()
As far as the Bronco goes, I received my cover panel from a popular Bronco vendor the other day... complete with pre installed rust... ![]()
![]()

Got it all mocked up and drilled.

I used 1/4-20 rivnuts for easy future access.


I was going to use button head allens for a clean appearance, but decided on plain old 1/4-20 bolts so I could get it off in the field with a pair of pliers if necessary. I used some all weather foam seal under the panel and gave it a shot of primer before bolting it down.

So the fuel pump saga is finally done.
In reply to docwyte :
"Last minute" may have been a little strong on my part... we were given plenty of notice and I don't want to give other impressions.
My complaint (and it's not a big deal, really) was canceling an event "because Covid" when registration opened long after Covid was a thing. If you didn't get enough drivers, which I believe was the real reason, I completely understand. Just say so...
Finally got around to uploading some pictures from the third leg of our trip.
After Ouray, we moved base camp to a small RV park outside Lake City, CO, near Lake San Cristobal.
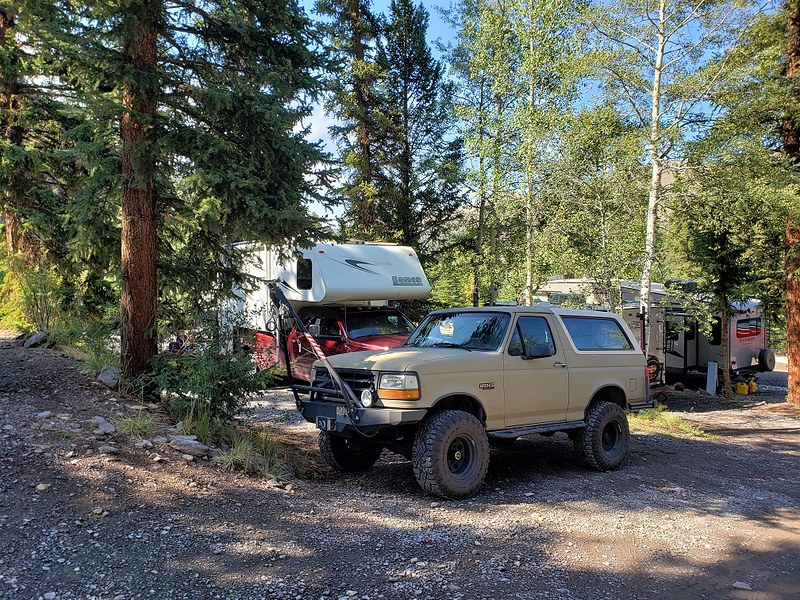

A beautiful location, and a very nice park, but the wi-fi was about the equivalent of dial up, and no cell service for us. Good thing we weren't there for 'net surfing! They told us a bear had been in the camp every night the week we arrived, and he visited several times while we were there though we never caught a glimpse of him. Apparently he has learned to open unlocked car doors!! ![]()
Our first day out, we did the Cinnamon Pass side of the Alpine loop, and it rained all the way to the top of the pass...

There were some crazy folks doing a 50 mile mountain bike race that day from Lake City running the entire Alpine Loop including both Cinnamon and Engineer passes. We passed a couple of stragglers still climbing Cinnamon. Good on them, as I would never have made it even that far!
Once we started back down, things started to clear up a bit, and American Basin was beautiful.

Back in camp, we had a visitor...
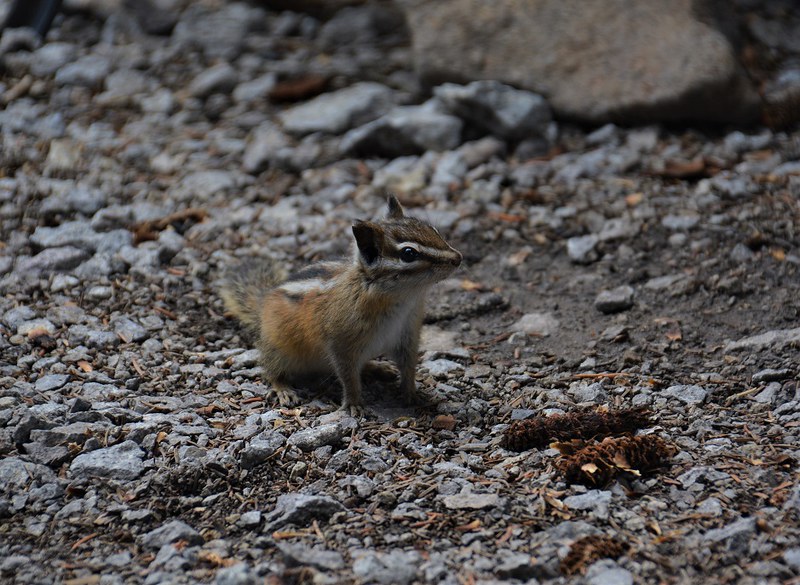
The dog was interested, but not that interested... there was around 5 feet between them in these two pics...
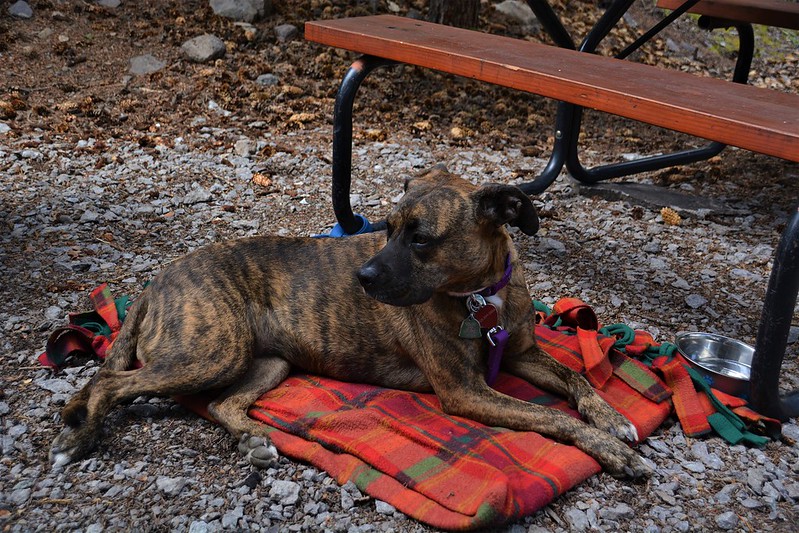
The next day we headed for Engineer pass... weather was still on and off, but better than the previous day.

I wondered if this was the aftermath of an avalanche...

This cabin is near the top of Engineer Pass, and it's for sale...

Only $700,000.... totally off the grid, and a swinging foot bridge to get there.
The views from Engineer were every bit as good as everything else we'd seen.
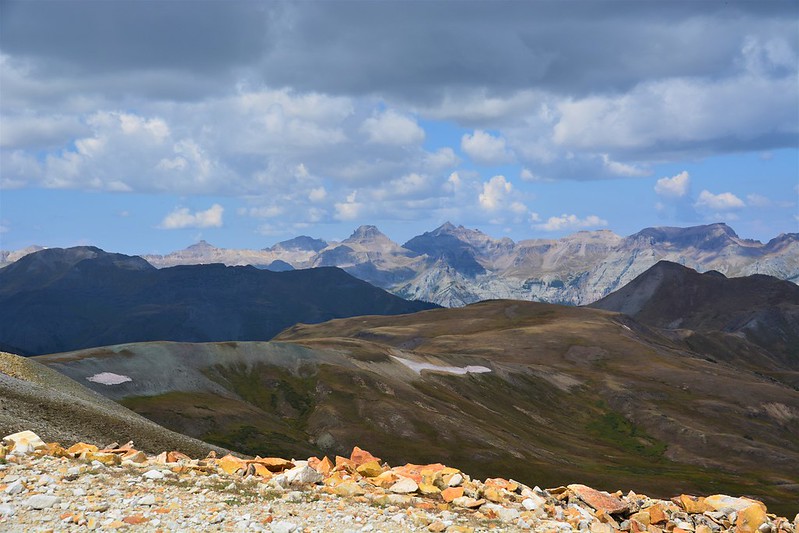

Then it was time to hit the highway and head for home. It had rained the night before we left, and all the peaks had snow.

On the way home, we stopped at Lizard Head again...


We also snapped a pic of Memorial Rock, which fell down the mountain and wiped out CO145 North of Dolores in 2019. It was so big, they decided to leave it there and rebuild the road around it...

And that about does it.
Now I need to figure out our Fall schedule, and decide if I'm going to finally start on Aero for the NA, or the exhaust on the Bronco...
Decided to do some cleanup in the garage, so I finally got around to tearing down the short block of the seized engine (prior owner ran it out of oil - thus my getting it cheap) that came in our blue NB. I knew it was going to be ugly...

The rod cap was welded to the crank journal... and two other rod bearings were nearly as bad. All the crank and rod journals showed signs of no oil. I was pretty sure the engine was going to be junk, but this confirmed it. It could probably be saved with some machine work, but the price of used NB engines makes it not worth the trouble.
With the engine gone, I could finally move the hoist and stand to my storage unit, since I have no plans for using it in the near term. Probably the lightest load I've transported in the trailer... At least I'll have a little more space in the garage this winter.

Also brought the NA home, as I have a few minor projects planned for the next couple of weeks.
One of the small projects I'd planned for a while was to re-do the exhaust system hangers. I've tried the poly hangers (they melt on the track), and the rubber hangers and neither really worked to my satisfaction... too much flopping around. Project creep set in immediately... I decided I wanted to re-do the muffler positioning while I was at it.
And then I started thinking about rear aero, as aero is the next big project. Trimming the rear bumper would allow me to raise the muffler and do some prep for a diffuser down the road.
So today the bumper came off...

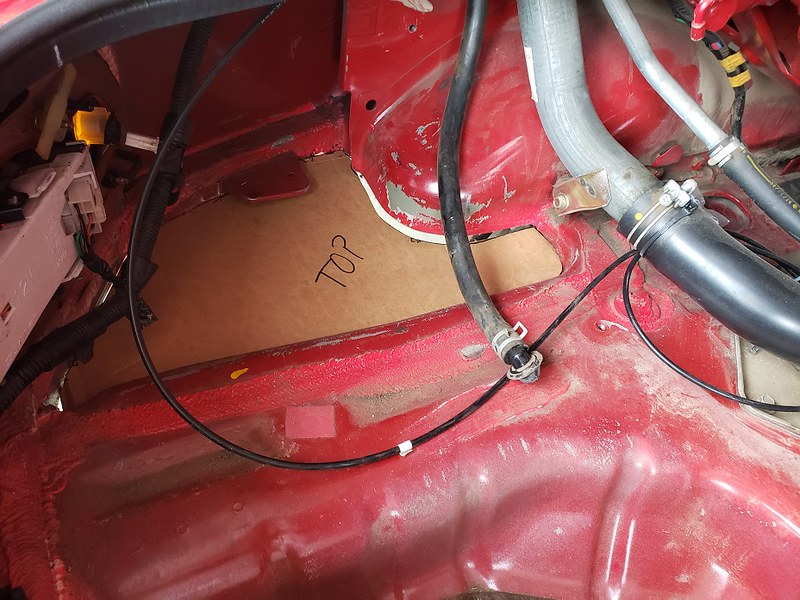
Next was trimming the sheet metal in the rear of the wheel wells, and cutting of the frame 'horns' that hang down in the rear. The driver's side has a recess for the factory jack, that when trimmed out leaves a nice big hole...

It seems this is the year to cut giant holes in the floor of my Miata... ![]()
Got everything cut and cleaned up.

Tomorrow I'll trim the bumper, then I can start reworking the muffler and tow hooks.
Cut the bumper today... used a jigsaw with a 'plexiglass' blade. Worked great, nice and smooth, no melted plastic.

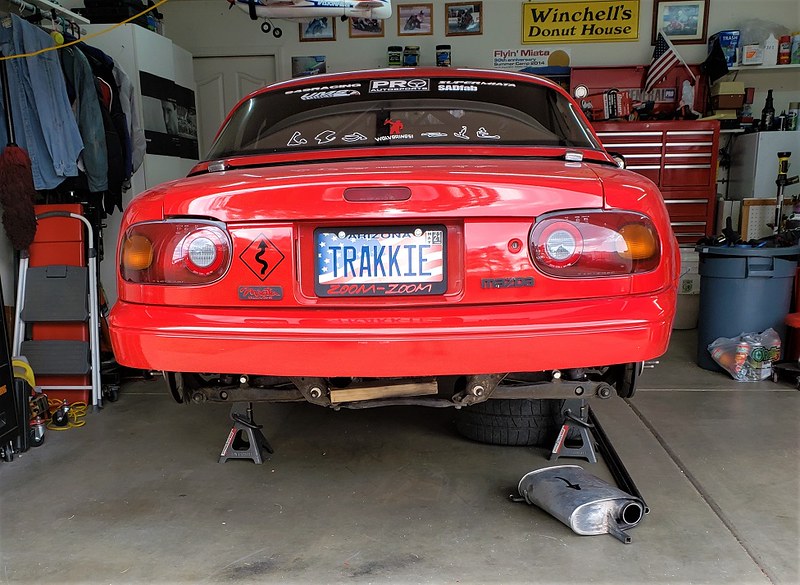

Also made a cardboard pattern for the sheet to plug the hole in the trunk.
Have some exhaust parts coming that should be here tomorrow so I can start re-hanging the muffler.
Finished most of the exhaust work today.
Old muffler setup (used the stock Miata hangers) :


New muffler setup:

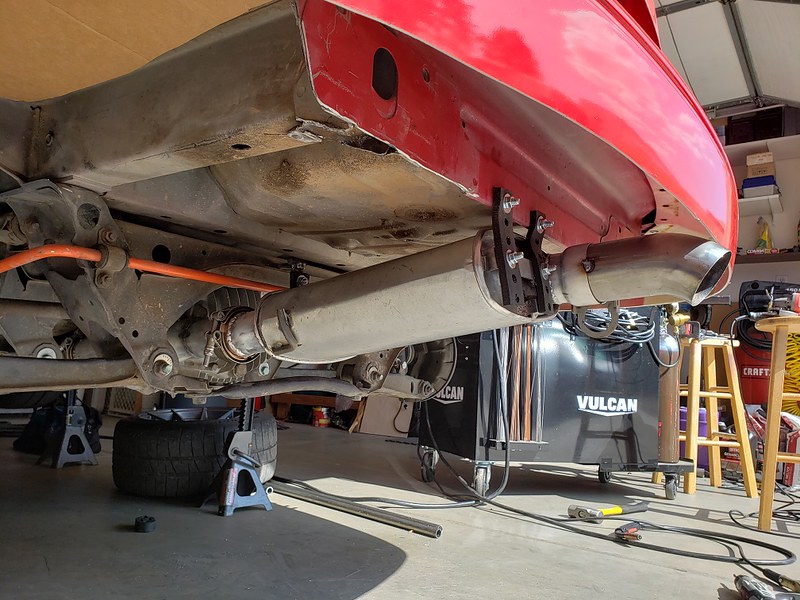
The new setup just uses straight rubber muffler hanger straps, and the location and orientation of the straps prevents almost all the unwanted movement I was getting previously. Double hanger in the rear, single in the front of the muffler... it's darn near a rigid mount. Still need to trim the hanger straps.


The new setup also elimates some tubing and material from the mounting points, so a couple more pounds removed.
I'm probably going to have to trim the bumper slightly, but it's hanging a little low in the pic since there's no support under it.

One hanger bracket for the mid-pipe to make in the morning.
Big box from Swag Offroad coming this week... then I can start on the bumper support. I'm also going to make a replacement heat shield to mount between the muffler and trunk. That and the 'plug' for the hole in the trunk floor.
Finished up the exhaust today... huge improvement over the floppy mess it was previously.
Also made the mounting plates for the bumper cover support bar to mount to the frame...

and the flanges for the bumper cover to mount to the support bar... I've been getting good use of the rivnut tool...
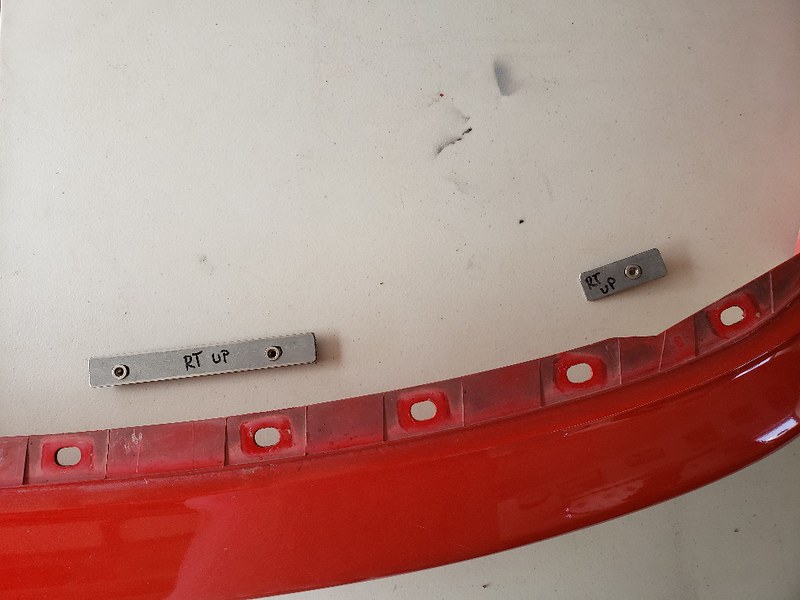

Also did the final trimming on the bumper cover for the exhaust exit.
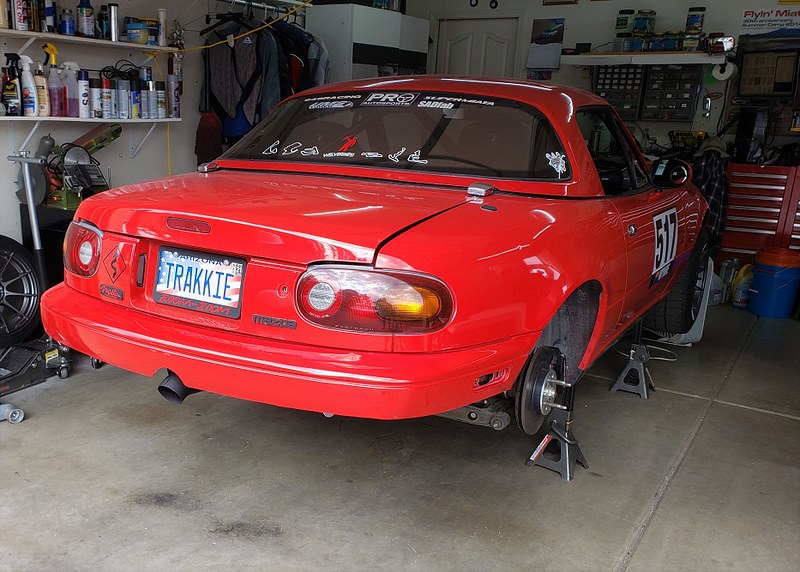
Now I just need my order from Swag Offroad to show up...
The next step for the rear bumper project required upgrading a tool.
Quite a while back, I bought a HF tubing bender with the intention of doing the Swag Offroad upgrades. I also bought the HF pipe threader, which enables power rolling. My tubing bender cart was designed to carry the roller as well as my JD2 bender, so I mounted it up. And it's never been used.


Until last week, I never got around to ordering the Swag upgrades. Well, now they're here...

First step is welding on the 'wings', which allow the 'base' rollers to be placed wider, increasing the leverage of the 'press' roller.
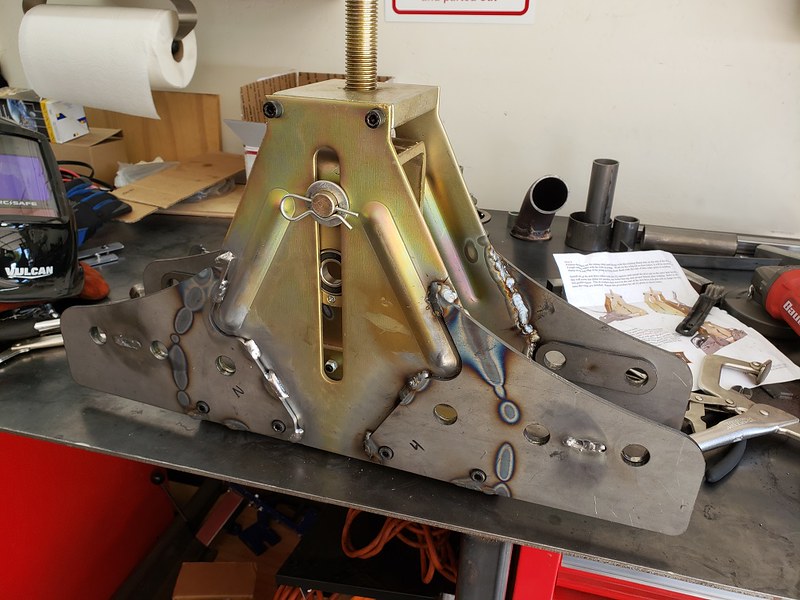
Next up was welding axle 'caps' and fitting the anti-rotation mechanism.


I shot it with some primer on the bare steel, and I was done with today's work on the roller.

I also have the parts for adding a bottle jack to replace the jack screw for the 'press' roller, but HF didn't have -any- bottle jacks. Not one, of any size! WTF?? I asked the manager, and he said they hadn't been able to get any for a while, and didn't know when they would get more. Great... I ordered one off Amazon that I hope will be similar in size to the HF jack... we'll see how that goes.
Anyway, on to the actual work. It was hot, and I kept getting interrupted, so I didn't get many pics of the process, but here's the bumper support bar... all bent up and ready for final fitting.

So was all of that bent with the roller or were the ends done with a normal die bender? It came out nice.
Those upgrades makes for a nice looking tool.
In reply to adam525i (Forum Supporter) :
Ends were done with the JD2 bender on the other side of the cart...

Got the bottle jack in, so I finished putting the roller together. The jack replaces the jack screw that puts pressure on the stock to create the bend, and makes the process a bit quicker.
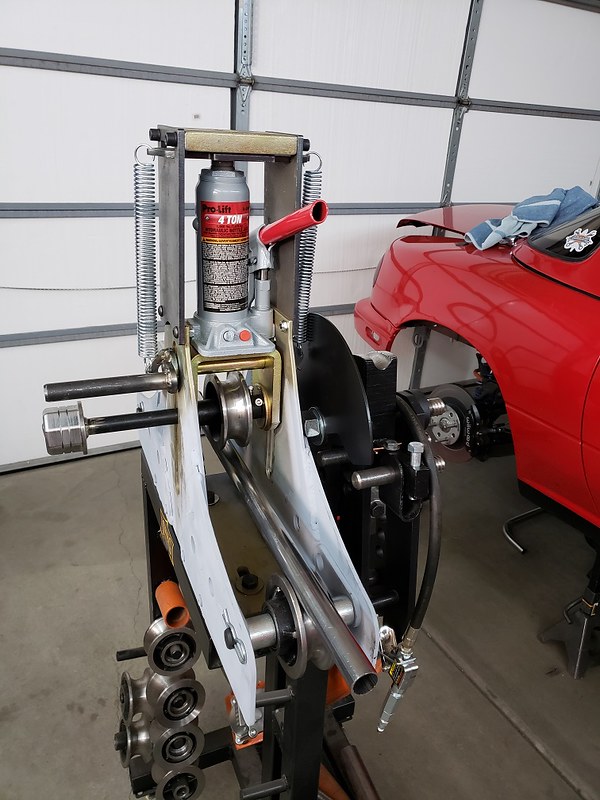
So, one side of the cart is for bending...

The other for rolling...

Also did a little work on the NA today.
Since I had cataract surgery on Friday, I'm putting off any welding for a few days, so the rear bumper support will have to wait. Instead, I got started on another aero project... venting the high pressure area behind the front wheels.
Fortunately, there are a lot of creative and industrious people in the Miata community, and Left Lane designs has a kit that matches the hood vents from Singular. I got an early kit, but it's now available from Flyin' Miata exclusively.
The kit:

I started by laying out the supplied templates on the passenger fender.

Next was cutting the holes... for which I used the HF shear I bought in CO for the Bronco fuel pump fiasco. Much easier and less messy than using a cutoff wheel.

I still need to do some fitting, but decided I didn't want to do any grinding yet, so I'll be continuing this install in a few days.

Wrapped up the fender vents, and most of the rear bumper project today.
First up was finishing the new bumper support. This was pretty fiddly to fabricate, but everything turned out alright.

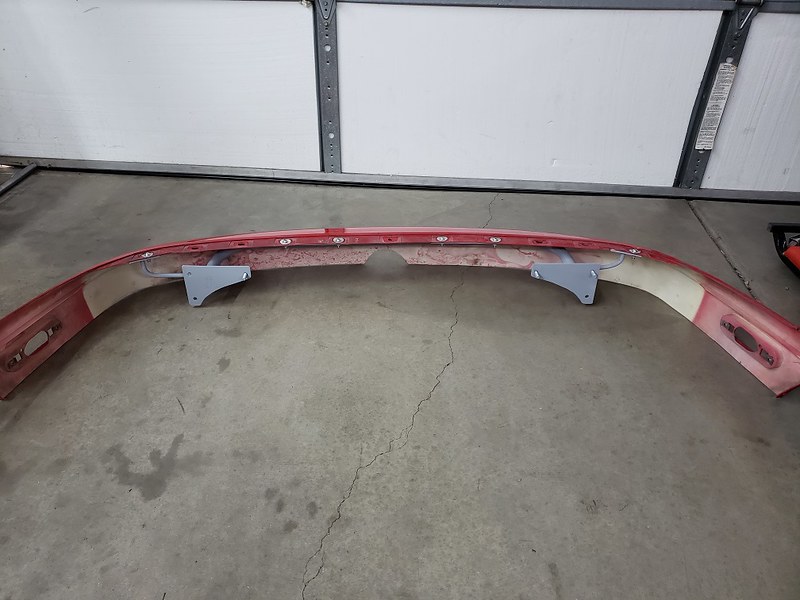

Everything is tucked up nicely under the rear, and it's all set for fabricating some kind of diffuser down the road.


I still need to re-install the side marker lights, which will be non-functional.
Also finished the vents, which all told, were kind of a PITA. The templates were fiddly (I took a lot of care getting them aligned properly), and none of the rivet holes lined up. I basically had to get one rivet in, then worked in an alternating pattern, chasing each hole with a drill to get the other rivets in. I'm pretty sure this is a result of the vent being flat, while the fender isn't... not really a failing of the kit, just the way things are. Anyway, they look good. Hopefully they'll actually evacuate some air from the wheel wells.

I have a couple more things to attend to at the rear, and then it'll be time for the front end...
First project for today was to cut a piece of aluminum sheet to plug the giant hole in the trunk left over from trimming the floor...

I added some seam sealer after taking the pic.
Next up was installing a Blackbird Fabworx lexan spoiler I picked up a while back. Like the fender vents, this thing had been gathering dust under our bed... since spring of 2019. ![]()
I had actually debated for quite a while if I was going to install it at all... I would have preferred to jump straight to a Singular or Nine Lives wing, but it's just not in the budget right now, and right now is when aero is happening. I'm going to be doing some work on the front, and I need something out back to balance it, so there it is.
Apologies for not having any in-progress pics... I was in 'the zone' and the install is a little tricky.


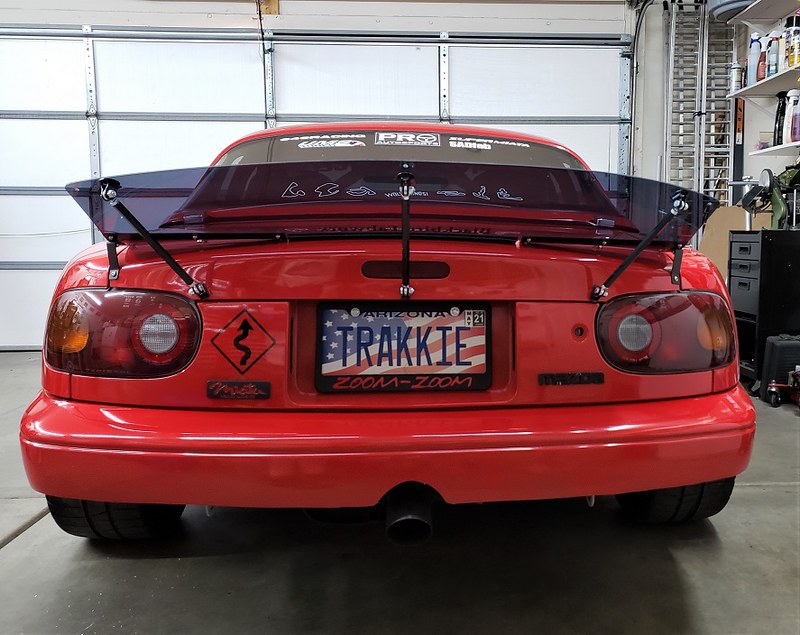
So the rear is 'done' for now. Starting the front soon...
You'll need to log in to post.