Nice! Re: The footwell brace, Do you think you gained a little front subframe stiffness?
In reply to NermalSnert (Forum Supporter) :
I don't think there's much to be gained there without going all the way to the shock tower. The firewall in a Miata is pretty flexy up top already, and the footwell braces don't really help that. The main intent is to help protect the footwell from collapsing in a hard hit to the front corner.
Today, we took the NB to the local AutoX. Not really our thing, but got a little seat time and had some fun. I certainly didn't set any records on 6 year old 340 treadwear Contis... ![]()
I'm kind of embarrassed I didn't realize how old the tires were until I looked at the date codes today. They were originally a rain set for the NA, but have spent summers on the NB.


Meanwhile, back in the shop things are slowly progressing...
The crossmember for the K swap is set up for an NB steering rack, so I had sourced one a while back. Before installation, the rack needs to be depowered. I had depowered the NA rack years ago, but it was just a line loop/plug. This time I'm going to do it properly. First step was stripping the lines off the rack.


today I disassembled the rack, and pressed out the mounting bushings.

Next will be the actual 'depowering' modification, as well as shaving the hydraulic inputs on the rack housing for clearance.
Rack work today...
1st up was chasing the threads on the V8R front subframe, which were a mess.

Next was removing the flange from the steering rod. This is the 'piston' the hydraulic fluid pushes against to assist steering effort, and it's what creates most of the drag in the system when you do a plug/loop depower on a Miata. Removing it allows the steering to move without the drag.
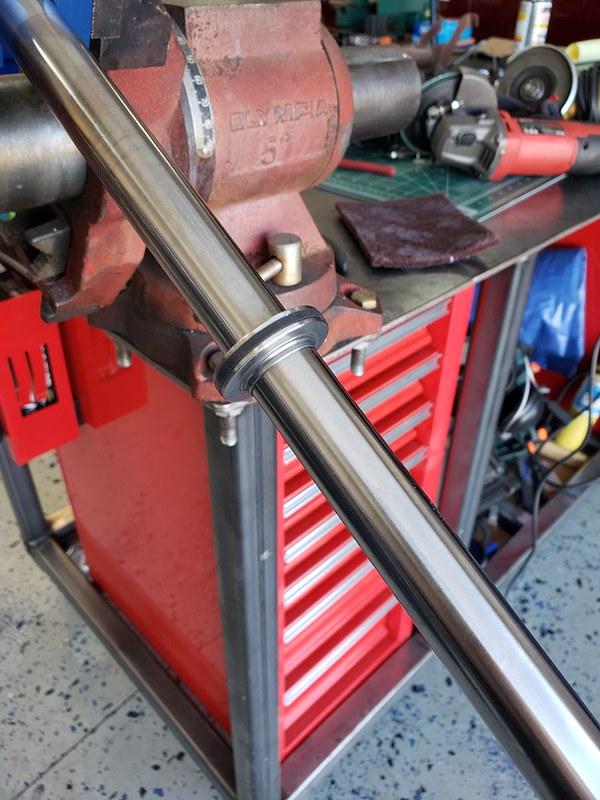
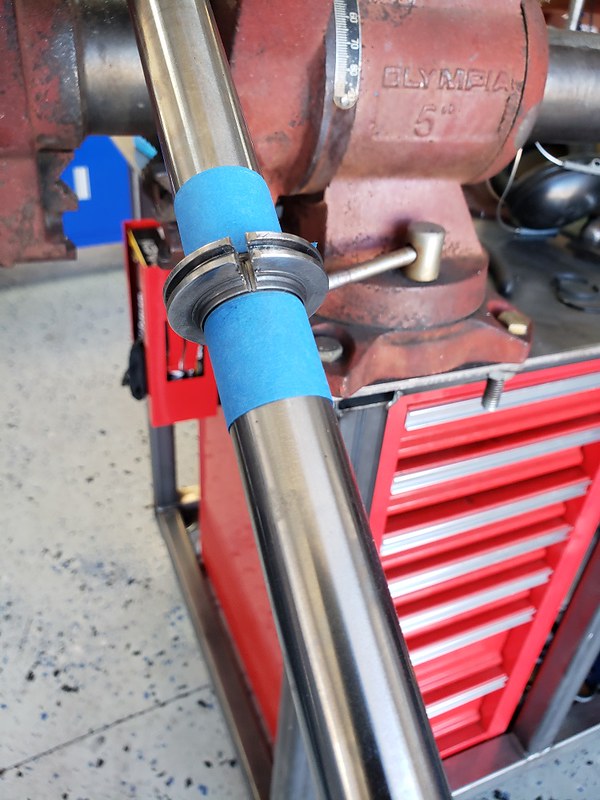
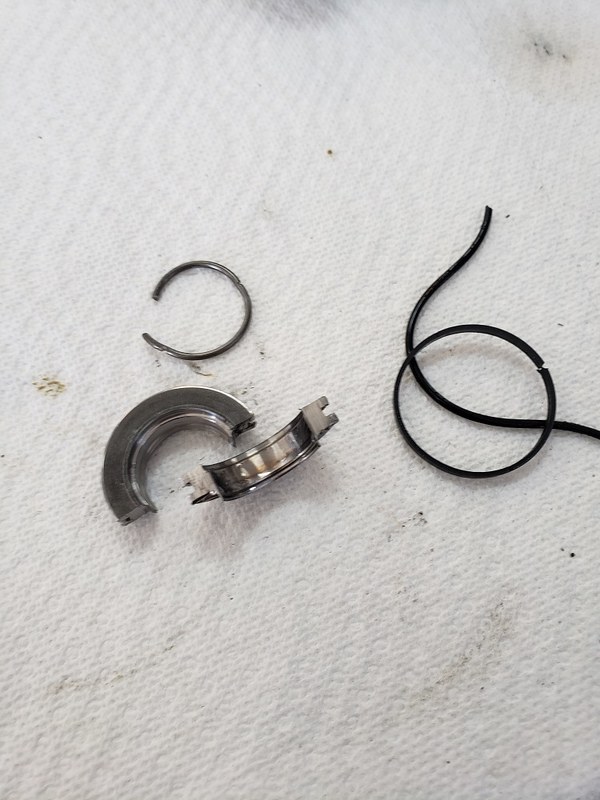

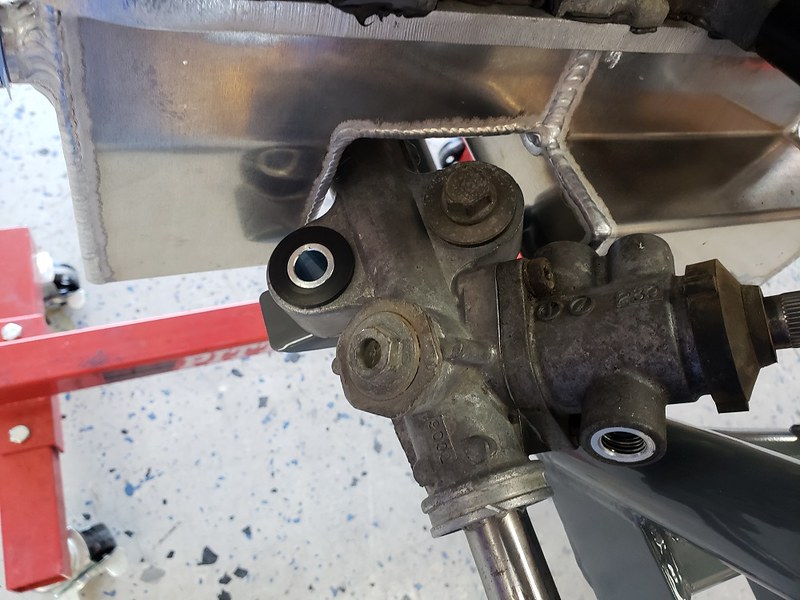
Next was 'shaving' the hydraulic inlets on the rack body, which is necessary to clear the oil pan on the K24.

Holes get welded up and the body gets some fresh paint.

Also did a little cleanup on the splines for the pinion...


I spent about 40 minutes looking through all my Miata stuff before I finally found the plugs I bought over a year ago...

And, of course, two of the plugs are the wrong thread...
Got the rack mostly back together, with new bushings pressed in, for a test fit on the subframe.

I bolted the V8R subframe to the K24 on the engine stand to check out the fitment of the steering rack and ensure I had done everything necessary for clearance. It's really tight in some spots...

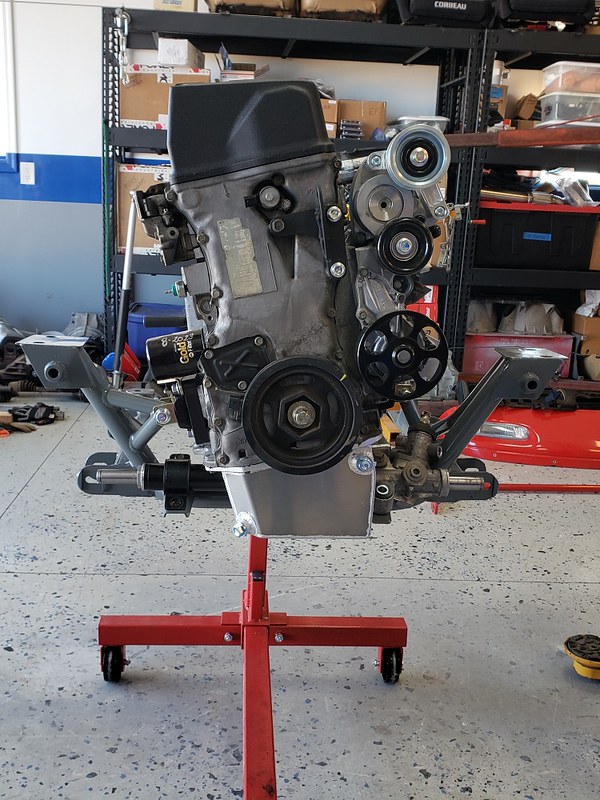

I think I would watch that awfull closely for abrasion on the oil pan. Every single session...Especially when you go somewhere new after it proves OK for a year in familiar territory.
In reply to TurnerX19 :
Definitely going to keep an eye on things. This was just a mock up... I'll see how it looks when installed in the car and the driveline angles are set.
It's just Rustoleum 'Professional' rattle can paint. I seriously considered using a catalyzed paint for the cage, but rattle can allows for easy repainting for modifications and touch up. I used clear 3M PPF on the cage for frequent touch areas.
Rodan said:It's just Rustoleum 'Professional' rattle can paint. I seriously considered using a catalyzed paint for the cage, but rattle can allows for easy repainting for modifications and touch up. I used clear 3M PPF on the cage for frequent touch areas.
Ok thanks, good to know, I am going to need to do something on my project at some point and like the light color and easy touch up is always a good thing.
Rodan said:The color, ironically, is Dark Machine Gray.
lol, I wonder if there is a "light machine gray" :)
Just saw that one their website....
Looks like lowes....nothing, homedepot, you can buy it by the case, amazon, $14/can
Going to grab a can and see how it looks
The weather has finally warmed up a bit, so I'm about ready to paint the engine compartment. In preparation, I removed the fenders and front subframe (which needs to come out anyway).

The lift table ended up working well for removing the subframe.


Test fitting the subframe today...


Unfortunately, V8R's reputation for spotty QC appears to be deserved... On a 32 year old chassis, I'm not going to complain too loudly, though...


Easy enough to open the holes a bit, and use a washer/spacer for the vertical gap.
Reinstalled the clutch and dead pedals.

Reinstalled the clutch hydraulics. Also re-bent the factory hard fuel lines to go up the firewall instead of out the right frame rail. Re-bent the rear brake hard line to follow the new firewall profile as well. All of these will eventually be pointed towards the driver's side, but for now they're out of the way and where they need to be.

Stripped out part of the OEM K24 engine harness today so I could start working on some electrical planning...

You'll need to log in to post.