1 2 3
armt350
armt350 New Reader
11/17/14 4:53 a.m.

Hey everyone,

This will serve to be a pseudo introduction thread and I figured this would catch a bit of interest here. I recently had a failure of my clutch slave cylinder on my 350z and decided rather than replace the slave cylinder to kick it up a notch. Instead I'm swapping the VQ35HR out for a LS3, because it obviously makes sense.

Here is the car I bought it a about 10 months ago. It was high miles and was a 5/10 wear wise on the interior plastics.

[URL=http://s46.photobucket.com/user/armt350z/media/635203703831707520_zps118ae861.jpg.html][/URL]
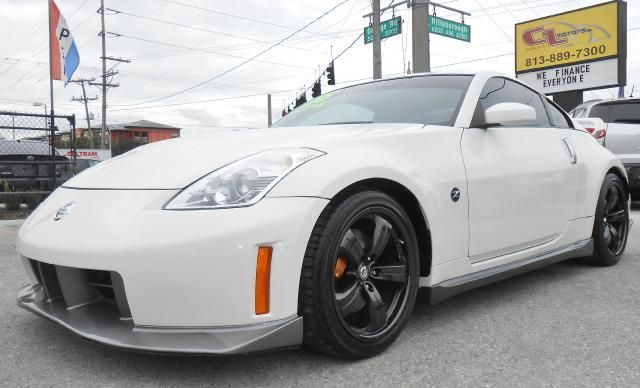
[URL=http://s46.photobucket.com/user/armt350z/media/635203703833270100_zps7b806be1.jpg.html][/URL]
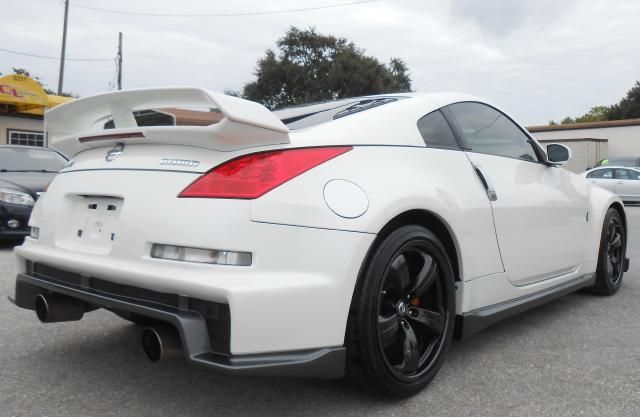
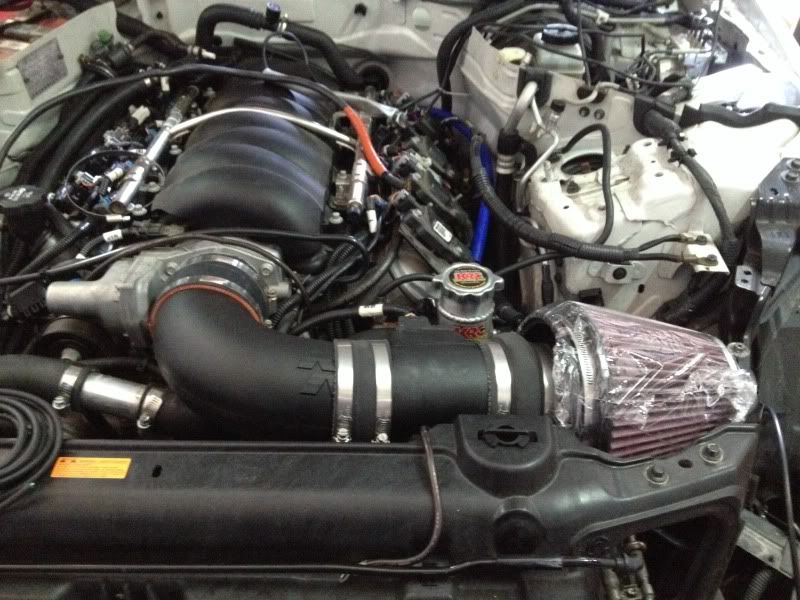
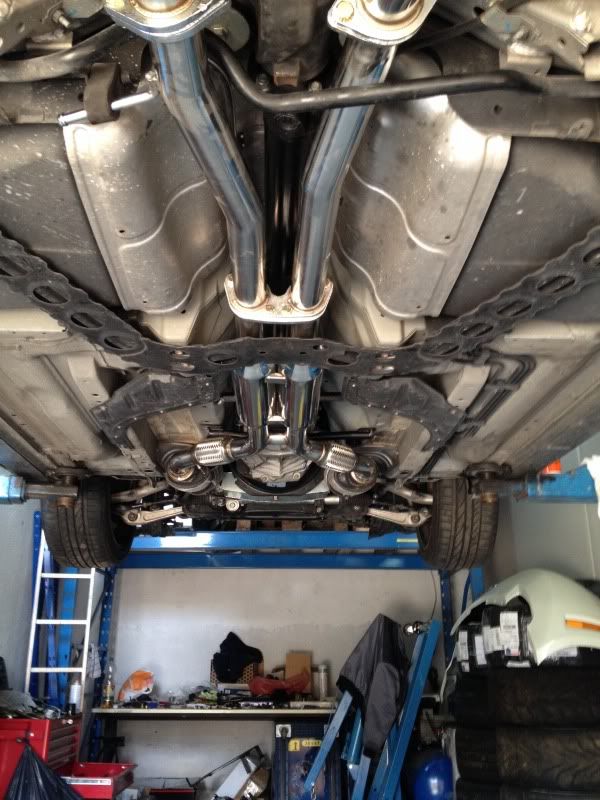
As of right now the build is focused around a 6.2L LS3 Motor out of a 2012 Camaro SS. I've put in a GMPP street cam in it for now but that may change later if I go forced induction or need more power. The intake is an off the shelf K&N unit. the exhaust will be a 2.5inch dual exhaust. I'll put the power down through a Tremec t-56(TR6060) Magnum Transmission with a Mcleod clutch and hydraulic throw out bearing. In the pumpkin, I'll put a Cusco 2 way locking diff. Whiteline bushings will be installed throughout the car.

For the interior i'm looking at Corbeau seats with a 6 point harness on planted seat mounts.

armt350
armt350 New Reader
11/17/14 4:55 a.m.

I forgot to mention, this build started in early spring which was when the clutch went out so a lot of this is past tense.

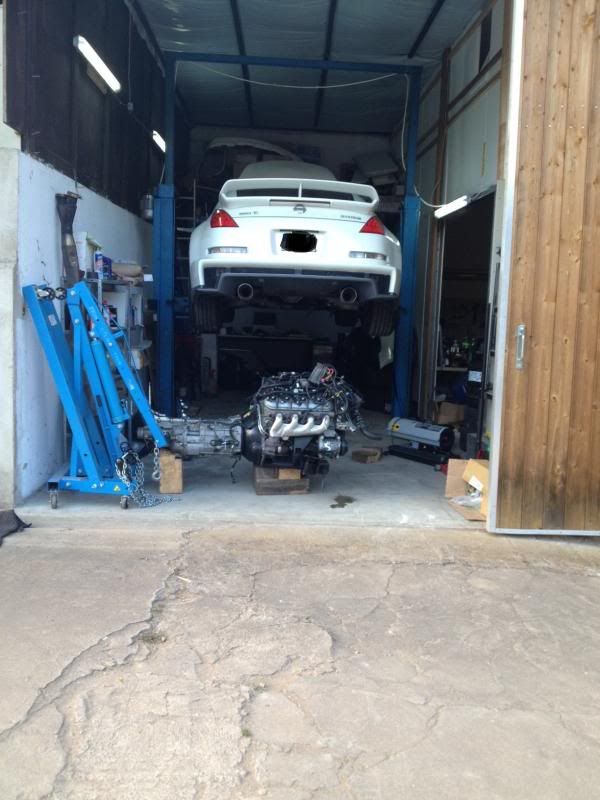
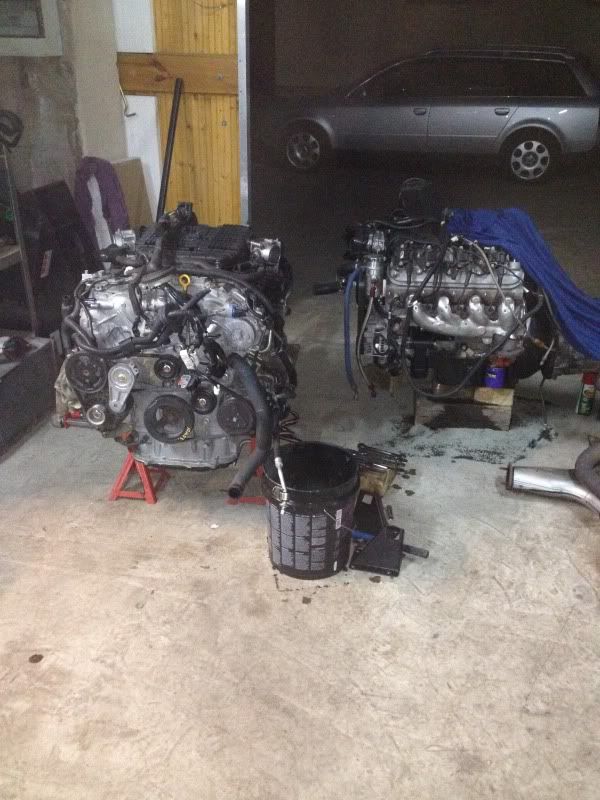
Here is the mandatory build up shot.

[URL=http://s46.photobucket.com/user/armt350z/media/350zausbau2_zps7805a54e.jpg.html][/URL]

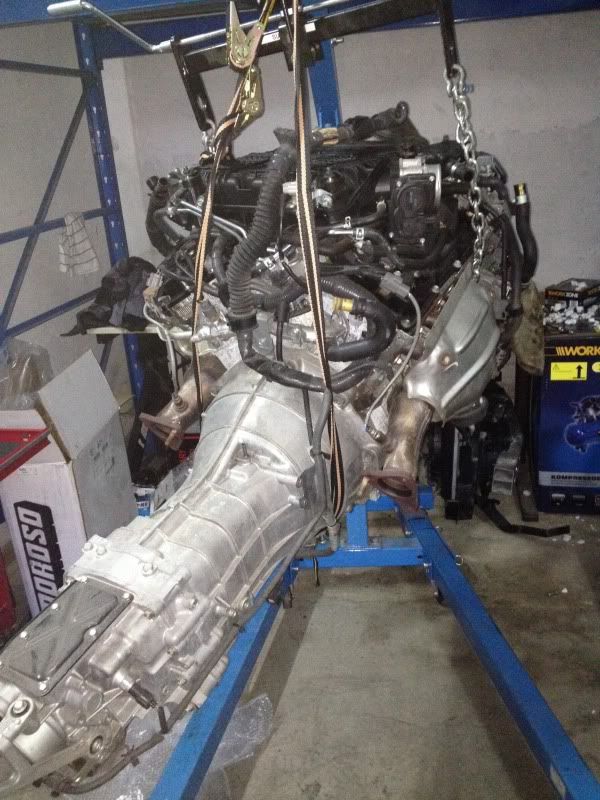
The engine and trans are already together, I had been running this setup previously in my FD3S which is now in the josh's hands.

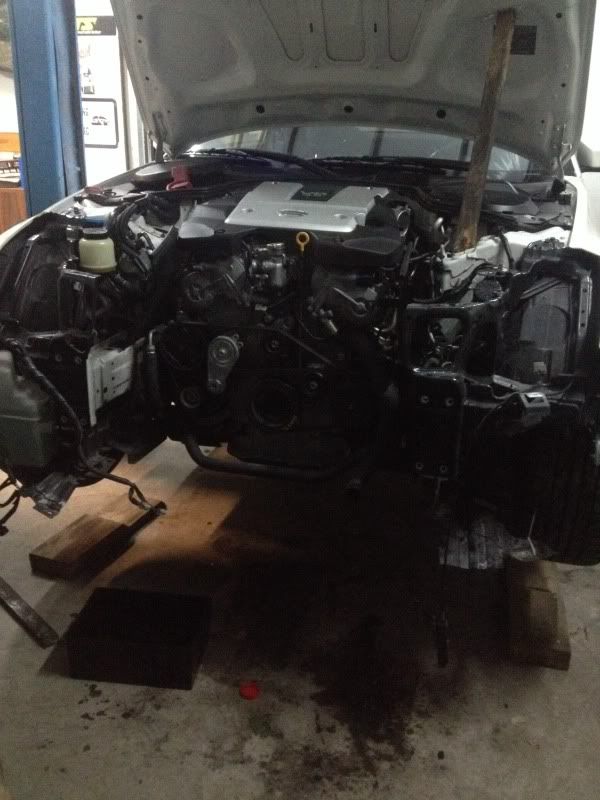
To start with, ripping the motor out... there are 3 ways to do it. 1. You can drop the engine/subframe/trans out the bottom if you have access to a lift. 2. Remove the front end and bring it out the front. 3. use a engine hoist and bring it out the top.

I chose method 2, although in retrospect I should have done 1, more on this later.

So here is with the front clip removed.

[URL=http://s46.photobucket.com/user/armt350z/media/92DECF8D-998F-4209-8113-6B33204B1A67-276-000000EDCDDF0D49_zps14102a61.jpg.html][/URL]

And the engine comes out.

[URL=http://s46.photobucket.com/user/armt350z/media/BFB989F1-4AC5-41A1-9127-47490A2863F7-145-000000045193593E_zps8f026be8.jpg.html][/URL]

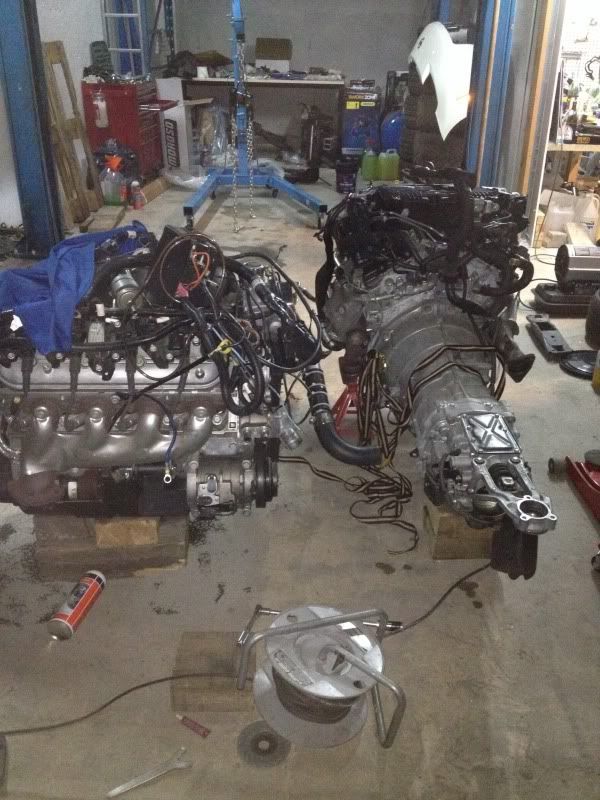
Here are some size references from the VQ vs. the LS

[URL=http://s46.photobucket.com/user/armt350z/media/579B1CF0-0EFD-4B53-B566-55B9A2558FEC-145-0000000464E84CD1_zps723bfb71.jpg.html][/URL]

[URL=http://s46.photobucket.com/user/armt350z/media/180629C7-B912-42CB-B958-057EE101AC11-145-00000004811A22B6_zps87ad3326.jpg.html][/URL]

armt350
armt350 New Reader
11/17/14 4:57 a.m.

So most of the day was spent doing some mild changes to the LS motor to prep it. The mounts Being used do not allow for the stock oil pan to be used, luckily the kit provides an oil pan that will. The downside is I no longer have a spot to mount my oil pressure sensor.

Here is the mounts and new oil pan on the subframe.

This is also the reason why if I were to do this again I would drop the motor out the bottom. There simply is no way I found to get the engine and transmission into the car with the subframe and power steering pump installed on the car. I spent more time trying other ways to get it in around the subframe that I could have just turned the wrenches and dropped the subframe and bolted it all back up. What can I say I'm very stubborn.

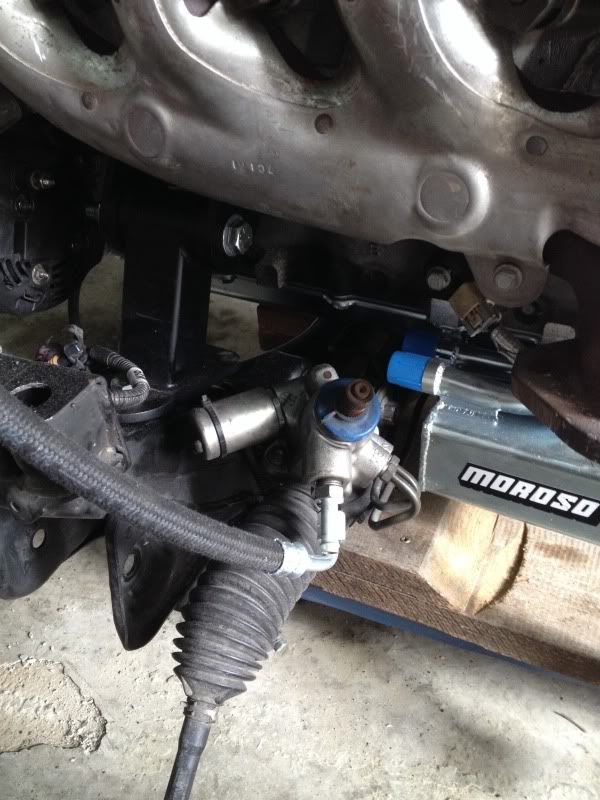
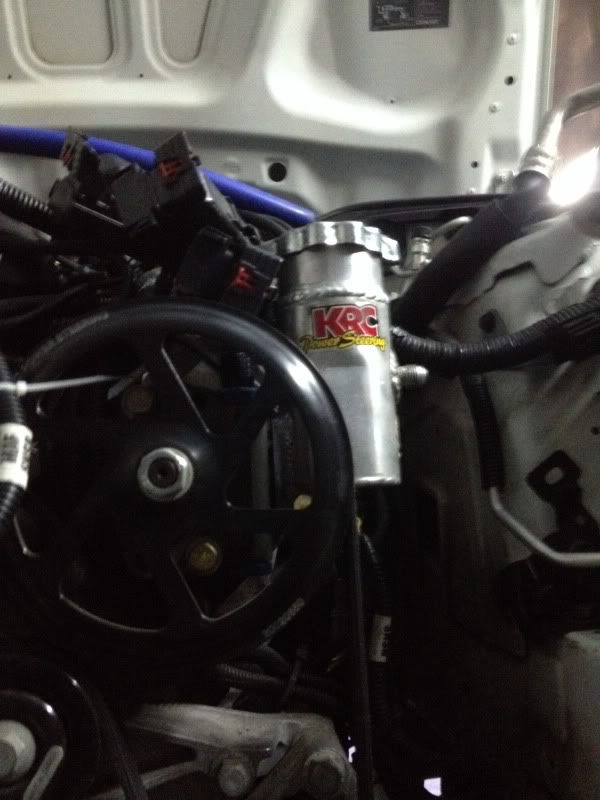
Since the steering will no longer be adapted by how fast the car is going I didnt want to over or underdrive the power steering rack. to get by this I bought a slick little KRC power steering pump that has different diameter flow restrictors that allow you to pump as much or as little as you want dialing in exactly how much assistance you want.

armt350
armt350 New Reader
11/17/14 5:13 a.m.

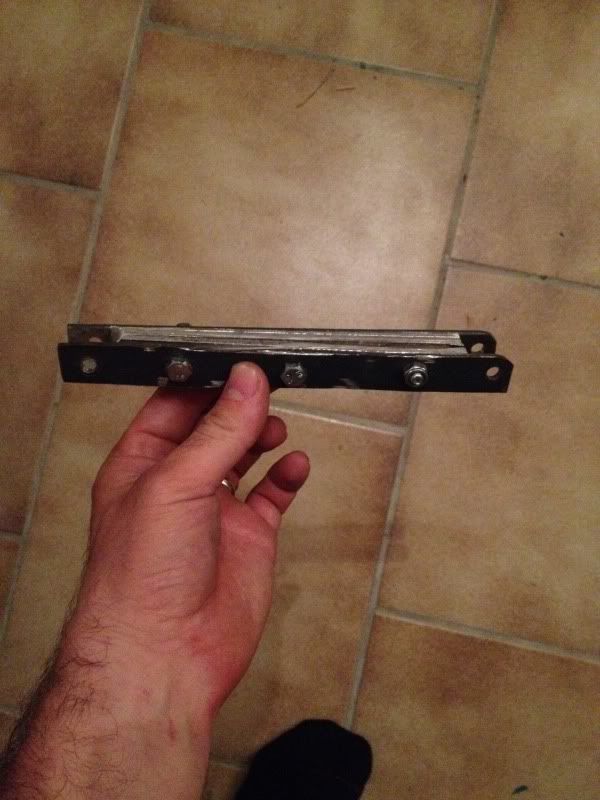
One of the downsides to using the Magnum transmission is its length. For this porject and most other LS swaps, it is simply too short. The shifter position is a little over 6 inches forward from the location of a a GTO/monaro. So, I had to make a shifter location adapter.

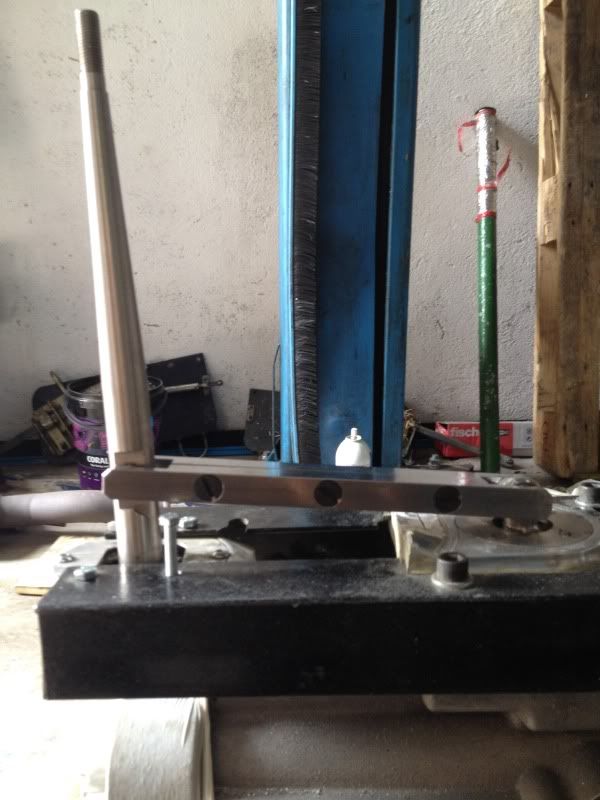
First I tried to use a offset shifter adapter but the arm on it was so long it would hit the transmission tunnel top on 1,3,and 5th gear shifts. Decided to hack apart 2 shifters I had laying around and connected an arm between the 2. So here is the first mock up of the arm to prove my concept. [URL=http://s46.photobucket.com/user/armt350z/media/24B85D02-C91A-4E54-A8E1-6C85DD750E18-454-0000010DDB9A084D_zps2b5666e8.jpg.html][/URL]

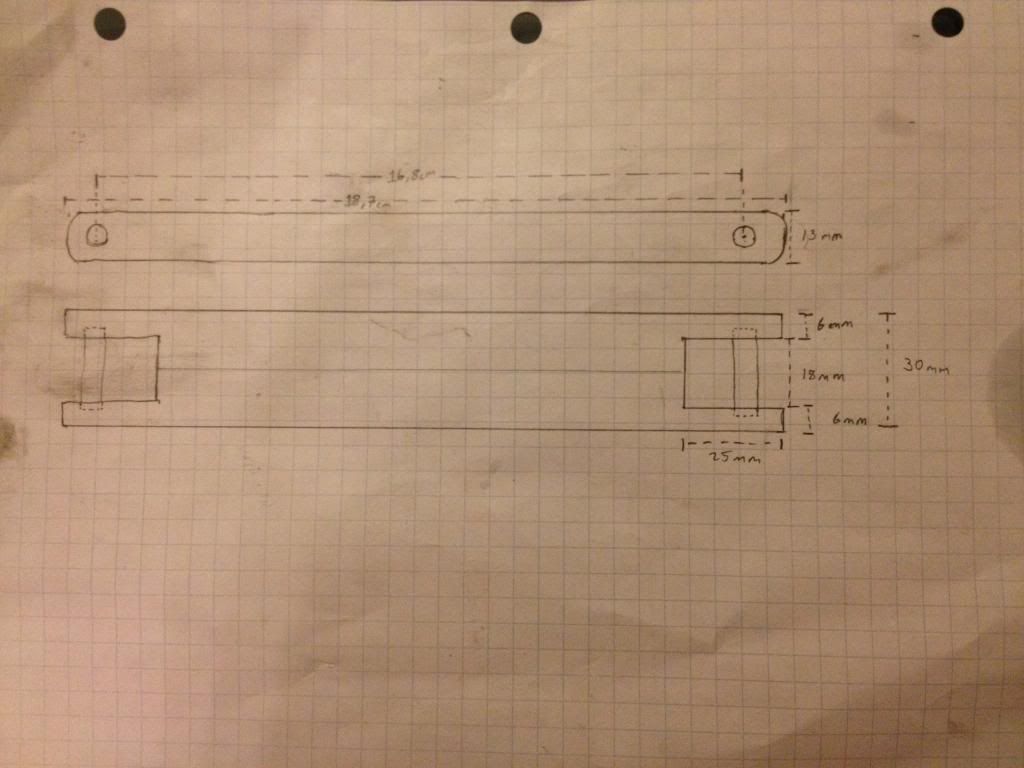
After that I made up some schematics to give to a machine shop, which is below for anyone who may do the same thing. [URL=http://s46.photobucket.com/user/armt350z/media/5758b93a-585d-4bc2-bc5c-1e9b72e4fbe2_zps76f2312d.jpg.html][/URL]

Here was the finished arm between the 2 shifters. [URL=http://s46.photobucket.com/user/armt350z/media/610CC397-7BC1-4C61-9D4E-80E5DBA416F3-454-0000010E0054F311_zps63194d95.jpg.html][/URL]

The shifters function flawlessly, I made a more permanant mount for the rear shifter but forgot to snap a picture of it. I'm about 97% happy with the location as its centered in the shifter hole of the chassis, it just appears to be slightly canted towards the driver.

armt350
armt350 New Reader
11/17/14 5:16 a.m.

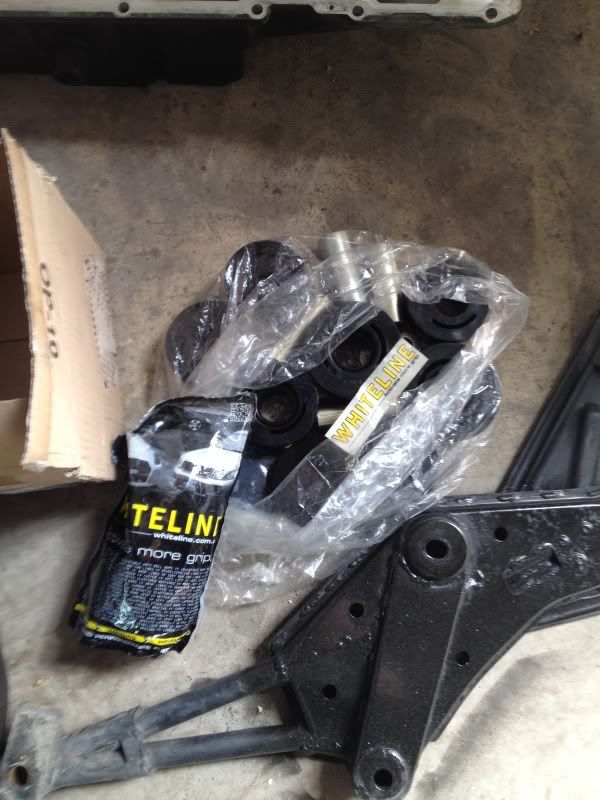
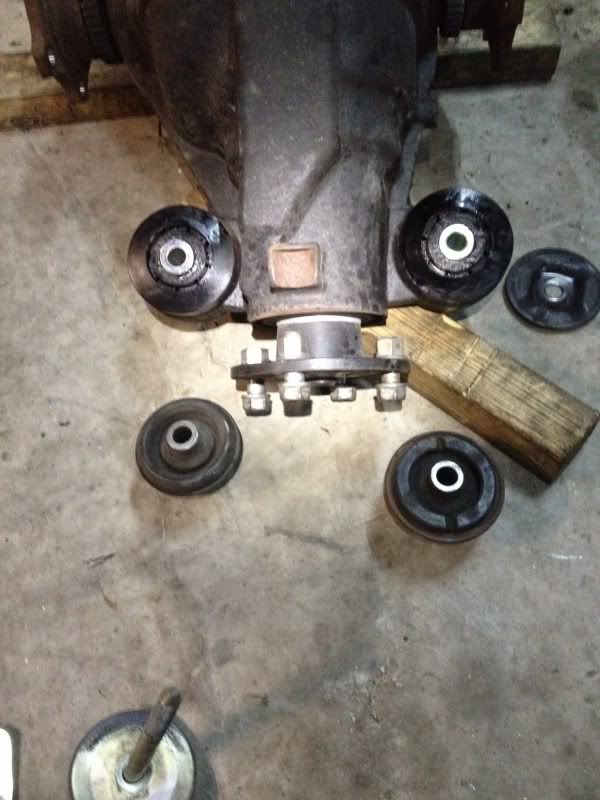
The whiteline bushings and longer studs finally came in.

[URL=http://s46.photobucket.com/user/armt350z/media/904ABD99-C0E2-44F2-BB7E-42942D2E2F15-145-0000000495CF526E_zps01f6d686.jpg.html][/URL] [URL=http://s46.photobucket.com/user/armt350z/media/4B9D66E0-DDF1-477D-9E5B-FE966DE328B7-145-000000049FFA614E_zps2cdd1a34.jpg.html][/URL]
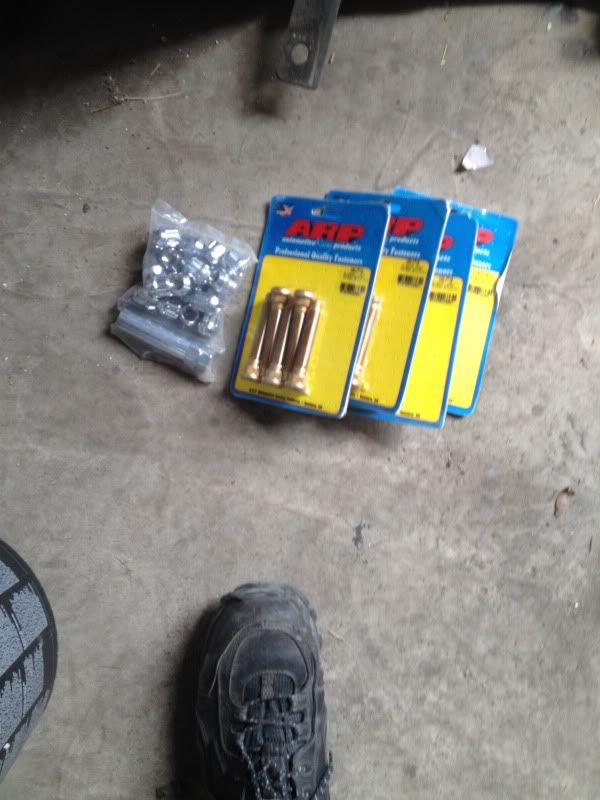
But onto the work... I started to get onto the electronics today. The 350z uses a canbus system for all data throughout the car. Once analog data for the sensors reaches the factory Z ECU it gets translated into canbus. This presents an issue for the average person and leaves a couple choices. first off you can use the stock oil and water sensors to feed into a hacked up loom into the Z ecu and have the motor run off the GM ECU. The speedo runs off the ABS sensors and doesn't go through the ECU. The tacho will also not function, it uses a combined signal of the crank and cam position sensors which when fed together form an uneven 5 pulse per rev signal. Without a digital converter the tacho gauge is not compatible and even with the converter, duplicating the 5 abnormal width pulses may not be possible.

OR

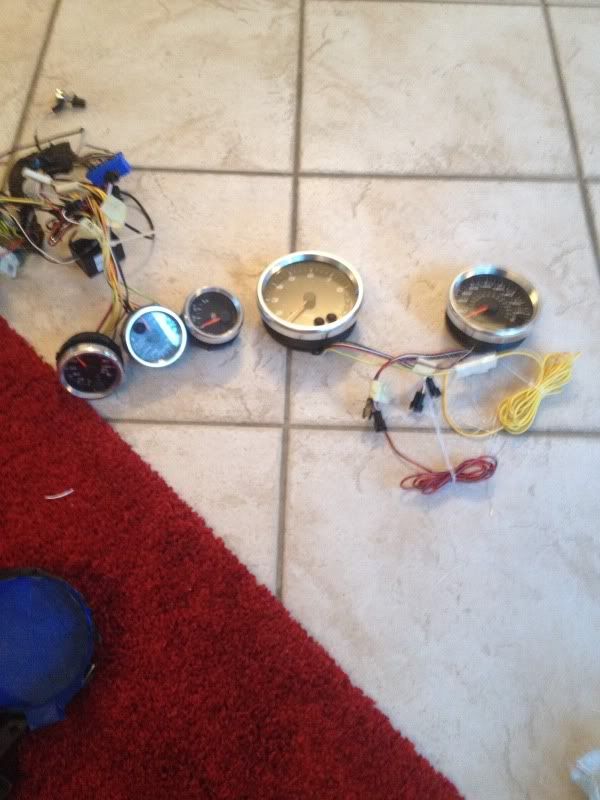
Buy yourself some speedhut or other aftermarket gauges and call it a day.I happened to have some gauges from a previous swap laying around so guess which I did.

[URL=http://s46.photobucket.com/user/armt350z/media/B5A73EB5-6700-4C8A-A764-C6FC4FBD0592-454-0000010E1643AADA_zps8146559f.jpg.html][/URL]

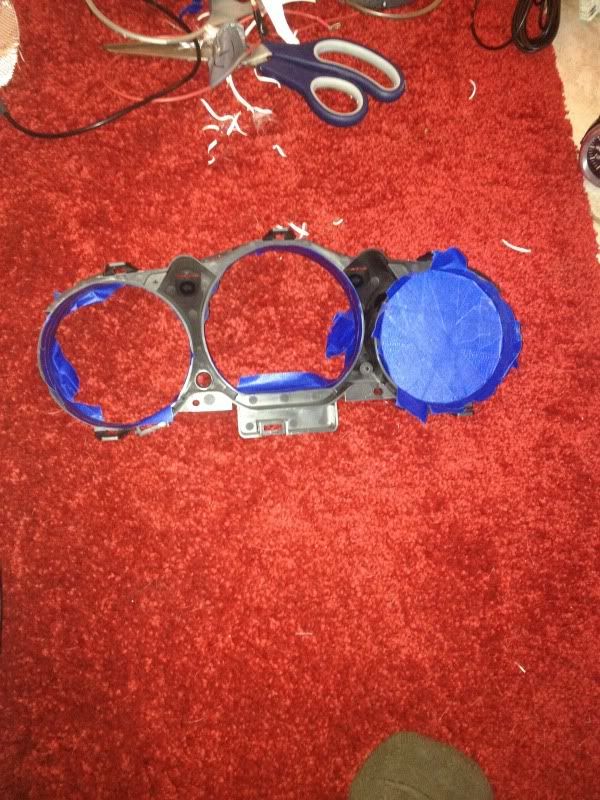
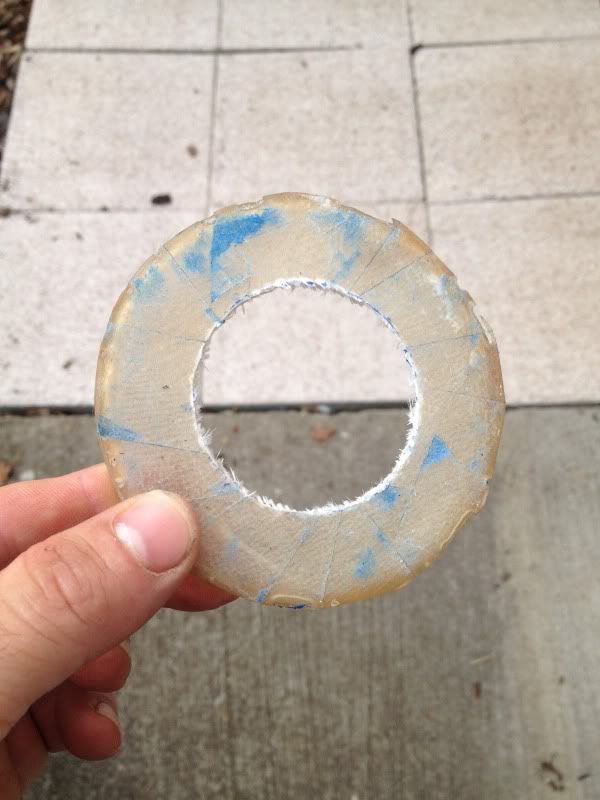
To get them to fit I started making some fiberglass plugs to mount the gauges to, later the plugs will sit in the factory gauge cluster.

[URL=http://s46.photobucket.com/user/armt350z/media/8A36954A-350F-4A6B-AACA-4E6BE3D7DE60-454-0000010E1E165EDD_zpsb2365557.jpg.html][/URL]

[URL=http://s46.photobucket.com/user/armt350z/media/A428CB1C-F7BD-4DE0-8084-726AB845AA3B-454-0000010DF64E65CF_zps9c676041.jpg.html][/URL]

Unfortunately I had to use a crappy polyester resin from a local hardware store instead of the normal stuff I use so my release agent didn't work so great and it also left a decent amount of voids. I'll fill those and paint it later.

armt350
armt350 New Reader
11/17/14 5:19 a.m.

So it probably should be mentioned that this is going to be a 50 state CARB approved swap. You may have noticed in some of the photos of the engine it uses factory manifolds. also its using a reworked set of OEM cats for the inspection.

A lot of the work today was busy work, nothing terribly interesting unfortunately.

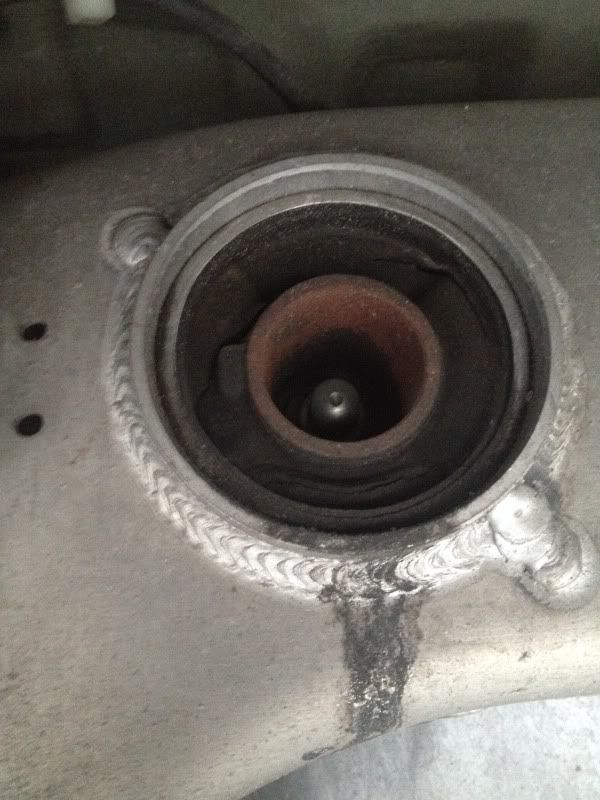
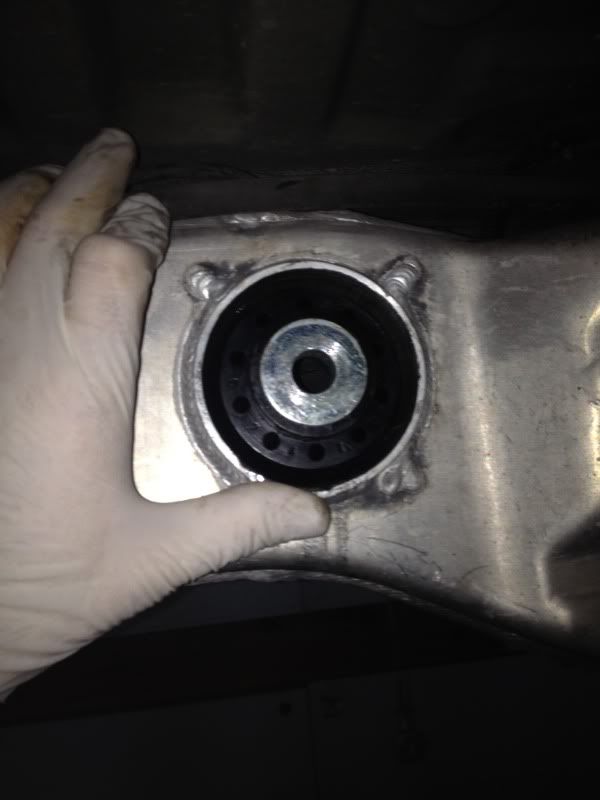
To start with, I found the rear differential bushing torn which is common so for a good part of the day I spent getting the bushings on the diff and rear subframe replaced.

[/URL]

Now the new one. [/URL]

[/URL]

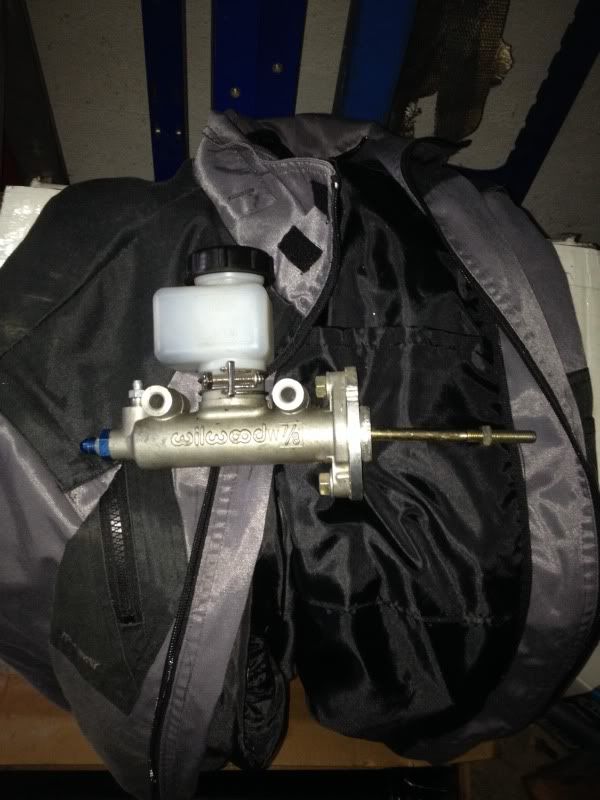
Also I started working out the clutch hydraulics, a willwood 7/8ths unit. The only problem being that I need to put in a 90 degree elbow right off the end of the MC due to the wheel well. Its a AN-3 fitting size so I'll have to wait a few days for that part to arrive since nobody seems to carry an AN-3...

[/URL]

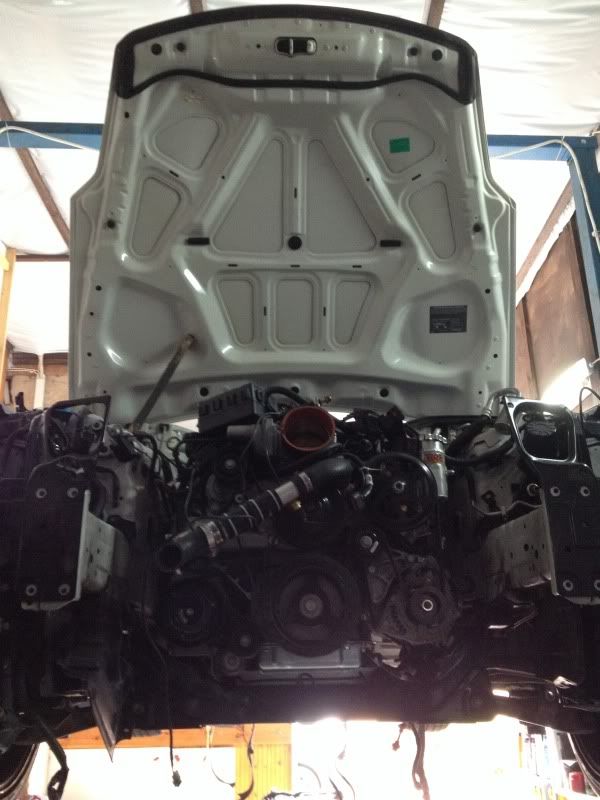
Also the motor is in the car, woohoo!

[/URL]

armt350
armt350 New Reader
11/17/14 5:23 a.m.

A couple details about using an aftermarket master cylinder. The mounting holes for the MC on the Z are offset by about 20 degrees from vertical. Most master cylinders have mounting holes that are vertical. To resolve this I made an adapter plate out of 1/4 inch aluminum. Fairly simple to do, just cut out the desired piece drill hold to put press in studs into for the MC to mount to and drill the holes for the bolts to go through the firewall.

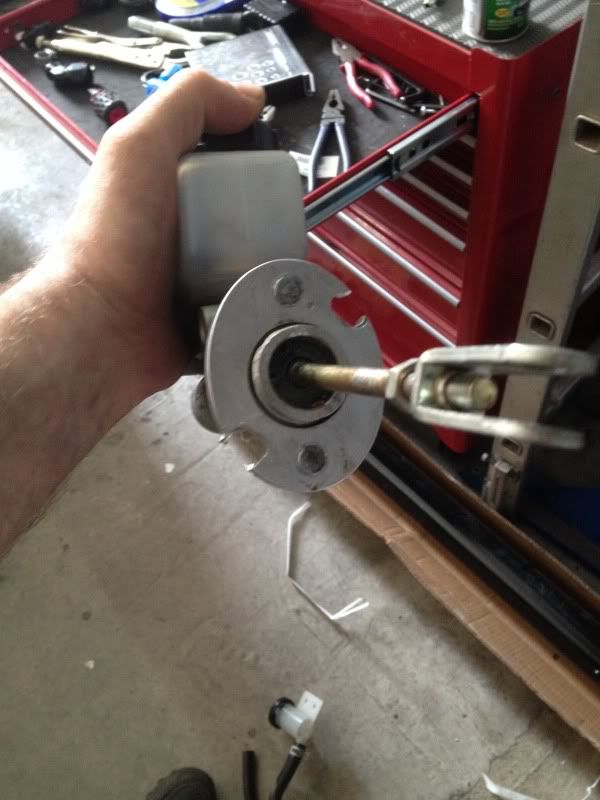
Another note on the MC, you must have a 90 degree AN-3 fitting to come out of the MC, there is no room to have a an-3 to an-4 adapter and then a 90 degree fitting. after that I simply plumber it to the braided line on my hydraulic throw out bearing.

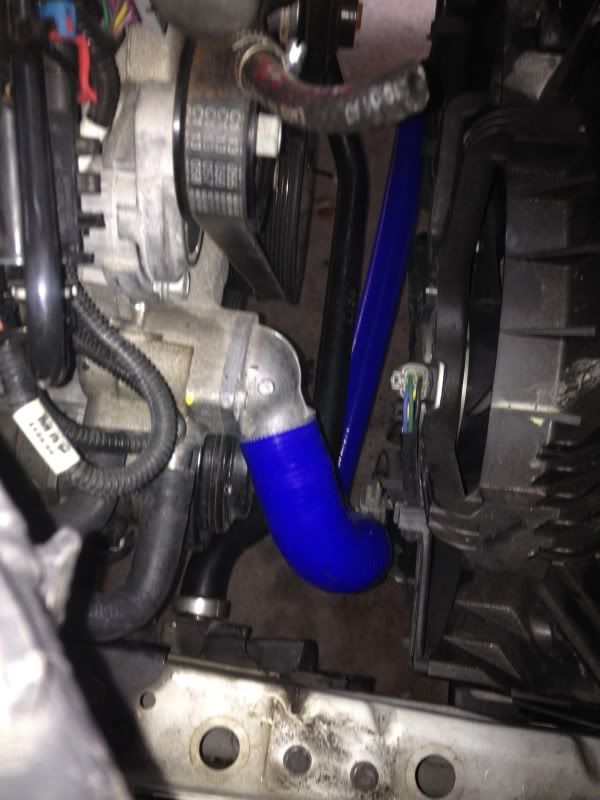
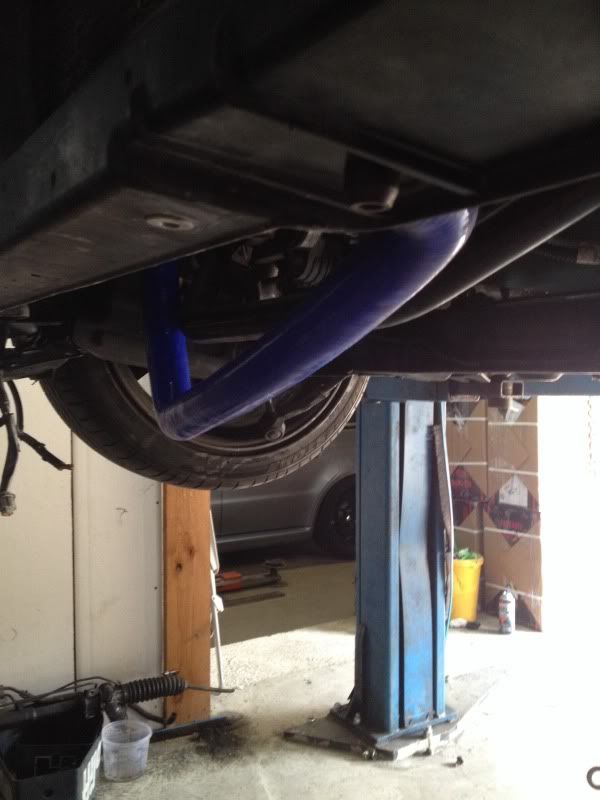
Up next was the cooling system. The LS motor has its coolant lines opposite to the Z. For the top radiator pipe it was simple, 2x 90 degree hoses and a 35mm pipe to connect them. The bottom however was a little more difficult. The engine side does not come out straight from the engine, its at a 45 degree angle from the engine. Luckily, I found that a 300ZX coolant line fits the angles, you simply have to cut a 6 inch straight section off to get the excess length taken care of. Here are photos of the 300ZX tubing.

I cut the 6 inches off the vertical part of the pipe so it fits correctly above the sway bar.

I forgot to snap a picture of the heater lines, but the short of it is that the front port off the motor is plumbed to the left side of the bay as referenced from the rear of the car to the front. The the rear port is plumbed to the right side.

Up next is wiring... woohoo...

armt350
armt350 New Reader
11/17/14 5:28 a.m.

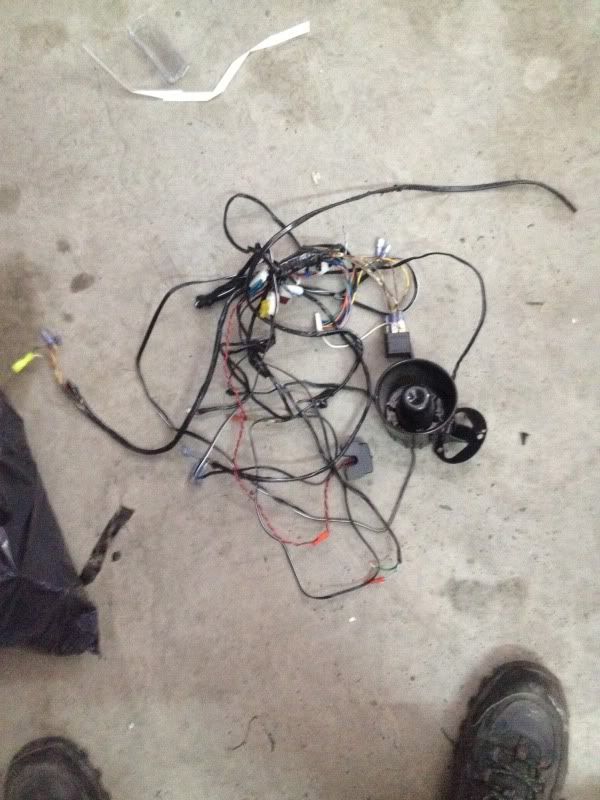
Unfortunately this won't be the most interesting post, its all wiring. I spent most of the day tearing the interior of the car apart to remove the autopage terrorist alarm system from the car that the original owner had put on. The installer did not make it easy on me at all on this, there were pieces EVERYWHERE.

but at the end of the day I got the rats nest of crap out.

So on to actual progress...

The most daunting part of this swap for people is likely the wiring. I'm going to try and point out as much of it as clearly as I can for whomever may want to try this later. Note that this is an 08 so plugs, wire colors, and some components may have changed throughout the years.

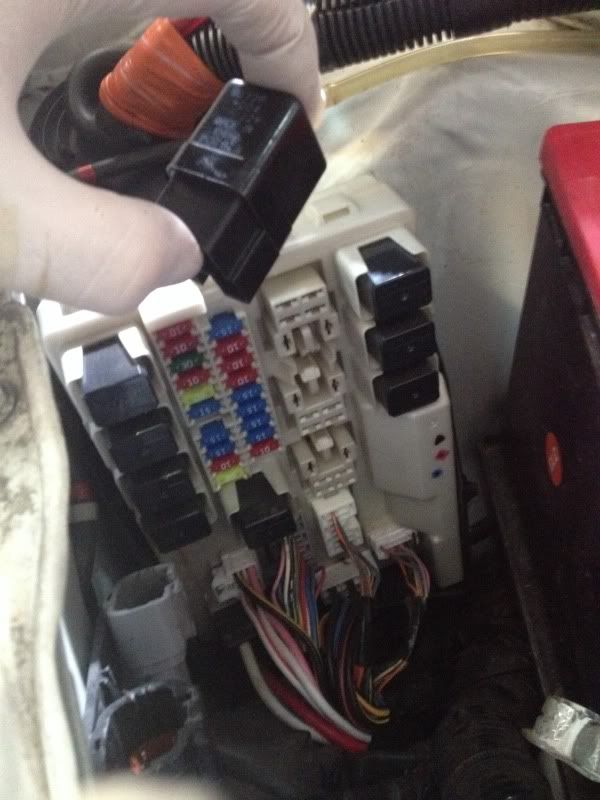
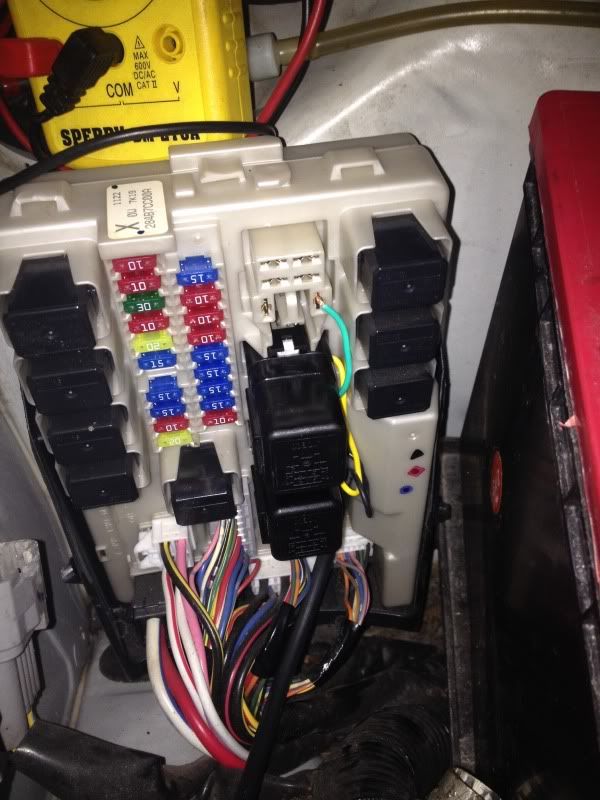
First this I did was the cooling fans. Nissan uses the IPDM ecu to turn on the factory fans by supplying a ground to the relays. The GM harness and ECU I have suppliers a 12V, and a single 30 amp line at that. You're left with two wiring choices here, you can either add a second 12v 30A circuit from the GM side, or wire into the IPDM and use the Z relays and wiring which is already present. I chose to use the Z relays which meant I had to make my 30A 12V line turn into a ground. I removed the 12v source to the GM relay and put it to ground instead and then ran that to the 3 Z fan relays.

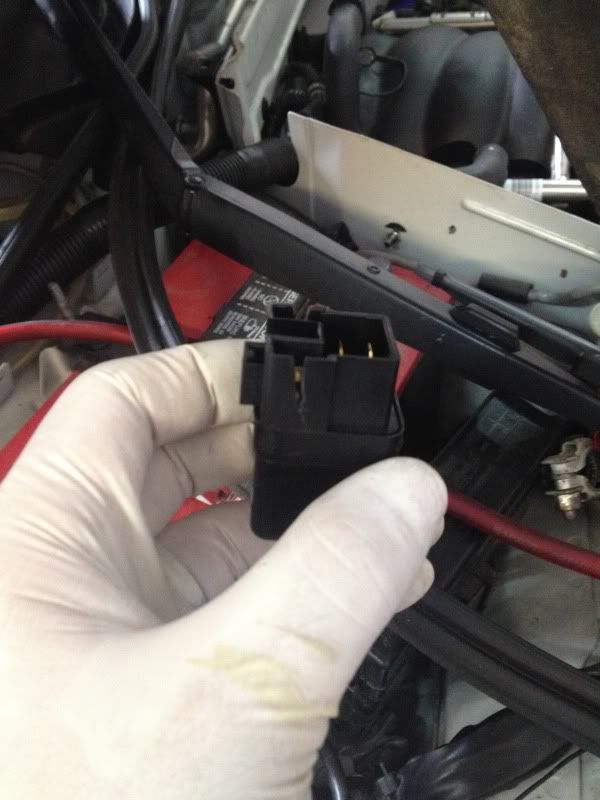
Since my ECU can only handle single speed control, I have to make all 3 Z Relays come on when the GM ecu commands the fans on. In the IPDM the relay in my hand is what your looking for, all 3 are removed in this photo

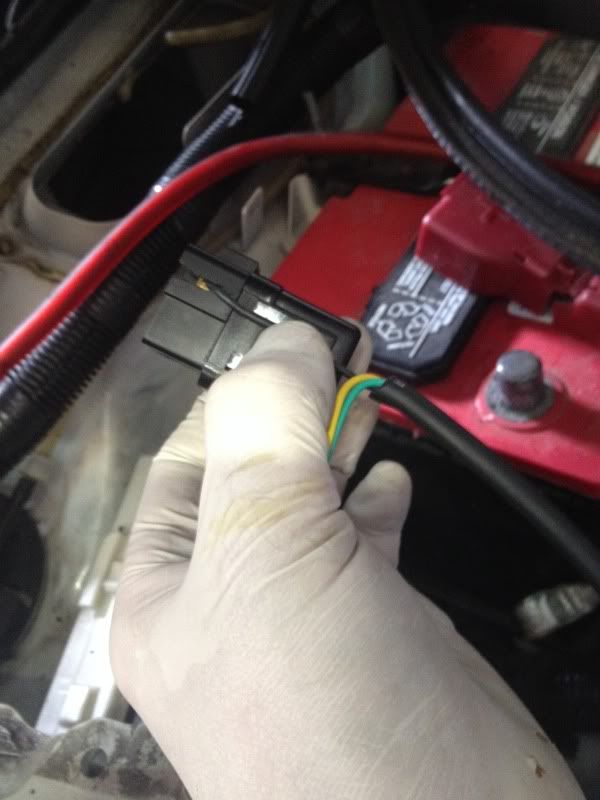
to run There were a couple options to get the switched ground to these but since the lines from the IPDM ecu to the relays did not provide adequate room to splice into, I had to get creative. I made a small cut into the ground side of each relay and then ran a wire to the contact and soldered it to the IPDM side contact. On the 08 years the ground side is on the right as you look at it.

Here is the cut in the relay

What the wire will look like after its run through the cut

And then what it looks like when its soldered to the contact, you can see the 2 below are done, the top one is left open so you can see where its soldered to.

When the GM ecu turns the fans on now, it will send both stock fans into full high, its not the perfect solution, but will work up until I get a fan controller.

The next post I'll work out the starter solenoid wiring and charging system.

armt350
armt350 New Reader
11/17/14 5:34 a.m.

The charging system was done and that was as simple as taking a 6 gauge wire and running it from the post on the back of the alternator to the post on the fuse/relay panel.

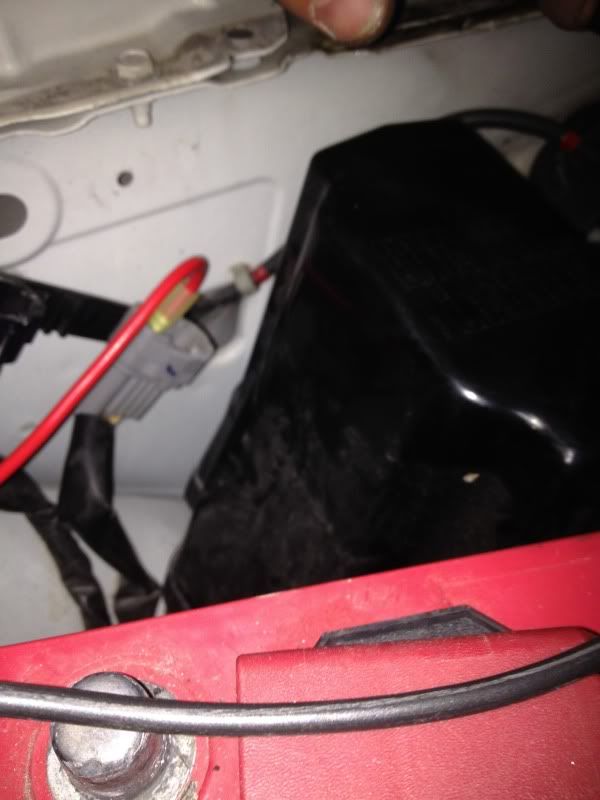
After that was the starter. Run a large gauge wire of the pos batter terminal to the heavy gauge pos post on the starter. After that run an appropriate sized wire to the starter solenoid from the IPDM or the connector next to it. I used a 10 gauge for the solenoid, crimp on a female spade connector to one end and a terminal lug to the other. Connect the spade connector here:

After that the wiring minus the gauges is done. So I moved onto the intake. Its based off a Camaro SS K&N unit, I just had to cut about 1 and a half inches of length off of it.

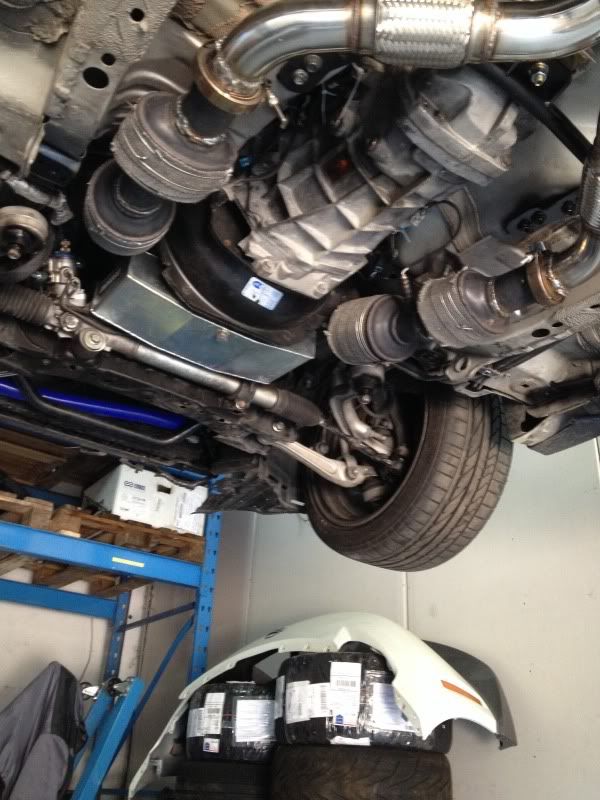
I'll start putting the front end back together next and hopefully the differential arrives from Z1 performance soon so I can get the differential back in. After that its simply welding up the exhaust and it will be street worthy and CARB legal.

armt350
armt350 New Reader
11/17/14 5:38 a.m.

The exhaust is done!

I had to hack and weld the cats to mount near oem Z exhaust locations so I could use any off the shelf Z exhaust by putting on V-band flanges.

I was fairly happy with myself on this considering I have not touched a welder other that to just dick around. They started out not so pretty but by then end I was happy with the welds on the mild steel... I havent quite figured out the SS welding settings yet so those are still uuuuugly.

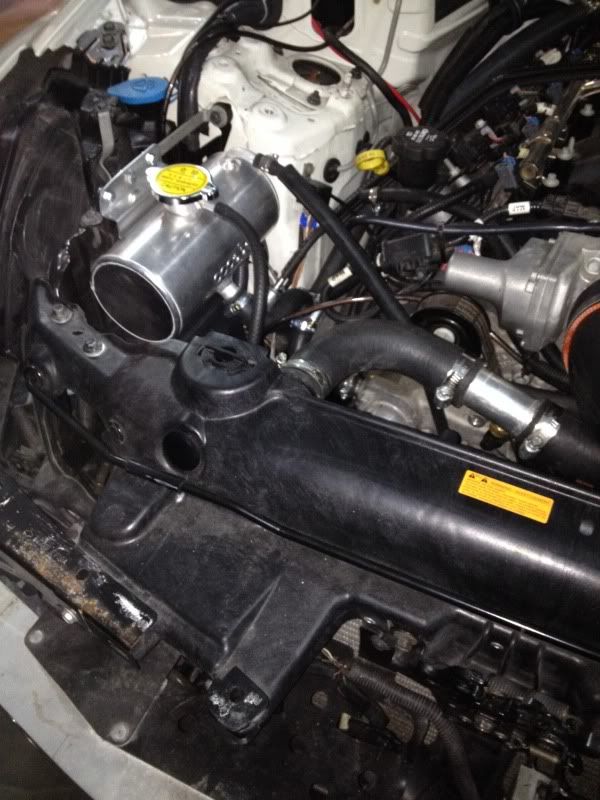
Here is the last piece to the cooling system. I'm using an 08 Z rad which has no cap or vent so I had to plumb in this surge tank. all in all I think it worked out. I will likely change it out later when I buy a quality dual pass rad with slim line fans and a proper radiator cap.

armt350
armt350 New Reader
11/17/14 5:41 a.m.

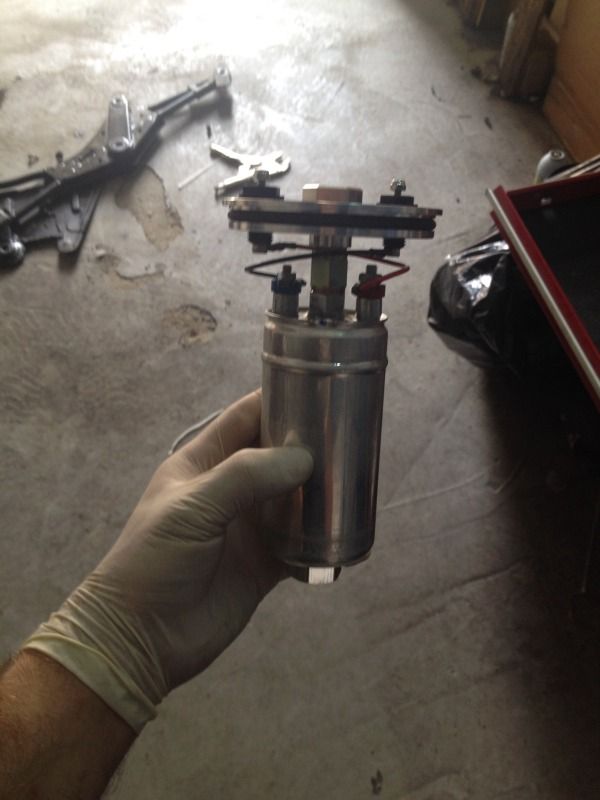
So I decided I wasn't happy with a couple things and ripped back into the car. Since the car will be used on the track I figured I should better sort out the fuel system. So.. a surge tank is in order. A bosch 044 pump submerged in a 1 liter catch tank fed by a DW300 in tank lifter pump. the DW pump would have likely sufficed for the 500 whp NA end goal I have, but I figured a slight overbuild here wouldn't be to bad.
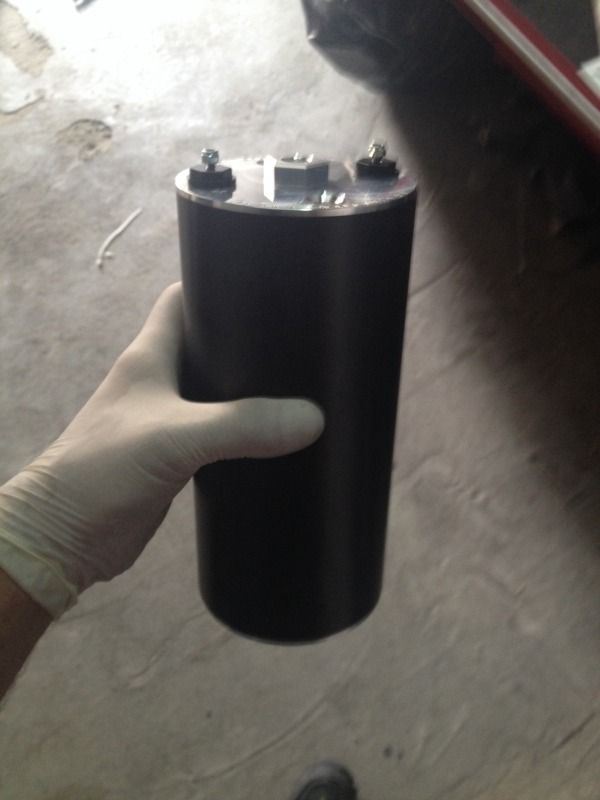
Its currently installed under the rear trim.

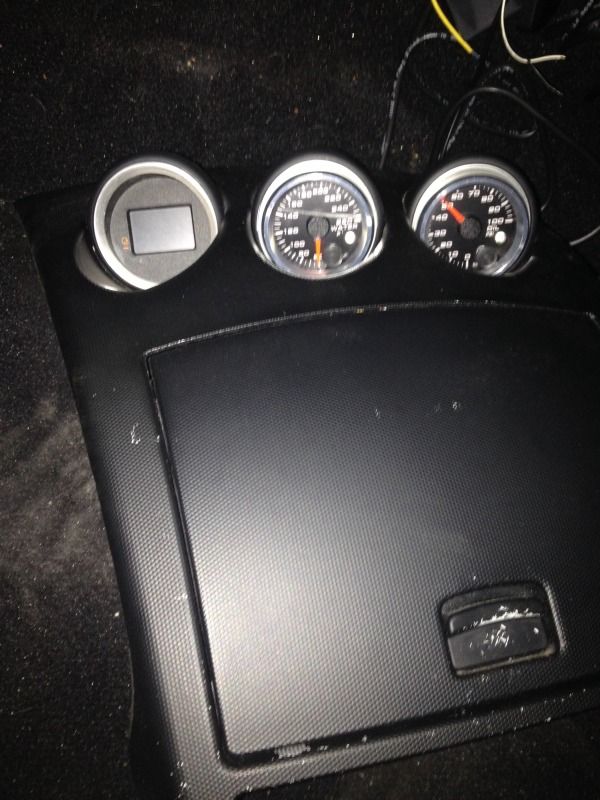
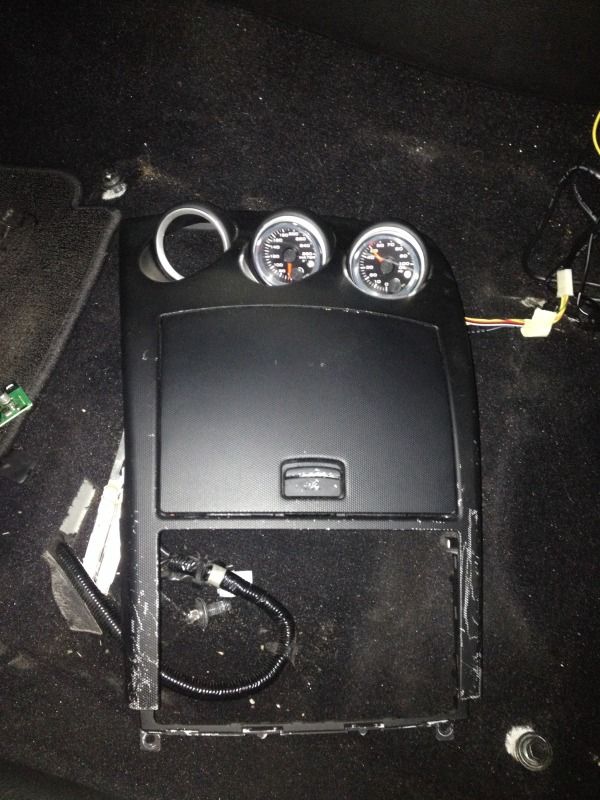
Next, because of the speed hut gauges I chose for the main cluster, I didn't have a working gauge for water temps or oil psi. to fix that I ripped out the center console and installed them there, here is the mock up.

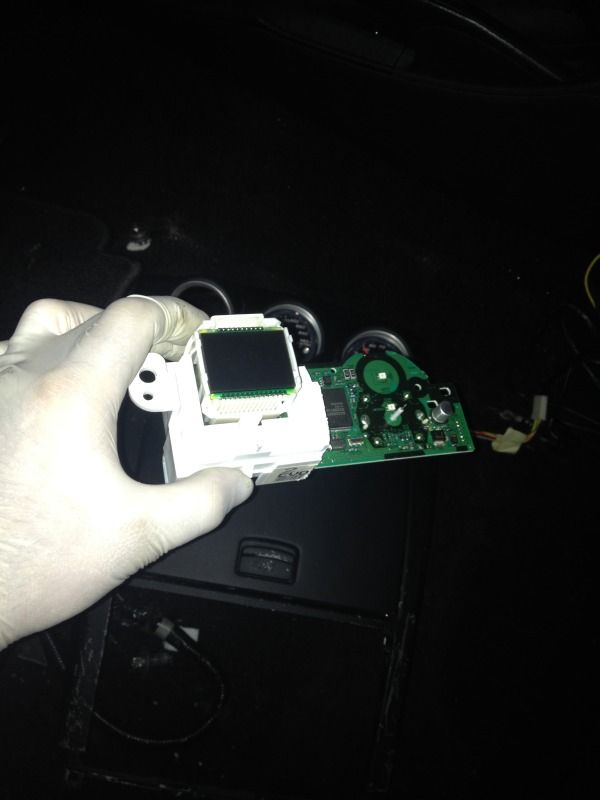
To do this you've got to remove and hack up the triple gauge cluster, its not a huge hassle and took all of 15 minutes.

I kept the multigauge since I liked the timer and the speed on it will work for the 30 seconds the GPS speedo takes to align.

all together..

fujioko
fujioko Reader
11/17/14 5:41 a.m.

Welcome aboard!

This is going to be an awesome build. Love the shifter mod!

Looking at the power steering rack and there is a solenoid like thingy sticking out.... is this what reduces steering boost at speed?

Looking forward to moar pictures.

armt350
armt350 New Reader
11/17/14 5:45 a.m.

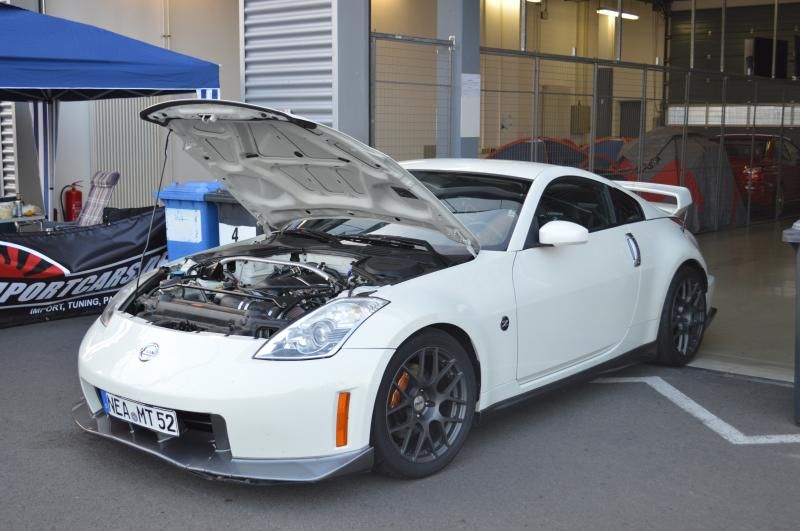
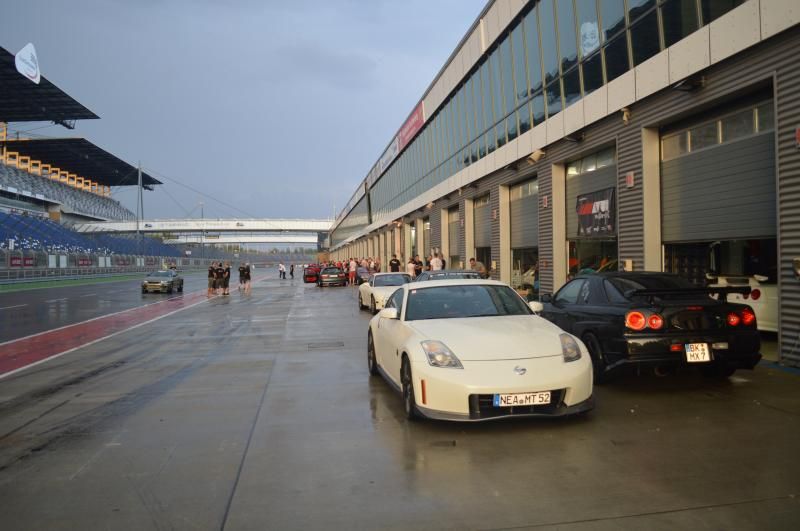
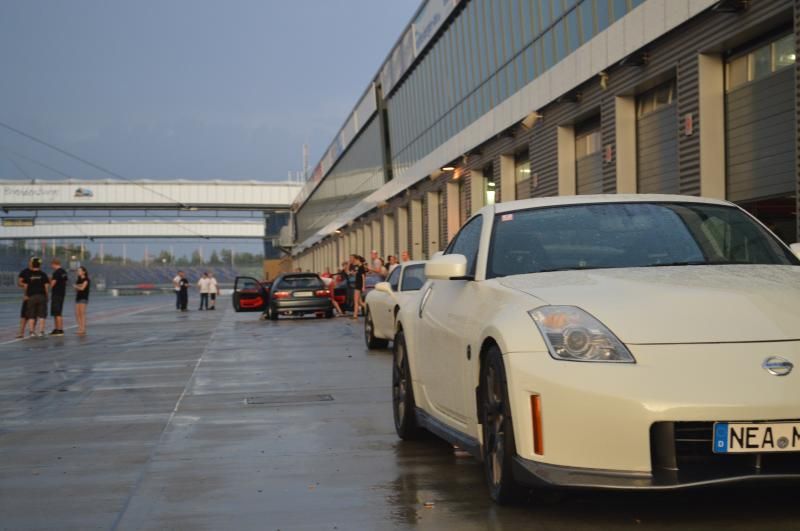
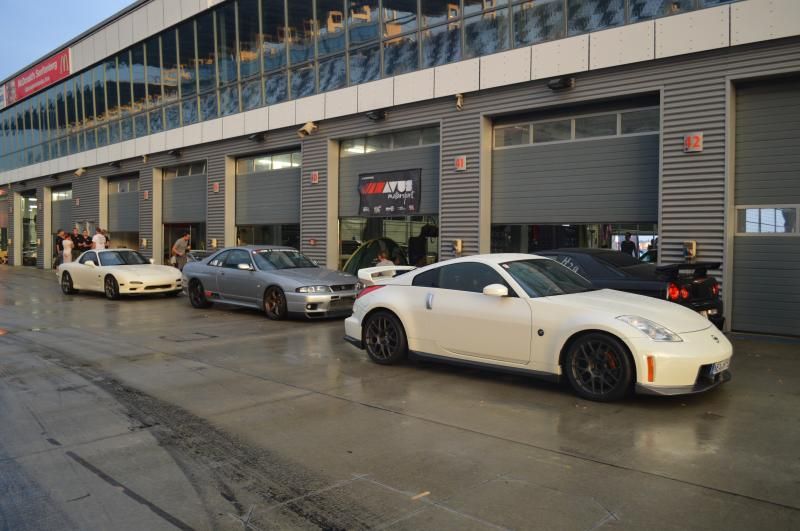
Well I have to say for the 1st outing on the track, I think I found every issue with the car hah. It was very frustrating for me though. First some photos.

<img src="http://i46.photobucket.com/albums/f118/armt350z/DSC_0382_zps42d382ec.jpg[/IMG

[IMG]http://i46.photobucket.com/albums/f118/armt350z/DSC_0383_zps3c53e7fc.jpg" alt="" />

So while I wait for the videos to convert and upload a brief synopsis.

The powerband with a bolt on LS3 is great and more than enough for now. With the extra power however it brought out the worst in the car. On the first outing the brakes failed on me, it boiled the fluid which was an off the shelf dot 4 fluid. The brakes on it are stoptech slotted rotors, factory brembos, SS lines, Ferodo DS3000 and DS2500 F+R pads. I had a feeling they wouldnt last but I was not suspecting such an abrupt an immediate failure. It went from great pedal feel to nothing from one turn to the other.

Sooo.... I grabbed a botle of ferodo 5.1 fluid and flushed the system and once more back out onto the track.

The next session went a lot better, I got to know the track a bit more and start working into the car. Then disaster struck, on of the nissan plastic heater hose joints broke and dumped all my coolant. Luckily The car could be coasted into the pits and the engine is as of now unharmed.

I'll post the videos as I get them uploaded.

armt350
armt350 New Reader
11/17/14 5:48 a.m.

In reply to fujioko:

You are correct on the solenoid. That being said it no longer functions so I have it wired for full open and use the KRC pump to set the PS boost.

armt350
armt350 New Reader
11/17/14 5:49 a.m.

http://youtu.be/H6MztN712Hk

First time on track.


This brings us nearly to present, I just put the car up for the winter and will start fixing the shortcomings and improve for next season. In the works are aluminum hardlines for the cooling, upgrading the brakes, upgraded cooling and proper ducting from the bumper.

I'm also on the fence if I want to strip it and cage it...

tuna55
tuna55 MegaDork
11/17/14 6:20 a.m.

very very very very very very very very very very very very very very very very very very very very very very very very very very nice

mazdeuce
mazdeuce PowerDork
11/17/14 6:56 a.m.

You make it look sooooooo easy. Well done.

Dusterbd13
Dusterbd13 SuperDork
11/17/14 6:57 a.m.

Where are you?

And it seems to me, watching your driving style in the video, that you've got other issues in the brakes if you're boiling fluid that quickly.

chandlerGTi
chandlerGTi SuperDork
11/17/14 7:30 a.m.

Looks awesome, thanks for sharing!

Gearheadotaku
Gearheadotaku PowerDork
11/17/14 7:51 a.m.

I've read several stories of 370Z's easily overheating the brakes. There isn't enough cooling air for them. (Car and Driver magazine wrecked one in a road test) You'll need to add some good brake ducting.

armt350
armt350 New Reader
11/17/14 7:56 a.m.

Ducting is going to be one of the improvements over the winter. I knew that I was going to have an issue but I underestimated how quickly they would go.

@dusterbd13 I am in Bavaria, Germany

Rusted_Busted_Spit
Rusted_Busted_Spit UltraDork
11/17/14 10:34 a.m.

Very cool, thanks for sharing.

Rad_Capz
Rad_Capz HalfDork
11/17/14 10:47 a.m.

Cool build! Glad you posted it here.

fidelity101
fidelity101 SuperDork
11/17/14 10:55 a.m.
armt350 wrote: Ducting is going to be one of the improvements over the winter. I knew that I was going to have an issue but I underestimated how quickly they would go. @dusterbd13 I am in Bavaria, Germany

So is that going to be a class 0 vehicle? haha

Build looks awesome!

armt350
armt350 New Reader
11/17/14 11:44 a.m.

If it got inspected as a swap then yes euro 0 haha. But on the sniffer it puts out less than it did as a stock 350Z and meets euro 4 emissions standards. It also gets better gas mileage at cruise.

1 2 3

You'll need to log in to post.

Our Preferred Partners
EF8XN2kQ7qM1IUodywyERZN2doCZLtM4Pg0gahPaJgxLHbJU1uNSgZngkOL5Sp0R