1 2 3
nocones
nocones Reader
1/16/11 12:16 p.m.

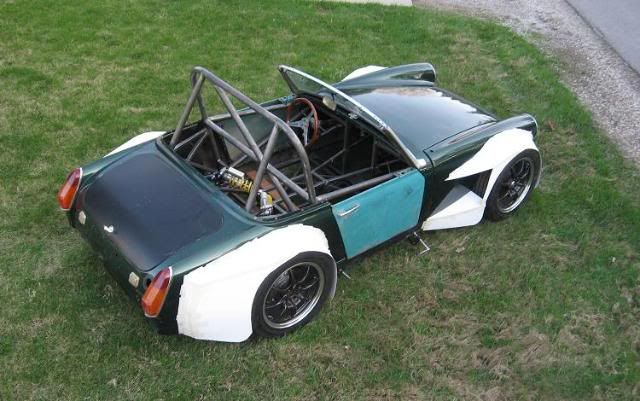
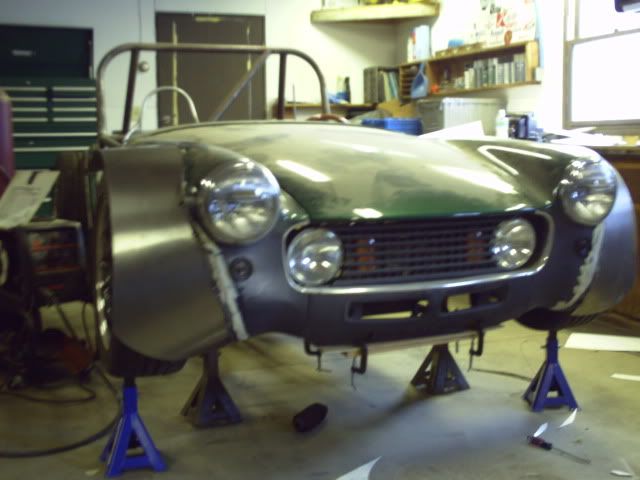
My MG project has reached the point where I am embarking into the great unknown of fabricating by hand nearly 12" wide fender flares (who makes cars this narrow that a stock 2nd gen Rx-7 track is nearly 2' wider than stock?)

A few warnings. These are still very much in progress. This isn't a thread where I'm going to wow you with a completed project and show you how I did it. I'll update this as I go along and really hope to be able to show you completed flares soon. Also, I've never done anything like this before so this thread might be worldwide documentation enabling people to witness Epic Fail as my flares crash and burn from a promising concept to a sad tortured reality (I hope not.. But it's possible).

So if you willing to witness the mayham and put up with some potentially slow progress, follow along!

First off a while ago I mocked everything up in posterboard. I don't have the skills or equipment to truly form metal so my idea is to build flares that don't require any metal shrinking or stretching. Posterboard doesn't stretch well so If I can build something that looks good with posterboard I should be able to duplicate it in metal (I hope). This is the concept I came up with. Photobucket
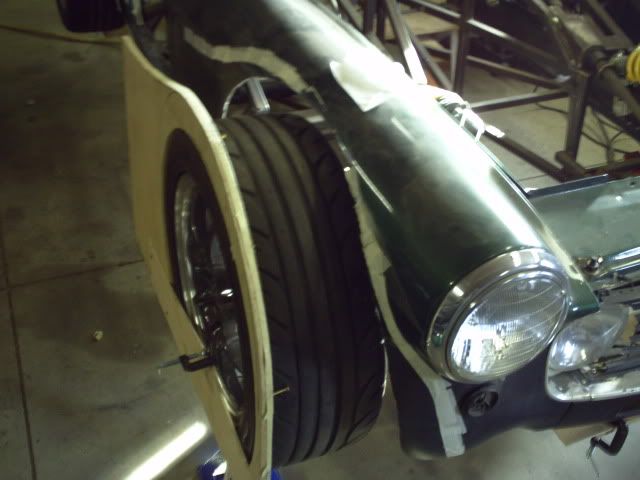
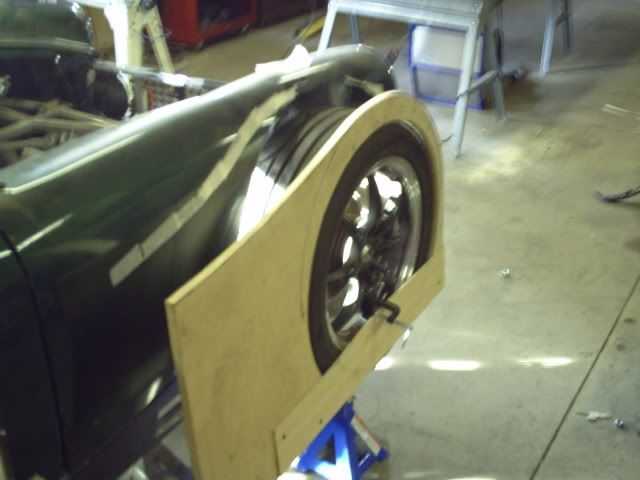
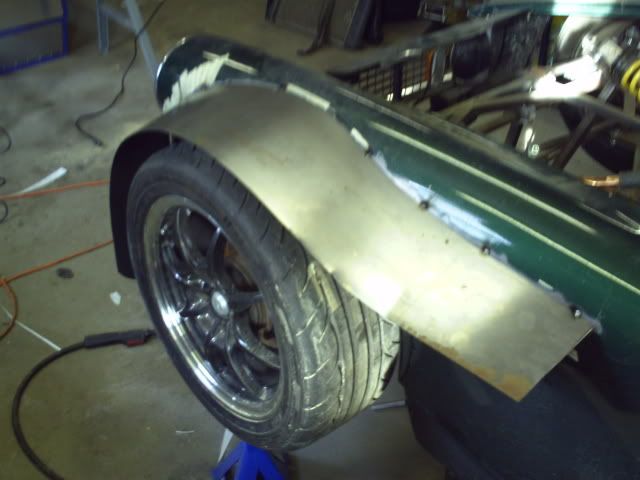
So now I have the body fixed relative to the chassis. I set the wheels on jackstands at ride height. I used a piece of half inch thick MDF to make a template of what I wanted the outer vertical part to look like. I laid the tire on the ground on top of the piece and traced the tire, them moved it down 2" (intended suspension travel) and retraced. I added about 1.5" in front of the tire free-form to give it some room to move. At the bottom I put a piece of 1/4" plywood so I could position it against the tire. I placed it on the tire and used an angle finder to set the board vertical and then clamped it in place.
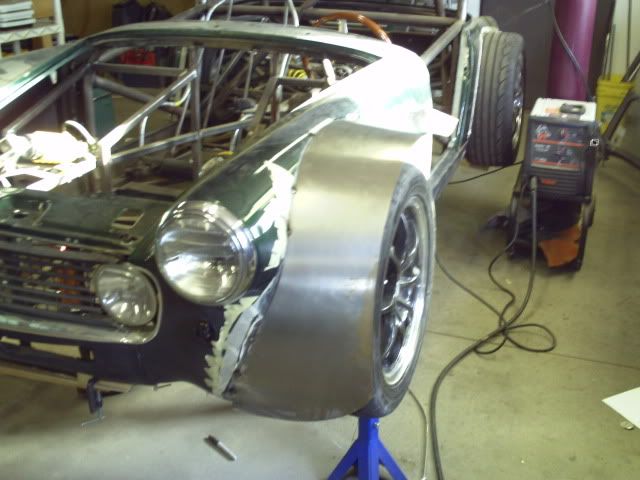
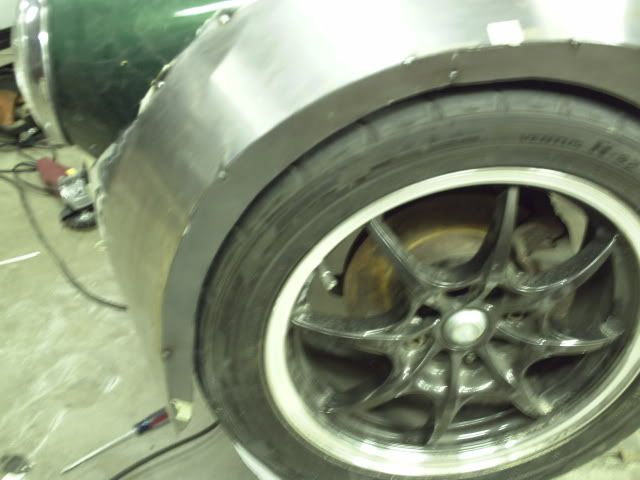
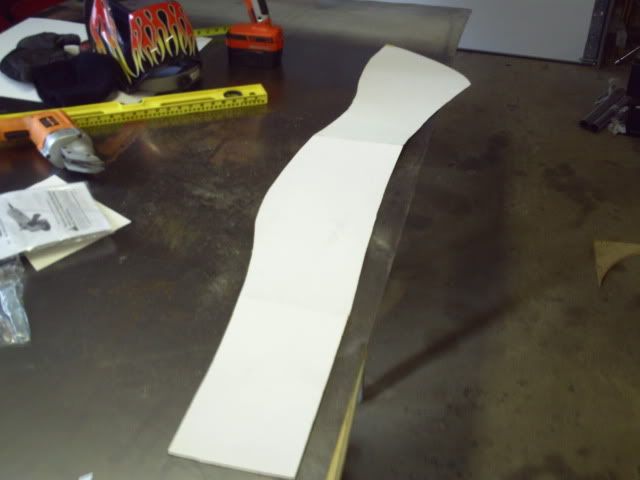
Photobucket Photobucket I was then able to build a template. I unfortunately didn't have a camera when I was making the template so I will take better pictures of construction of the rear tire template. Basically I Laid poster board against the MDF in a cone shape to match the desired contour of the fender. I then slowly shaped the fender side of the template to match the profile as it hit the body. I taped the template to the body and then just used a razorblade to cut along the MDF form. Photobucket I then used a Harbor freight swivel head shear to cut out the traced pattern out of 18ga steel. (great tool, use a little cutting oil and it cuts the metal like the butter) I took the steel back to the car and then slowly worked bends into the metal. I simply bent it over my thigh. If your template and cutting are acurate enough the part will simply fall into place and tell you where and how you need to bend it by being tight to the fender. At this point I simply tack welded it on in spots every 6" or so. I then ran out of welding wire.
Photobucket

Photobucket

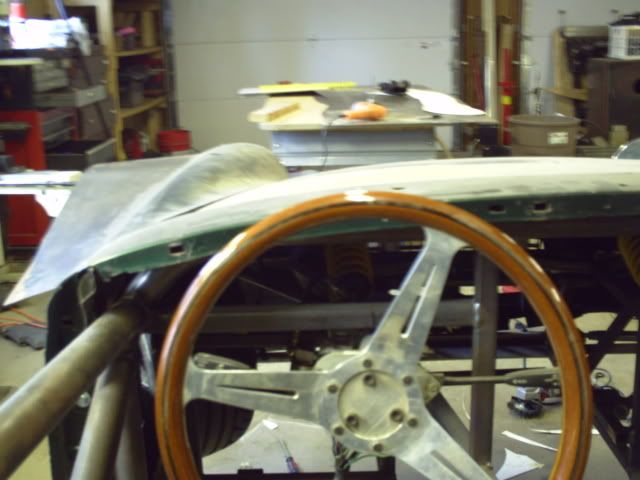
The view from the drivers seat! Photobucket

So that is where I am at today. I will post progress as I go along. Sorry about the low quality pictures I will try to get better ones with my other camera. Photobucket Thanks for looking!
Daniel

mw
mw HalfDork
1/16/11 12:28 p.m.

I'm impressed. It's awesome that you didn't let the lack of metal stretching and shrinking stop you.

Raze
Raze Dork
1/16/11 1:37 p.m.

I already like it

RealMiniDriver
RealMiniDriver Dork
1/16/11 1:48 p.m.

Another cheer for your attitude! Box flares make it awesomer! Me likey!

jhaas
jhaas Reader
1/16/11 2:45 p.m.

BRAVO! i would tell my class to treat working with metal like working with chipboard. they react the same. i would also tell them they had to make all cuts with a paper shear, this acted like the hydraulic shear we were using in the metal shop. it sunk in fast for most of them.

it already looks mean as hell! i have seen these on sale for $129 http://www.harborfreight.com/metal-shrinker-stretcher-set-95062.html

jakeb
jakeb New Reader
1/16/11 2:48 p.m.

wow, nice. Are you planning to make a lip of some sort to finish it off and add more strength?

mndsm
mndsm SuperDork
1/16/11 2:51 p.m.

I like what you have to say and would like to subscribe to your newsletter.

In other words, amazing. I really like the way it looks.

fast_eddie_72
fast_eddie_72 HalfDork
1/16/11 3:26 p.m.

That's really looking great! Can't wait to see it all done!

bluesideup
bluesideup Reader
1/16/11 3:50 p.m.

Can't wait to see the progress. If this becomes a giant thread like the other box flares one it would be cool to see how to make E30 M3 type box flares. Or start another thread for that since we all love those boxes.

Rad_Capz
Rad_Capz Reader
1/16/11 5:22 p.m.

Looks good! Will watch for updates.

Toyman01
Toyman01 SuperDork
1/16/11 6:12 p.m.

Color me impressed. Looking pretty good so far, keep us posted.

mike
mike Reader
1/16/11 6:30 p.m.

If it were possible to subscribe to a thread on GRM, I would check the box on this one. Definitely put up more pics as you go along!

nocones
nocones Reader
1/16/11 9:13 p.m.

Thanks for all the kind words. I'll be sure to keep this updated as I go along.

I actually got out to the garage a bunch more than I thought today.

Work continued on the front fenders. I am adding vertical sides.

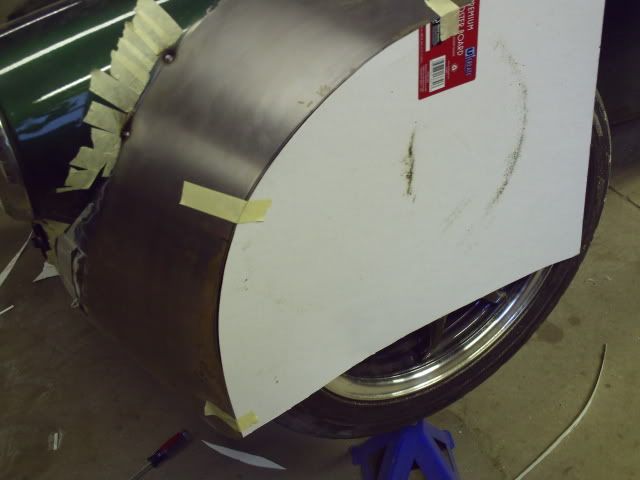
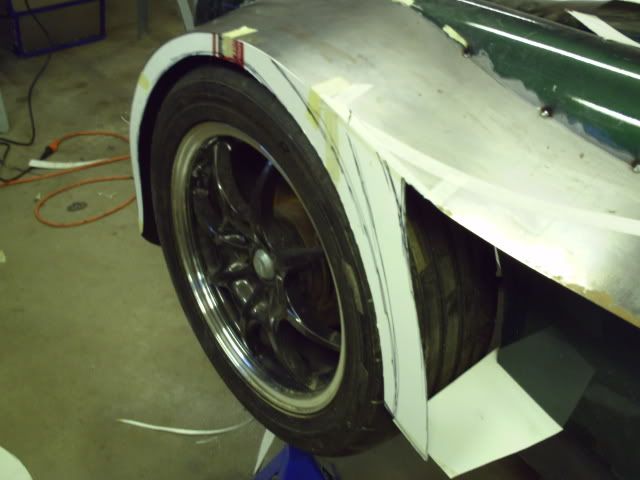
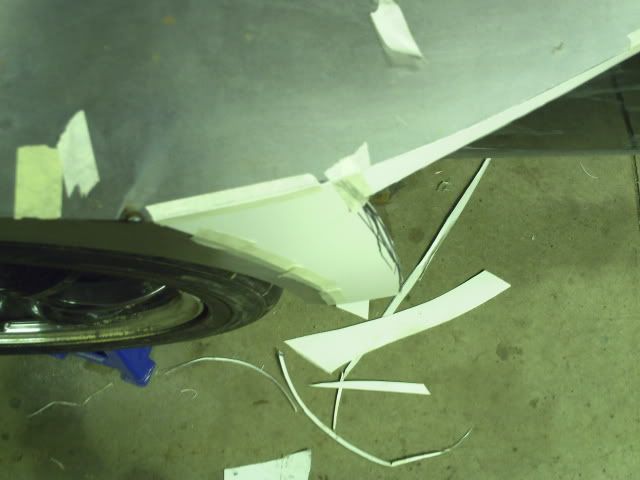
Here I start the template with poster board.. or should I say PREMIUM posterboard (Walmarts finest, which believe it or not is actually made in the USA for $0.97 per sheet). I simply hold it up and trace the fender flare shape then cut it out with scissors. Photobucket

I go as far as I need to for this piece (it will end at another piece that will make up the rear of the vent kinda like an RX-8.. it will make more sense). I used a marker and sorta sketched on the paper what I wanted to see in sheetmetal and cut a oversized wheel opening. I added on lines for where the two pieces are going to seem and for the end of the outer portion of the vent, I also trimmed the bottom. This part is really arts and crafts time in the Nocones garage. Photobucket

The first black line closest to the wheel was what I origionally thought about doing, but that was just to much taper on the top, so I moved it back on the second line. The back edge will be the end of the 2nd piece. You can see the masking tape I used to cut the tapper into the top of the flare The tapper actually starts where the 2nd black line intersects the top of the flare. Enter the swivel head shears (I haven't yet given this tool a cool name.. I tend to name my tools because I'm off a little and just haven't been inspired by this guy yet). Photobucket

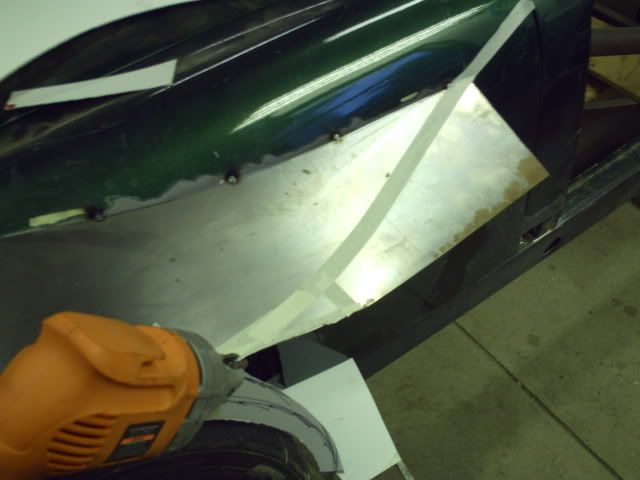
I then transfered the template to steel in two pieces. I cut it roughly in half to nest better and preserve metal. I then tacked the pieces on to the top on the outside. When I finish weld this will be welded from the inside of the flare so I can come along and put a small radius on the edge.
Photobucket

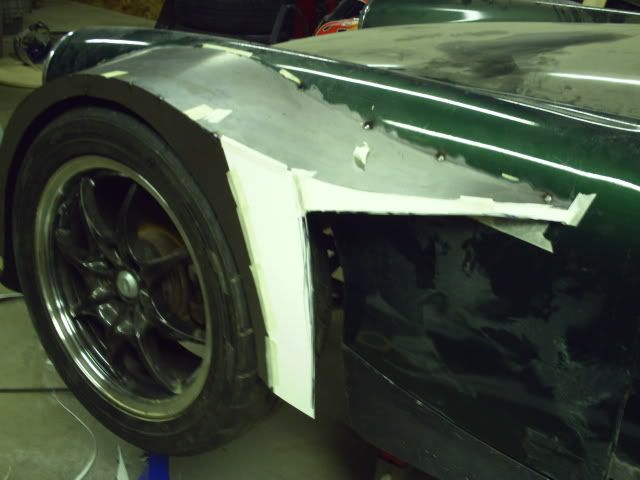
The last thing I did was create the template for the back taper of the flare. What you see in paper is all there will be in steel. The rest will be open. The sill will come out to meet this at the bottom and from above match the tapper of the upper part of the fender. I think the tapered look matches the car better than the F40 type true "box" flare, however it's a stretch to say anything "matches" the look of the car when you are adding nearly 10" per side. Photobucket

The tapper from above to get a better idea of whats going on. Photobucket

I put the edge on vertical. I'm debating actually cutting ~.5" off of the flare and tapering the edge. It would be alot harder to have this look flat from the front though, and any trimming for the wheel movement would potentially affect the depth of the flare relative to the wheel. I'll finish them this way and after I cut the sides to allow for wheel movement when the car is in primer and running I might come back and re-do them. That's the good thing about DIY projects though, you can always fix what you screw up.

Thanks again for the interest and kind words.

Daniel

vazbmw
vazbmw Reader
1/16/11 10:31 p.m.

In reply to nocones:

Great job

unevolved
unevolved SuperDork
1/17/11 2:03 a.m.

Sweet Christ on a cracker, this makes me inappropriately excited.

Ignorant
Ignorant SuperDork
1/17/11 5:30 a.m.

awesomes.

DukeOfUndersteer
DukeOfUndersteer SuperDork
1/17/11 6:18 a.m.

this thread makes happy baby jesus happy

Steve Chryssos
Steve Chryssos Associate Publisher
1/17/11 8:56 a.m.

Insanely awesome. A lot.

cghstang
cghstang Reader
1/17/11 9:02 a.m.
mike wrote: If it were possible to subscribe to a thread on GRM, I would check the box on this one. Definitely put up more pics as you go along!

It is! Click this button at the bottom of the page...

Strike_Zero
Strike_Zero HalfDork
1/17/11 9:04 a.m.

AWESOME . . . man I need to learn how to weld . . .

RossD
RossD Dork
1/17/11 10:12 a.m.

Nice work Daniel.

nocones
nocones Reader
1/17/11 9:23 p.m.

Thanks again for all the positive comments. It may be a while before my next update. I'm going to be unable to work on this beast for two weeks, but I will get back at it then.

Daniel

red5_02
red5_02 New Reader
1/18/11 8:12 a.m.

This will be the coolest MG ever. Props to your grassroots effort.

wheelsmithy
wheelsmithy Reader
1/26/11 9:50 p.m.

bump.

unevolved
unevolved HalfDork
1/26/11 11:36 p.m.
nocones wrote: Thanks again for all the positive comments. It may be a while before my next update. I'm going to be unable to work on this beast for two weeks, but I will get back at it then. Daniel
1 2 3

You'll need to log in to post.

Our Preferred Partners
TF5Tt38kWhyRimRYbUAiwyz7dBDHVTGMnWbWuMLVuoS04XzrL3FAysKBwl0cxAIm