


Not high budget, not high brow, not high skill...
Just plain fun!
Now it has:
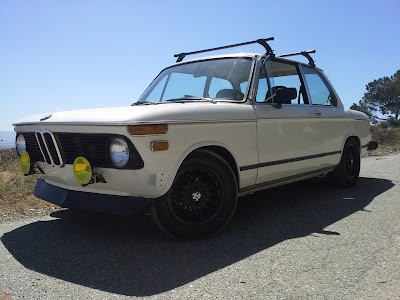
1974 BMW 2002 Chamonix (white)
H&R Springs and Bilstein Shocks
Weber 38/38 carb
E30 wheels
Miata Front Seats
And a whole lot of fun! http://nomads2002.blogspot.com/


Not high budget, not high brow, not high skill...
Just plain fun!
Now it has:
1974 BMW 2002 Chamonix (white)
H&R Springs and Bilstein Shocks
Weber 38/38 carb
E30 wheels
Miata Front Seats
And a whole lot of fun! http://nomads2002.blogspot.com/
Hurry up and wait... time is a fleeting resource

I had time off of work and I'm very lucky to have it. I used that time to its fullest. LOTS of work done on the car and it should be ready to fire up soon. But... I have to get back to work and my time will be more limited. Such is life. Always a balancing act.
I'm super excited, if not a little nervous on bringing her back to life. There's still a lot to do but to be running again will be great! I see a few late nights in my future.


After having a Mazda Miata I campaigned in autocross on the East Coast I knew I liked the feel of the seats. I got a pair from the wrecker and completely disassembled them, sanded and painted the steel pans and then fully reupholstered them with a decent kit from online. The next thing to do was to mount them.

The brackets are very different on the Miata seats, so a little modification is in order.
The first issue is the seat rails are longer and narrower than the stock sliders. This required a new mounting method obviously. I went round and round with ideas on"Keep It Simple Stupid" method of... a rectangle.
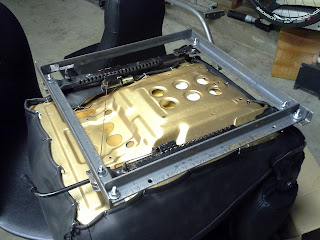
These mounts allow: Full contact along the stock seat mount platforms, full support under the new seats, full slider range of motion, and it's fully reversible in the future for both the seats and the car. I have it bolted for proof of concept but will get it welded in the future. If I can do it, anyone can do it.
Tools:
Drill
Tape measure
Any type of metal cutter (I used a sawzall).
Wrenches
Or welder if you have it.
Supplies:
1" angle steel 1/8 thick. (could also use 1" square tubing but the seat sits higher)
Grade 8 bolts washers and locknuts.

Finally, I trimmed all the steel ends, painted the brackets and reinstalled. I'll also be covering them with upholstery vinyl for a more hidden look in the future.

Very cool.
Great to see one not rusted to hell like mine ![]()
In reply to NordicSaab:
Well I was able to get a "rust free" model which means it only has a "few" holes! I'll be attacking with POR15 soon. I'll do simple patches and save full on welding for the future. I just want to drive it right now.
In the process of rescuing some plus one size E30 basketweaves. Bad peeling chrome and corrosion. These may only last a little while but the price was right. Now in black with E21 centercaps.
Have to smooth out a front wheel lip and replace one tire.

More Progress over the months:
Added gauges to the dash

"Safety Third!" because you never know:

Removed the 'diving board' rear bumper and installed the smaller '72 bumper. Had to work it back into shape but saved $

Had to dig into the transmission to replace some seals, darn thing still drips... because rustproofing...

Installed a '67 Camaro lip spoiler with the help of a heatgun.

Replaced the exhaust because louder is faster

Suspension swapped with fat swaybars and Bilstiens as well.
Build blog is www.nomads2002.blogspot.com
I detailed it all on my blog for posterity, to show others that they can easily do better than me, or if you are having trouble sleeping.

Love it! Keep the square Euro coming sir.

Read the entire blog. Keep up the good work! A roundie is on my bucket list ![]()
Thanks all! Full brake job with ss lines is due this week, just waiting on the larget tii rear cylinders to come. I'll then feel much better driving around, particularly with a kid or two in the back. (big motivation is they want to ride in "the old car")
Love the catch can setup. I'll be adding that to El Rabbito shortly.
Minor update, with major work being done.
I guess I'm a glutton for punishment.
After removing the interior and sound deadening tar I took a break.
I could have gotten right into cutting out the rotten floor pans but life happens.
I just wanted to wait till it got over 100 degrees! Finally I put aside some time and dove in.
I drilled out the spot welds on the rear seat panel and removed it. I need to repair and reuse it so I tried to minimize the damage it took.
A twisted wire cup on an angle grinder removed all the surface rust and the dirt and junk on the undercarriage. I then assessed where I wanted to cut.
On the back side, the floor pans came with 2 3/4" after the subframe brace bolt location so I used that as my guide. On the front side I chose to cut out the floor after the large drain hole to utilize the new pan's lack of a hole. I had to cut out more on the passenger side due to a small hole further along the transmission tunnel.

All cut out. That was the easy part. The floor pans were sourced direct form Germany through WallothNesch.com and look nice and arrived very quickly.
 Cutting out the rotI cut the floor pans larger than the openings for now. They look like they fit. So far so good. It was hot and humid and I was already 3lb down from sweating all day so I quit and cleaned up. I didn't want to push on and make a stupid mistake with all the careful trimming needed.

I carefully scribed and trimmed the pans down to fit and cleaned to bare metal on both sides. Harbor Freight Butt weld clamps are doing great and I'm all ready to fire up the little Eastwood 125 I got (only have 115v in the garage and the panel is on the opposite end of the house)


I'll practice spot welding, never tried it before!
Funny way things add up when fixing things. I wanted to take care of a drippy oil pan. Then scope creep happened... here's how this crazy logic goes:
I want to replace the oil pan gasket.
In order to drop the oil pan I need to suspend the engine and drop the front subframe for allow clearance.
The back of the oil pan interacts with the rear main seal so might as well do that to fix all the leaks.
This means removal of the transmission and flywheel.
I need to swap the transmission due to a bad bearing and I have a clutch kit to go in.
This means the driveshaft will drop so might as well take care of the center shaft bearing.
If the driveshaft and exhaust is off the rear end can easily be dropped, and cleaned up.
I've got polyurethane bushings and diff hangers to go in.
Diff is oily and caked with goo so a clean/inspect the diff and give it a new gasket.
Rear axle boots are cracking but not ripped so time to clean them up, new boots and grease.
So while its all out the obvious step is to clean everything completely, sand and hit it all with POR-15.
And that's how an oil pan leak leads to a rear end rebuild...
Removal of the rear end isn't bad, just remove the correct bolts and balance it carefully with some wood and slowly let it down. Brake lines do have to be opened so a flush and bleed is also getting done (front right caliper seemed sticky after I made all new brake lines so I need to rebuild it).
Nothing was really tough to do, just messy. The rear axles needed some careful pounding to remove the CV but it all worked well using various size PVC couplers to pound on. Polyurethane bushings are easy to install with Poly lube. I pressed in subframe stiffener pieces into the large subframe mounts. I decied to give these a shot before spending the money on new ones just yet to keep the budget happy.
I used a bench vice and PVC coupler to force out the worn rubber bushings. Install is the reverse of removal with no real gotchas to speak of (rear drum brake clip isn't all that bad).
Lots of cleaning, wire wheel and painting. Locktite on all the bolts, reconnect it all and it's a great feeling to have everything clean and inspected.


Finally getting more done, seems every time i finally drive it i take it back to the garage to tear it down again.

Several jobs are lined up so I decided to knock them all out at once:
 Hard to see just how grimy this is!
Oil Pan gasket
Rear main seal
Transmission swap
New clutch kit
Polyurethane bushings throughout the front suspension
New ball joints
Offset camber plates
Weld reinforcement on driver engine mount
Rebuild brake caliper
Fully clean and paint the subframe
A few 2x4's spanning the engine bay and some ratchet straps help suspend the engine while I drop the subframe and suspension out of the car. Removing the distributor cap and gas pedal linkage allows the engine to tip slightly back. Engine mounts are loosened.
 Undo the brake lines, steering connector and strut mount bolts, then the three subframe bolts to the chassis and it drops right down with a jack and some wood to balance it out.
Then the hard work of unbolting everything and cleaning off layers of caked oil and dirt can commence. Finally got it all done though and painted with POR-15.
While i had the control arms out I added some stitch welds to the ball joint mount area and the sides to stiffen them up a bit. Control arms are now close to $300 each and they just have a few spot welds holding them together. This certainly works but additional welds are cheap insurance. Some have had the arms bend from abuse over time and certainly track use is another story. For street use these should be plenty strong.


All clean, scuffed, painted and ready to reassemble. The brakes are new and the bearings were repacked already so I didn't touch them. I knocked the mount bolts out of the strut mounting hats and bolted on Ireland Engineering fixed camber plates to the top. This won't add a lot but every bit of negative camber helps. I'm stopping short of getting their offset roll center plates for now.


 Most critical, as many have said, is welding in an engine mount reinforcement plate on the driver side mount. I cleaned it up, welded it in and at least I can rest easier not having to worry about a fatigue crack that any have suffered.
The next thing I had to learn as I reinstalled the components was how to safety wire bolts. The struts are held on with three bolts with safety wire. Mine had no safety wire when I removed them but in such a critical spot I definitely want to add locktite and some safety locking wire.
 First shot at safety wiring
Cheap Amazon safety wire pliers were very hard to use! If you can afford good ones then get them! I had a few do-overs but I suffered through it. Hardest part of the job so far! I hope it does the job and just adds that last bit or safety. It's a difficult area to safety wire due to the ball joint area.

 The steering Idler arm bushings needed some angling of the bottom cup but a C clamp pressed them in nicely.
Tip, fill the ball joint nut cavity with grease to avoid a frozen rusty mess next time its serviced.

floors are in and once i run the battery under the rear seat I'll put the interior back in
made some pedals while i have it stripped


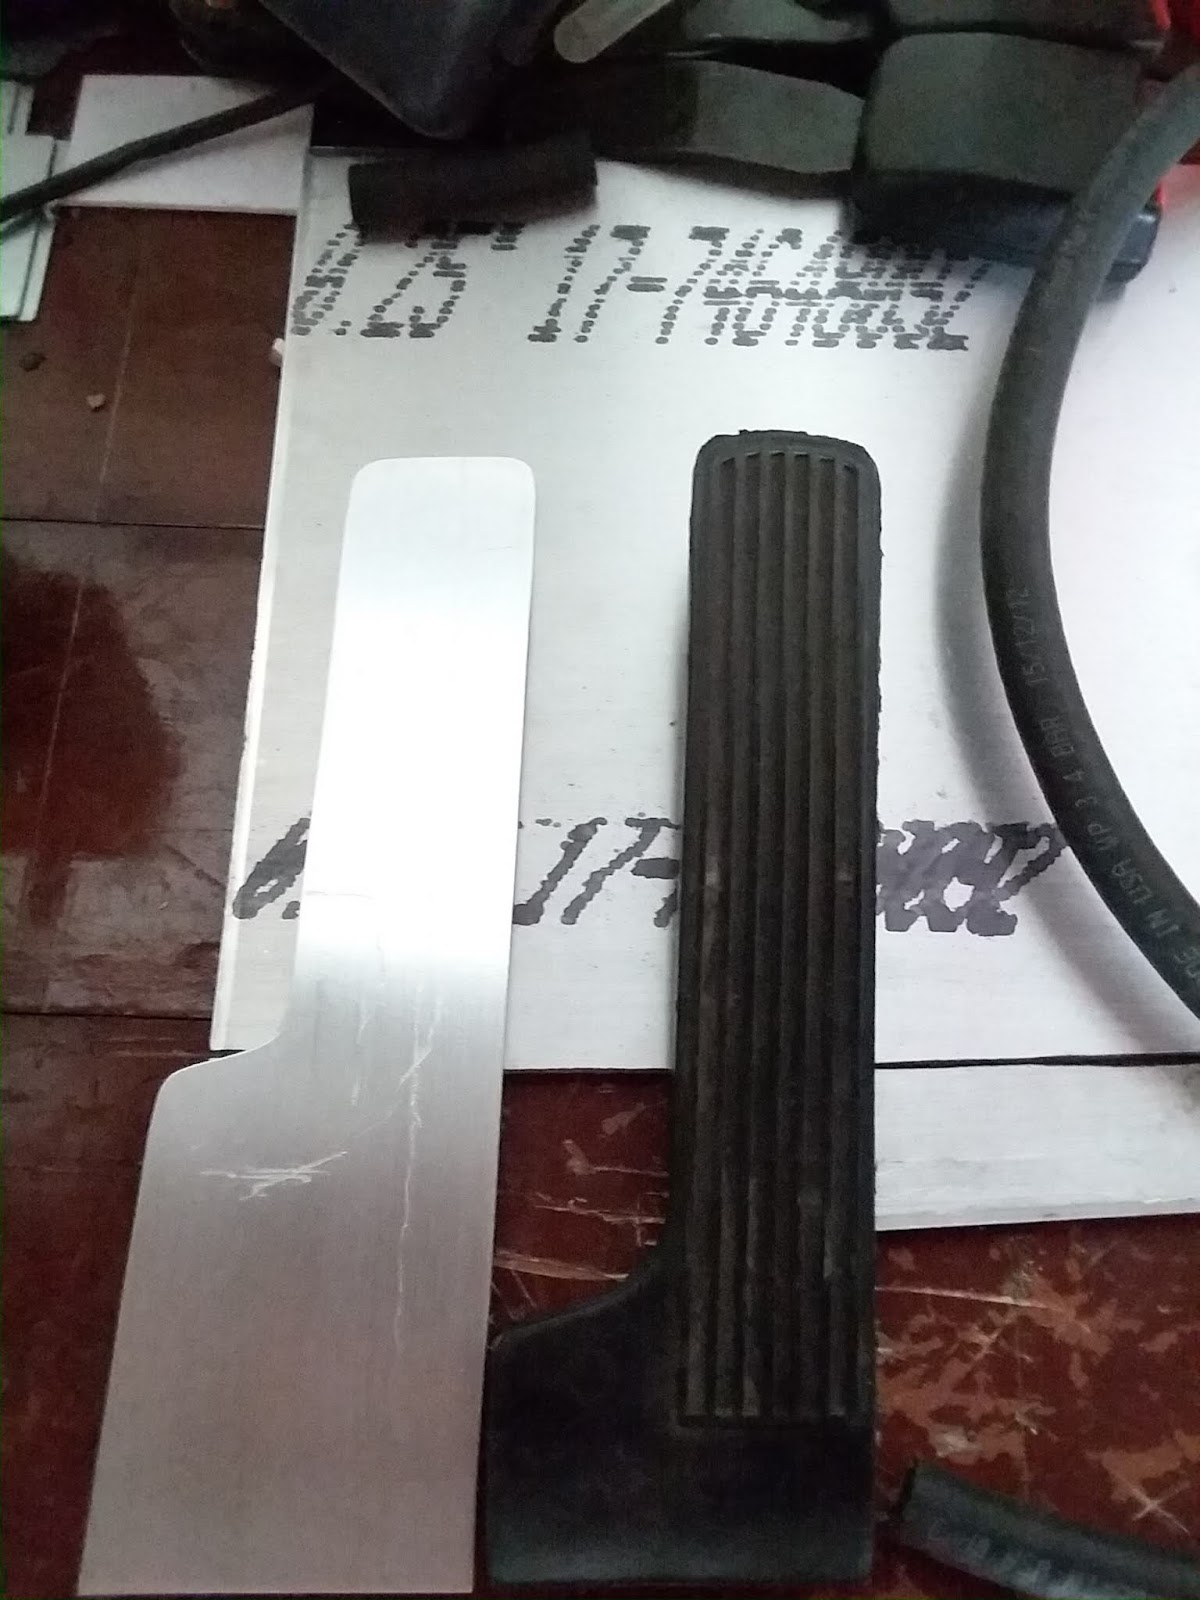
Just a few "under construction" pics of the dead pedal I started making that will match the pedals I've already made. I used a vice to bend up some 16 gauge steel to make a base and 3/16" aluminum plate for the face. I'd done a version with a rectangular face plate but it didn't look quite right so I remade it narrower with a slight angle to match the gas pedal.

Rough base shaping.

Before welding up the edges of the base.

Mock up with the face plate before drilling and countersinking the holes.

Ready to drill.


I just wanted to record the effort and maybe it can help someone else looking for ideas on how to do it way better than my hack version.


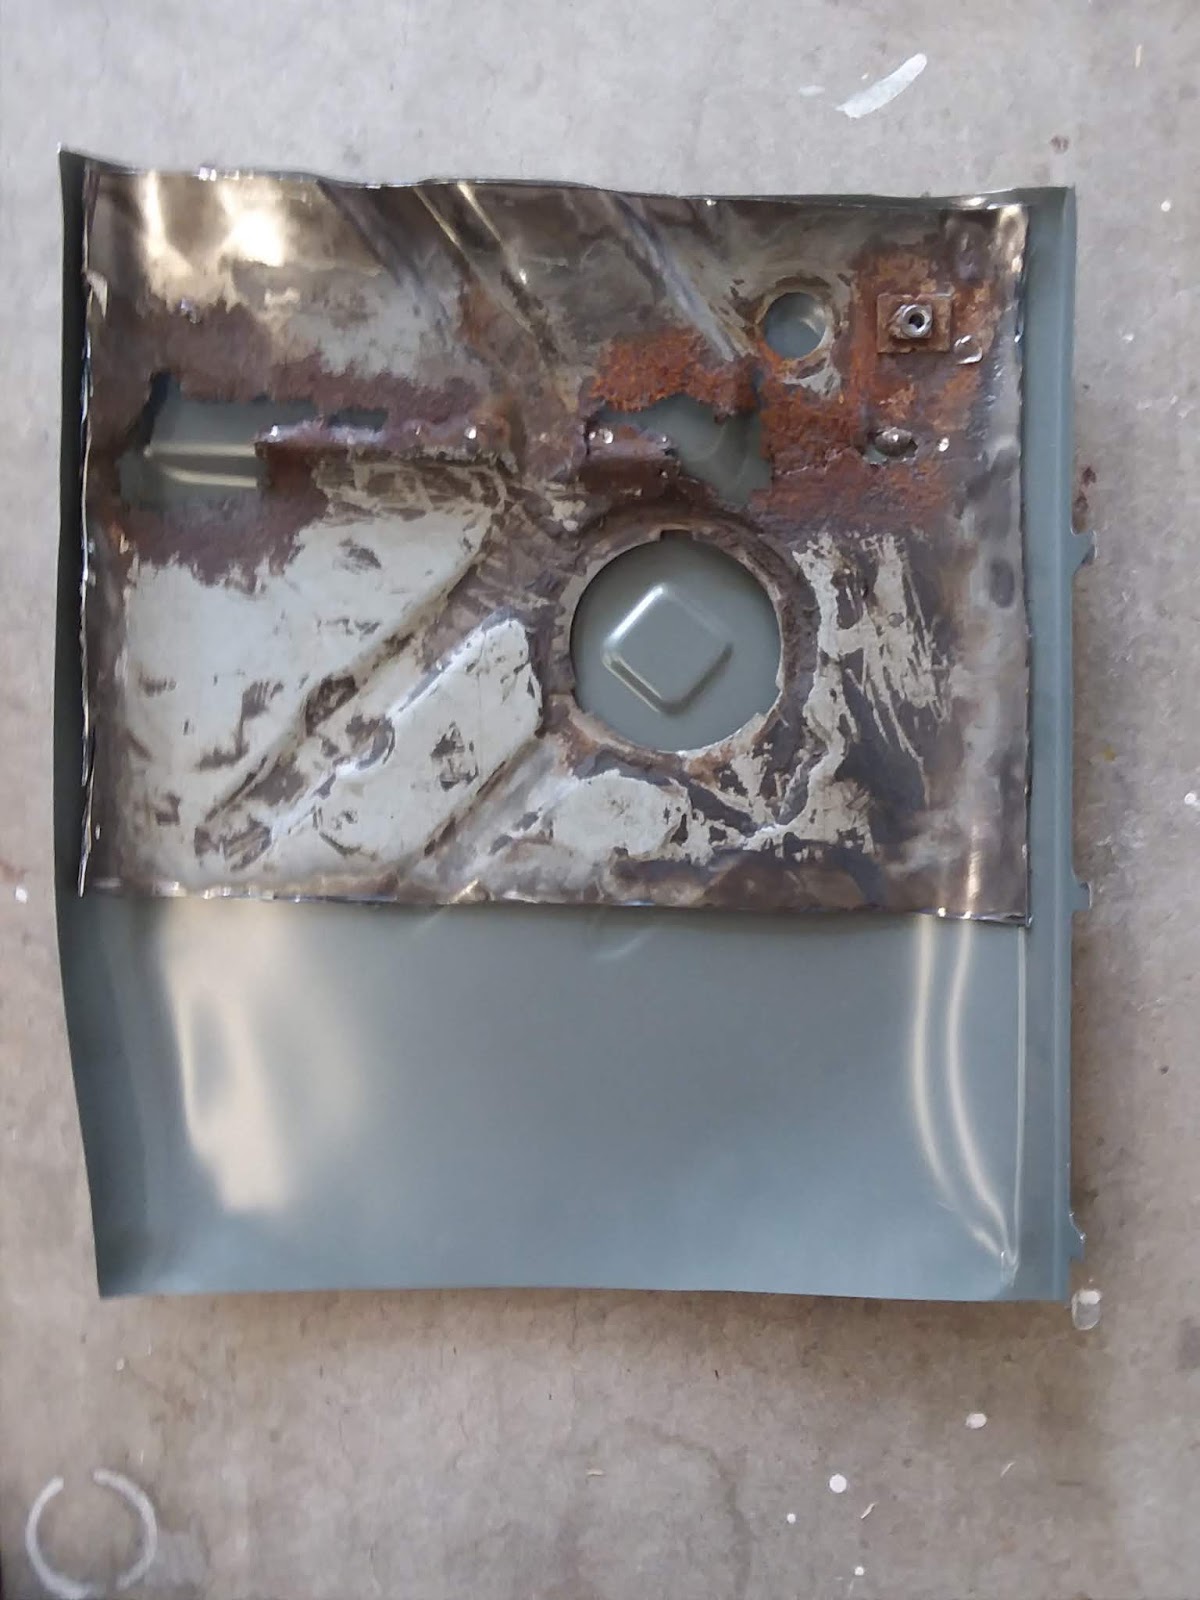
The stock gas pedal is held on by little metal ball studs or "nubs" and they fail over time. I had to replace the section of floor pan anyhow so I needed a new gas pedal mount.
I decided to make a new aluminum gas pedal and a hinge mount and might as well make some matching pedals for the brake and clutch.
I bought a 12"x12" plate of 1/4" thick aluminum. I cut out a piece with the jigsaw and made it a little larger for heel-toe downshifts and a better look. My cheap angle grinder did a great job finishing the edges.

A drill press was all that was needed to perforate the pedal. I considered simply using grip tape but wanted to try something I hadn't done before.

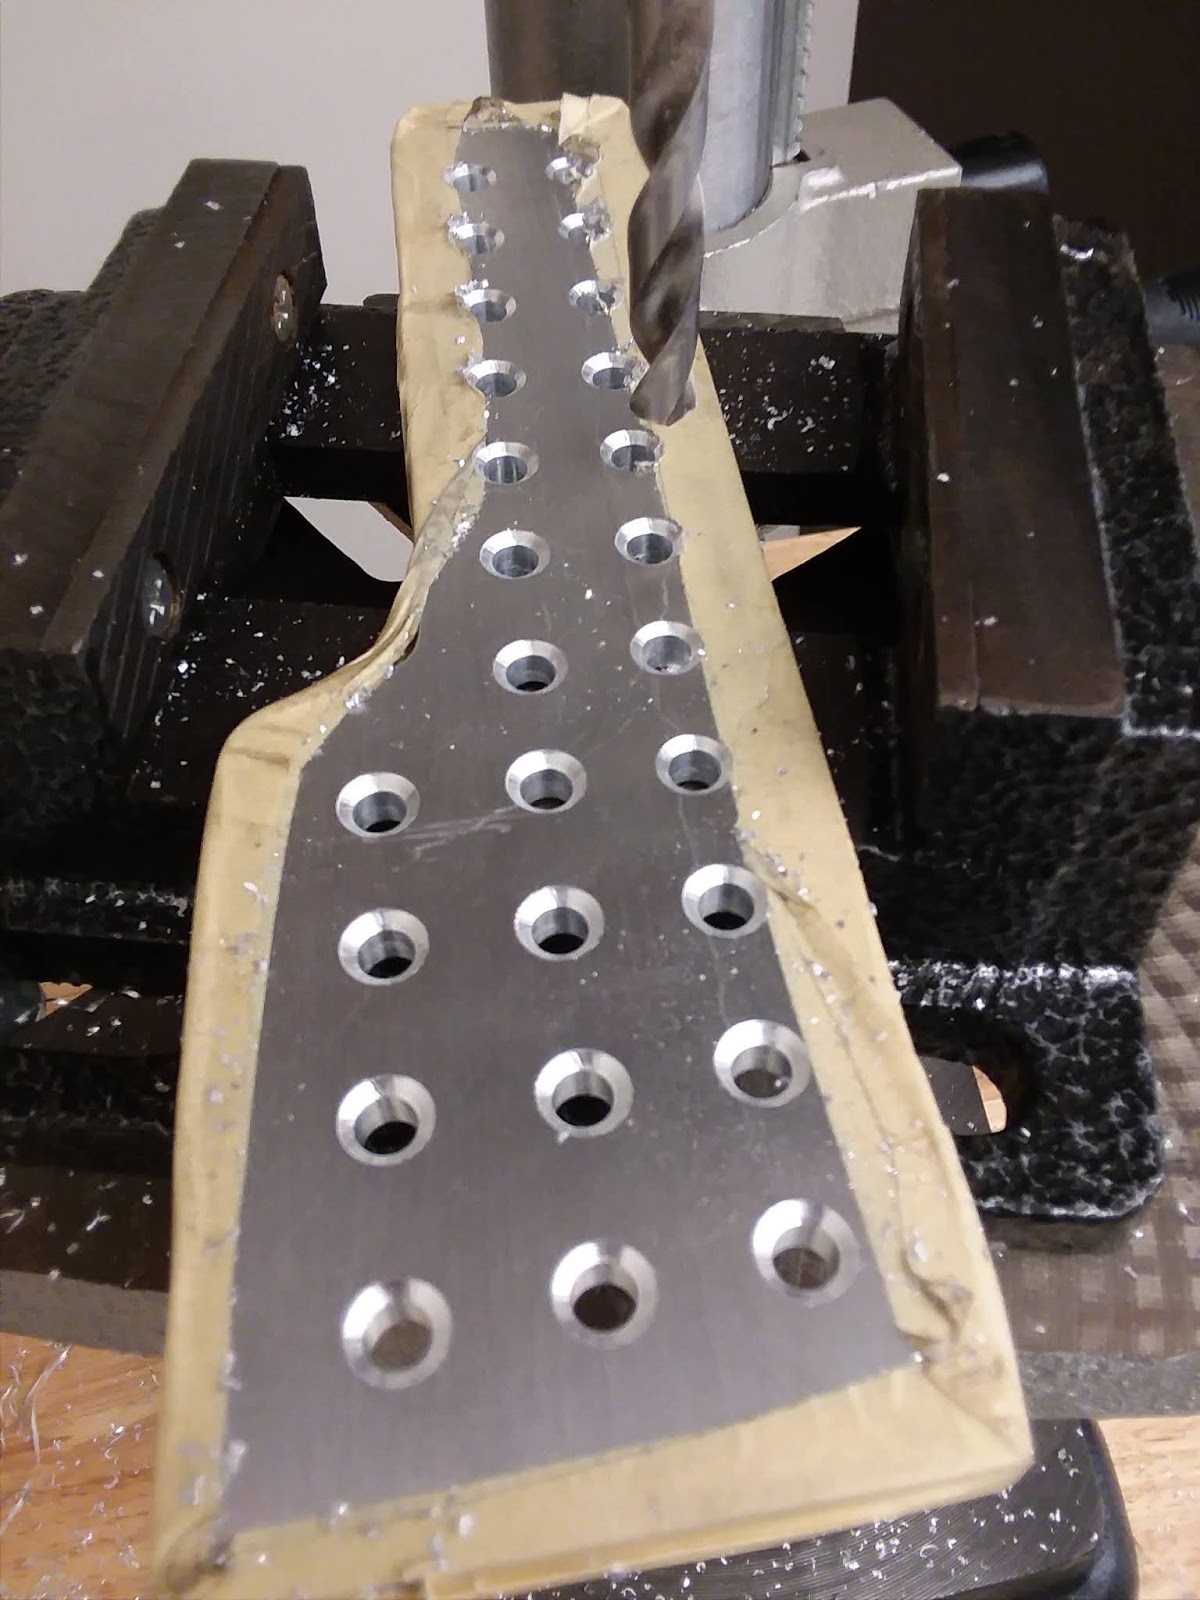
A larger drill bit to carefully countersink the holes worked out well.
A good sanding will take out the scuffs. All ready to go.

A couple more blanks were cut out for the other pedals, and I rounded the edges with the angle grinder.

The stock pedals are curved for the bottom pivot pedals. I put the blanks in a vice with some carefully placed steel rods and I got a bend I'm pleased with. Time to drill out some more holes.


So after having some success with the gas pedal I (stupidly) decided to change my method for hole location on the brake and clutch pedals. I didn't use a scribe nor a punch to locate the holes as I thought I'd still do a good job. This was a bad idea as I messed up the placement of a few and had to fight to get it to look "good enough". I can do another batch later but there's too many projects I'm trying to finish up. I did take a few minutes with the grinder to taper the bottom of each pedal so that there was a more continuous curve on the pedal's surface. I'm hoping this helps with the foot feel as well.

Mounting is straight forward with a hinge bolted to the floor. Heck, one of my metal nubs was a replacement bolted through the floor. A bearing from my son's old fidget spinner fits perfectly on the gas pedal rod.

Don't look at those nasty welds... at least they hold the floor in...


Nice car and work. I miss my 74 Tii, still one of my favorite models.

Great build! I loved my 02s and would love another, but all the ones I see for sale are well outside my "Fun car" budget.
Thanks,
I did get it at a decent enough price, I guess, but I certainly wish I'd "stumbled into" some great deal like I always read about.
Spent far more than a challenge budget but am working all the angles I can.
So I got an idea...
With some of the larger projects winding up (need to actually finish them up this next week though) I thought I just need to drive it more... so I thought about how fun it'll be to drive it around and on weekly fun runs.
Then I thought, turbo sounds would be even cooler...
Uh oh.
Not the best idea I've had but, could be fun... so, lets see how it all pans out!
The plan:
Electrical system upgrade, Electronic Fuel Injection and higher fuel pressure, then digital ignition, then get it tuned well, then make a turbo manifold, run some piping, tune and enjoy!
No more than 7-10 psi on stock internals, conservative tune just for fun, no "limit-pushing" but I'll still have my hands full with this.
All this on a budget of course.
Did some junkyard pats diving and got the following:
Early E30 318i (m10 engine) alternator, intake manifold, injectors and fuel rail, throttle body and some sensors.
I did a bunch of reading and then pulled volvo 2.2lh Ecu and injector harness and a Ford EDIS system for ignition. This can work but I didn't feel it was a good fit since I want to push on to the turbo side of things.
I then researched Megasquirt but the components kept adding up to more than I want to spend right now.
Then I came to Speeduino: Arduino based engine control-with a custom injector/ignition control. Uses all the same parameters as the Megasquirt and Tunerstudio.
Pulled the trigger and have one coming for $170 so far. Now to actually finish what I started and begin updating the wiring.

In reply to Nomad :
I've had similar thoughts. Looking forward to you working out the problems.

I had a ‘75 2001 and I miss it. I sorted a few things, drove it a while, added a Megajolt using Ford EDIS and ditched the dizzy and points. Decided I wanted to Megasquirt it. Got it 90% completed. Planned out a turbo system, then ended up moving from AL to MN on short notice and abandoned the project. Sold the mess to a buddy for a grand and he got it running and sold it for multiple times more a couple months later.
The only thing that remains other than my memories is that about that time, I signed up for a PSN account so I could play gran turismo online and I chose M10PSI as my screen name. I figured 10psi would be enough and being an M10 engine, it was going to be my vanity plate. Maybe someday I’ll get another one and actually finish it.

This is turning out really nice! My son wants one for a first car, I think this is a great idea.
Got more work done after some procrastination...
No more spinning shift rod - welded the shaft solid!

Located a smaller battery to under the rear seat:

Fixed the sloppy play in the hand brake with thrust bearings:

Installed a Wideband sensor and a small display in the seatbelt pod


Installed a lightened flywheel, new clutch, replaced the 4 speed with one in better condition and finally installed the interior.

Finally at a point where I can actually take it one a shakeout drive to sort out any issues since I've now touched every bolt in the suspension and driveline nose to tail.

Great build ,
My friend is looking for a clean sunroof clip from a 1600-2002 to replace a rusty one , if you happen to have one ;)
You'll need to log in to post.


