1 2 3
NOT A TA
NOT A TA SuperDork
9/6/20 9:59 p.m.

In reply to 759NRNG (Forum Partidario) :

Whittingtons?

-----

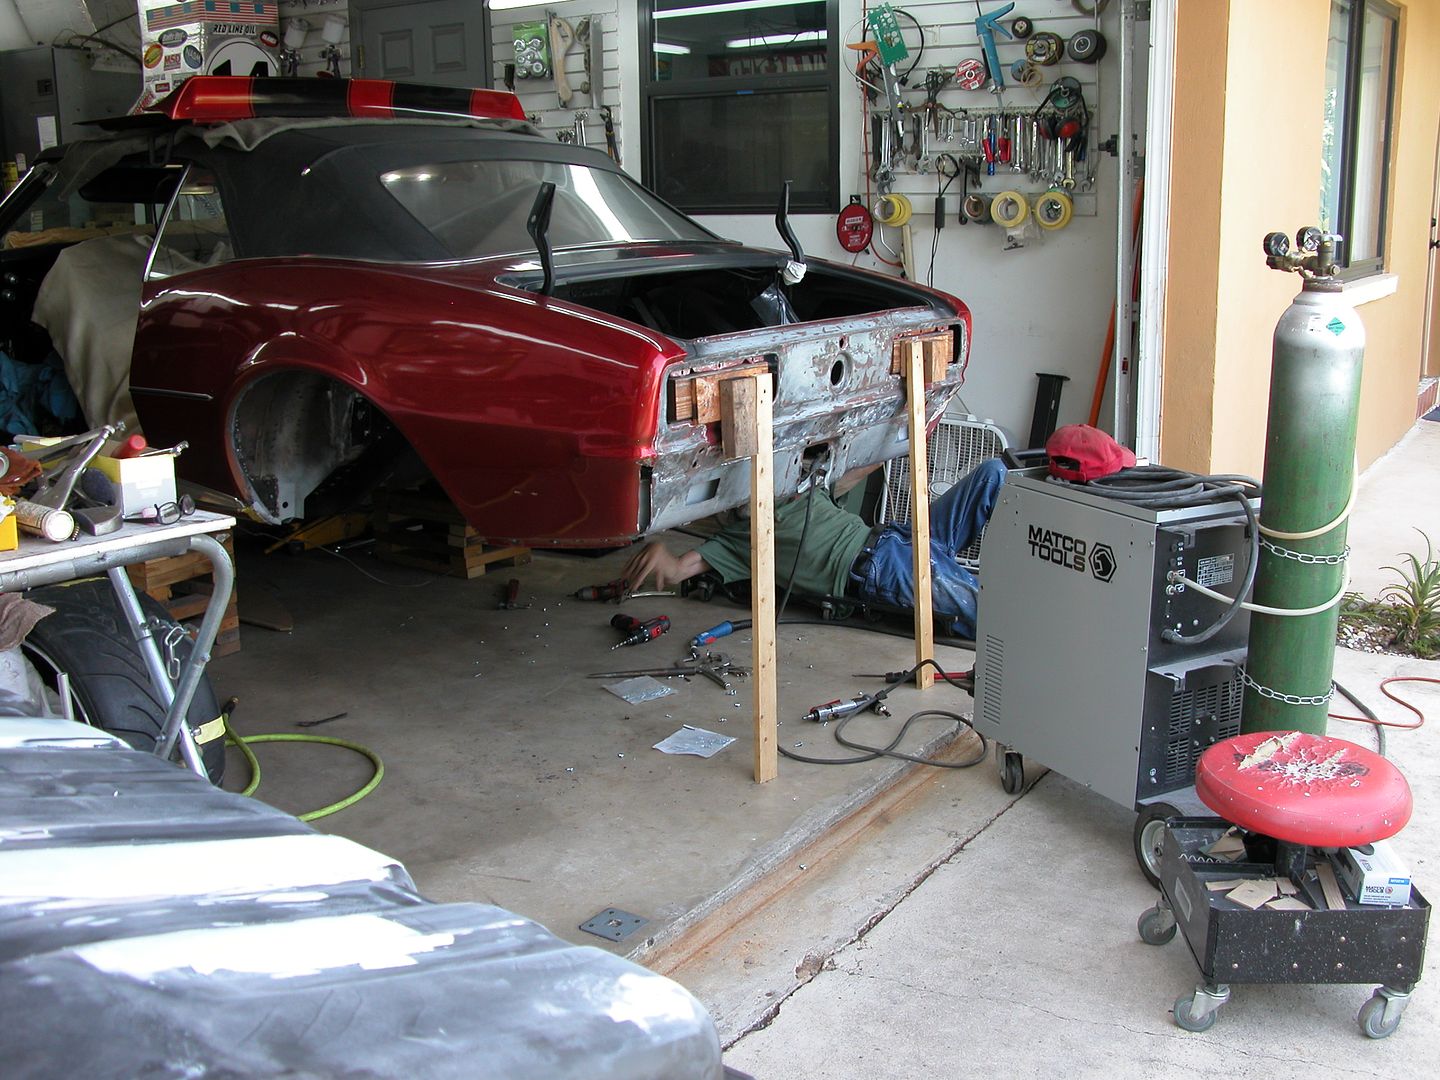
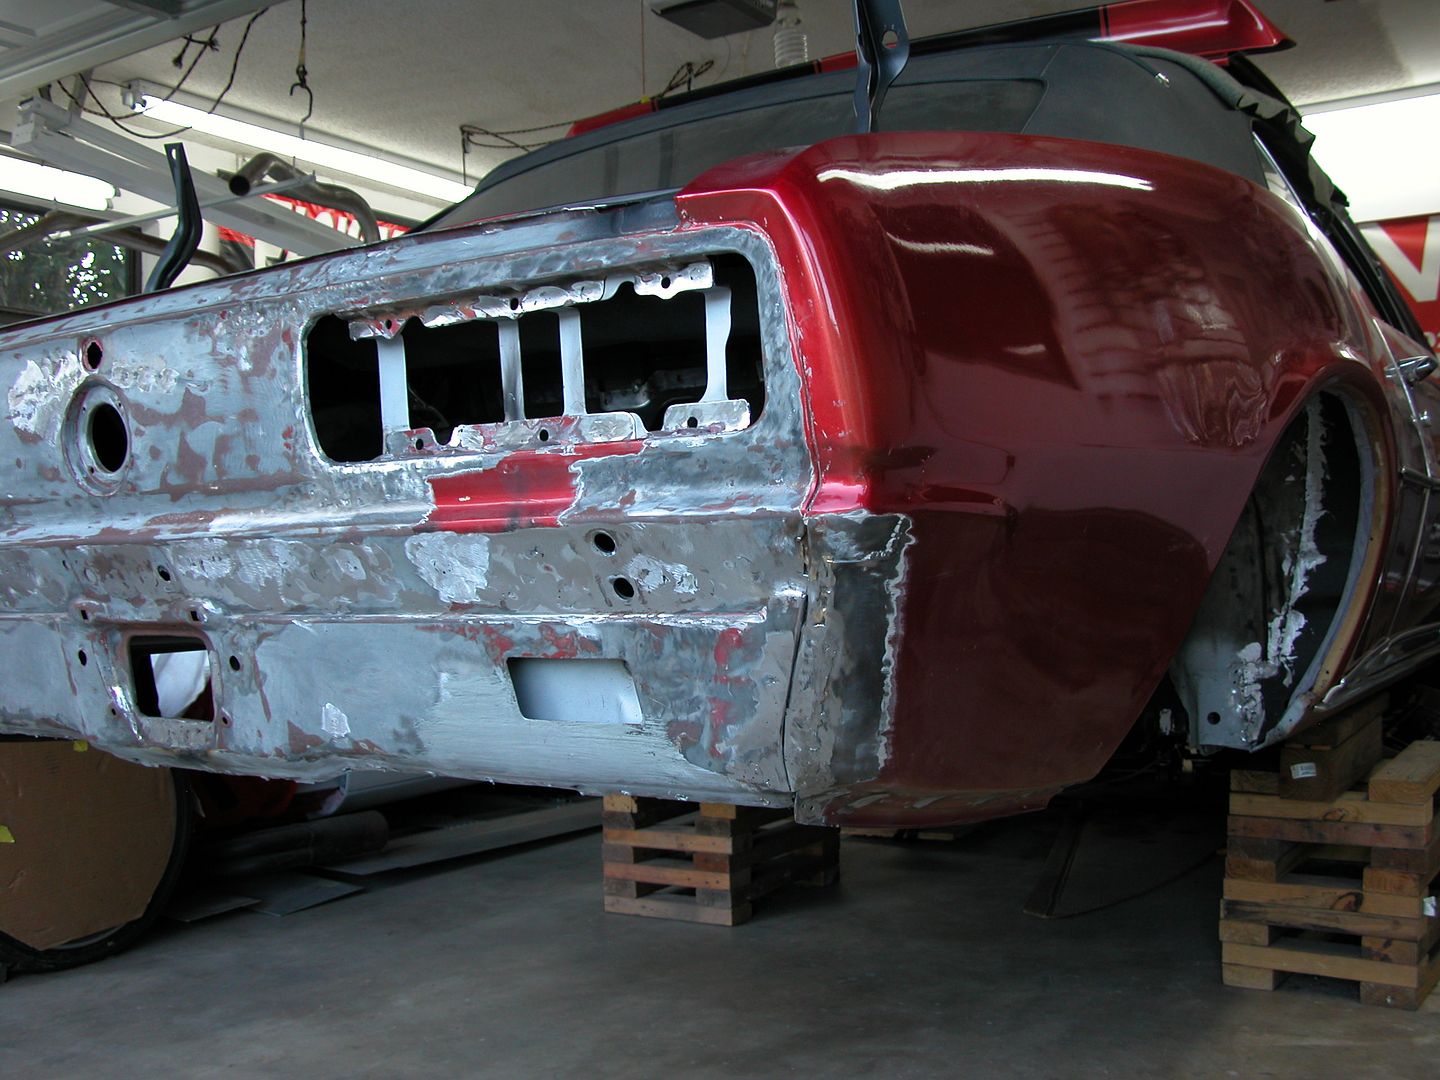
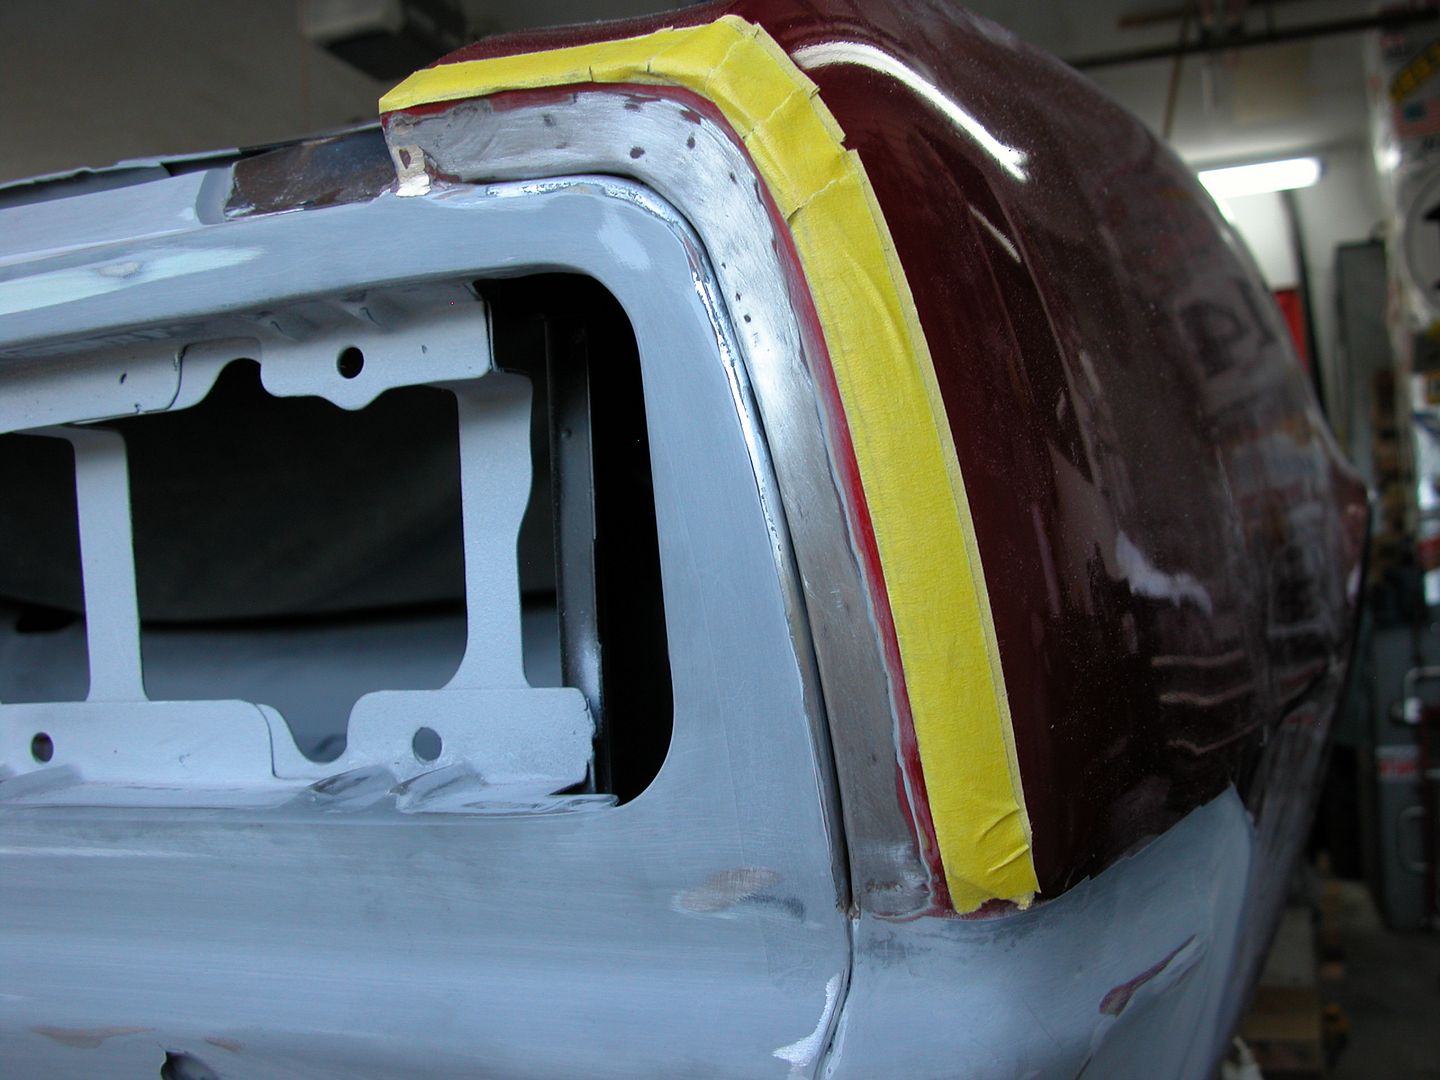
There's almost always unexpected surprises when going deep in the rabbit hole on a project like this. One was that I found the people who installed the quarters decades ago just filled between the quarters and tail panel below the bumper on both sides with fiberglass resin and mat then smoothed it with bondo to blend it in (see pic below). So I fabricated metal pieces to weld in and make it much better although certainly not "correct". There would be no way to weld the quarter to the tail panel without buying new quarters and welding them in. Not going there, again I'll mention scope creep was already way outta control. The patched areas were ground nicer before epoxy primer & bodywork than as shown in the pics.

[URL=https://app.photobucket.com/u/NOTATA/a/4084bbc8-1e50-4486-872e-fbce3ed87549/p/41c73d9d-7168-4415-a99c-9c48dd5373db][/URL]

[URL=https://app.photobucket.com/u/NOTATA/a/4084bbc8-1e50-4486-872e-fbce3ed87549/p/35f96098-5ac0-4766-8b20-aa06f0169c28][/URL]

[URL=https://app.photobucket.com/u/NOTATA/a/4084bbc8-1e50-4486-872e-fbce3ed87549/p/7958ae12-716d-4b6f-9d52-12ec36ea370d][/URL]

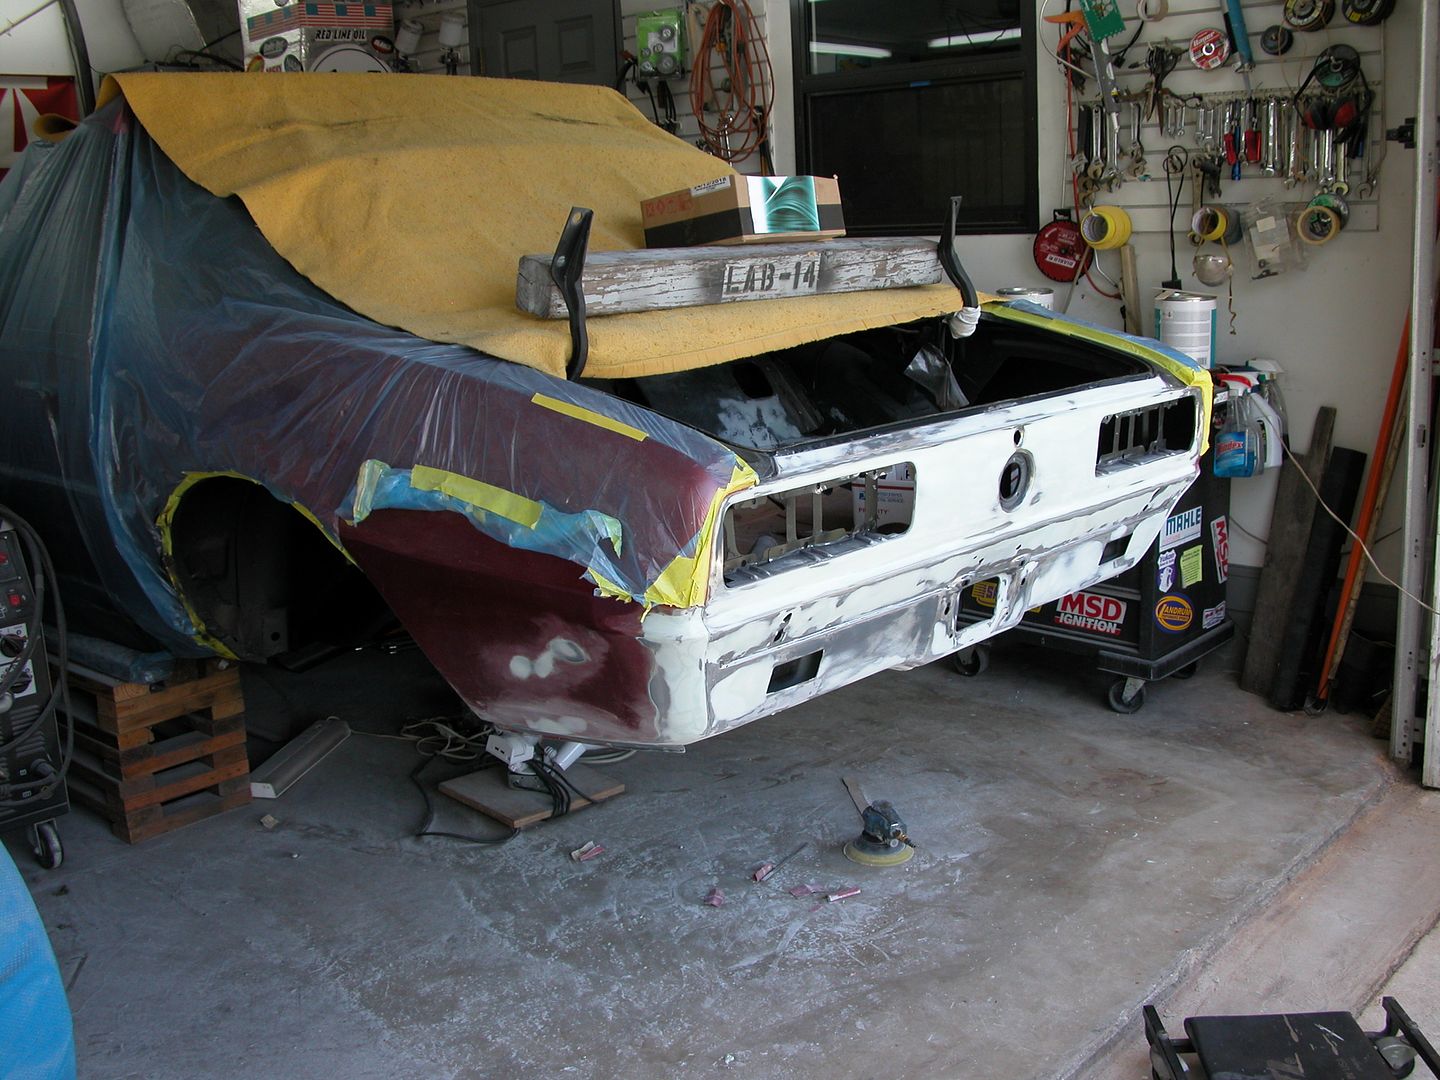
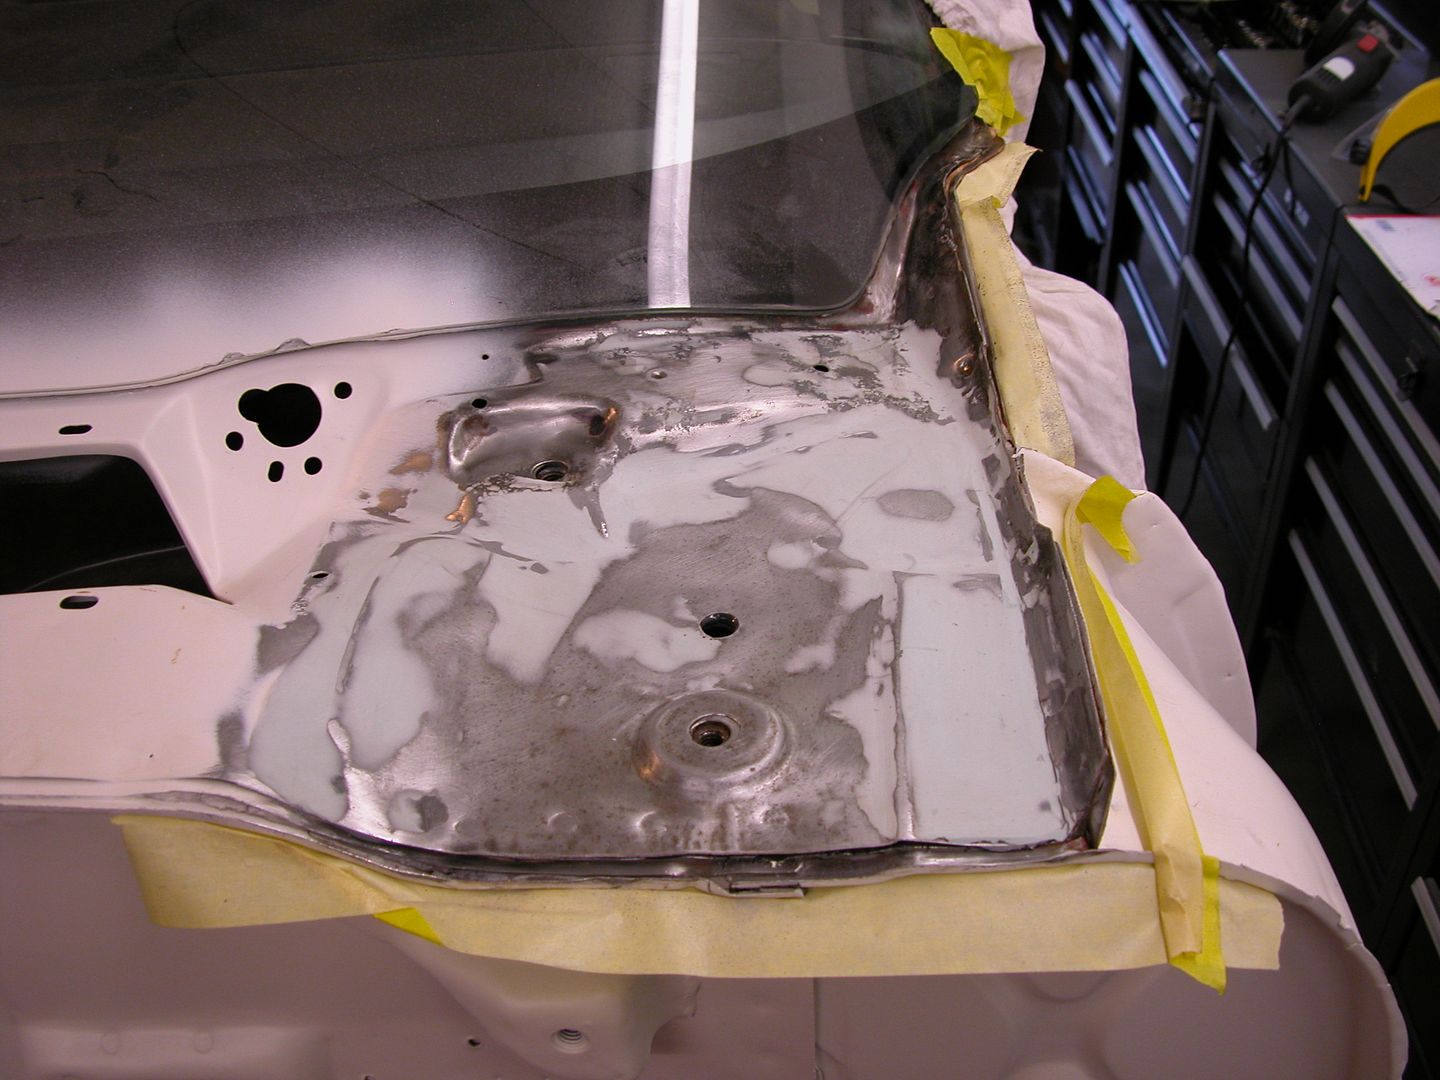
The car had been kicked in the rear softly at some point(s) during its daily driver time so the right tail light pocket someone had done work to previously wasn't up to our quality expectations. We removed it then sandblasted, straightened, weld through primed & reinstalled correctly. Also did some other repair work to the rear panel welding up old screw holes from morgan pullers and did some panel beating to make it straight. The whole panel was taken to bare metal & epoxy primed before thin coat of body filler in certain areas. Then primed & blocked till straight & smooth. The lower lip of the inner lower tail panel was bonded with structural adhesive to the tail panel and the top was welded in the sandwich where the trunk floor, tail panel, inner panel, etc all meet behind the bumper across the car.

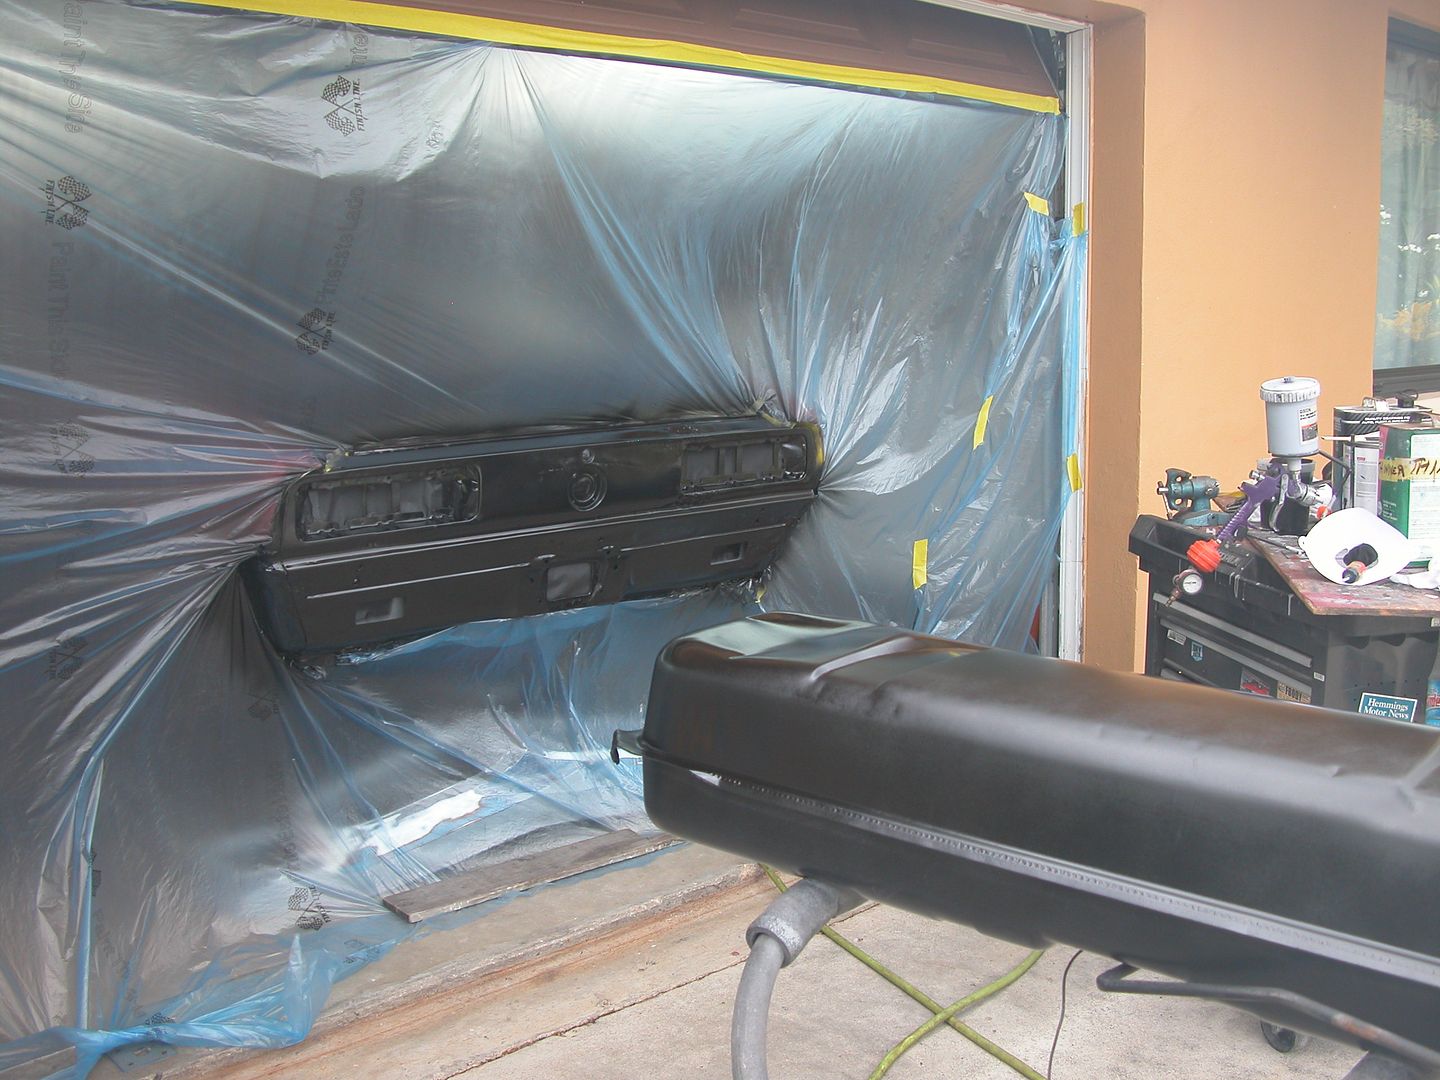
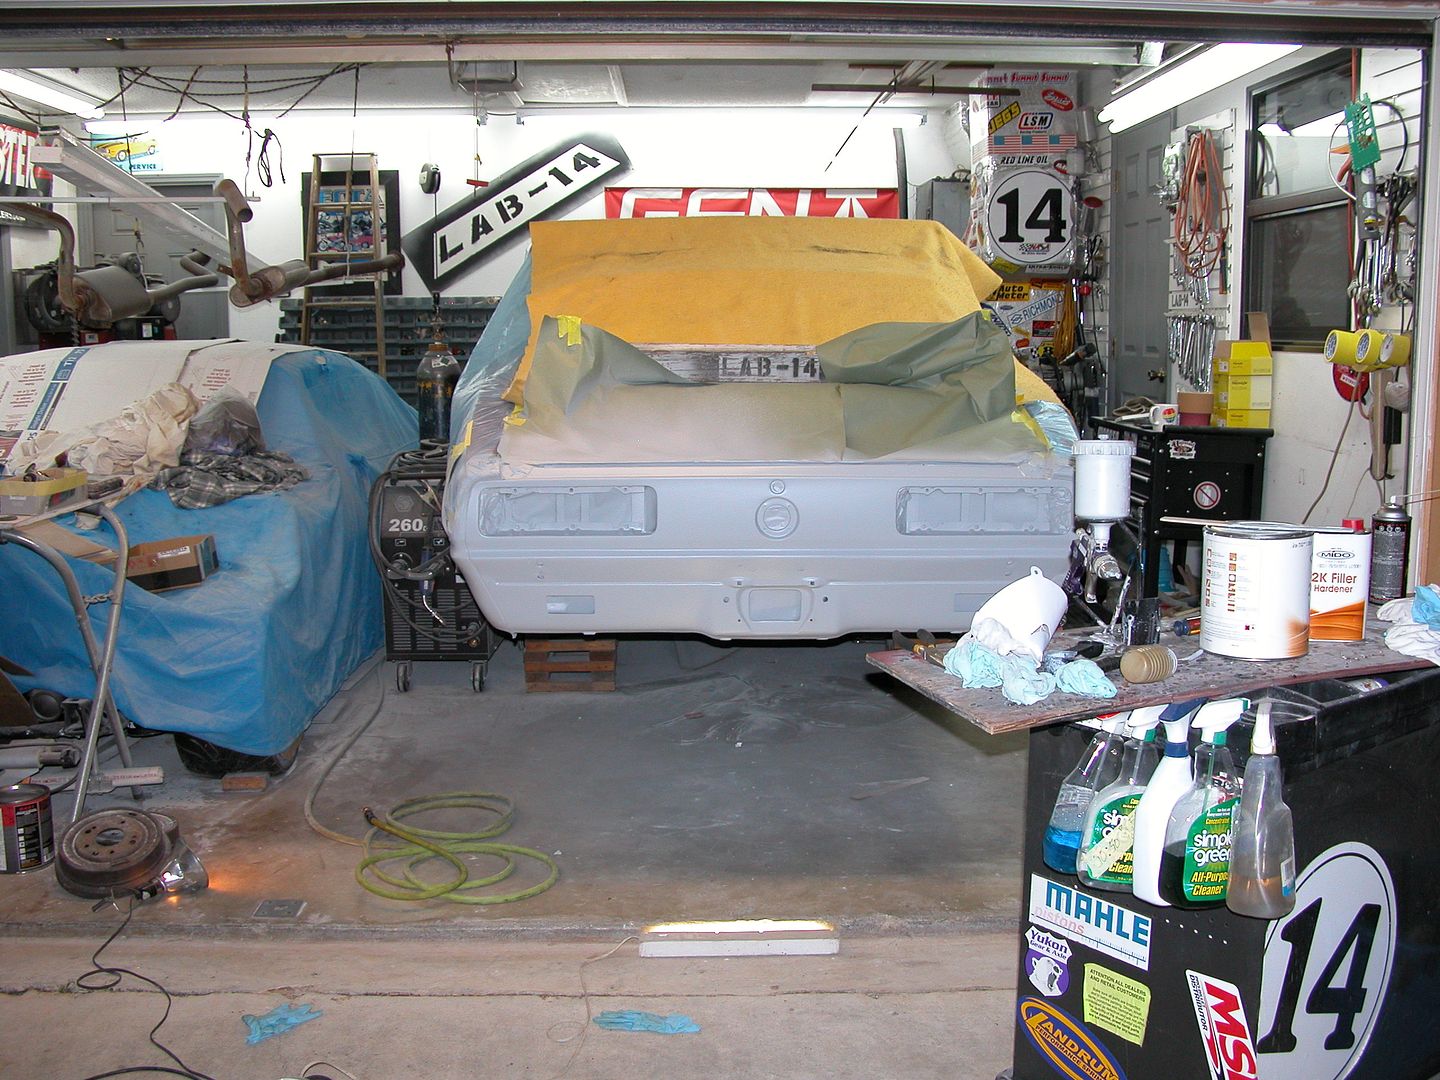
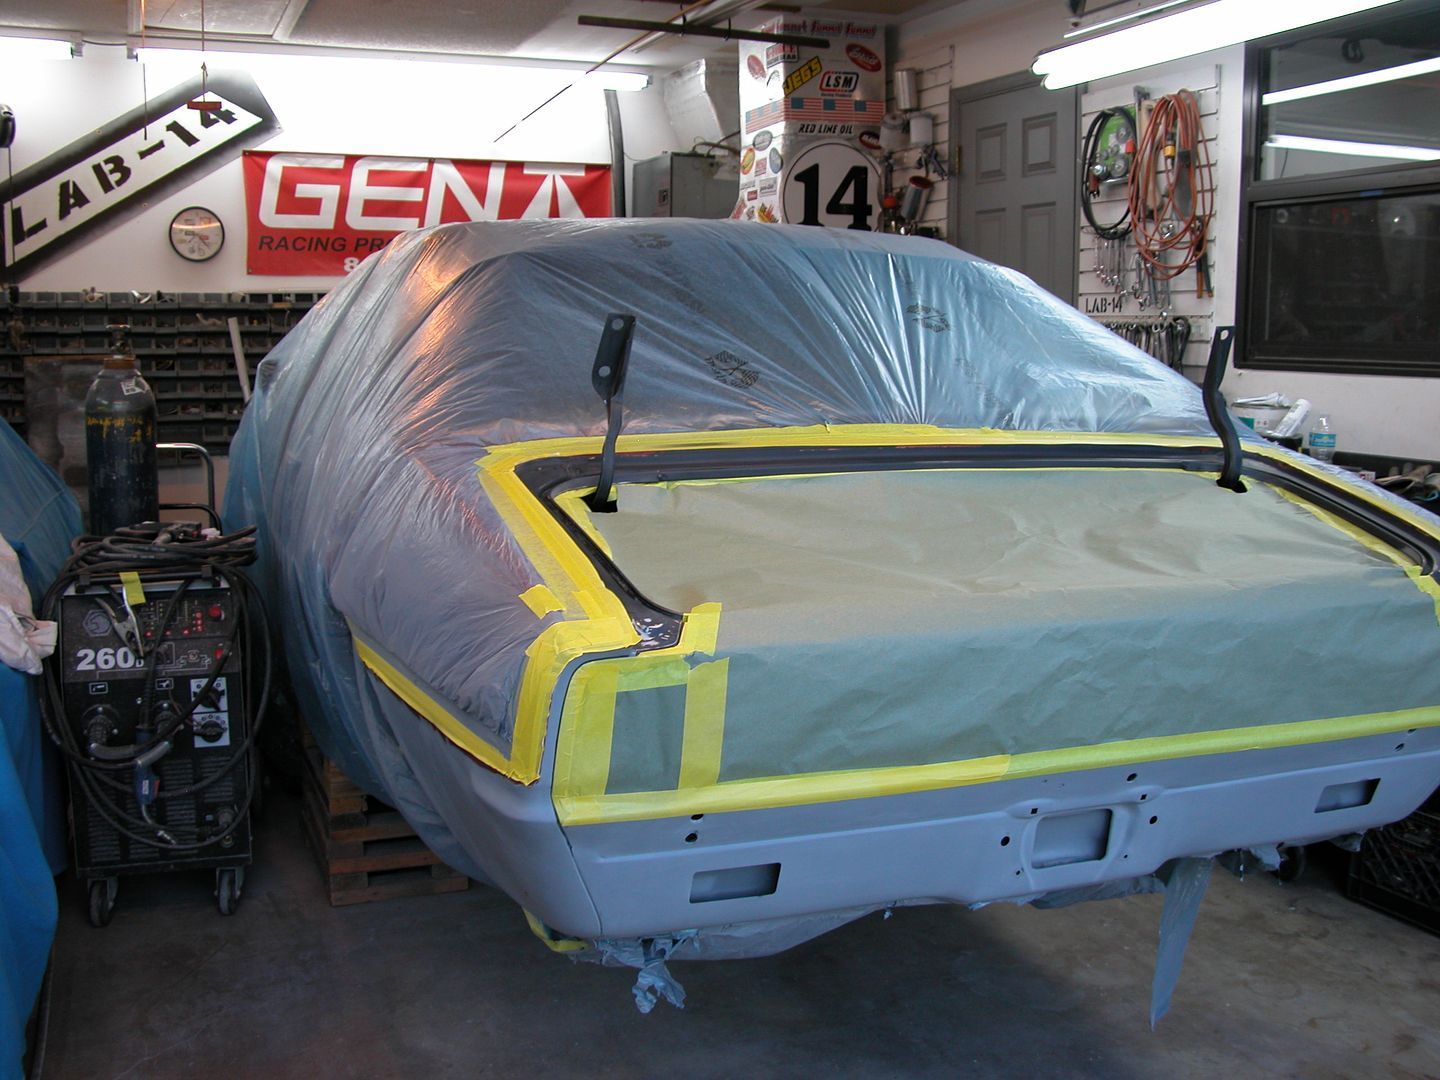
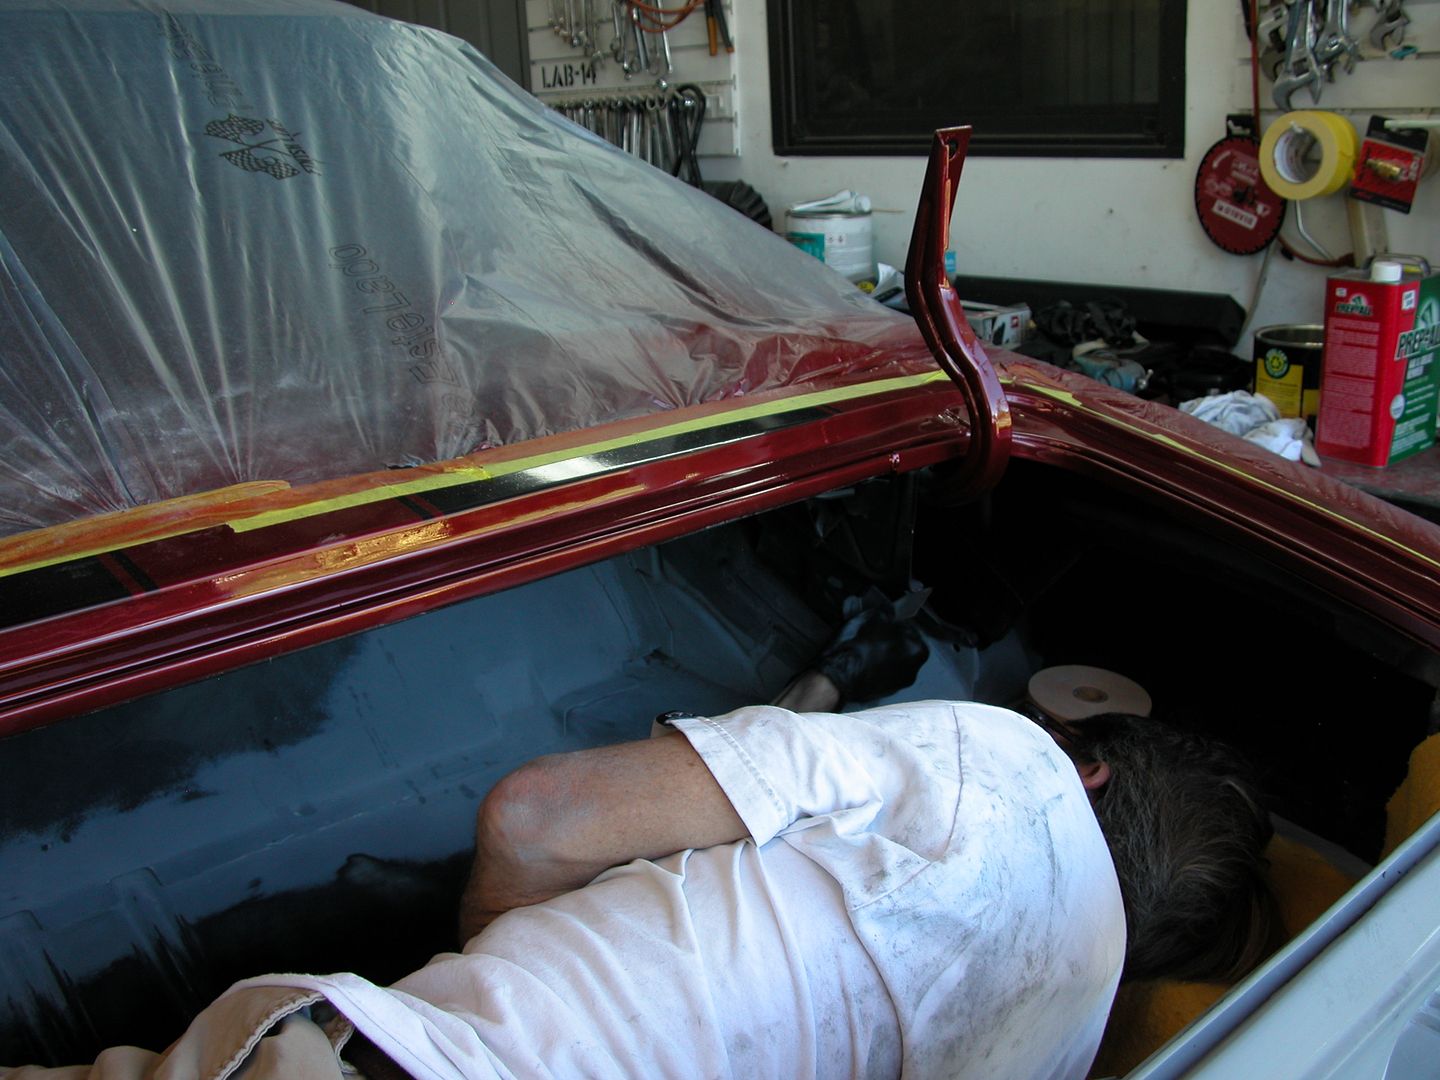
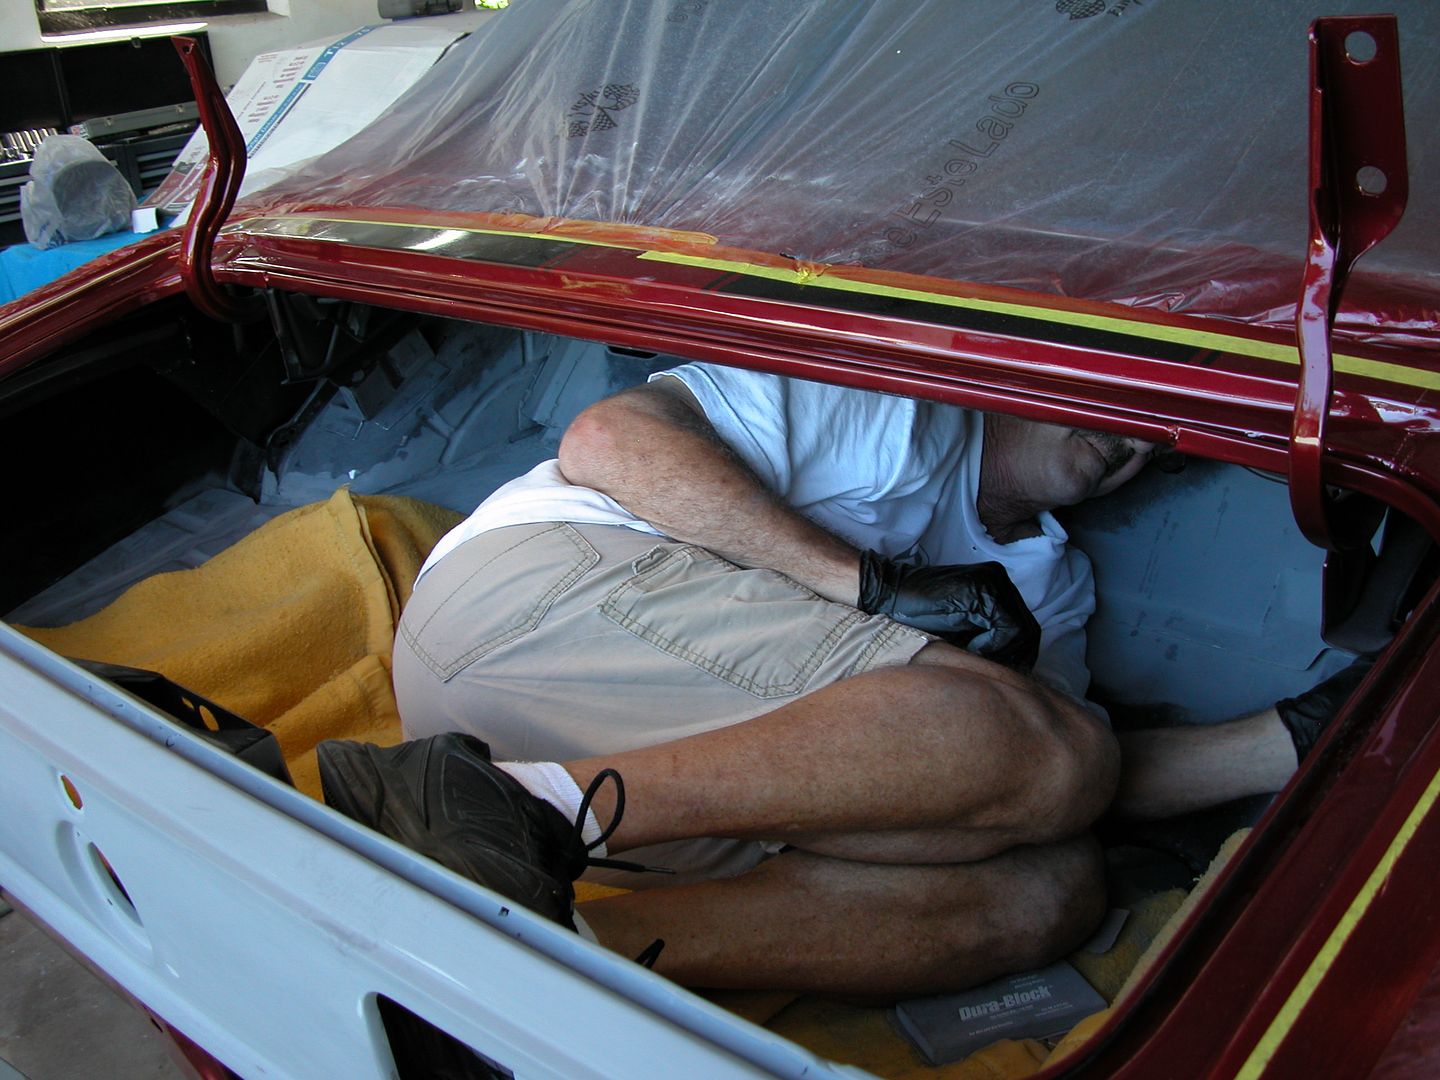
I didn't want to have a lot of work masking and covering things to prevent over spray on the cars and what not so I took the easy route masking for the epoxy primer.

[URL=https://app.photobucket.com/u/NOTATA/a/4084bbc8-1e50-4486-872e-fbce3ed87549/p/136c0d09-de15-494a-a896-cb26c818648a][/URL]

[URL=https://app.photobucket.com/u/NOTATA/a/4084bbc8-1e50-4486-872e-fbce3ed87549/p/ea4fb2cb-d548-4a53-948e-c1da485ce3c2][/URL]

[URL=https://app.photobucket.com/u/NOTATA/a/4084bbc8-1e50-4486-872e-fbce3ed87549/p/afcbce38-e299-4d36-9c9e-34af26053ff2][/URL]

AngryCorvair (Forum Supporter)
AngryCorvair (Forum Supporter) MegaDork
9/8/20 10:31 a.m.

last pic is some weird sci-fi camaro breach birth from another dimension.  should i have another cup of coffee?

TurnerX19
TurnerX19 SuperDork
9/8/20 10:38 a.m.

In reply to NOT A TA :

You need to research the Whittington brothers. Famous for katchabuzz plants

NOT A TA
NOT A TA SuperDork
9/8/20 9:46 p.m.
AngryCorvair (Forum Supporter) said:

last pic is some weird sci-fi camaro breach birth from another dimension.  should i have another cup of coffee?

Excellent description! ^^^

Will look up the Whittington brothers.When I went to college the first time (agricultural) I lived on the South side of the 17'th floor of a high rise dorm. When asked where I lived,  I'd point up and say "See the green window?"  ahahaha


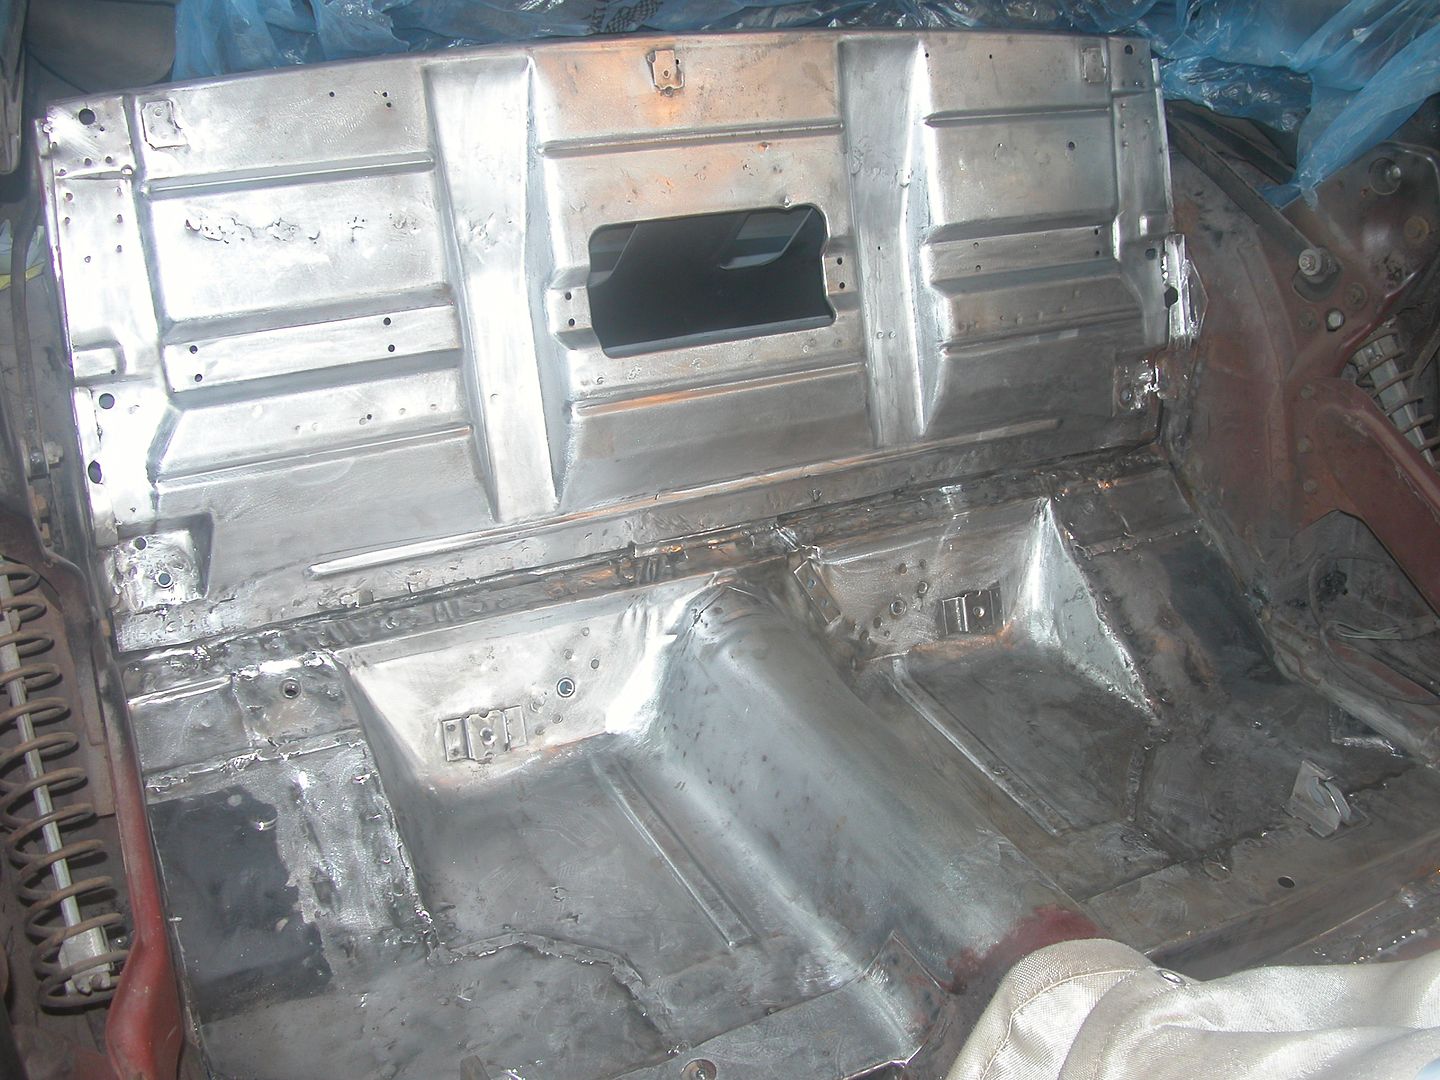
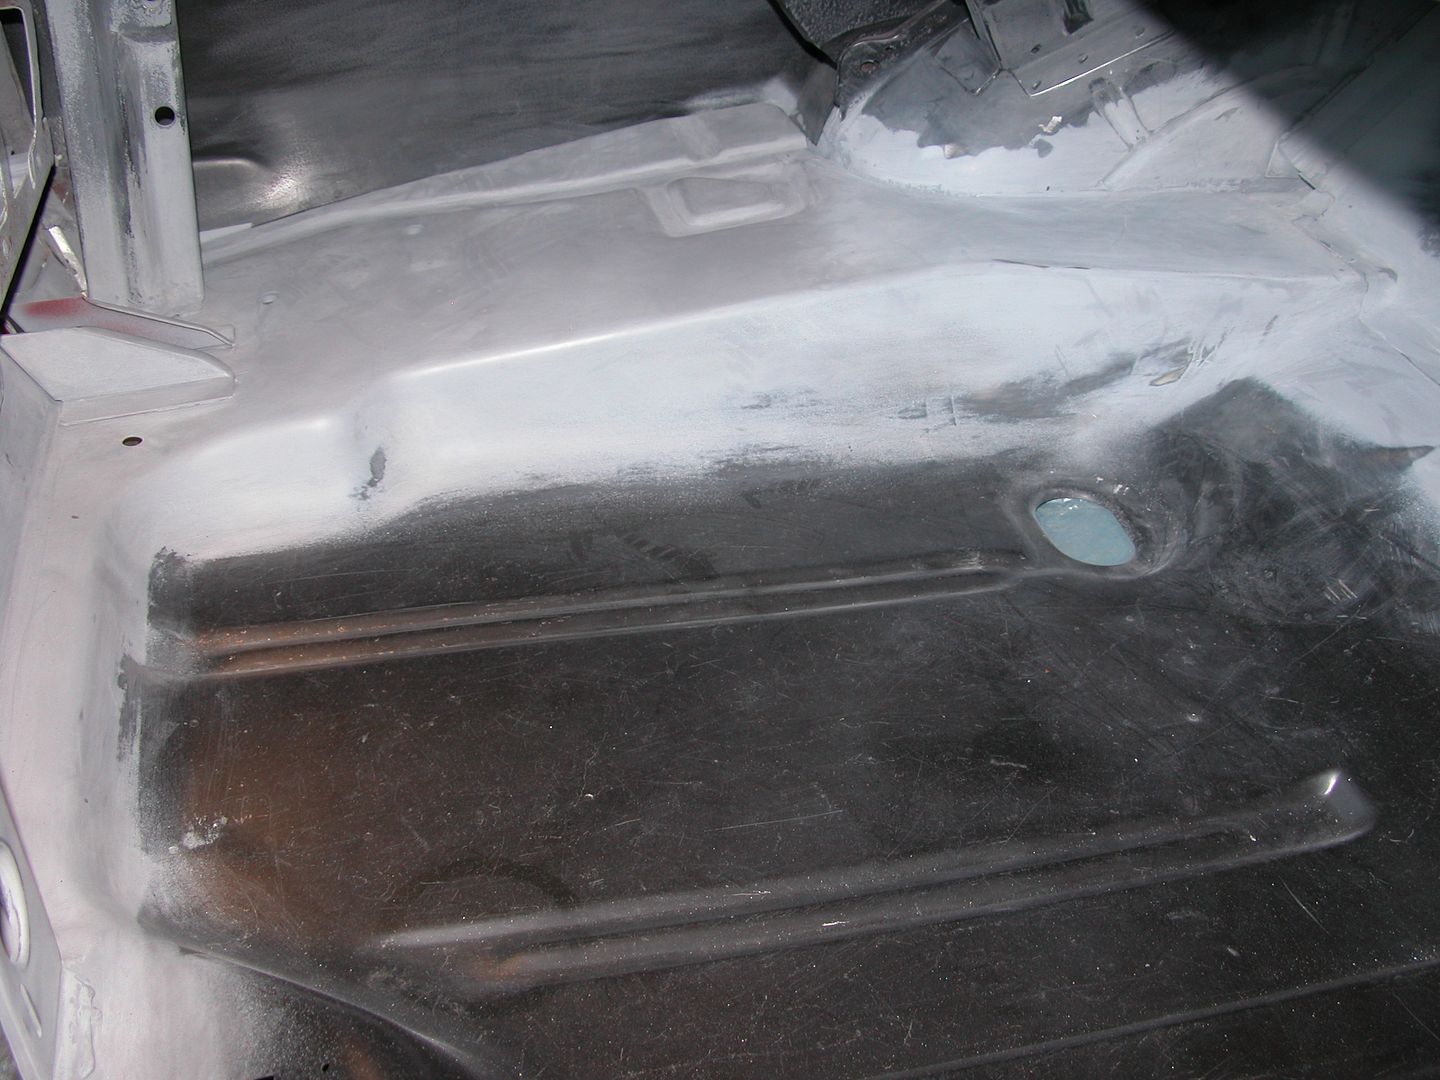
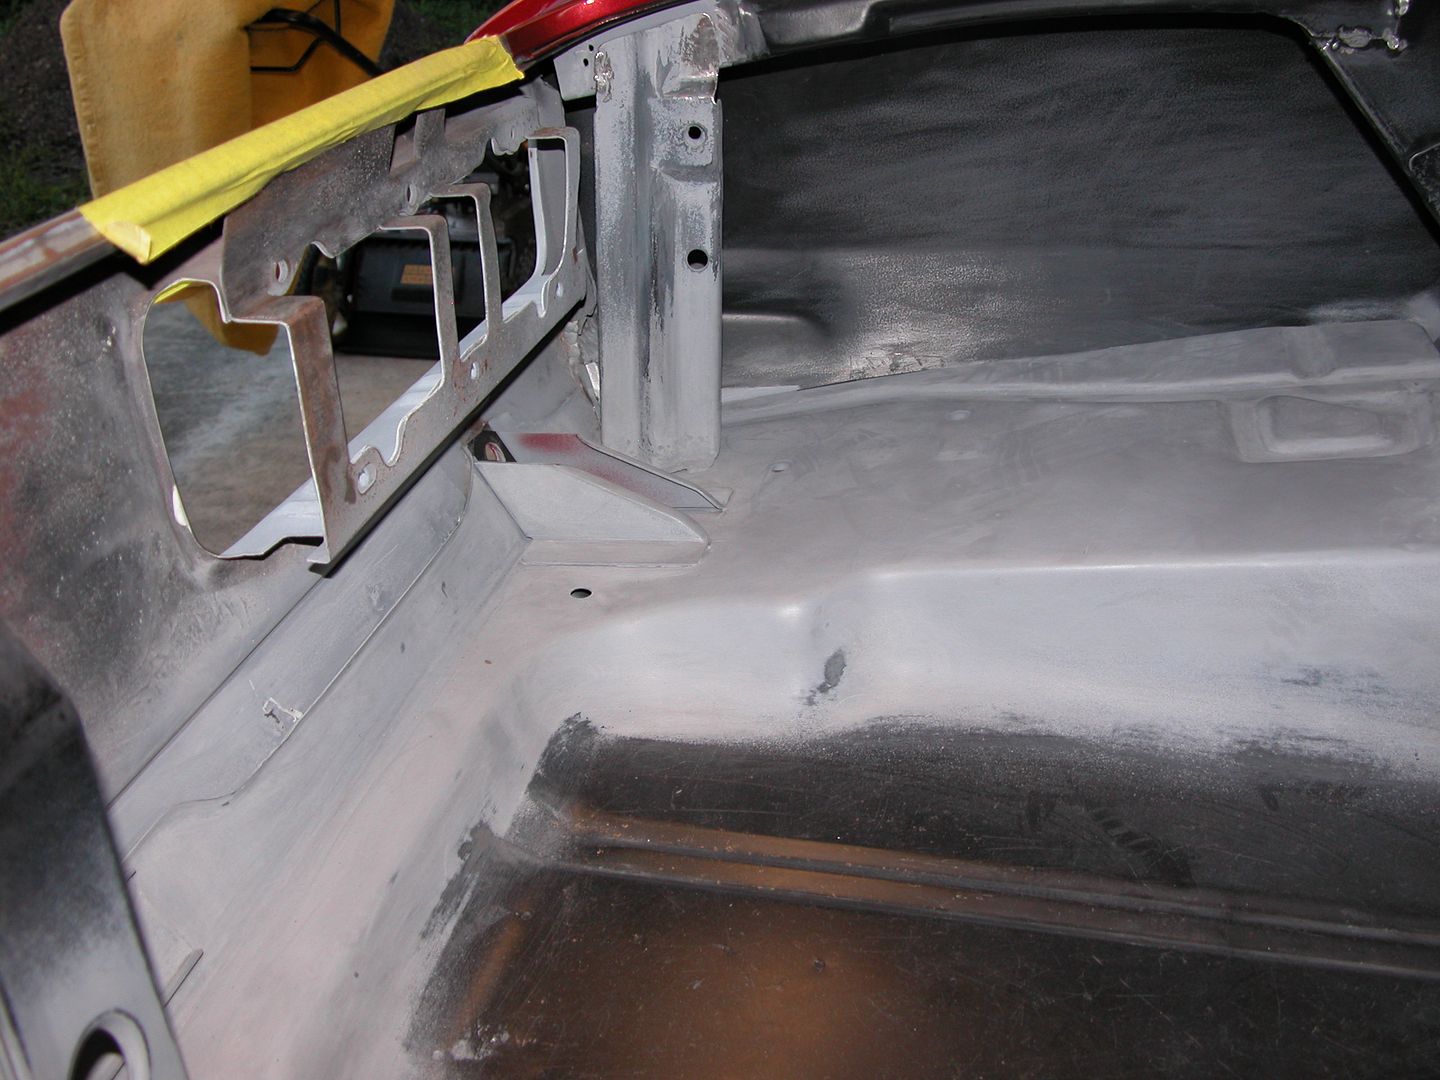
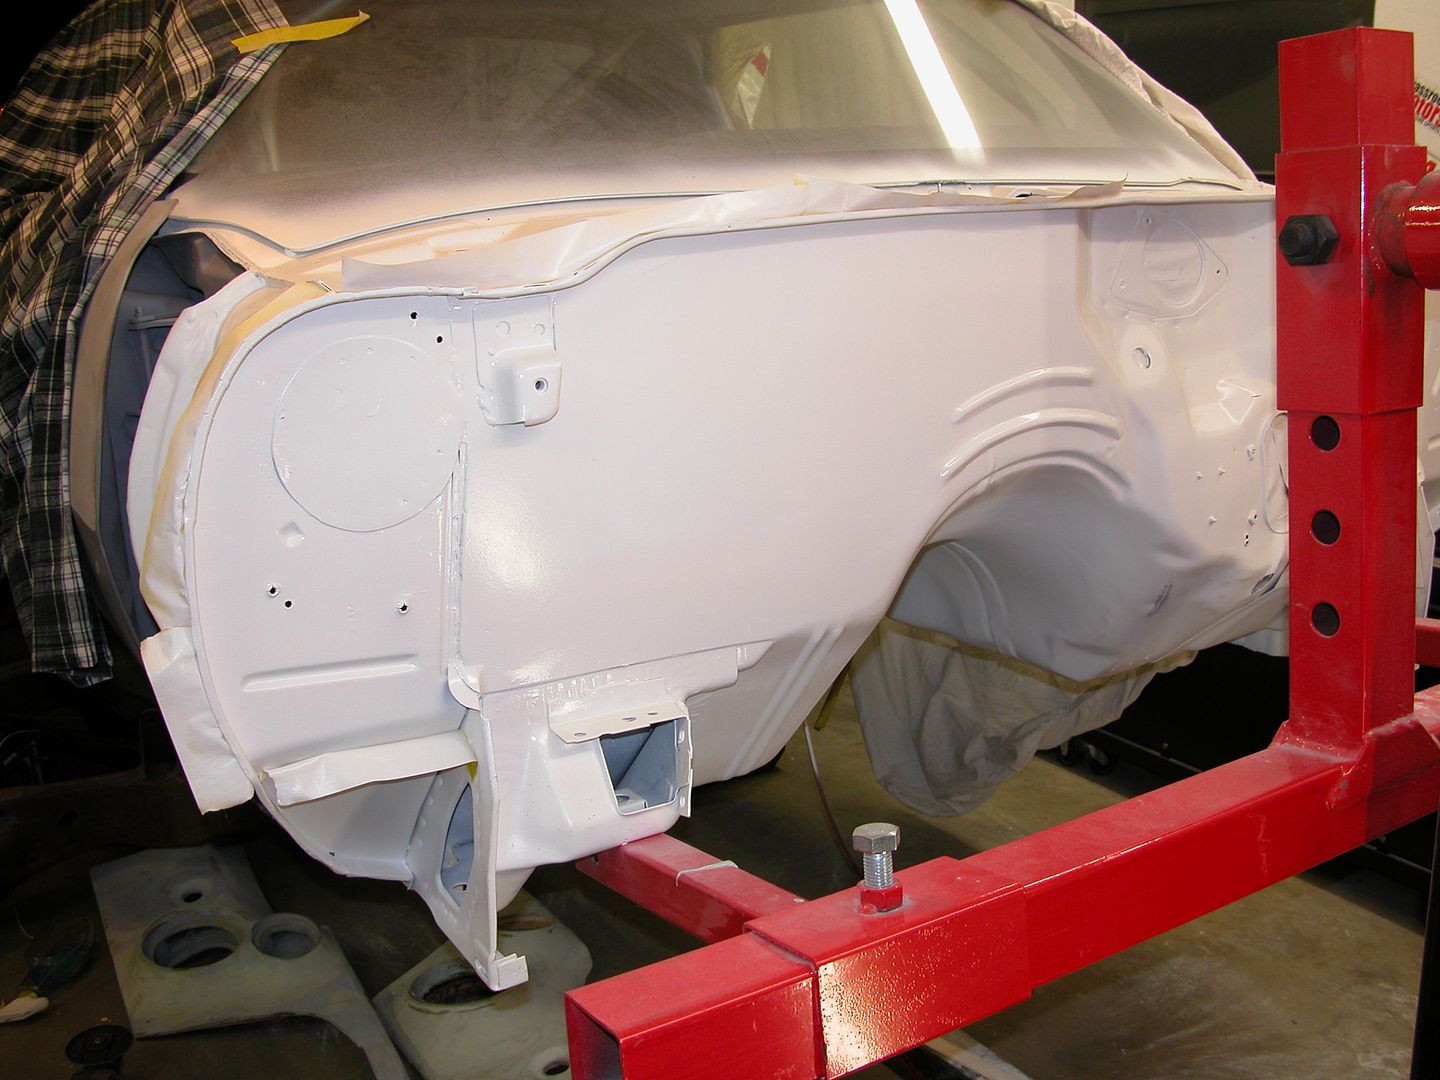
At this point in time Jeff had finished all the welding so the rest of the work is all me.  It was time for me to get after the "finish " work of grinding welds,  smoothing, and priming. I wanted everything in epoxy primer to prevent any bare metal from getting surface rust since it's really humid here during the summer. Started in the wheel wells taking all the old metal to clean shining metal, then shooting epoxy primer on them. Followed up by doing the same thing to the interior and then underneath the car. The new metal pieces that had factory black E coat on them (or I'd epoxy primed before installing) were scuffed where paint remained. Weld through primer was removed where visible also before being shot with epoxy primer using an old but trusty HF HVLP gun with a 1.4 tip.  

This process takes a LOT of hours to end up with what you see in primer in pics below. If you've never done this type of work and are considering a project like this don't be fooled into thinking it's a quick process because you see folks like me making threads like this that make it look fast. It's never fast or fun but the prep work like this really makes the difference if you want a nice final appearance and don't want to be smearing seam sealer everywhere to hide all the welds etc.

[URL=https://app.photobucket.com/u/NOTATA/a/4084bbc8-1e50-4486-872e-fbce3ed87549/p/d73dcc95-c2f8-40fd-83d3-51c236d0944a][/URL]

[URL=https://app.photobucket.com/u/NOTATA/a/4084bbc8-1e50-4486-872e-fbce3ed87549/p/8fe2ded5-742f-4b93-af84-1b19194b221a][/URL]

[URL=https://app.photobucket.com/u/NOTATA/a/4084bbc8-1e50-4486-872e-fbce3ed87549/p/0322d416-09f8-48f4-96ab-e088ddfb1bfa][/URL]

[URL=https://app.photobucket.com/u/NOTATA/a/4084bbc8-1e50-4486-872e-fbce3ed87549/p/0a1eb204-98a7-4431-9985-dddc1981d0c9][/URL]

NOT A TA
NOT A TA SuperDork
9/9/20 10:00 p.m.


Now it's time to make exterior bodywork look quick & easy! I allowed several days for the epoxy primer on the tail panel to fully cure (aided by our blazing FL sun baking it by opening the garage door in the morning). Coated most of the tail panel with a thin coat of body filler & sanded.

Then I got set up to shoot a couple coats of the super thick (like pudding) high fill primer with a medium level gun "Vapor?" with a 1.6 tip. However I hadn't used that gun in a couple years and even though it functioned fine when prepping it and testing with cleaning thinner it wasn't happy and wouldn't work correctly with the super high build pudding primer. So I went to my backup, a cheap HF gun with a 1.5 tip and although a bigger tip would have worked better it got the job done.  

After baking the primer for several days to allow for shrinkage I blocked out the super high fill primer to 180 grit and then shot a coats of normal high fill primer on it with a HF 1.4 tip gun. Let that bake & cure then blocked it out to 320 but found a few areas I wasn't thrilled with so I repeated the process with the normal high fill primer and the 1.4 HF gun again, curing/baking, and again blocked it out to 320 including the old lacquer on the lower quarters. Seam sealed the fender to tail panel from the bumper up and let it sit waiting for a good paint day. Scuffed everything including the lower quarters with ultrafine Scotchbrite.

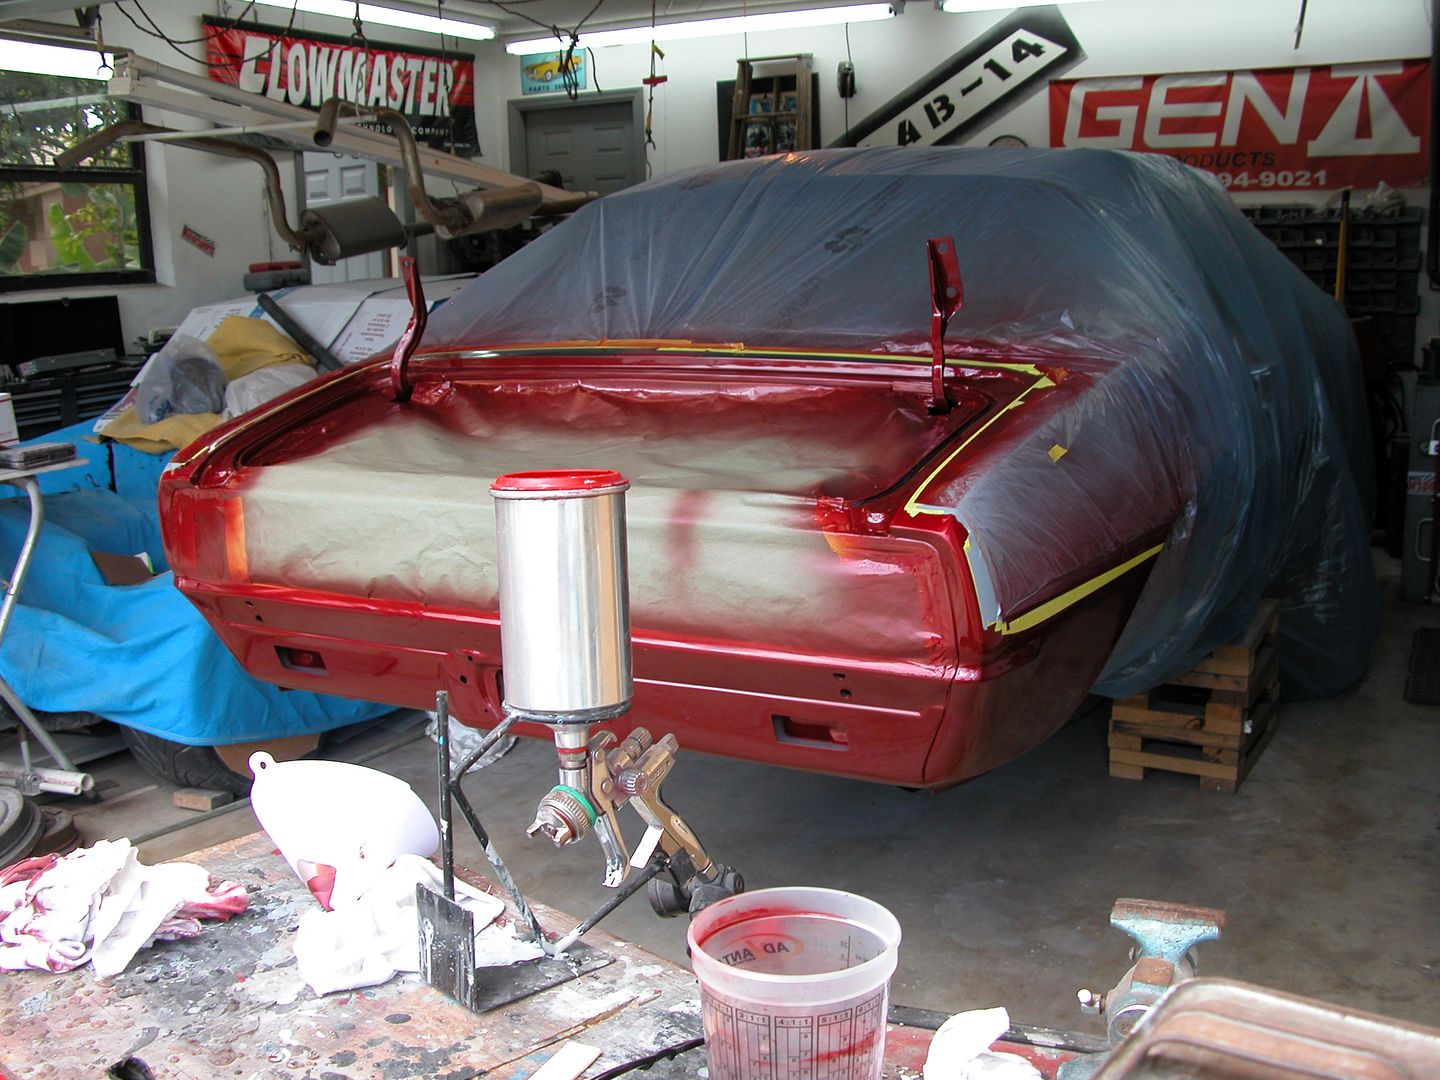
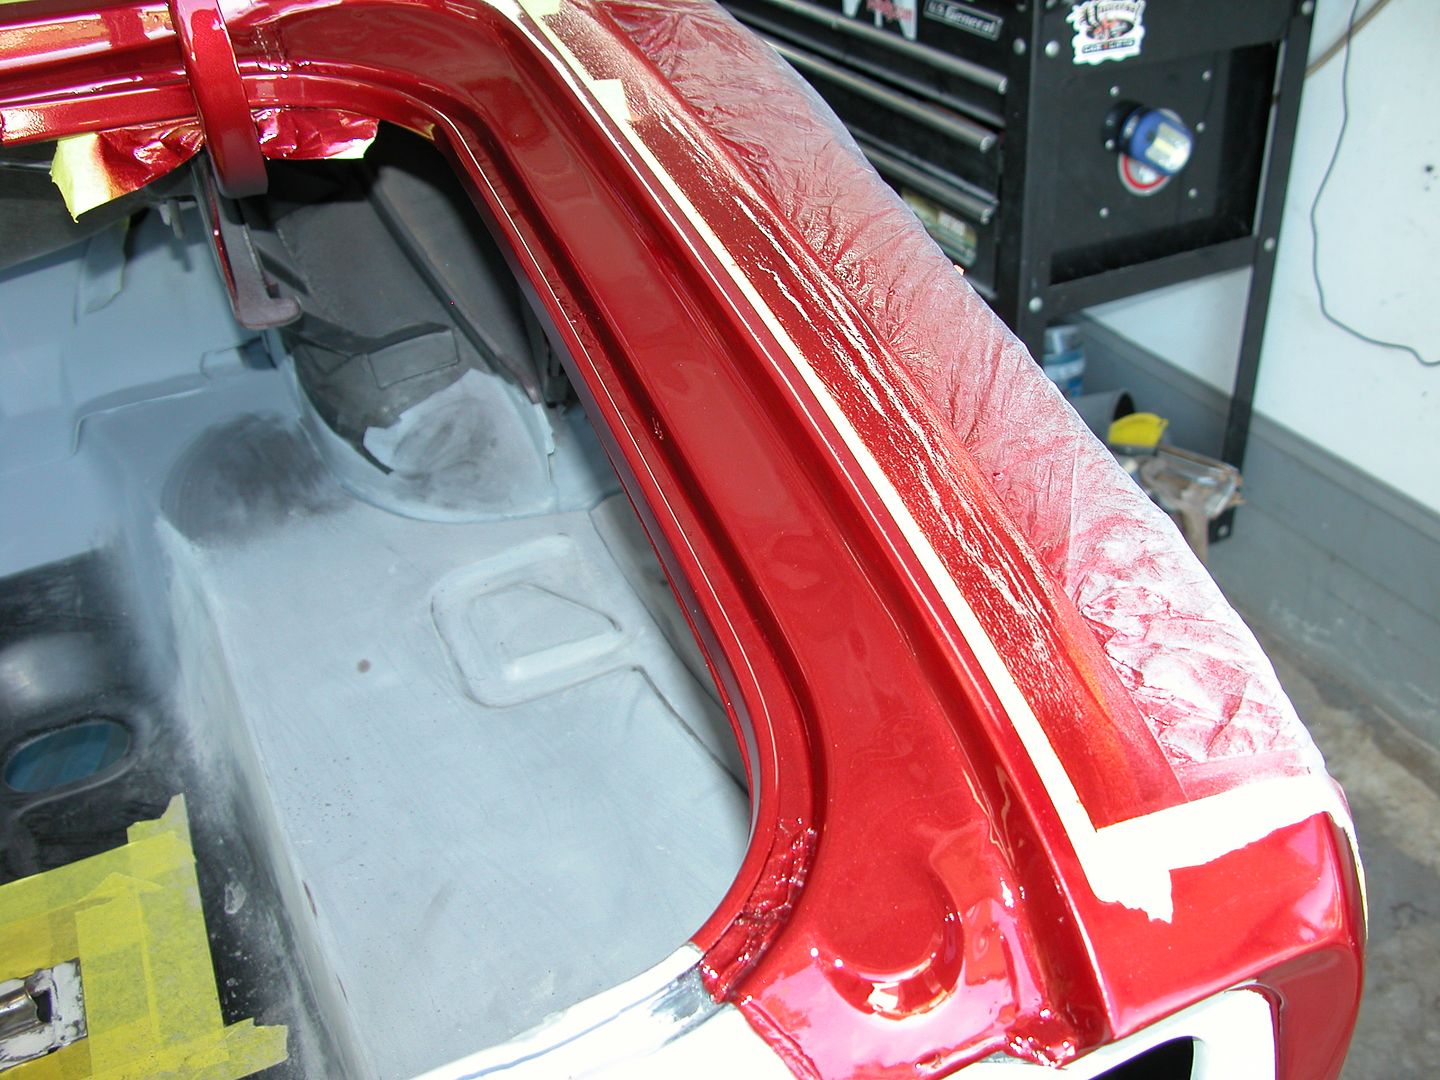
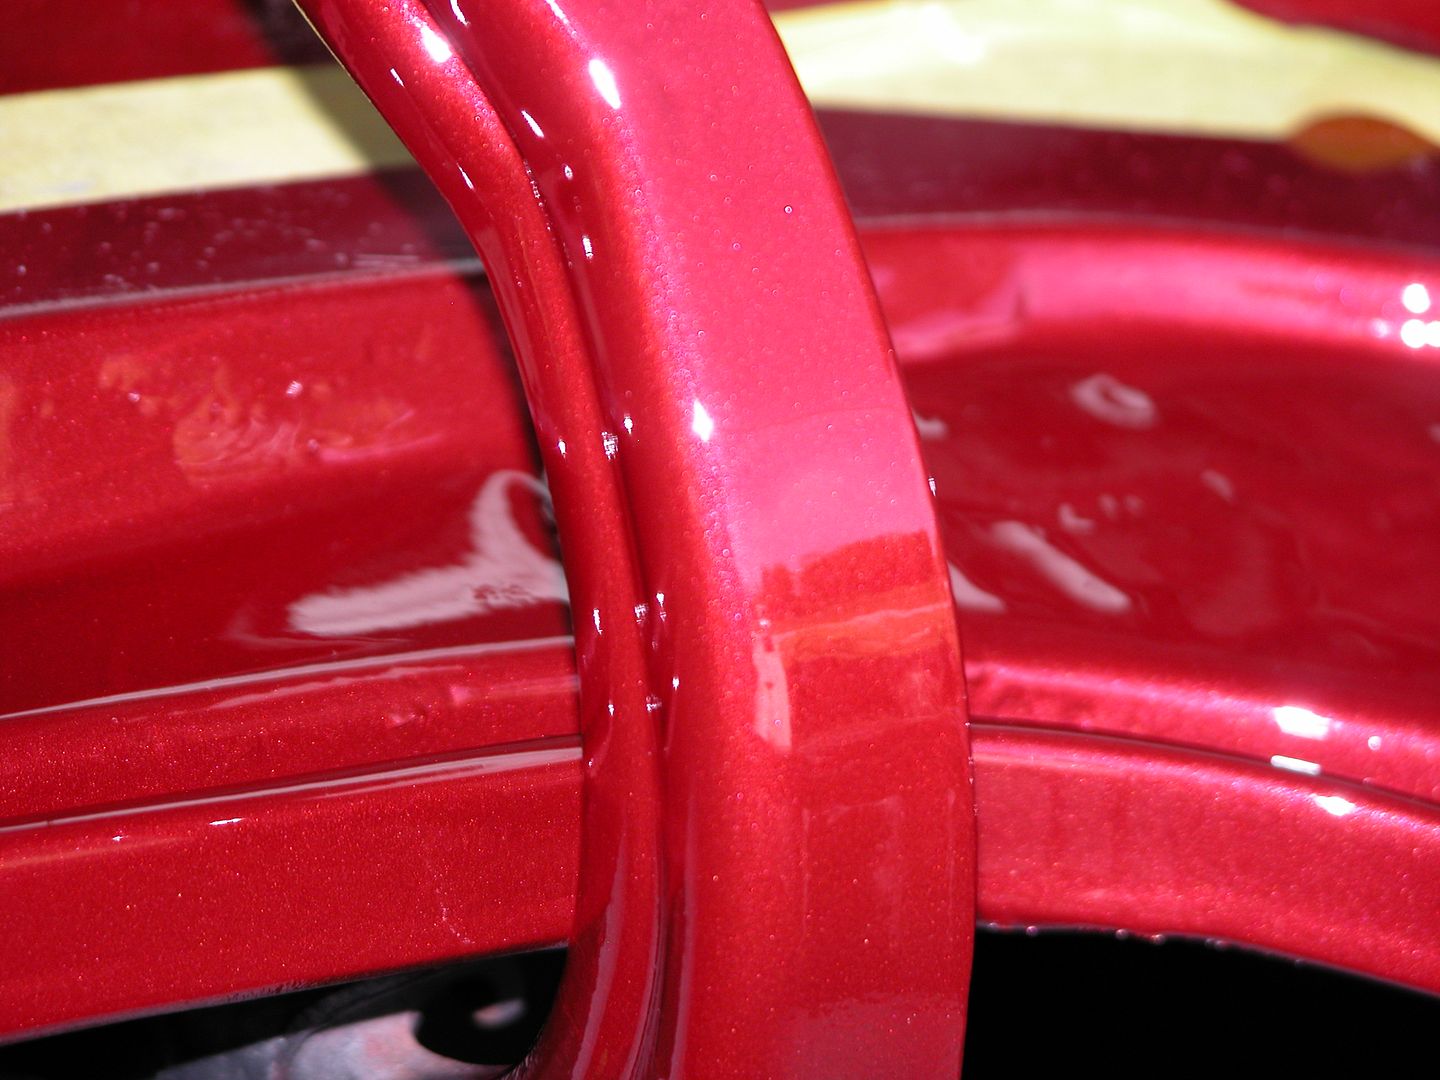
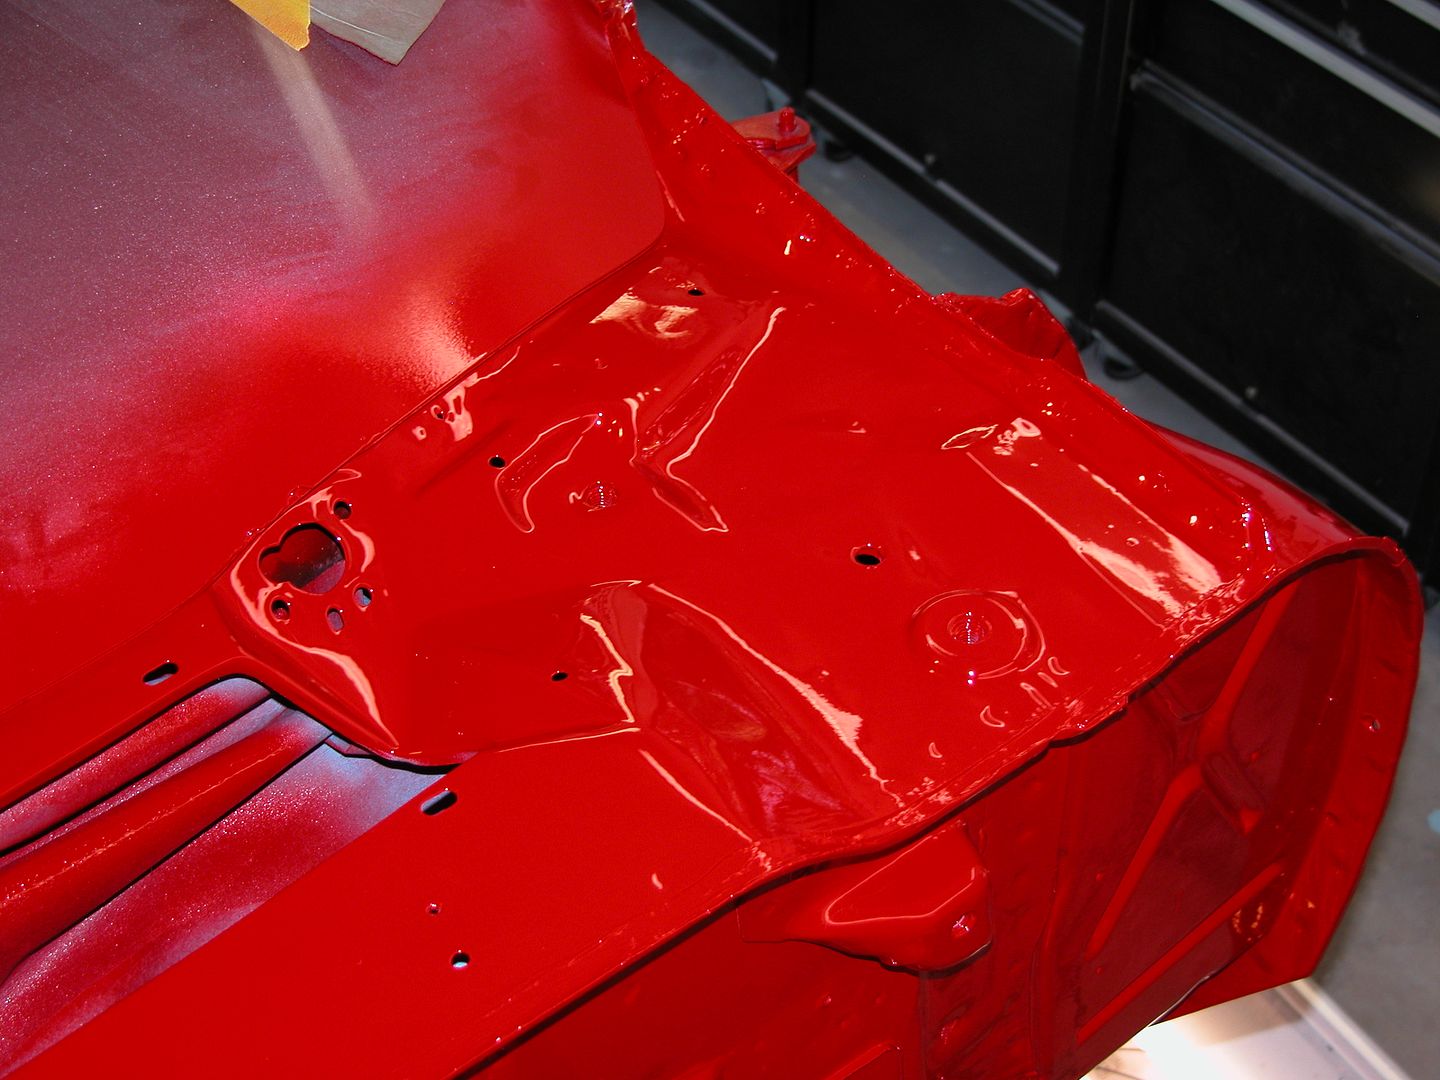
A couple days later was a perfect paint day so I shot the top coat with a SATA jet 4000 B gun with a 1.3 tip. The paint color mix was determined a couple years ago by one of the camera/computer set ups the paint stores have. There's no way to duplicate a clear coated tri stage candy lacquer that was poorly shot 30 years ago so I knew there would be no really good way to match or "blend" this new paint to the previous paint. For starters the color on the car was not uniform so while my new paint (a single stage acrylic urethane) might look kinda close on one part of the car it would be obviously off on another area. However I'm not painting the whole car so I trued to blend a bit at the body lines by rolling the masking a bit.

I should mention there's steps along the way to minimize the possibilities of problems. Wax & grease remover before starting any work and then as things progress it gets used before each paint step at a minimum. Tack rag to pick up any debris (like rag fuzz) on surfaces to be painted moments before shooting. Also other things like emptying water traps before each paint step, cleaning the outside of air hoses so dirt doesn't fall/blow off the hose onto fresh paint, having fresh white clean rags ready, rubber gloves,  and other stuff I do out of habit I'm probably not thinking of typing this.

So here's the pics!

[URL=https://app.photobucket.com/u/NOTATA/a/4084bbc8-1e50-4486-872e-fbce3ed87549/p/c1a00abe-d751-4209-b4eb-f8e5ad529a4d][/URL]

[URL=https://app.photobucket.com/u/NOTATA/a/4084bbc8-1e50-4486-872e-fbce3ed87549/p/8b72eb16-9e33-4b46-b19e-5a474be7d891][/URL]

[URL=https://app.photobucket.com/u/NOTATA/a/4084bbc8-1e50-4486-872e-fbce3ed87549/p/1de078aa-c0e4-4d0f-84f6-5562176abaee][/URL]

[URL=https://app.photobucket.com/u/NOTATA/a/4084bbc8-1e50-4486-872e-fbce3ed87549/p/13f779a7-4ddb-4d64-8f41-a253851f4a5a][/URL]

[URL=https://app.photobucket.com/u/NOTATA/a/4084bbc8-1e50-4486-872e-fbce3ed87549/p/e85e971a-1d0f-4140-b110-43345c505196][/URL]

[URL=https://app.photobucket.com/u/NOTATA/a/4084bbc8-1e50-4486-872e-fbce3ed87549/p/3b3672fd-d9f1-4855-8b5b-b5174197ea65][/URL]

[URL=https://app.photobucket.com/u/NOTATA/a/4084bbc8-1e50-4486-872e-fbce3ed87549/p/8f117e55-92ac-4307-87fa-a7e23b22e33a][/URL]

[URL=https://app.photobucket.com/u/NOTATA/a/4084bbc8-1e50-4486-872e-fbce3ed87549/p/a7bff24b-1152-497d-a98e-4a1155291a18][/URL]

solfly
solfly Dork
9/10/20 6:46 a.m.

New paint looks really good!

NOT A TA
NOT A TA SuperDork
9/10/20 9:53 a.m.
solfly said:

New paint looks really good!

Thanks! I'll get some better pics of the paint when I can get the car outside.

NOT A TA
NOT A TA SuperDork
9/11/20 12:11 a.m.

It occurred to me that some of us who do this kind of stuff regularly use terms like "grind the welds".  While those in the collision repair and restoration businesses know exactly what we're talking about and most enthusiast/hobbyist type forum members have an idea of what we're talking about but don't really know the details of the operations or tools involved. So I figured I'd put a post or several in this thread to enlighten those who want to know a bit more with some of the details.

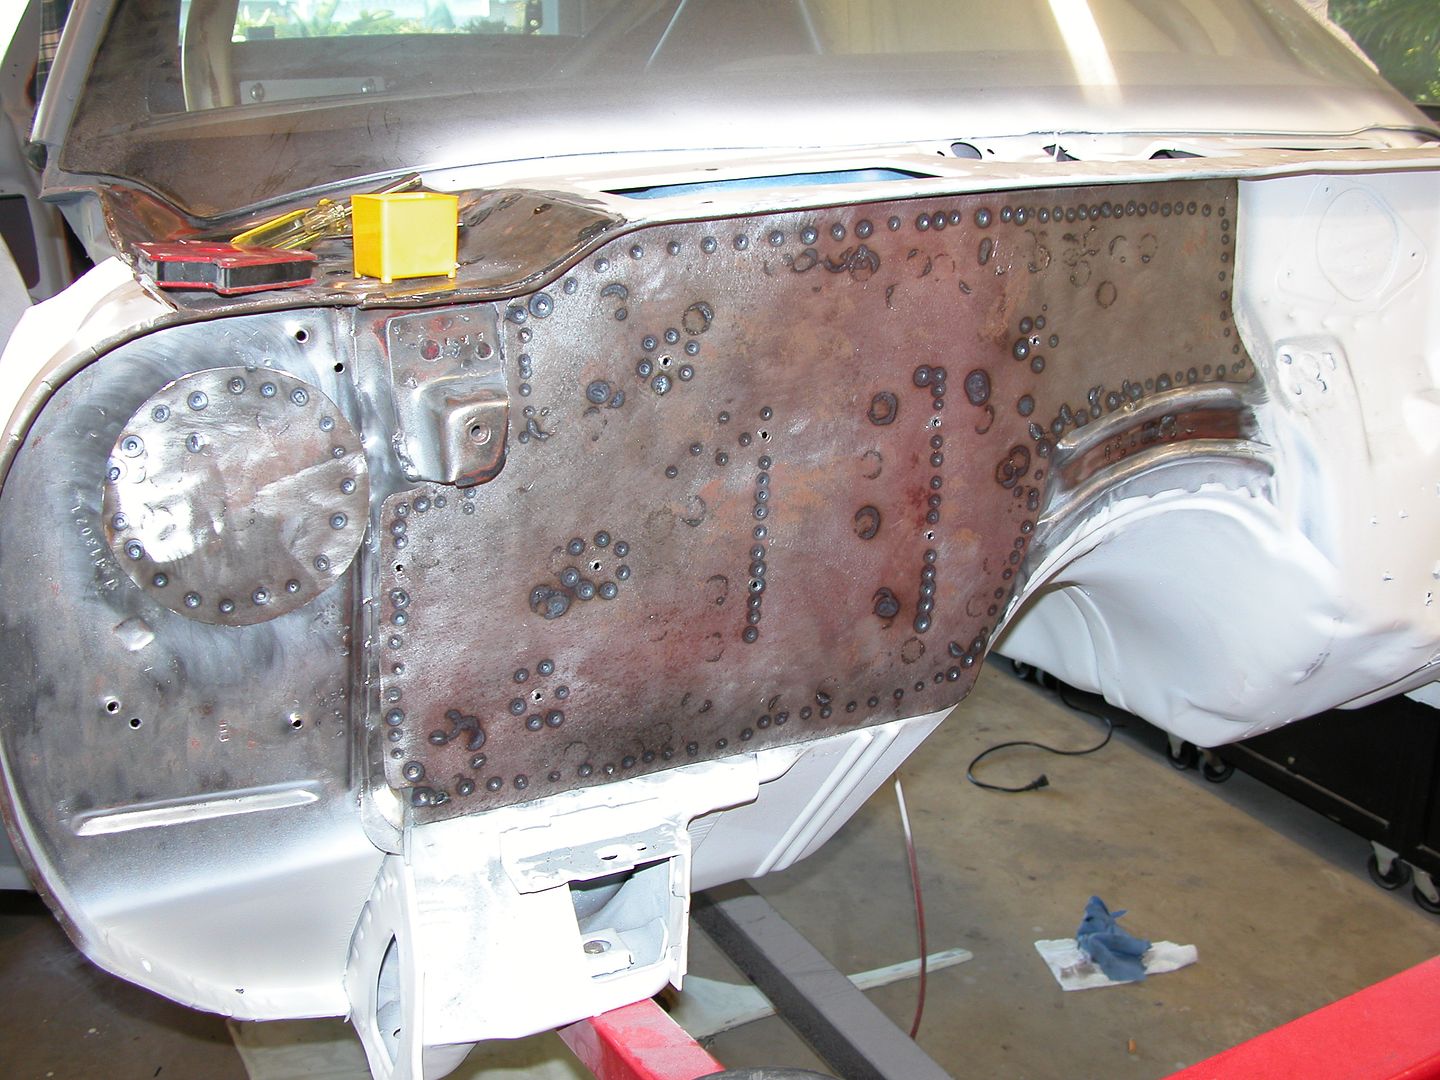
A lot of bodywork involving replacement of sheet metal for collision and restoration work is done by plug welding. A piece of sheet metal with holes in it is placed against sheet metal without holes. A MIG welder is used in a spiral motion to "plug" the hole with enough new molten metal to create a slight bump where the weld is thicker than the joined pieces of metal. The lump needs to be ground flush, or in some cases ground down to look like a "pinch weld" which is done with resistance welding by factories with no filler welding wire or rod adding metal.

Grinding the welds is done with various tools and everyone has their own favorite tools & techniques to reach the goal. The quality of the job required sometimes makes one or more techniques and or tools more or less useful. This is a time consuming process so the finish quality of grind welds on say a door skin vs a frame rail on a daily driver can be very different on the same car.

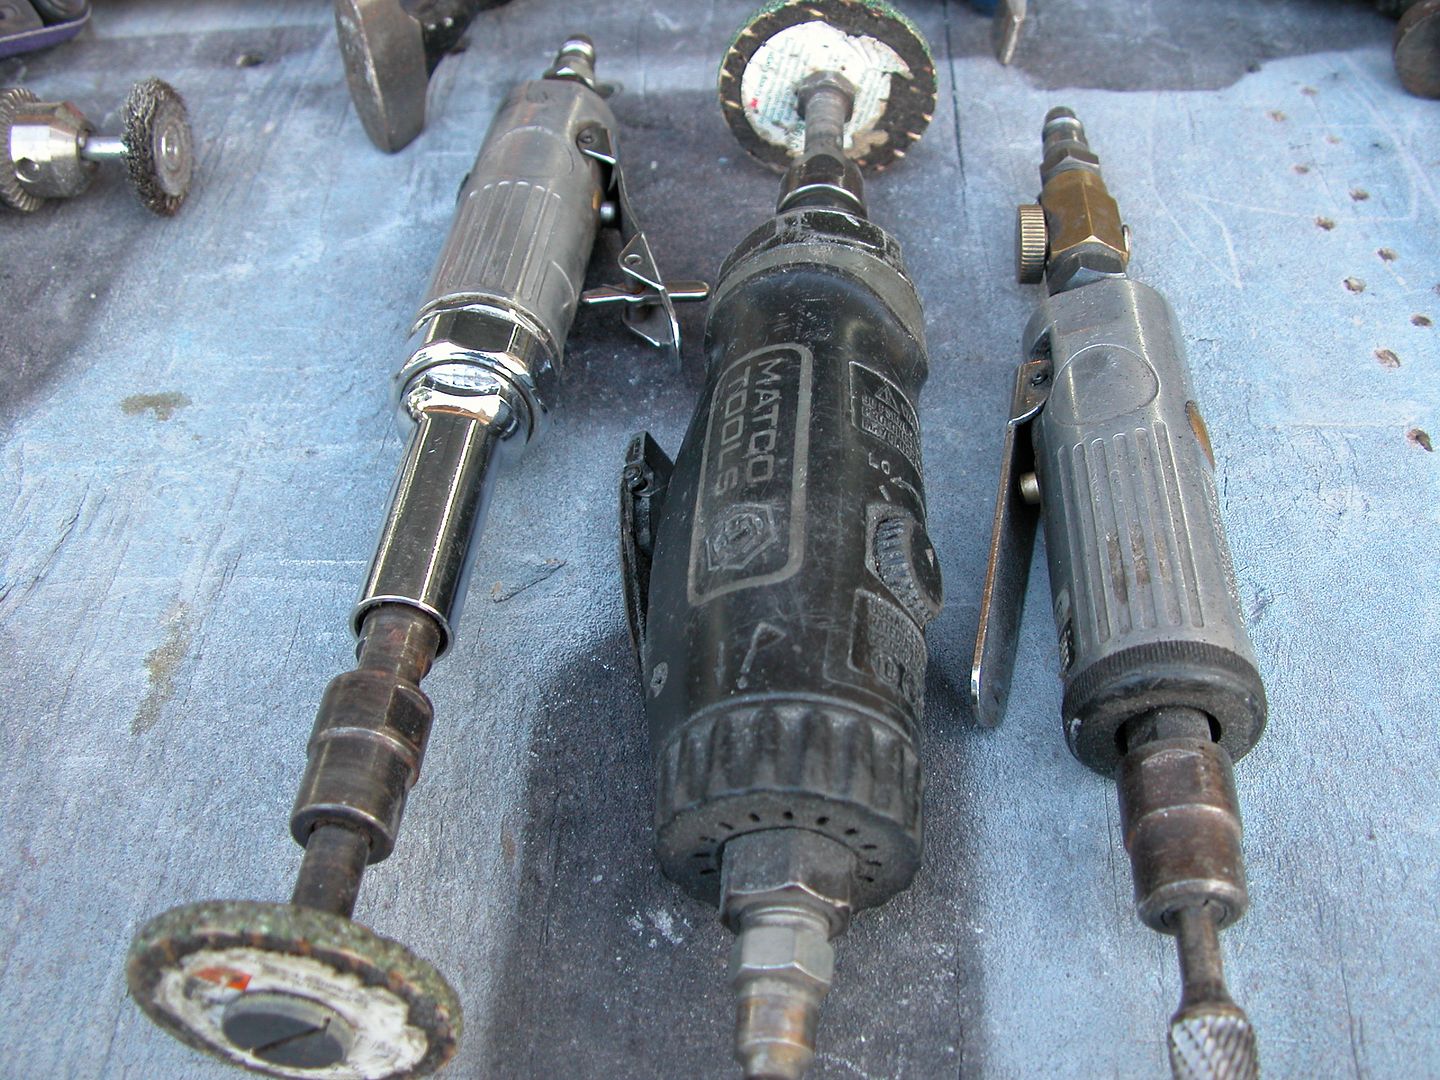
Here's a show & tell of the tools I use regularly for grinding welds along with some tips on use etc.

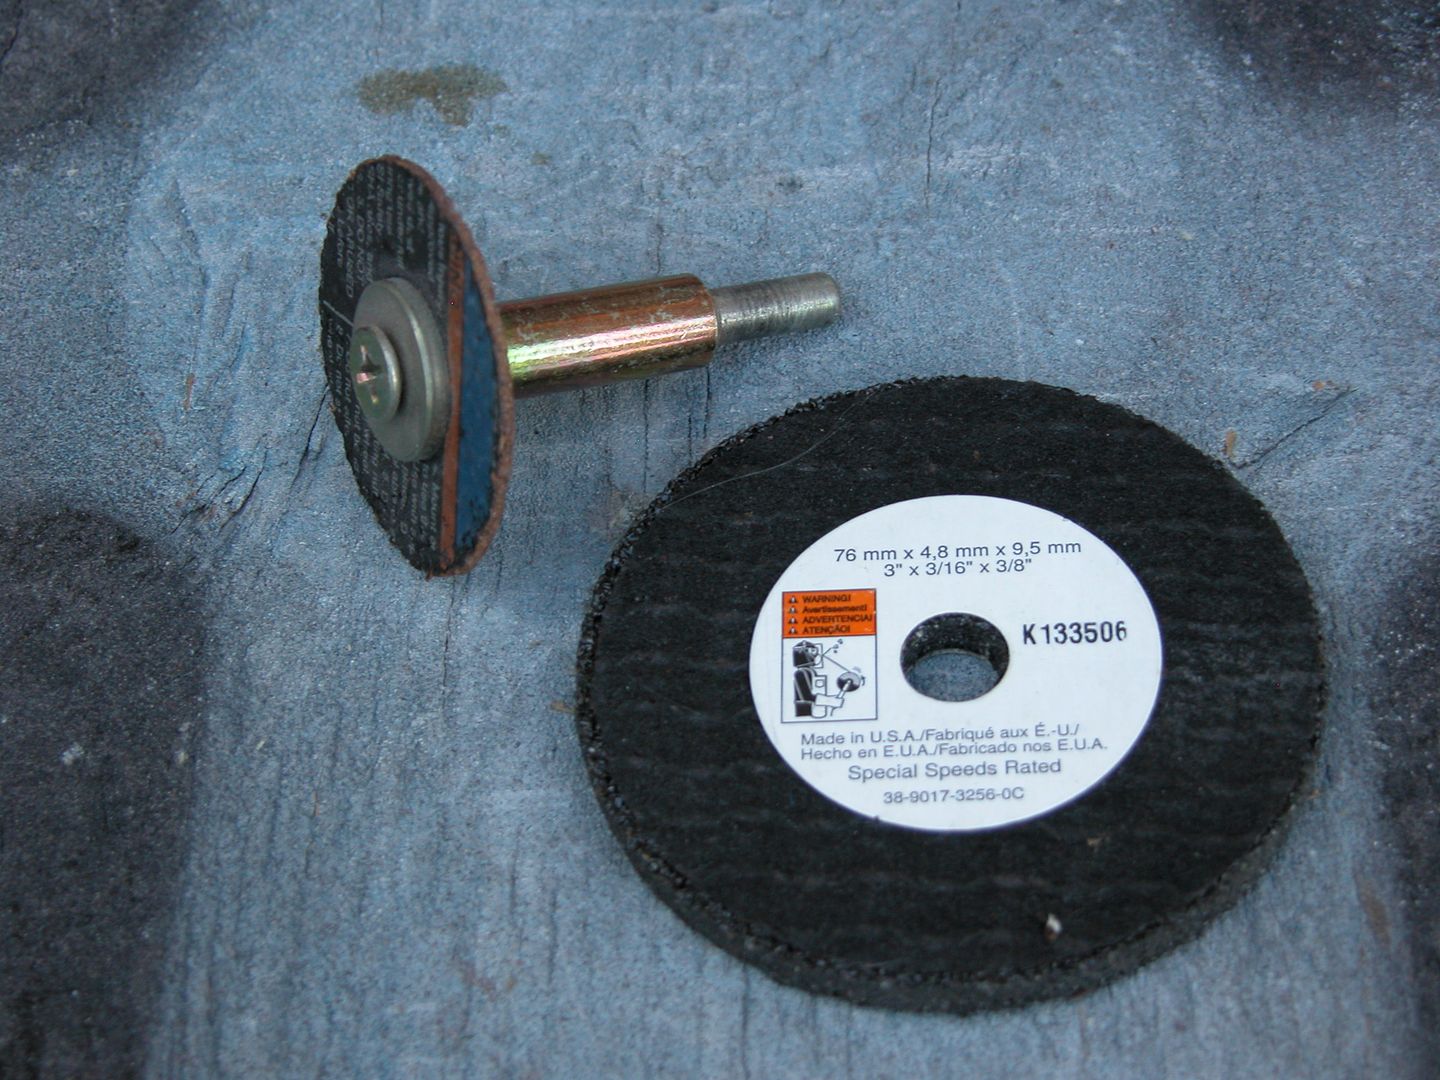
First tools I use on a job like this Camaro are very high speed air tools. These are like a bench grinder but smaller and on steroids. I use 3M "green" wheels on them or a carbide bit. Most welds are ground down with the green wheels with the carbide bit only used in tight spaces or certain circumstances. You'll notice the tools have air adjustments on them to slow them down because full speed is often too much. The tools, bits and wheels are all considered consumables in a shop environment. Note the bit is welded to the tool on one of them. This is because the green wheels are kinda heavy for the speeds and never perfectly balanced so the chuck of the tools tend to loosen up and the spinning disc with bit takes off at 20,000 RPM. Not good if it hits another car in the shop, person, or whatever.

When using the grinding tools I wear face shield, hearing protection, and heavy gloves to absorb the vibration. There's a LOT of sparks and they'll pit aluminum or glass and can cause fires. So protect things and watch where sparks are going. No flammable liquids in the area, open or in plastic containers. Take the same precautions as welding. Using these tools the welds are ground down to just above the finish panel.

[URL=https://app.photobucket.com/u/NOTATA/a/05b53996-5069-4d81-b347-6e06f4236899/p/a6a35885-b737-459f-b09e-69b8fea40fe7][/URL]
[URL=https://app.photobucket.com/u/NOTATA/a/05b53996-5069-4d81-b347-6e06f4236899/p/b31583dc-4860-42af-95a3-791e69a1467f][/URL]
[URL=https://app.photobucket.com/u/NOTATA/a/05b53996-5069-4d81-b347-6e06f4236899/p/00173d97-8d6b-494b-ae4e-7e82d8e9ab9d][/URL]
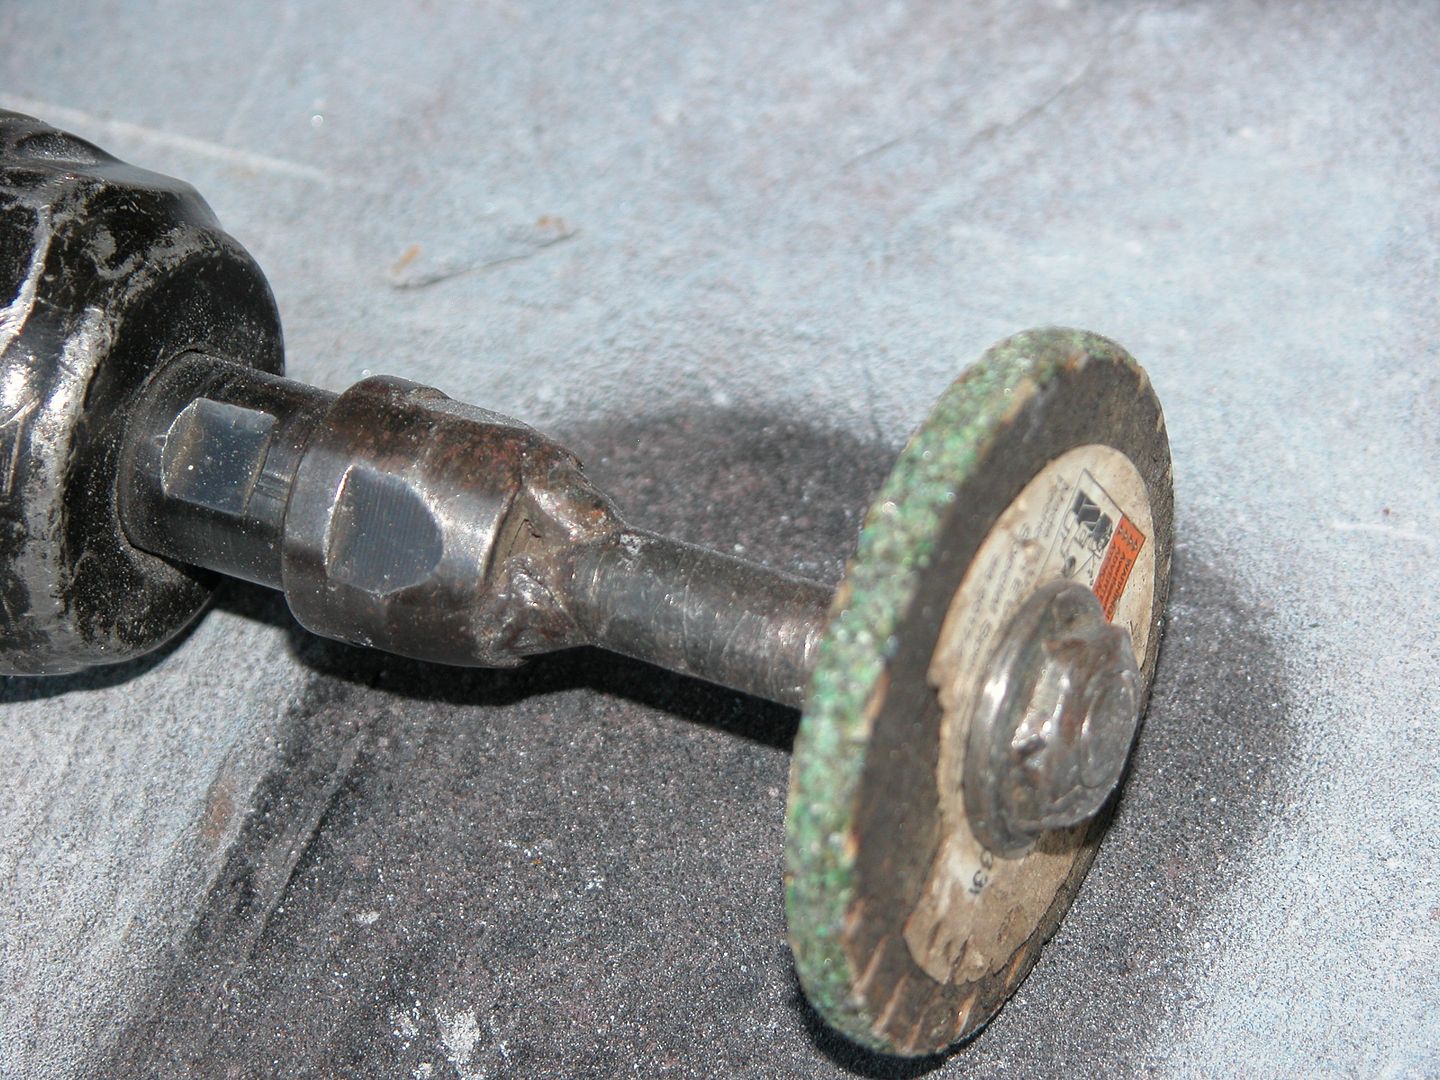
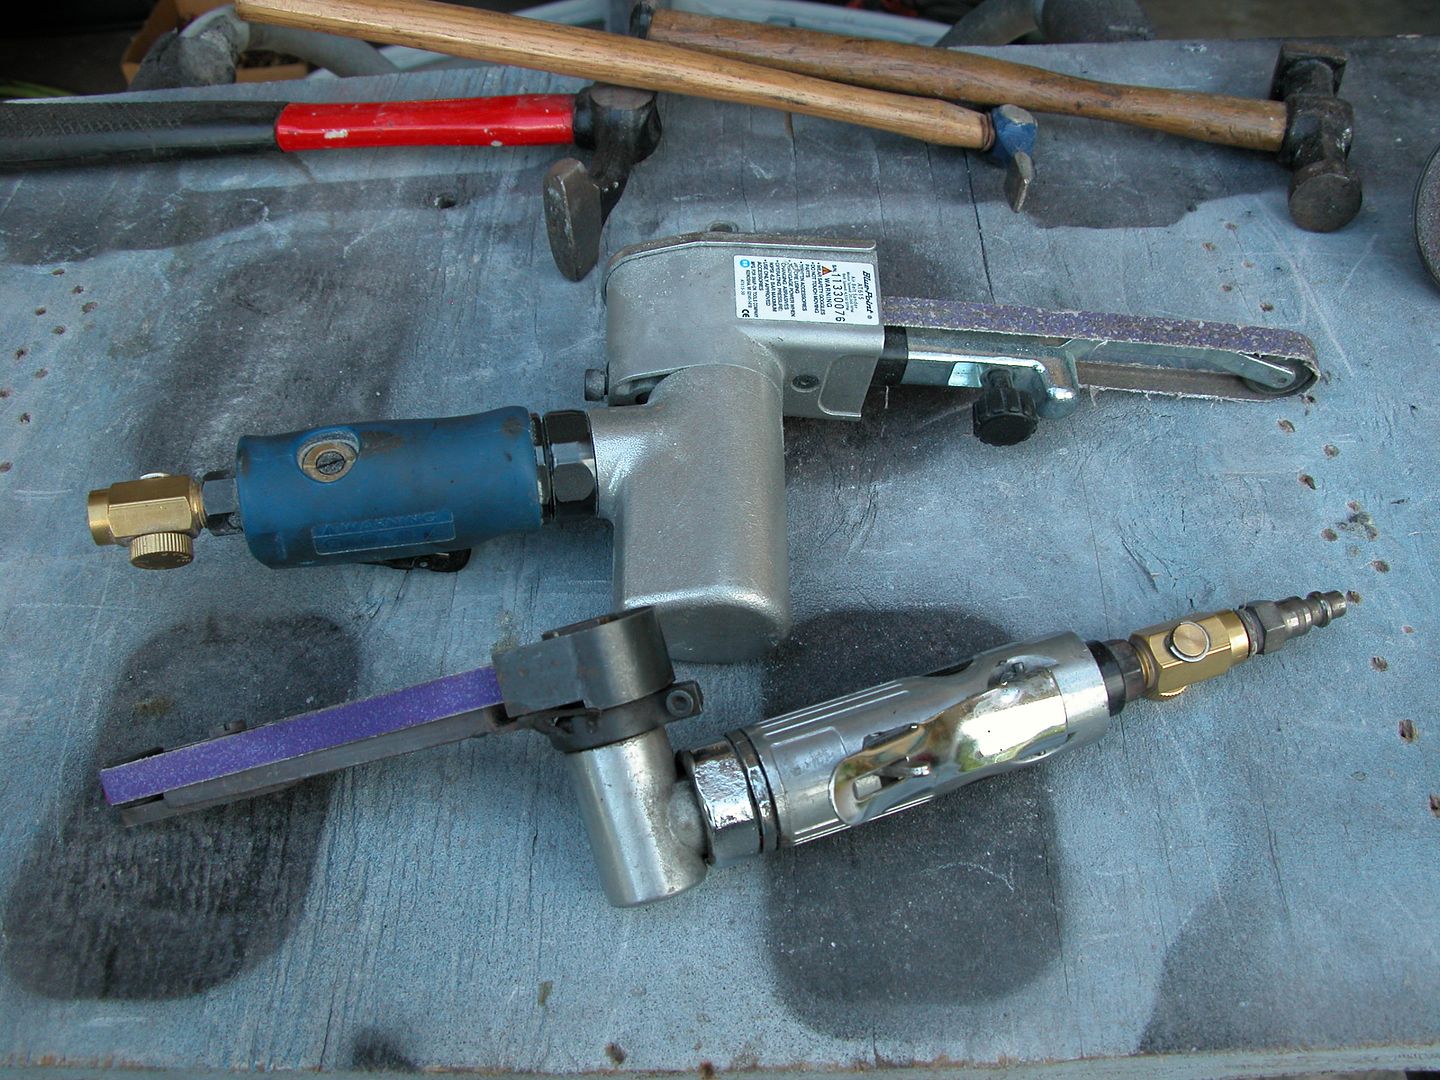
Next tool for show & tell is air powered belt files. Kinda like sandpaper but can grind through metal. I use for hard to reach places where the grinding stone type tools don't fit. Belts come in different grades so a rough one will cut right through weld, and fine grade can almost polish steel.  They're more expensive to use per weld so only used where necessary and aren't as quick as the green grinding wheels. Again air controllers on them because they can run too fast for delicate areas. One of the things about grinding welds is that if you slip and hit nice metal nearby you make more work for yourself filling in the grind marks. Two different sizes one bigger that can reach into deep areas and one smaller to be used in confined areas.

[URL=https://app.photobucket.com/u/NOTATA/a/05b53996-5069-4d81-b347-6e06f4236899/p/bae96b87-43f9-4f0e-8c5e-da69b6dc5bdc][/URL]
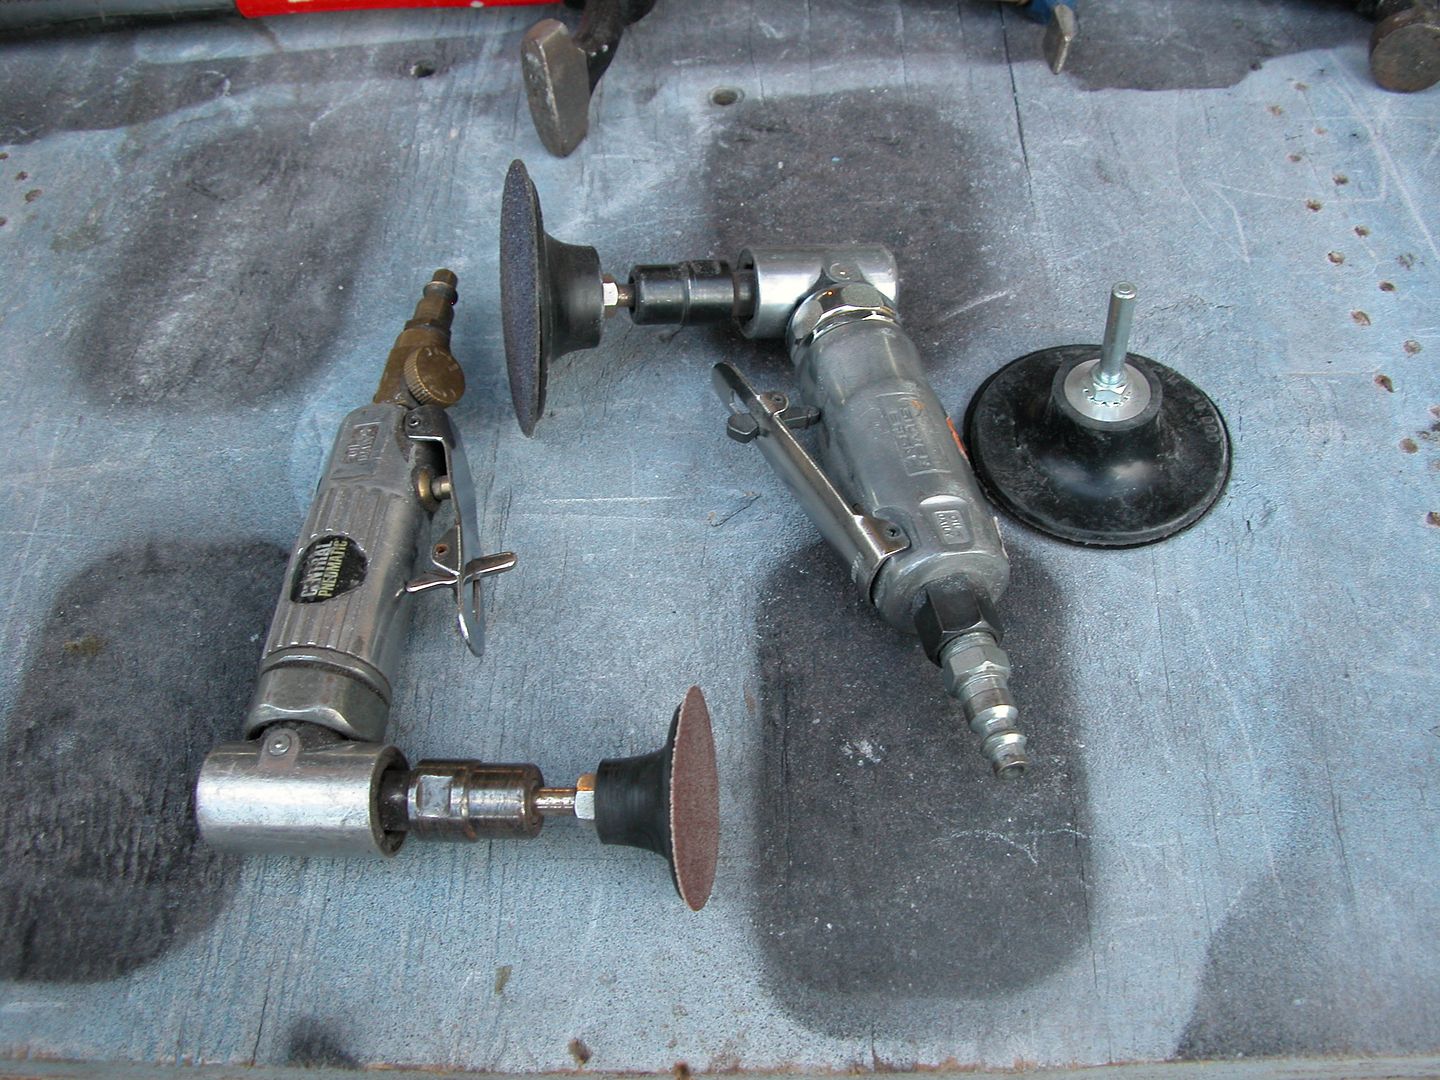
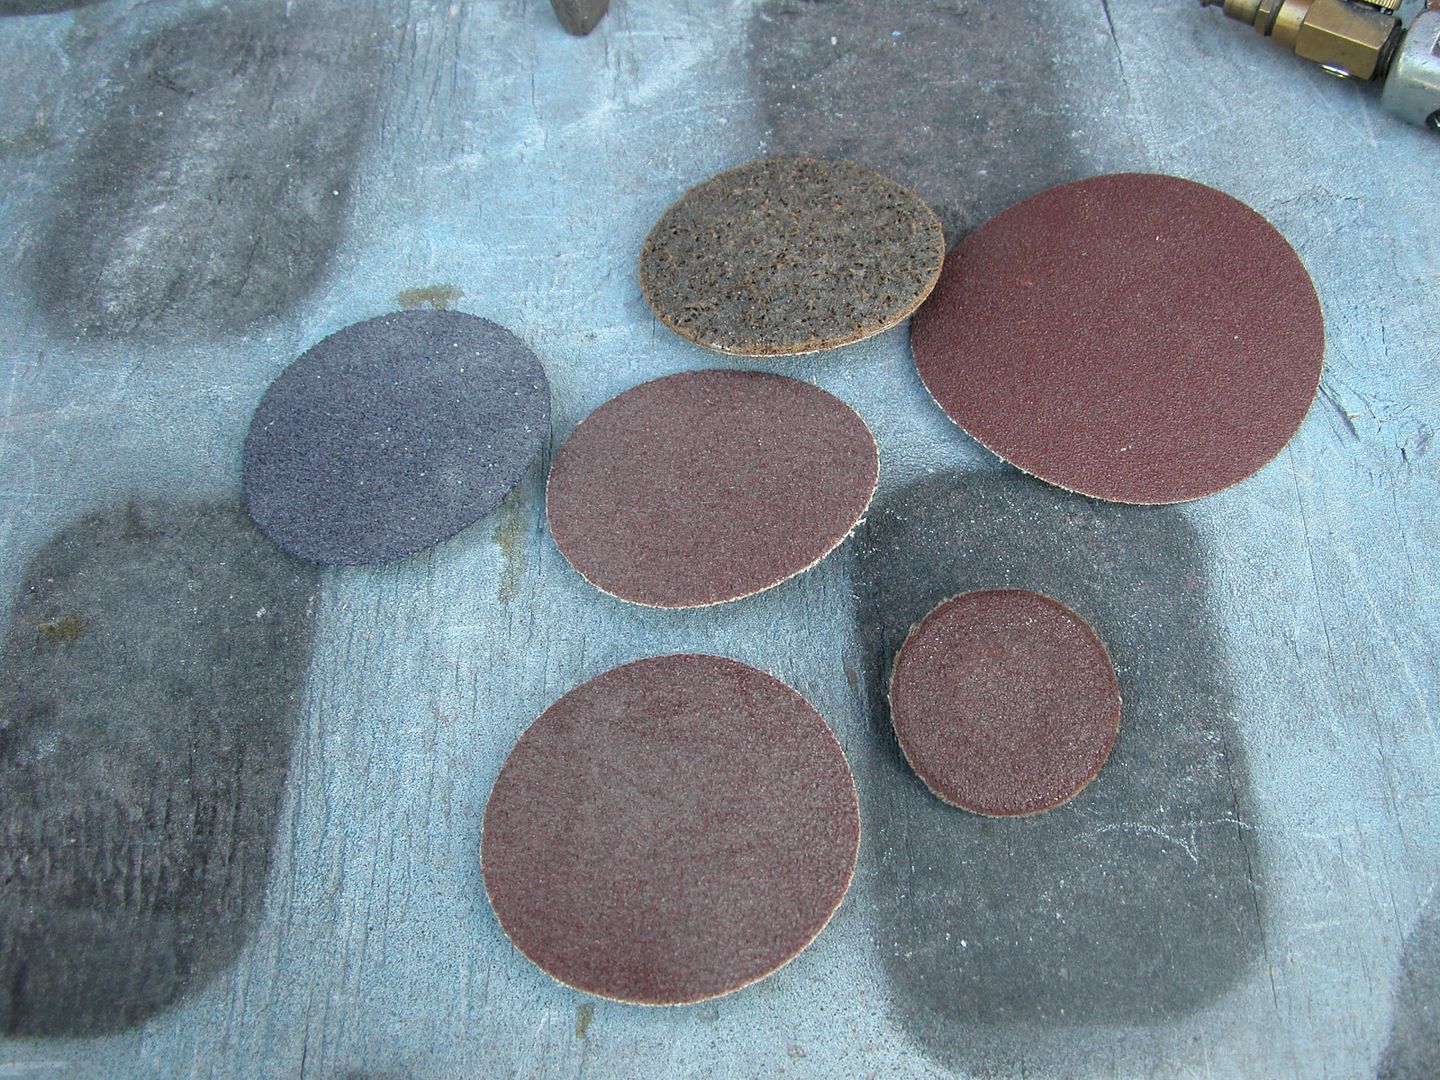
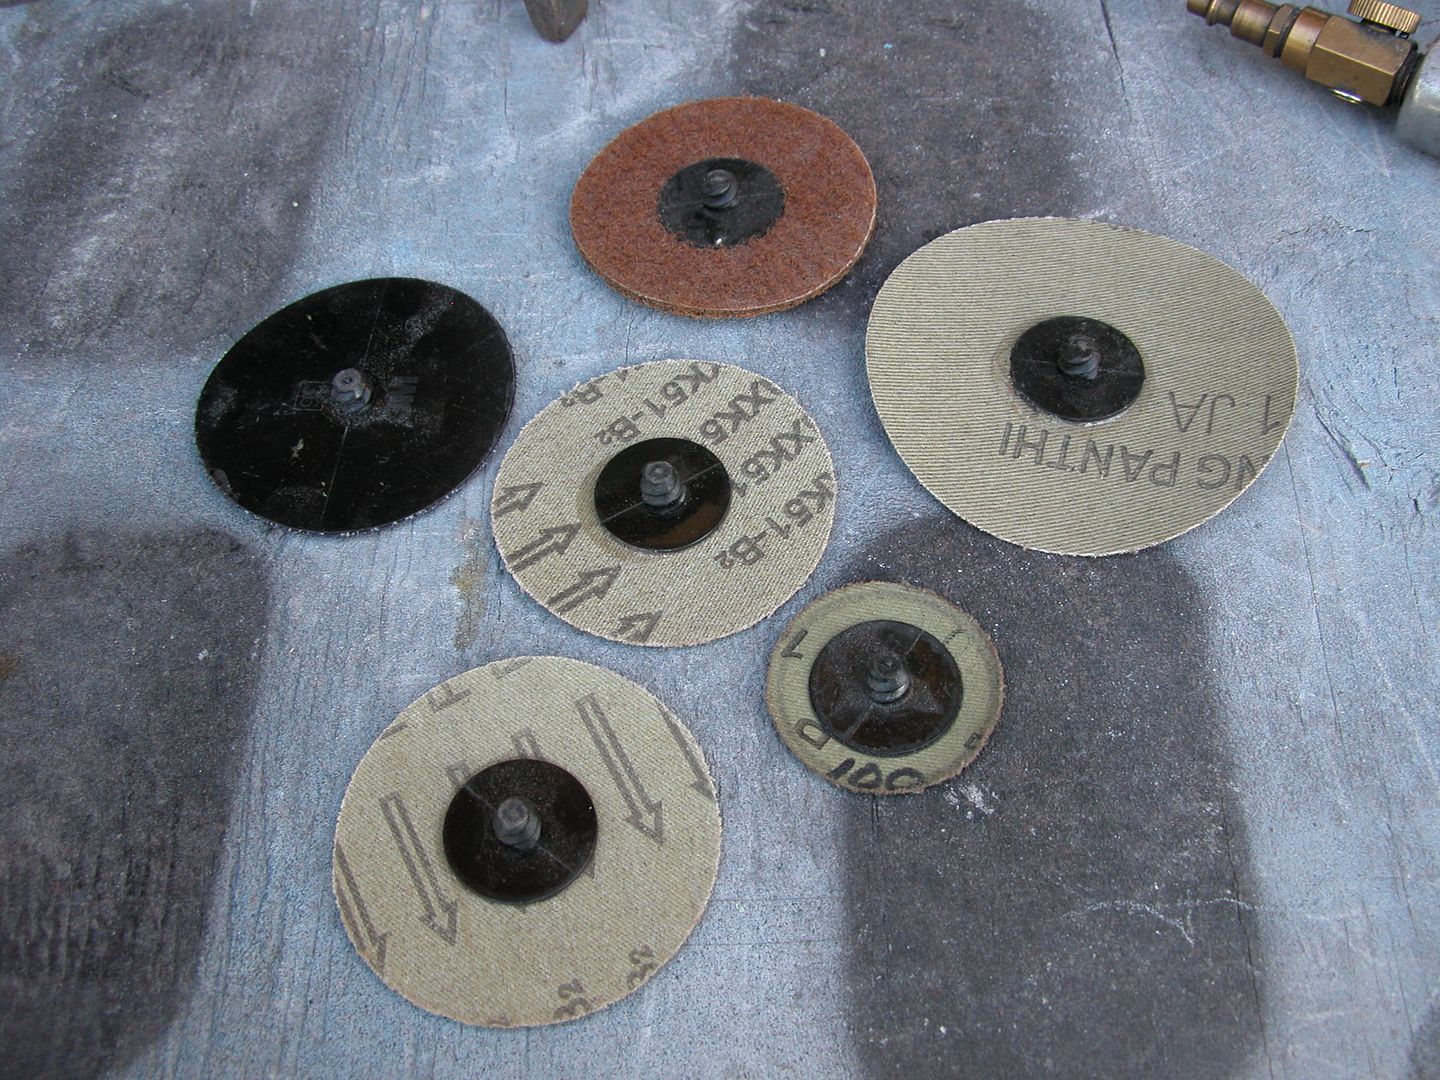
An assortment of right angle high speed air tools used with various grades of grit for grinding metal on different "twist lock" bits with a rubber backing are used to grind the welds after the green wheels. They remove less metal and over a wider area. With these you can make it look almost like like there was no welding done. I included a scotch brite disc in the pic because they are also used on the same bit for polishing etc.  

[URL=https://app.photobucket.com/u/NOTATA/a/05b53996-5069-4d81-b347-6e06f4236899/p/889ede88-b1dc-4b4a-97c5-20962122903d][/URL]
[URL=https://app.photobucket.com/u/NOTATA/a/05b53996-5069-4d81-b347-6e06f4236899/p/09fd5890-a5dd-49e2-9380-f342a5a1cea1][/URL]
[URL=https://app.photobucket.com/u/NOTATA/a/05b53996-5069-4d81-b347-6e06f4236899/p/171fa6f6-2845-4838-b456-2975d21cb213][/URL]
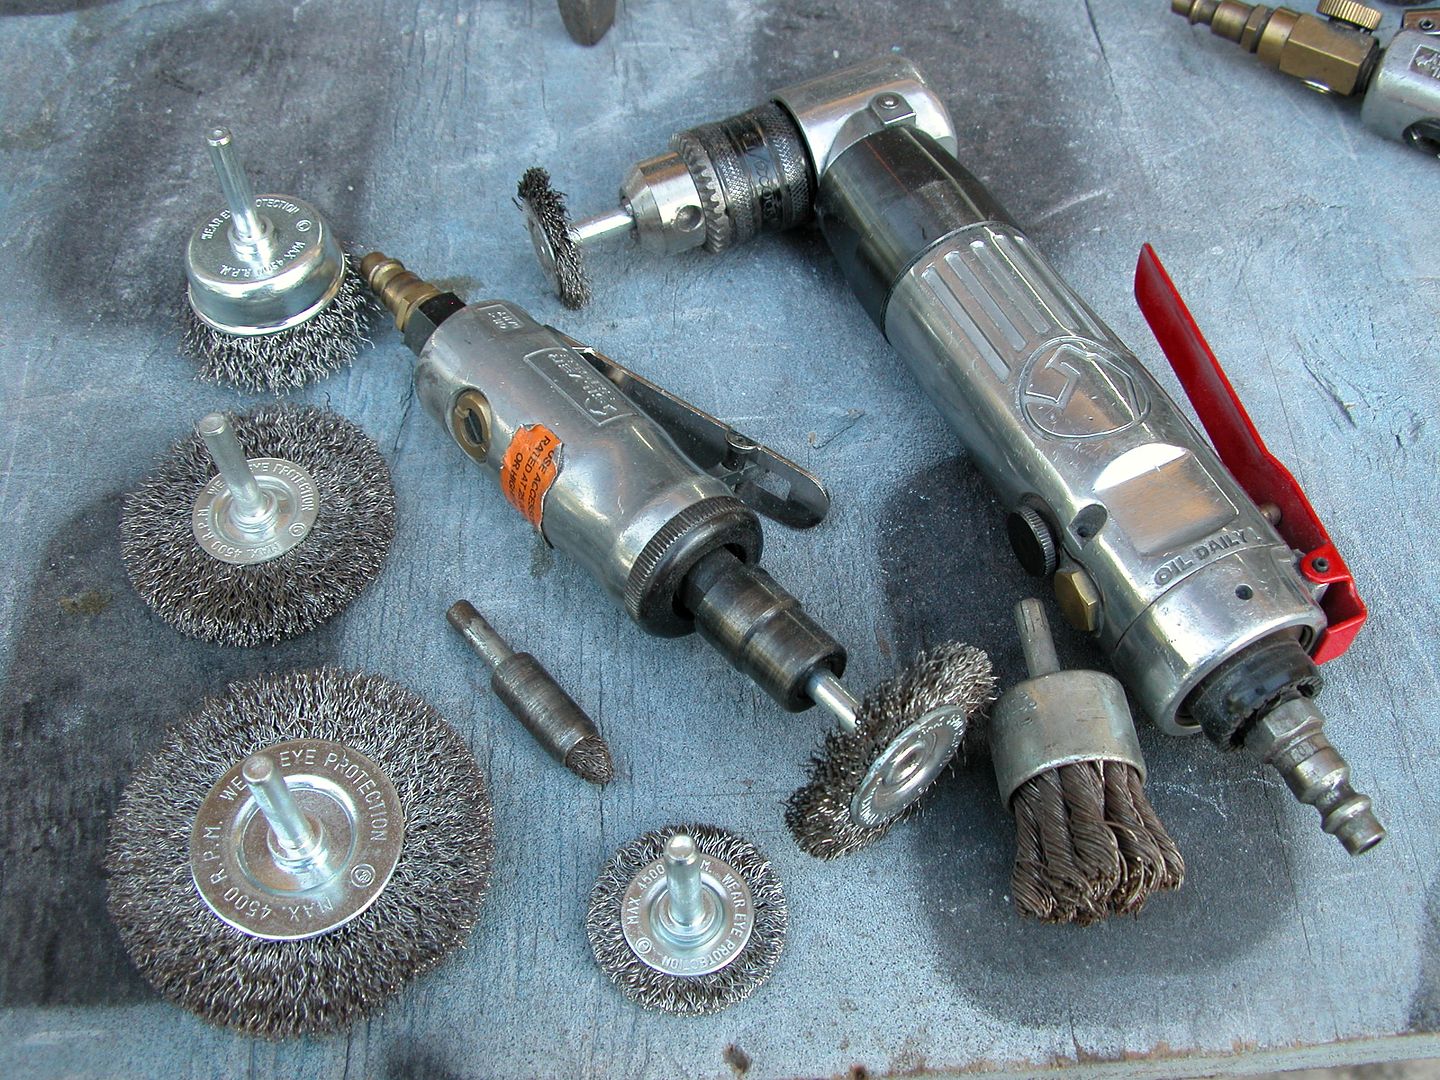
We really want all the debris and what not gone from welding so wire wheels get used to clean up any remnants of black carbon and what not before paint or body filler is used.

[URL=https://app.photobucket.com/u/NOTATA/a/05b53996-5069-4d81-b347-6e06f4236899/p/8e84b809-583e-4308-a392-8fe020eac70b][/URL]
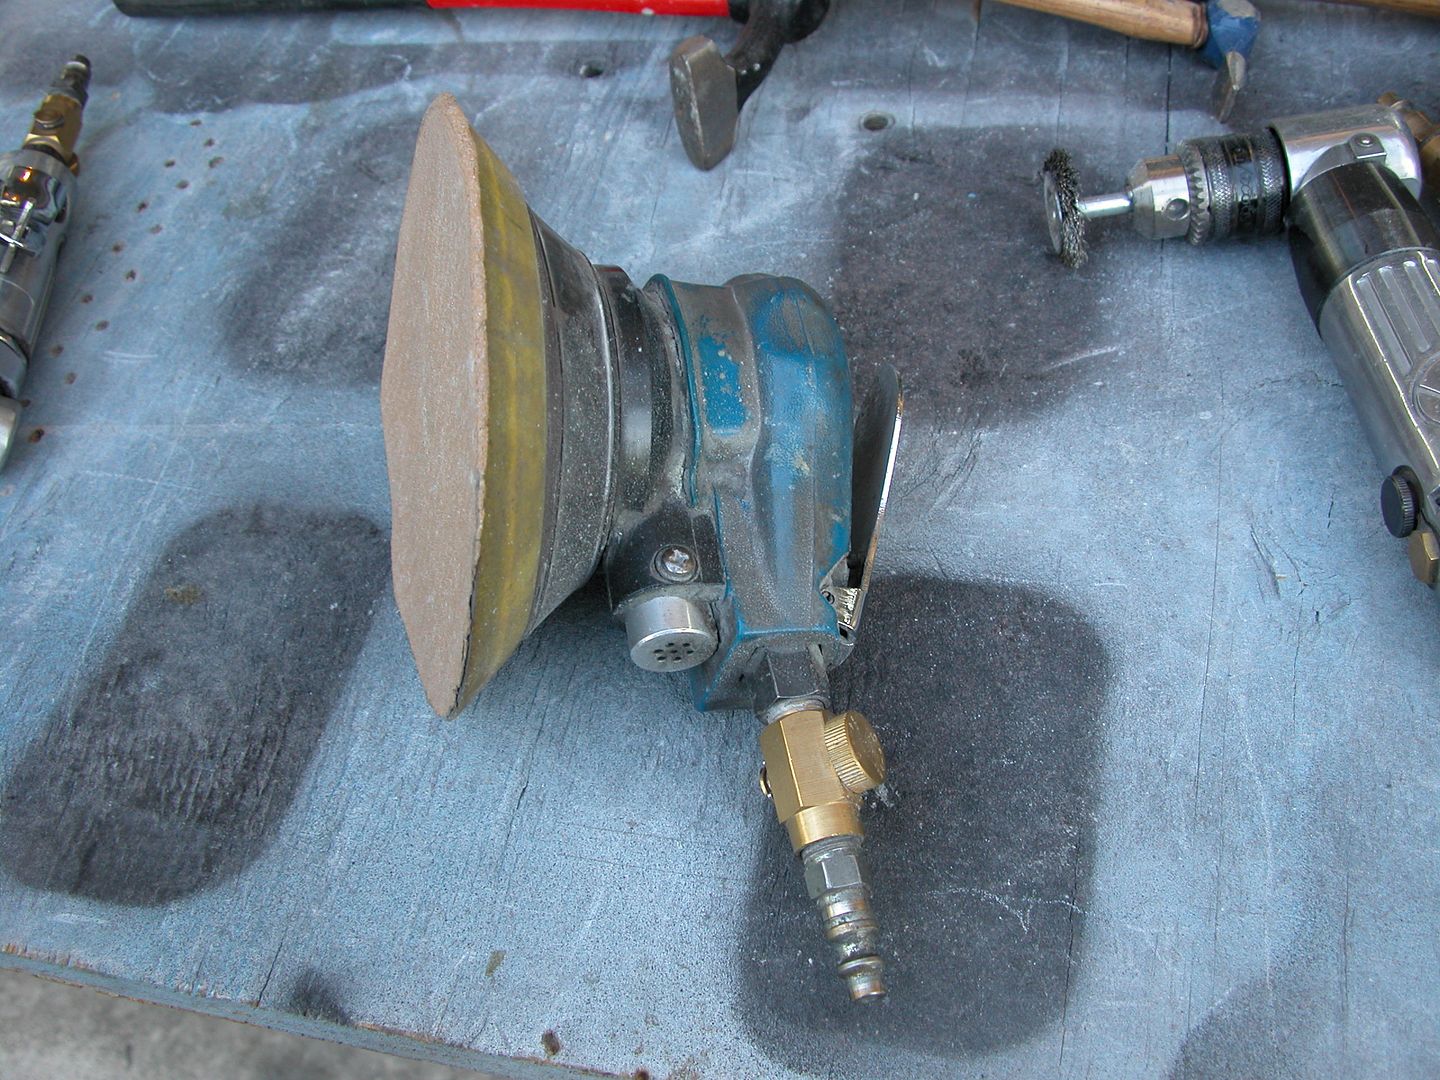
Lastly I'll use a DA with various grits if the particular job warrants it. This can allow me to take off very small amounts of metal and nip off any random weld splatter plus provide a good finish for mechanical grip of fillers or primer.

[URL=https://app.photobucket.com/u/NOTATA/a/05b53996-5069-4d81-b347-6e06f4236899/p/9f1bfb69-b7d2-4c61-9e92-7b488822b5ee][/URL]
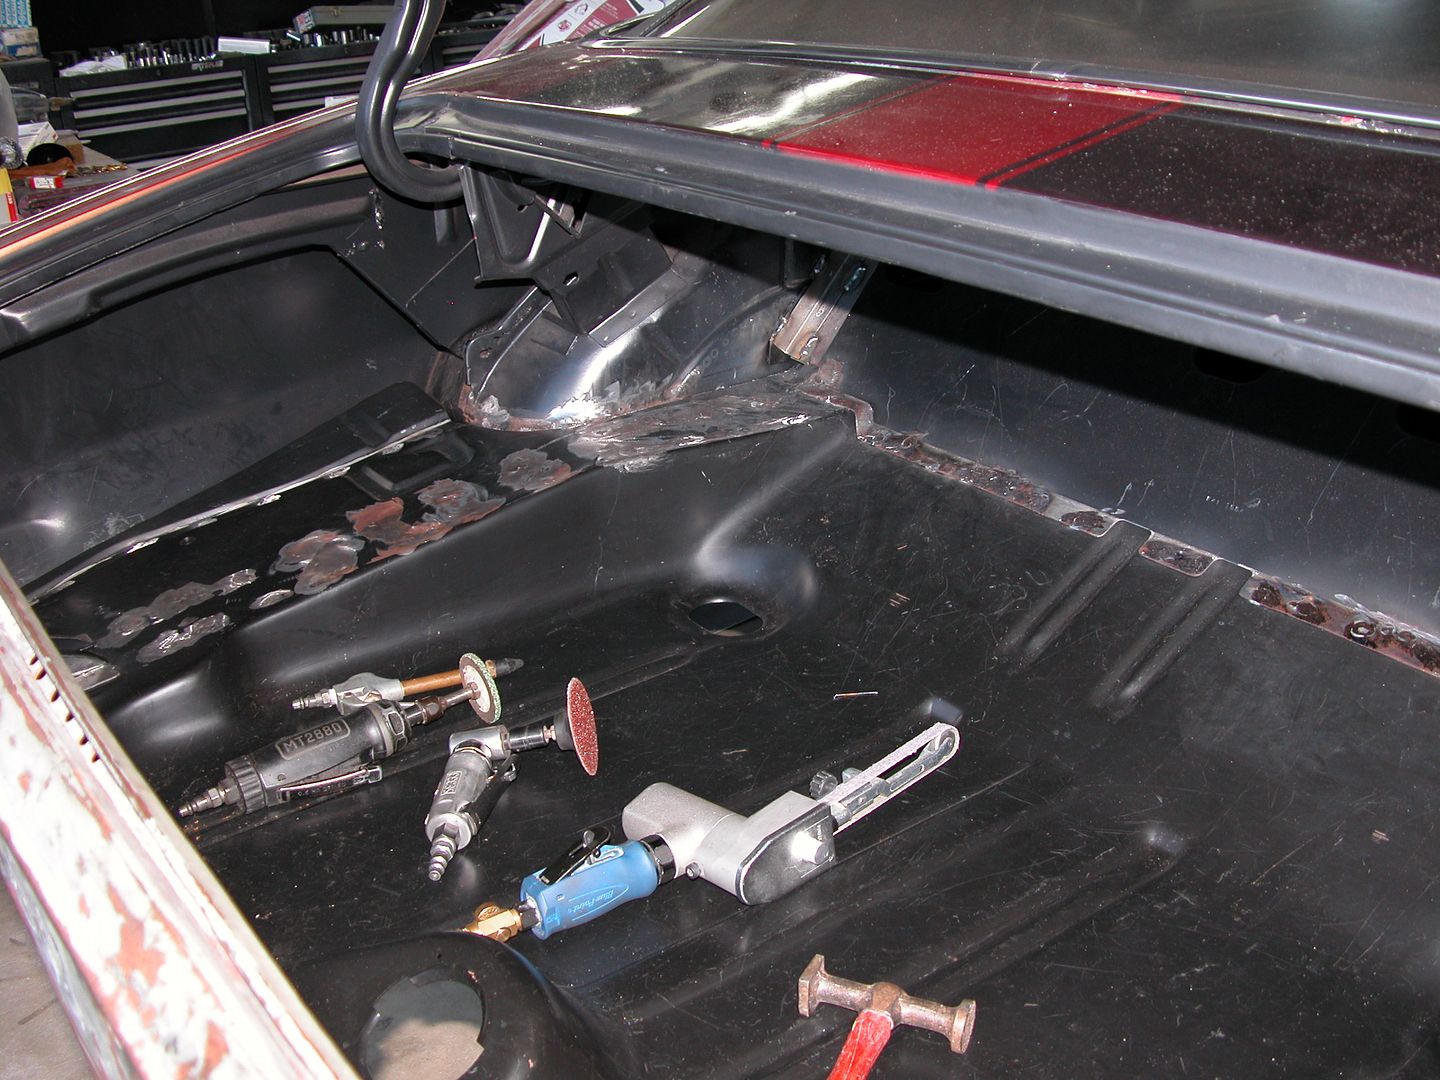
In the pic below the top panel was drilled through about every 2 inches when the car was taken apart then plug welded to the new floor pan below it. Using the tools and processes discussed above only a couple "finger smears" of filler were used along the edge to fill slight grinder marks. Looking at it you'd never know this panel edge probably had 8-10 holes drilled through it near the edge.

[URL=https://app.photobucket.com/u/NOTATA/a/4084bbc8-1e50-4486-872e-fbce3ed87549/p/af83674e-394a-4006-933d-ba69876ee56e][/URL]
[URL=https://app.photobucket.com/u/NOTATA/a/4084bbc8-1e50-4486-872e-fbce3ed87549/p/639e78ec-8d36-48ab-8133-8f15bc3c7004][/URL]
NOT A TA
NOT A TA SuperDork
9/13/20 10:48 a.m.

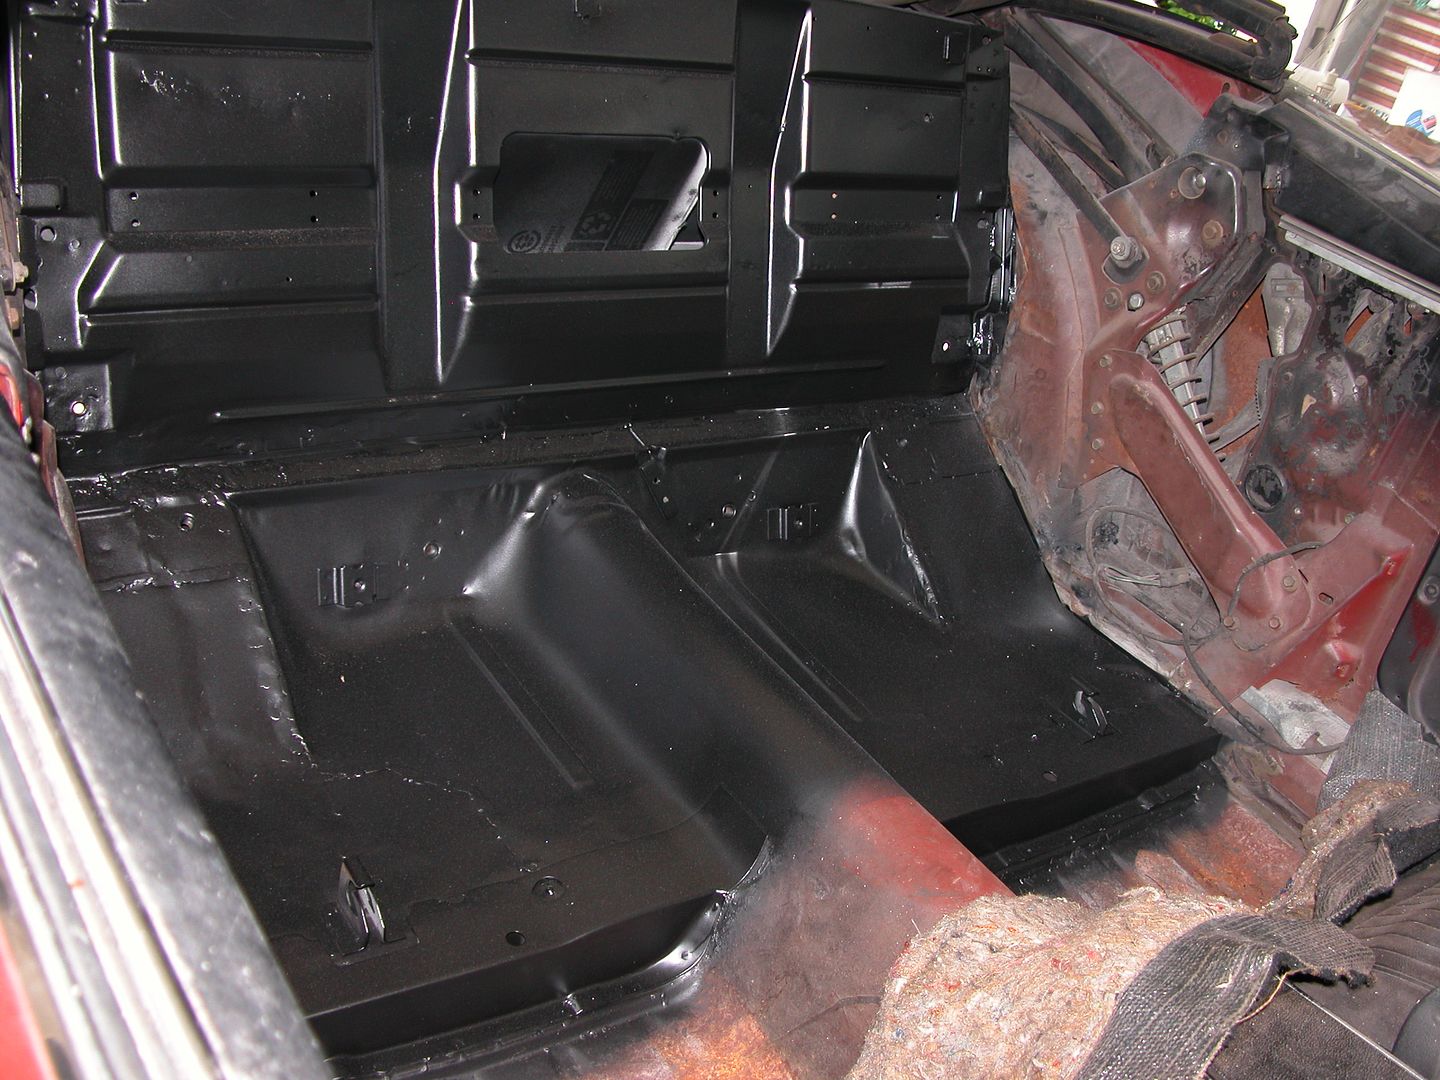
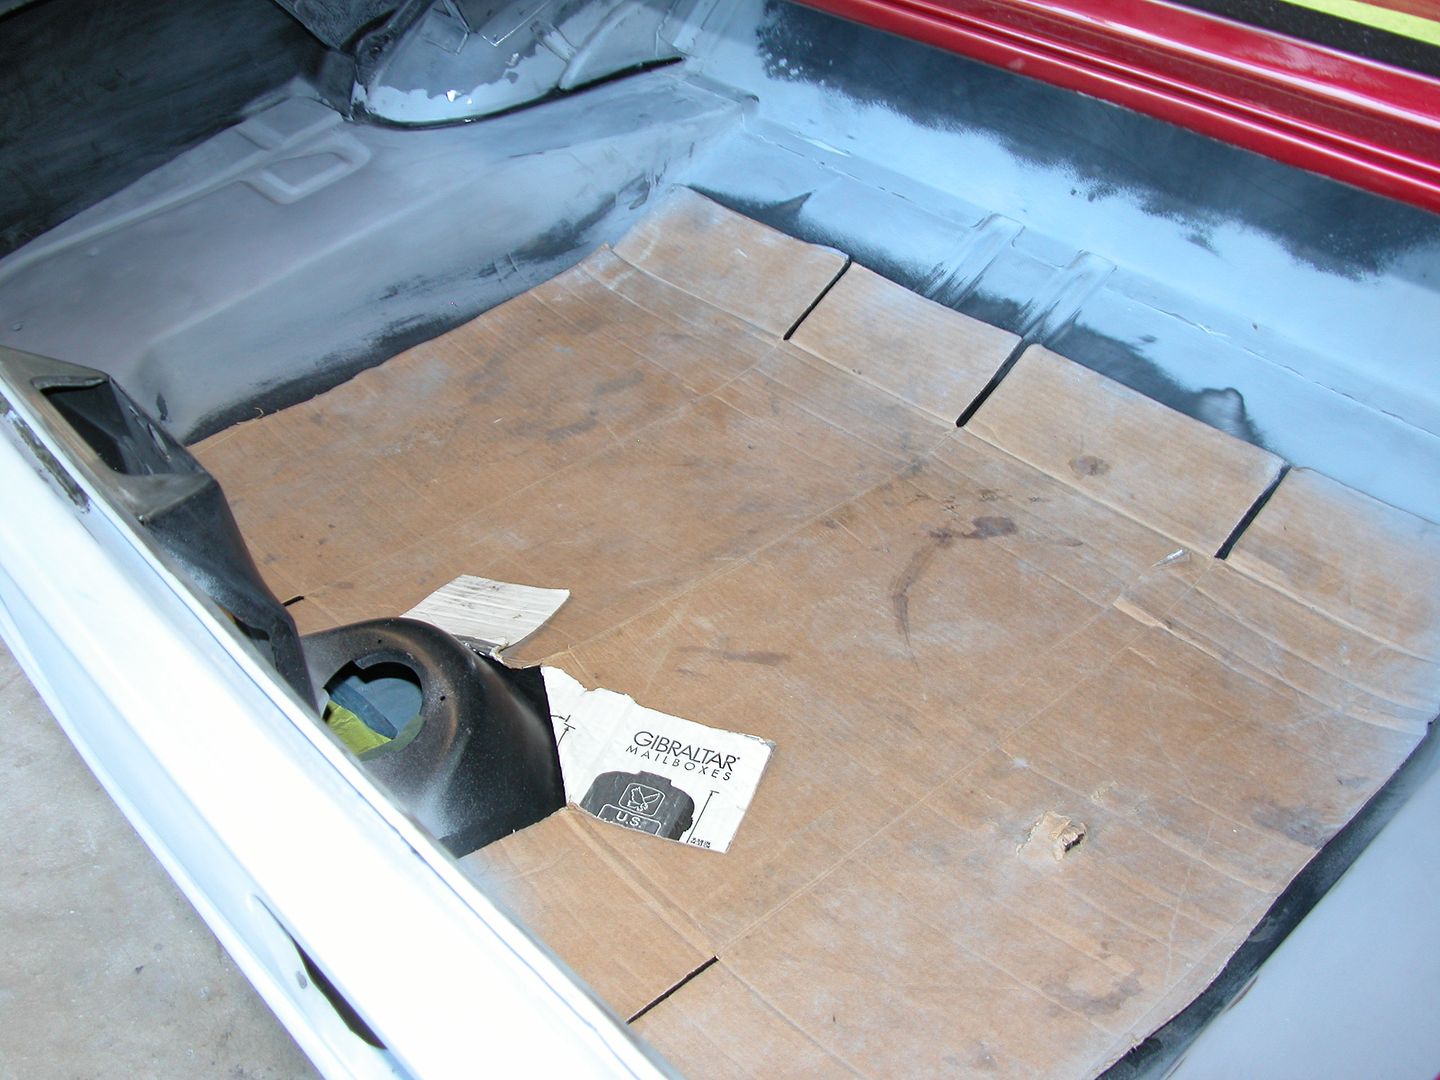
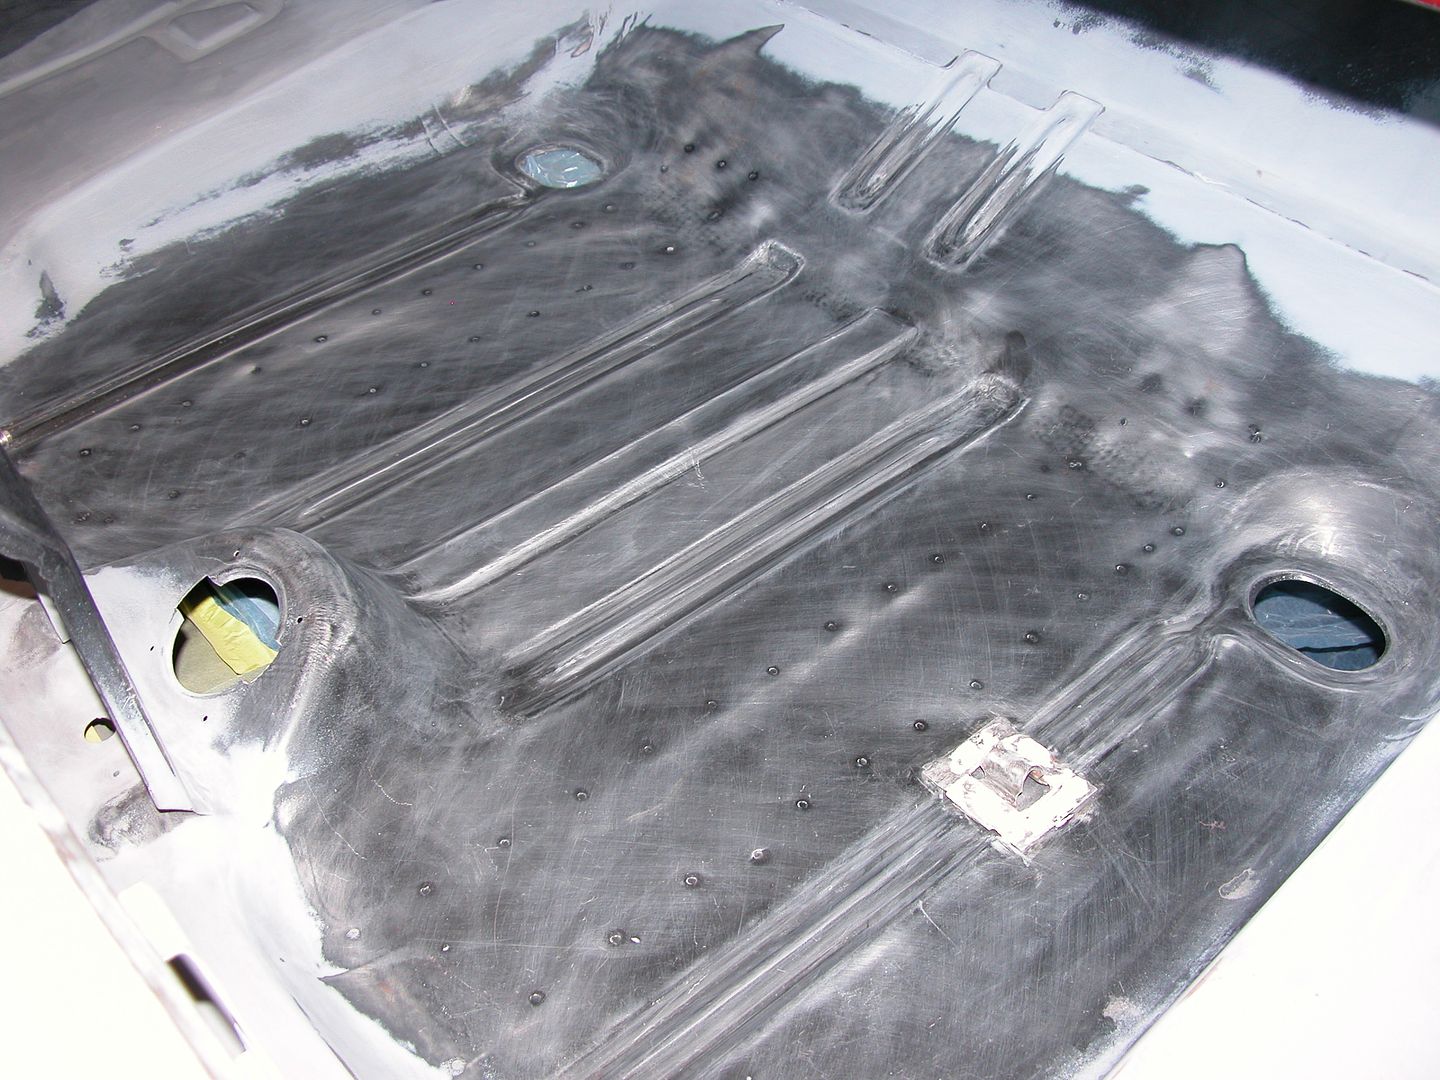
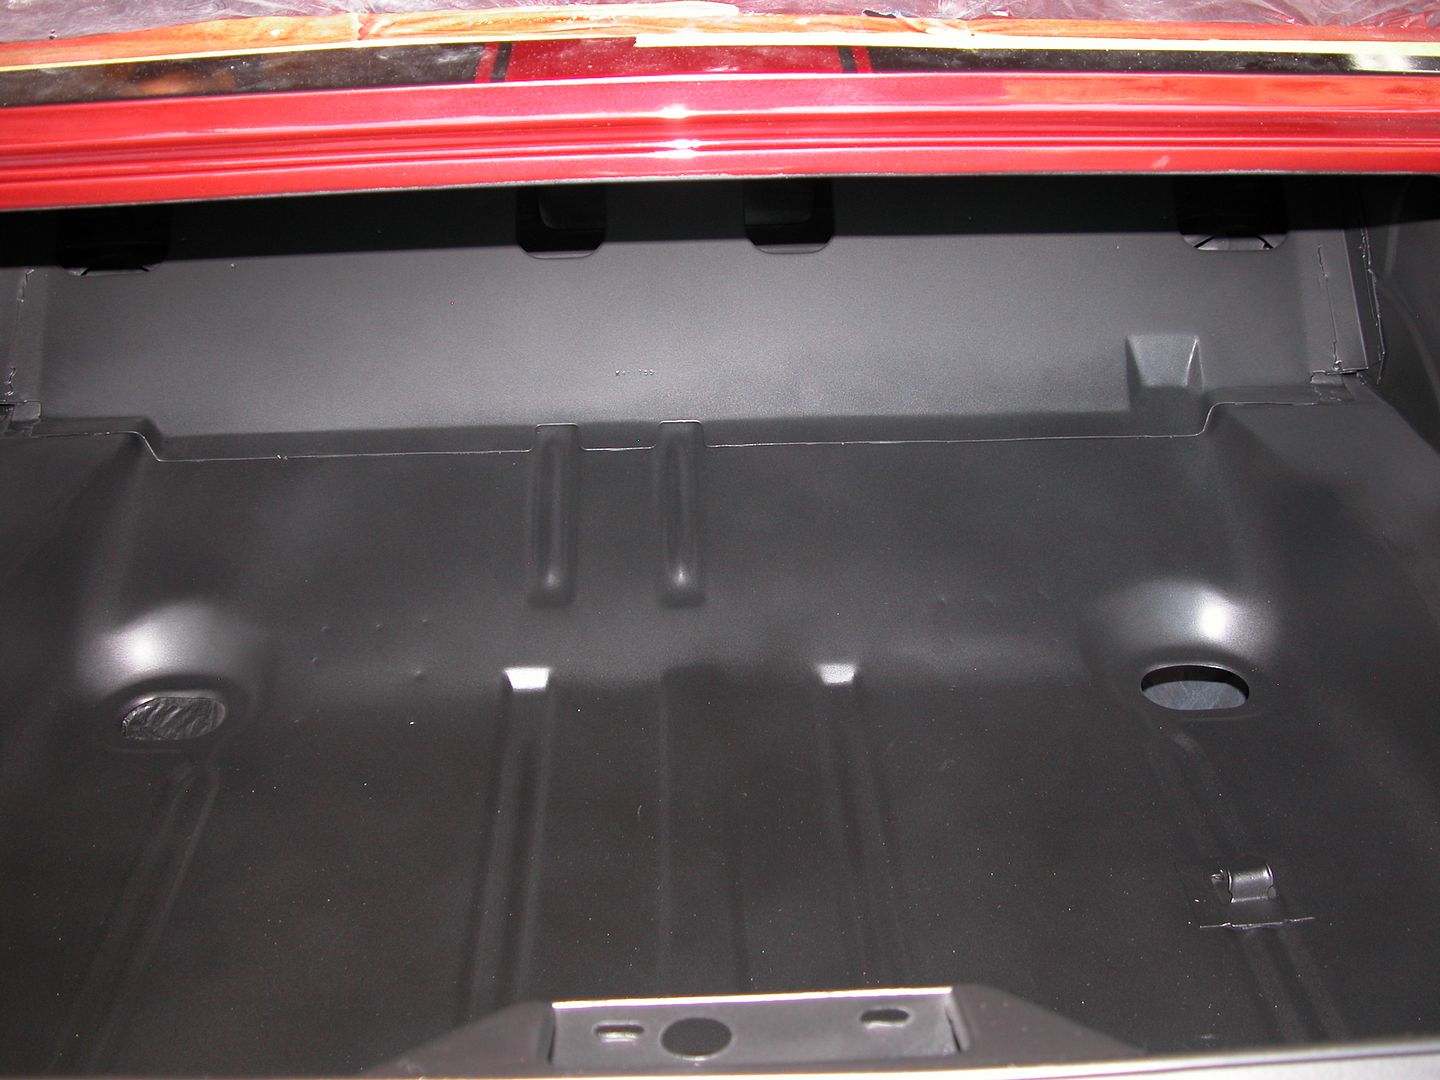
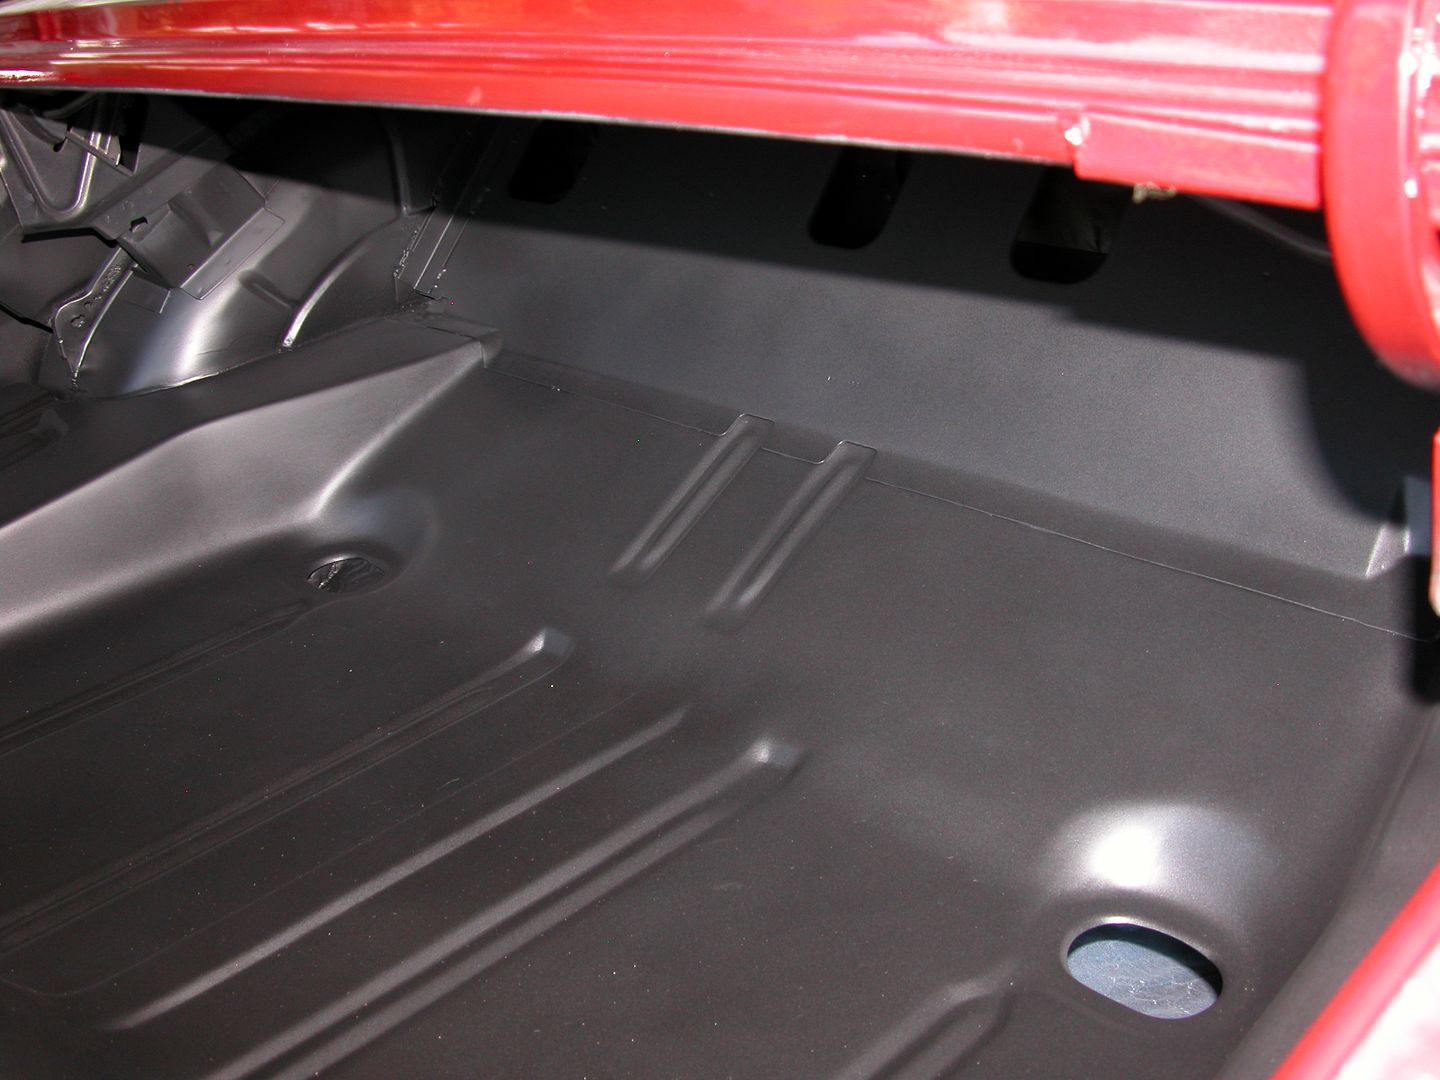
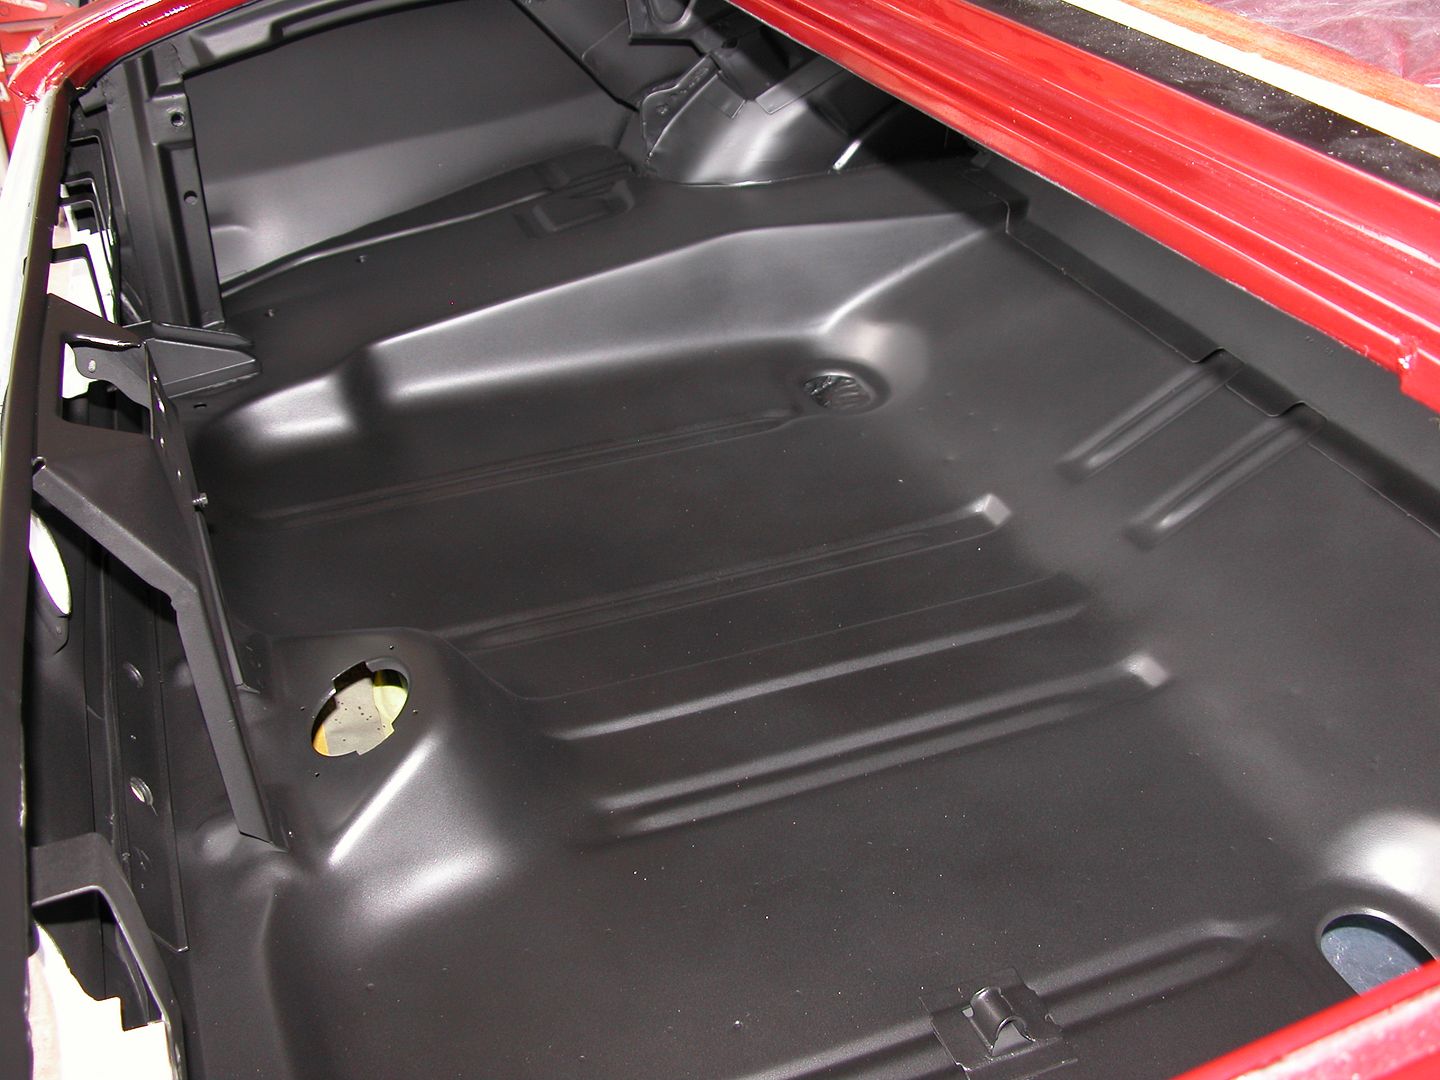
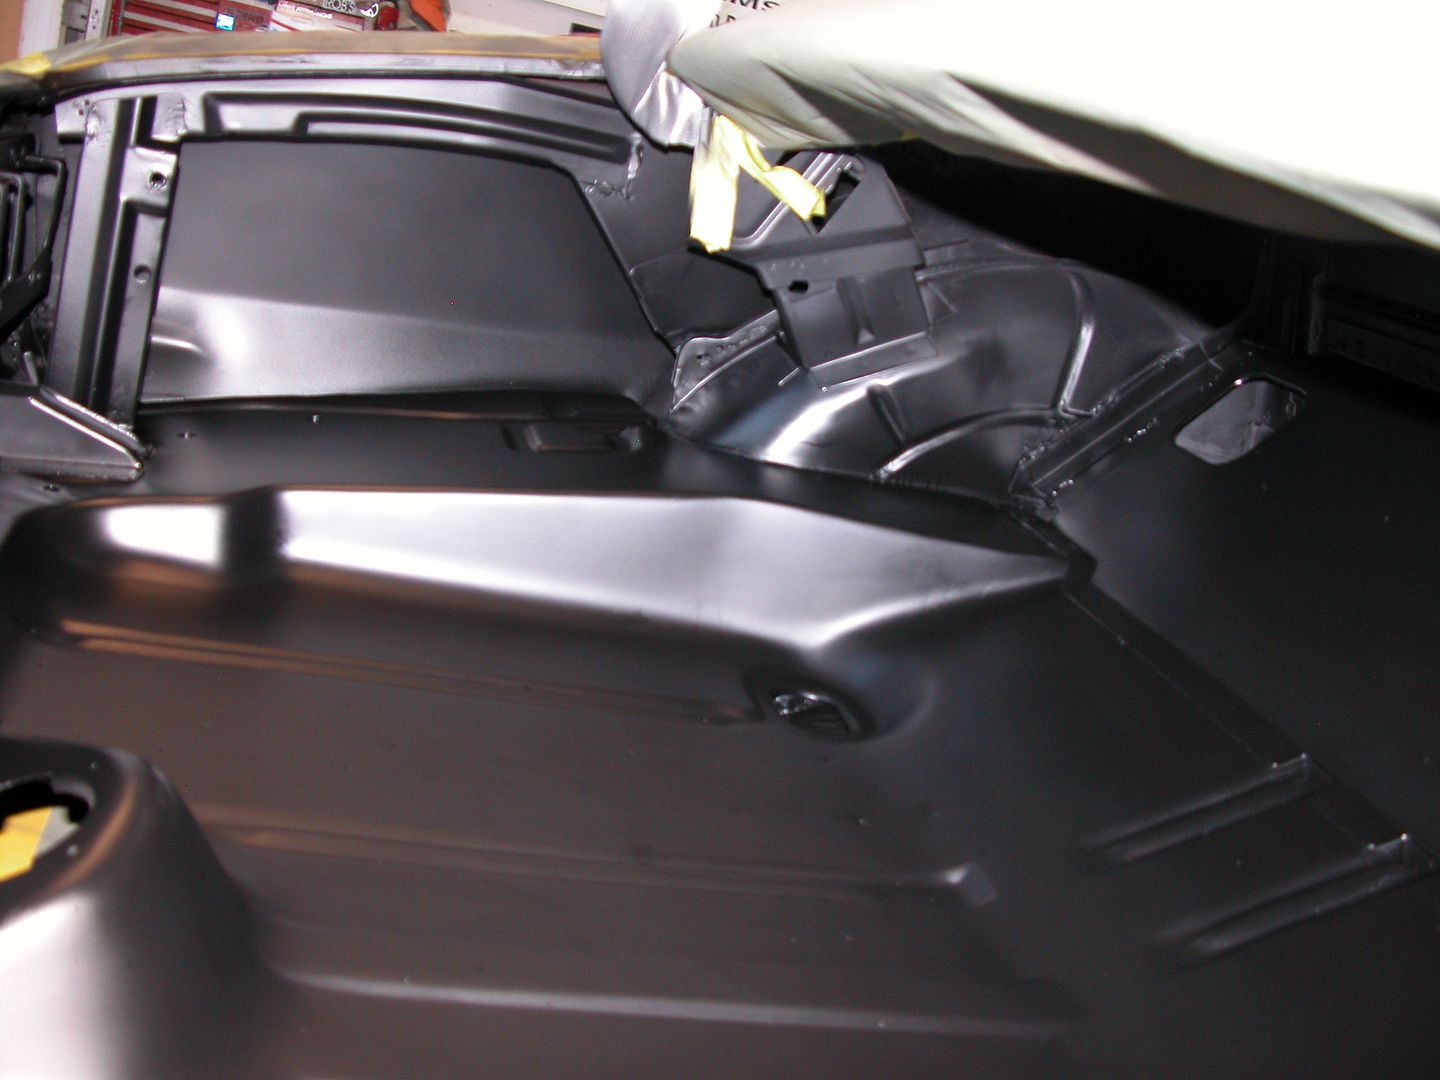
Time to finish inside the trunk area! I ground all the welds, used wax & grease remover, did some body filler & block sanding, and then gave it a good cleaning and vacuuming, then more blowing with air hose & cleaning with wax & grease remover. Then I shot certain sections in regular high fill primer with a trusty old cheap HF gun with a 1.5 tip. Blocked the primer out to 180, seam sealed by the wheel wells, went through the cleaning & grease remover process, and shot it again with primer reduced about 5% with a different old HF gun with a 1.4 tip and blocked it out to 320 grit.

Then I got a bit carried away and sanded everything to 320 including all the areas I'd epoxy primed previously before assembly and welding. After that I went back over everything with ultra fine Scotchbrite. Then I did a super cleaning because trunks and interiors are tough to get all the dust out of. Back and forth a few times with air hose and vacuum, followed by wiping everything with a rag dampened with wax & grease remover, followed by wet wax & grease remover rag and drying with a dry rag. Then just before paint I went over everything with a tack rag.

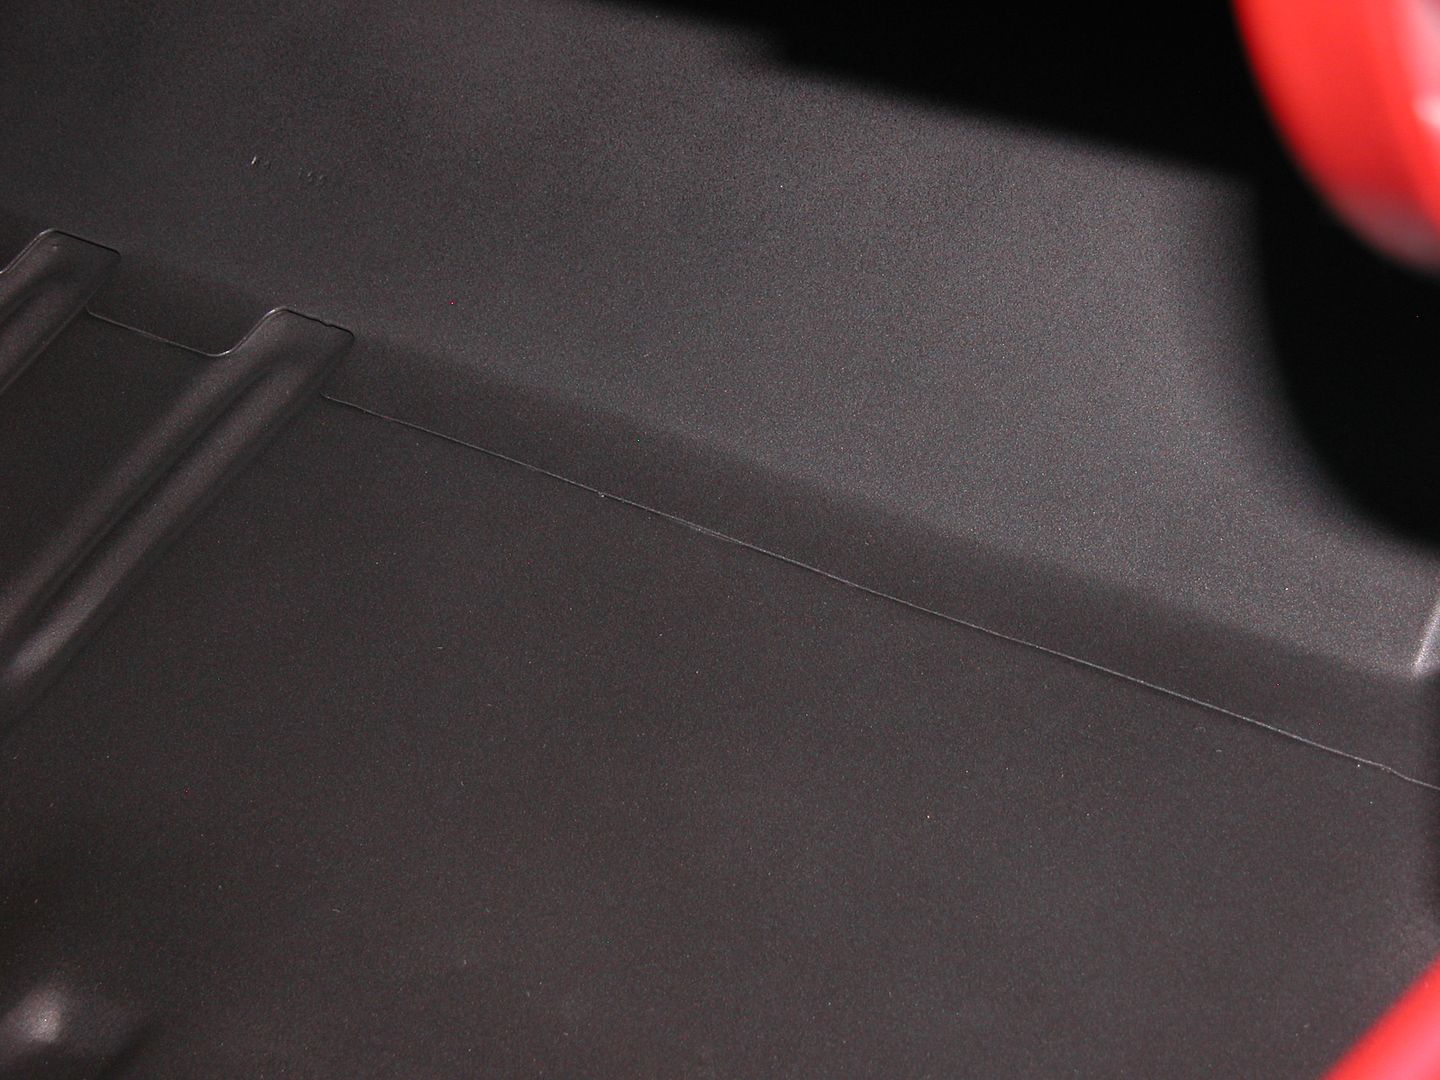
Then I shot a couple coats of epoxy primer reduced an extra 10 % with a SATA jet 4000 gun with a 1.3 tip. It actually looks better than these cars looked new when I was young (my first street car was a '68). I'm gonna have a real hard time putting the trunk mat back in. I'll let the next owner decide on whether to splatter paint it like factory or not, can't bring myself to do it.  The little specs seen in the last pics are dust that fell after the paint was dry or something, there's nothing on the black.

[URL=https://app.photobucket.com/u/NOTATA/a/4084bbc8-1e50-4486-872e-fbce3ed87549/p/af83674e-394a-4006-933d-ba69876ee56e][/URL]

[URL=https://app.photobucket.com/u/NOTATA/a/4084bbc8-1e50-4486-872e-fbce3ed87549/p/fcfb535f-3905-439c-9912-77640892cbfa][/URL]

[URL=https://app.photobucket.com/u/NOTATA/a/4084bbc8-1e50-4486-872e-fbce3ed87549/p/c1be8c00-e909-4b68-a624-90430cba78be][/URL]

[URL=https://app.photobucket.com/u/NOTATA/a/4084bbc8-1e50-4486-872e-fbce3ed87549/p/4a41eac2-a18f-476e-909d-660edfad0c00][/URL]

[URL=https://app.photobucket.com/u/NOTATA/a/4084bbc8-1e50-4486-872e-fbce3ed87549/p/66ec1f84-edad-4a2f-8e4b-d28d76364f5d][/URL]

[URL=https://app.photobucket.com/u/NOTATA/a/4084bbc8-1e50-4486-872e-fbce3ed87549/p/c610fa4e-c1aa-44ad-b11e-24919f1636c5][/URL]

[URL=https://app.photobucket.com/u/NOTATA/a/4084bbc8-1e50-4486-872e-fbce3ed87549/p/0ef7d5ca-77fc-4160-a0bd-08e8808597a2][/URL]

[URL=https://app.photobucket.com/u/NOTATA/a/4084bbc8-1e50-4486-872e-fbce3ed87549/p/d9de78e3-2b14-4f46-876d-9340313f9c13][/URL]

[URL=https://app.photobucket.com/u/NOTATA/a/4084bbc8-1e50-4486-872e-fbce3ed87549/p/664b6ccc-ead4-4fc3-8e36-5854ccfbe900][/URL]

[URL=https://app.photobucket.com/u/NOTATA/a/4084bbc8-1e50-4486-872e-fbce3ed87549/p/378718a8-aac2-4c44-a566-7c6569c9d041][/URL]

[URL=https://app.photobucket.com/u/NOTATA/a/4084bbc8-1e50-4486-872e-fbce3ed87549/p/40dd4b2d-9924-4661-a62c-29dae107ba22][/URL]

AngryCorvair (Forum Supporter)
AngryCorvair (Forum Supporter) MegaDork
9/13/20 4:42 p.m.

Your trunk is straighter than any exterior panel of any car I currently own.

Beautiful work, and show and tell is excellent!

Pete Gossett (Forum Supporter)
Pete Gossett (Forum Supporter) MegaDork
9/13/20 6:17 p.m.

In reply to NOT A TA :

If I crawled into a trunk like that now I think I'd need an engine hoist to get me back out. 

Beautiful work though, I just don't have the patience for bodywork & marvel at those like you who do!

solfly
solfly Dork
9/13/20 6:20 p.m.

How far is the work you're doing from restoration quality? Looks close to the untrained eye.

TurnerX19
TurnerX19 SuperDork
9/13/20 9:46 p.m.

On a high volume production car this qualifies as over restored.

NOT A TA
NOT A TA SuperDork
9/13/20 10:22 p.m.
 
solfly said:

How far is the work you're doing from restoration quality? Looks close to the untrained eye.

Awesome, I love questions like this! And thanks for the compliments from the other folks.

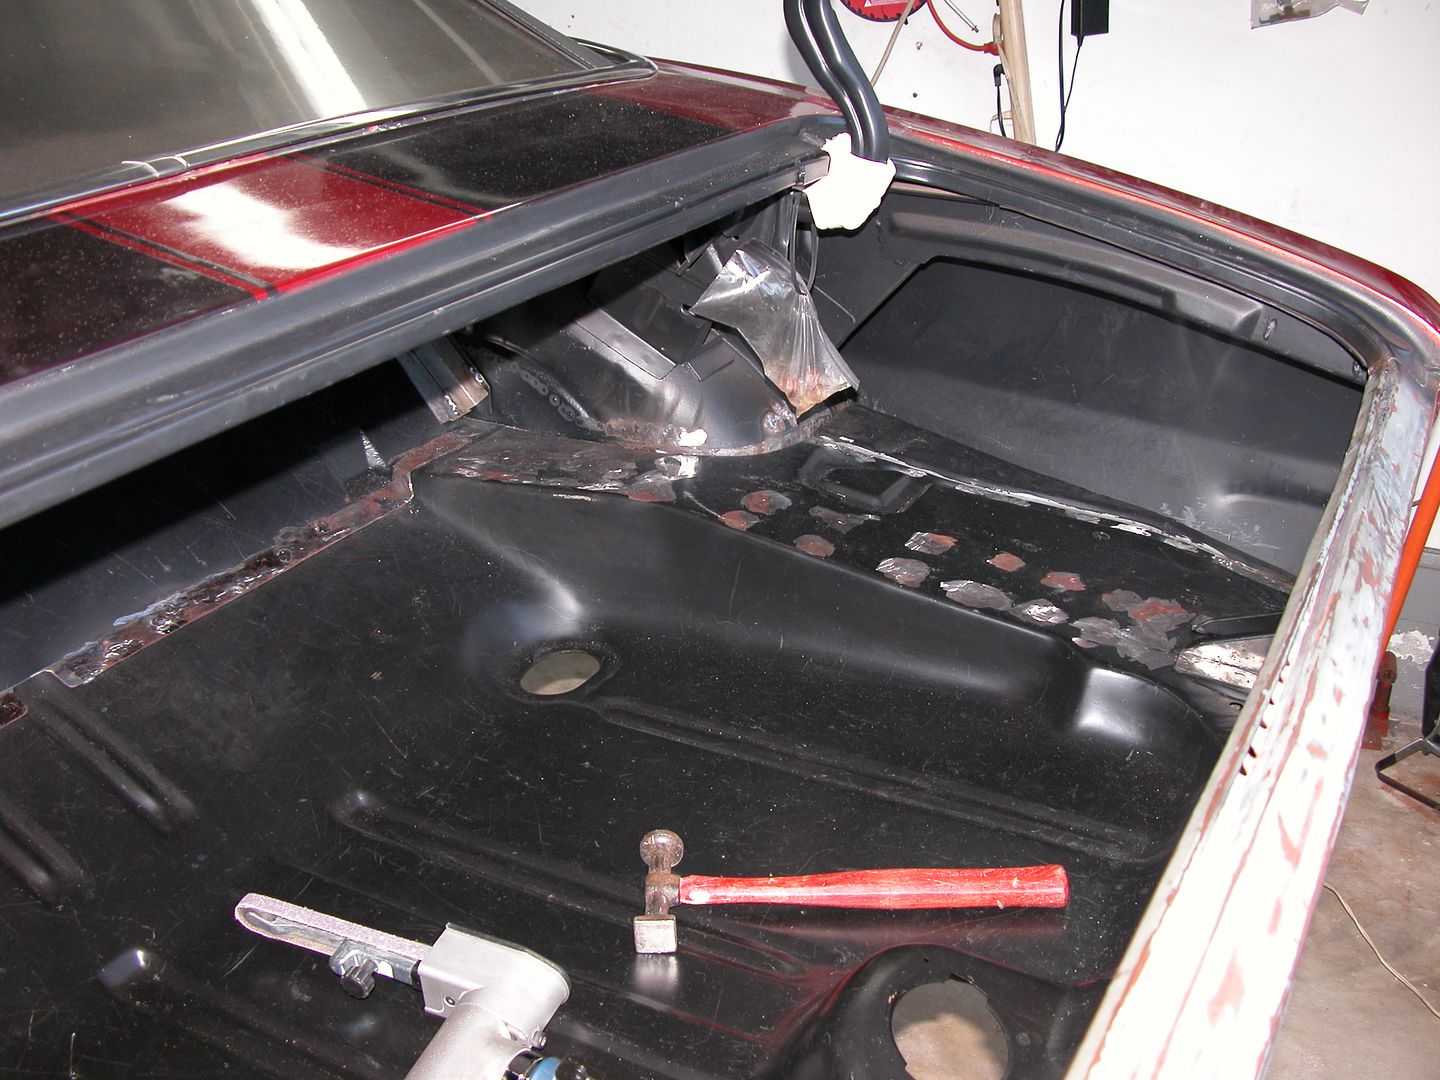
As far as "appearance" inside the trunk area. If I was doing this as a "correct" restoration the resistance welds for the frame rails would have been recreated. The resistance welds on the angled panel toward the front would have been recreated. The seam sealer between the trunk floor and wheel well would have been wider and sloppier with a brush stroke appearance. The trunk would have been sprayed with a different black primer that looked more like the factory primer. The whole trunk would have been sprayed before the body color red. When the red was painted I'd be sure the over spray into the trunk areas looked like the factory did it. Correct would have splatter paint. Correct would also have red over spray on the trunk latch area and I believe the side braces and cocktail shaker brackets. I would have checked on the appearance of the factory welds for the cocktail shakers and used the same technique instead of MIG bead welding and grinding.

A couple things that would be different for a "correct" restoration as opposed to my more custom version.

In the pic below you can see where the frame rails were welded to the trunk pan in the raised flat area, angled brace welded to trunk pan, and trunk drop offs welded to trunk pan over by the quarter panel.. The factory used a resistance welder that left dime size dimples in those locations I'd recreate using one of a couple different methods. In the following pic you can see recreated dimples in a panel I made for the cowl of a different car where I wanted to recreate the look of resistance welds. In that case I used a drift and a BFH to create the dimples before the panel was bonded to the car. In that case there was no need or reason to weld the piece in place but I wanted it to look original.

[URL=https://app.photobucket.com/u/NOTATA/a/4084bbc8-1e50-4486-872e-fbce3ed87549/p/fcfb535f-3905-439c-9912-77640892cbfa][/URL]

[URL=https://app.photobucket.com/u/NOTATA/a/6b6f76c0-5830-42f9-94b2-3399d5fddd0f/p/f400ed6e-8d9f-4772-a67f-9c9c88597ff3][/URL]

[URL=https://app.photobucket.com/u/NOTATA/a/6b6f76c0-5830-42f9-94b2-3399d5fddd0f/p/f90e43f5-2e2a-4a92-9a71-7058c291e1c7][/URL]

I did try to recreate the appearance (somewhat minimally) of stock over spray in the trunk hinge area but less than would have occurred at the factory. I'd epoxy primed the upper surfaces inside the trunk purposely before the red paint so that I could create the look but less dramatic. You can see in the top pic below that the masking isn't tight to the trunk hinge arms. This was to allow a controlled amount of over spray to "fade away" on the arms and a little to hit a couple points beyond that. Then when I shot the whole trunk area in primer I masked off the arms and a couple points I wanted the over spray to remain as seen in the next pic.

I expect the next owner of this car will be a deeper pockets kinda person who will want to restore the car to original because it's a early production first year real RS SS conv. with some cool options which can be determined by the stamped numbers as opposed to later years where authenticity can't be verified. I minimized the over spray so that if the car is "restored" they can easily change the appearance with the correct color red over spray since it was a factory red car. This is also one of the reasons I'm not doing a stock looking splatter paint. If they want "correct they can easily sand down my epoxy primer and shoot it with the correct shade of black then apply the splatter. If I apply splatter it would make a lot of extra work for them prepping to shoot the correct black.

[URL=https://app.photobucket.com/u/NOTATA/a/4084bbc8-1e50-4486-872e-fbce3ed87549/p/13f779a7-4ddb-4d64-8f41-a253851f4a5a][/URL]

[URL=https://app.photobucket.com/u/NOTATA/a/4084bbc8-1e50-4486-872e-fbce3ed87549/p/19cb2cff-941e-4621-bcee-626ad77ba2d4][/URL]


rezisehtnys
rezisehtnys New Reader
9/14/20 10:14 a.m.

Quick quality work as always!  I can't wait to see it finished!

~Casey of TAC

solfly
solfly Dork
9/14/20 12:33 p.m.

Thanks. I could tell you were doing high quality work and maybe a bit different than it would have been done 50+ years ago.

NOT A TA
NOT A TA SuperDork
9/14/20 9:07 p.m.
solfly said:

Thanks. I could tell you were doing high quality work and maybe a bit different than it would have been done 50+ years ago.

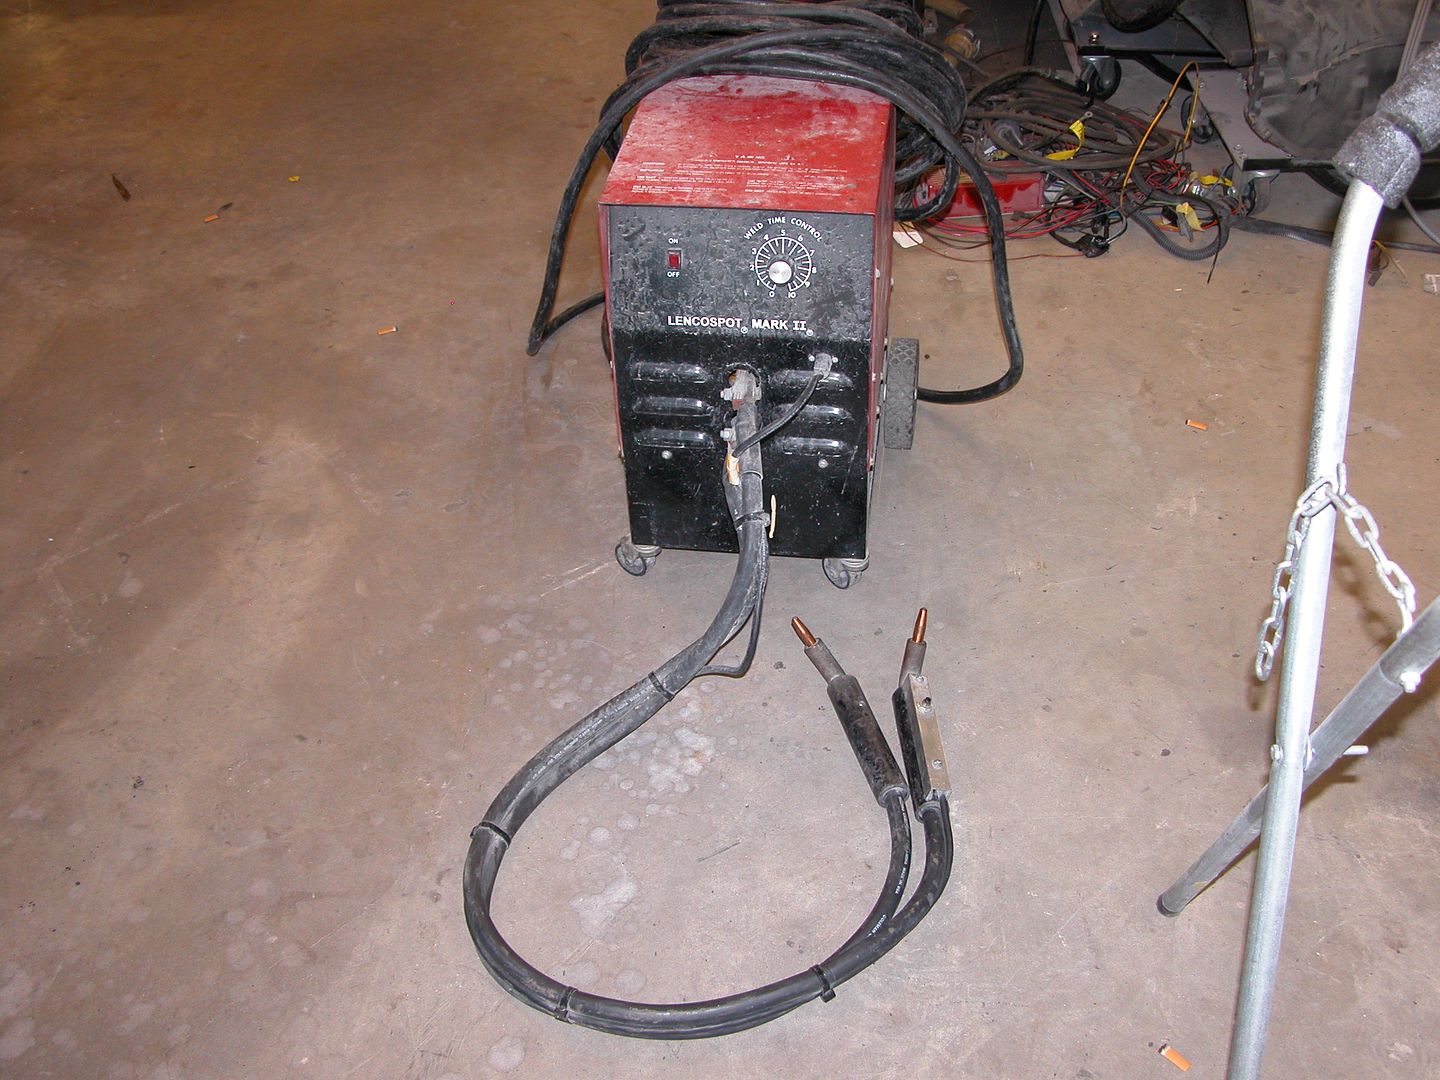
Ya the factory used serious resistance welders on body panels. I should have mentioned I do have a small one I use for certain tasks like the firewall block off plates in pics below. It's not powerful enough to weld frame rails and such though.

[URL=https://app.photobucket.com/u/NOTATA/a/6b6f76c0-5830-42f9-94b2-3399d5fddd0f/p/a4ccaa61-a7c3-458b-8e1e-04bfb38969c4][/URL]

[URL=https://app.photobucket.com/u/NOTATA/a/6b6f76c0-5830-42f9-94b2-3399d5fddd0f/p/65caacb8-d401-42a2-9246-ae655fd24184][/URL]

[URL=https://app.photobucket.com/u/NOTATA/a/6b6f76c0-5830-42f9-94b2-3399d5fddd0f/p/5e8b039d-8f29-48ba-854f-78b06d8dda8d][/URL]


solfly
solfly Dork
9/15/20 6:03 a.m.

is this just a hobby for you or do you do it professionally?

NOT A TA
NOT A TA SuperDork
9/15/20 7:16 p.m.
solfly said:

is this just a hobby for you or do you do it professionally?

Both at this point. I started very young racing and working on cars which became a lifelong hobby. Always had a different "regular job" till my 50's when I switched to just building cars in shops and private residences for about 10 years. Now winding down in my 60's with heart issues so I'm not taking any more "full builds" where I would take a car from a stripped unibody and build the entire car. Only smaller jobs and I really need the Camaro out of the way because I need the space to work on others cars.

NOT A TA
NOT A TA SuperDork
12/18/20 9:20 p.m.

With fall weather here in S FL it was time to get yard projects done so I didn't work on the Camaro for a couple months but been back at it a bit this past week.

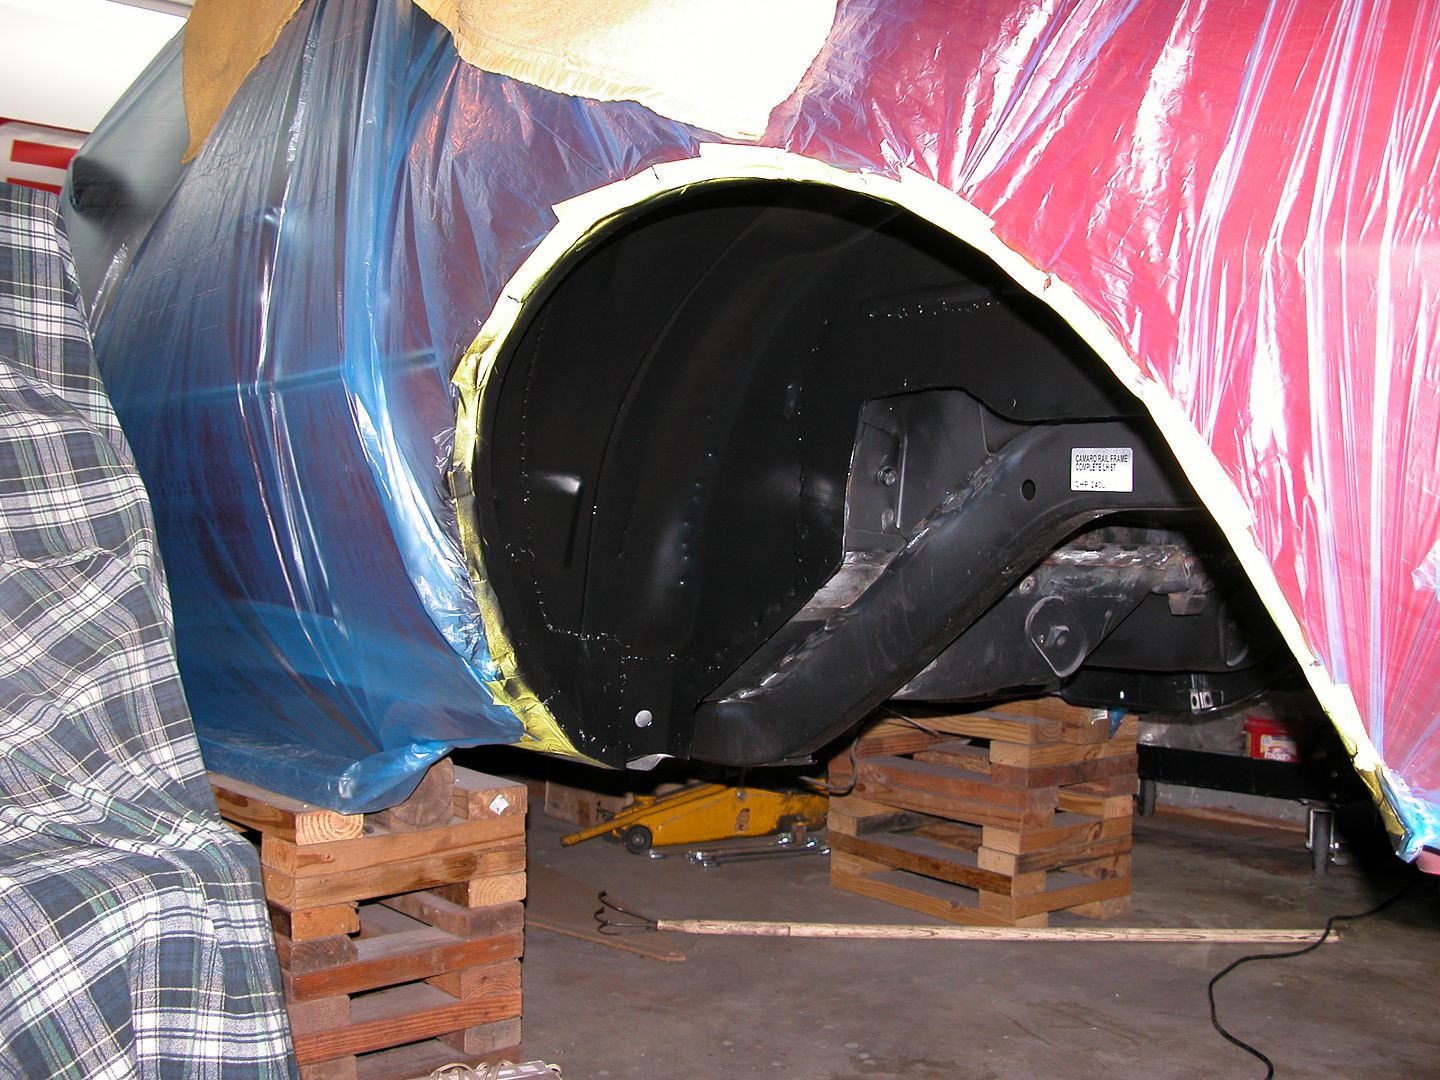
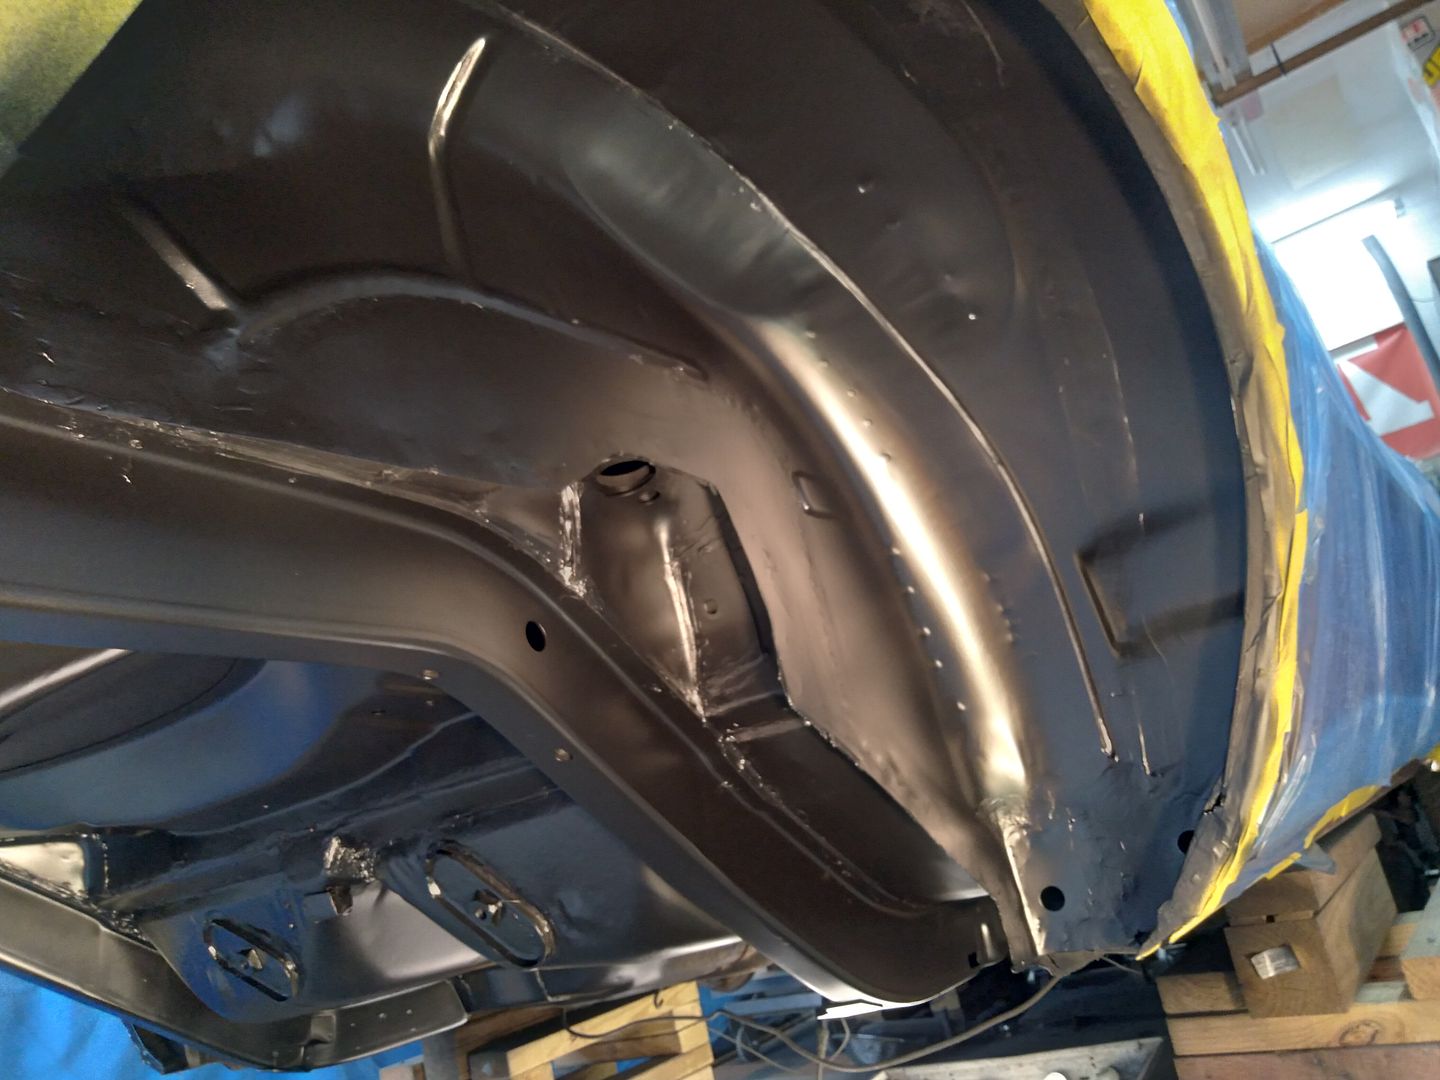
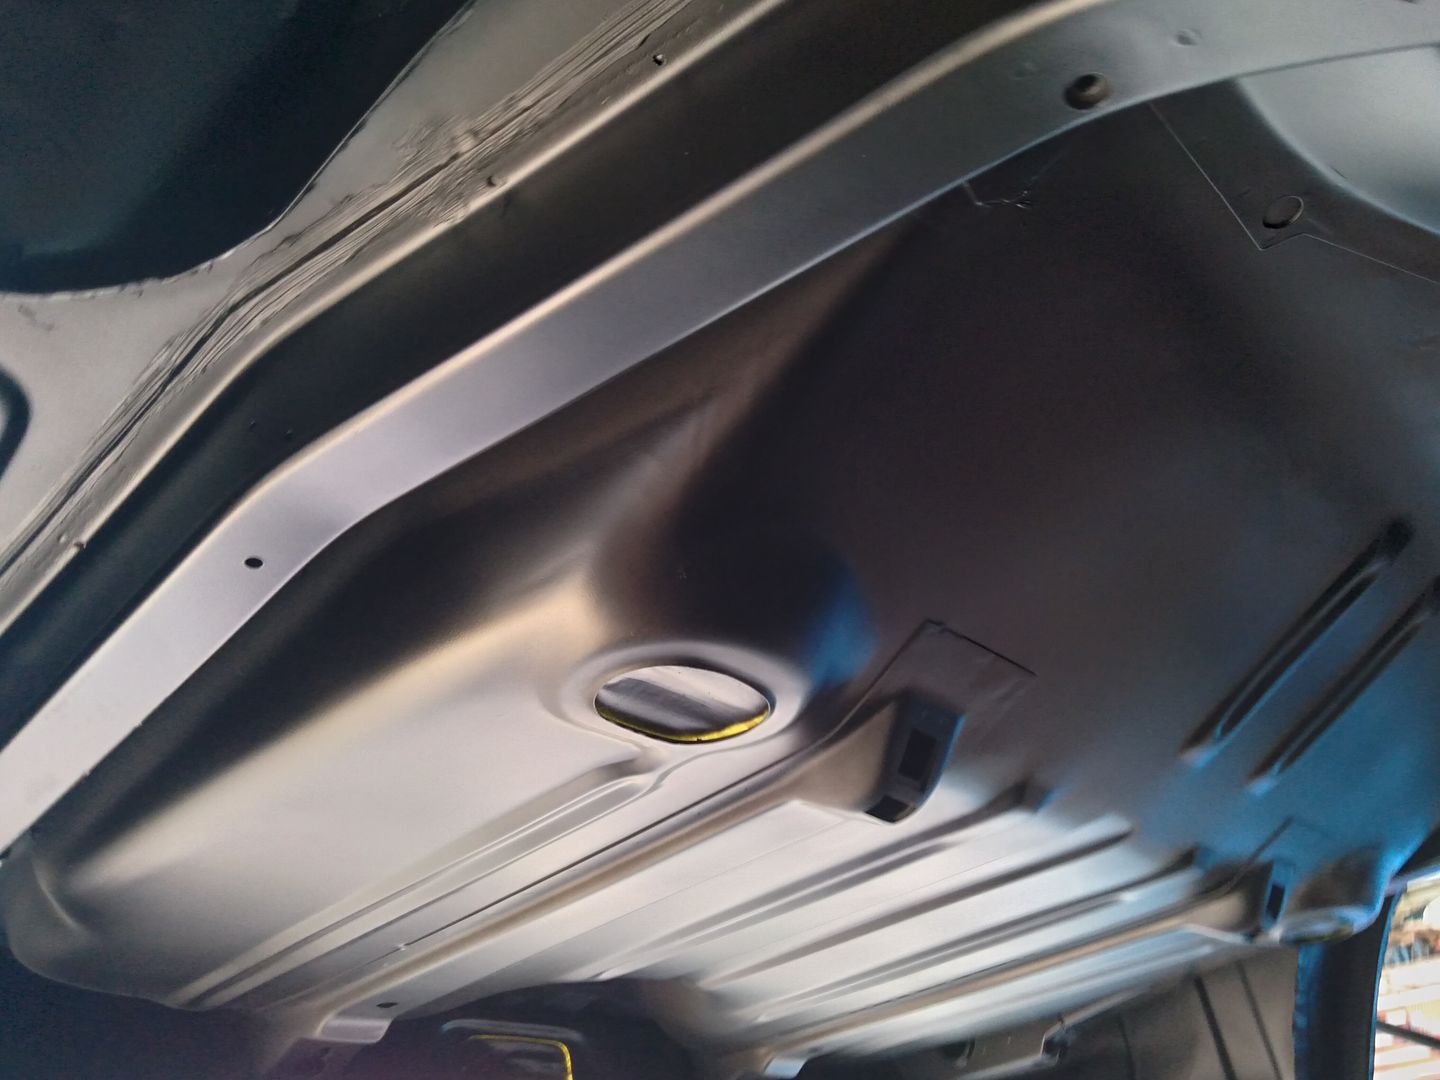
Seam sealed everything under the car and in the interior using SEM 29392 seam sealer. It's black, and can be sanded & painted. Let that dry a couple days even though it can be painted immediately because I wanted to sand it in some areas to achieve a certain appearance. Then I sanded all of the area under the car from the rear foot wells to the rear splash pan including the wheel wells with 180 grit. Most of that was done by hand along with some larger areas being done with a DA. Next I went over the entire area with fine Scotch Brite. Wax & grease remover was used between steps and then again before the whole area was shot with two coats of black epoxy primer using a cheap 1.5 tip HF gun.

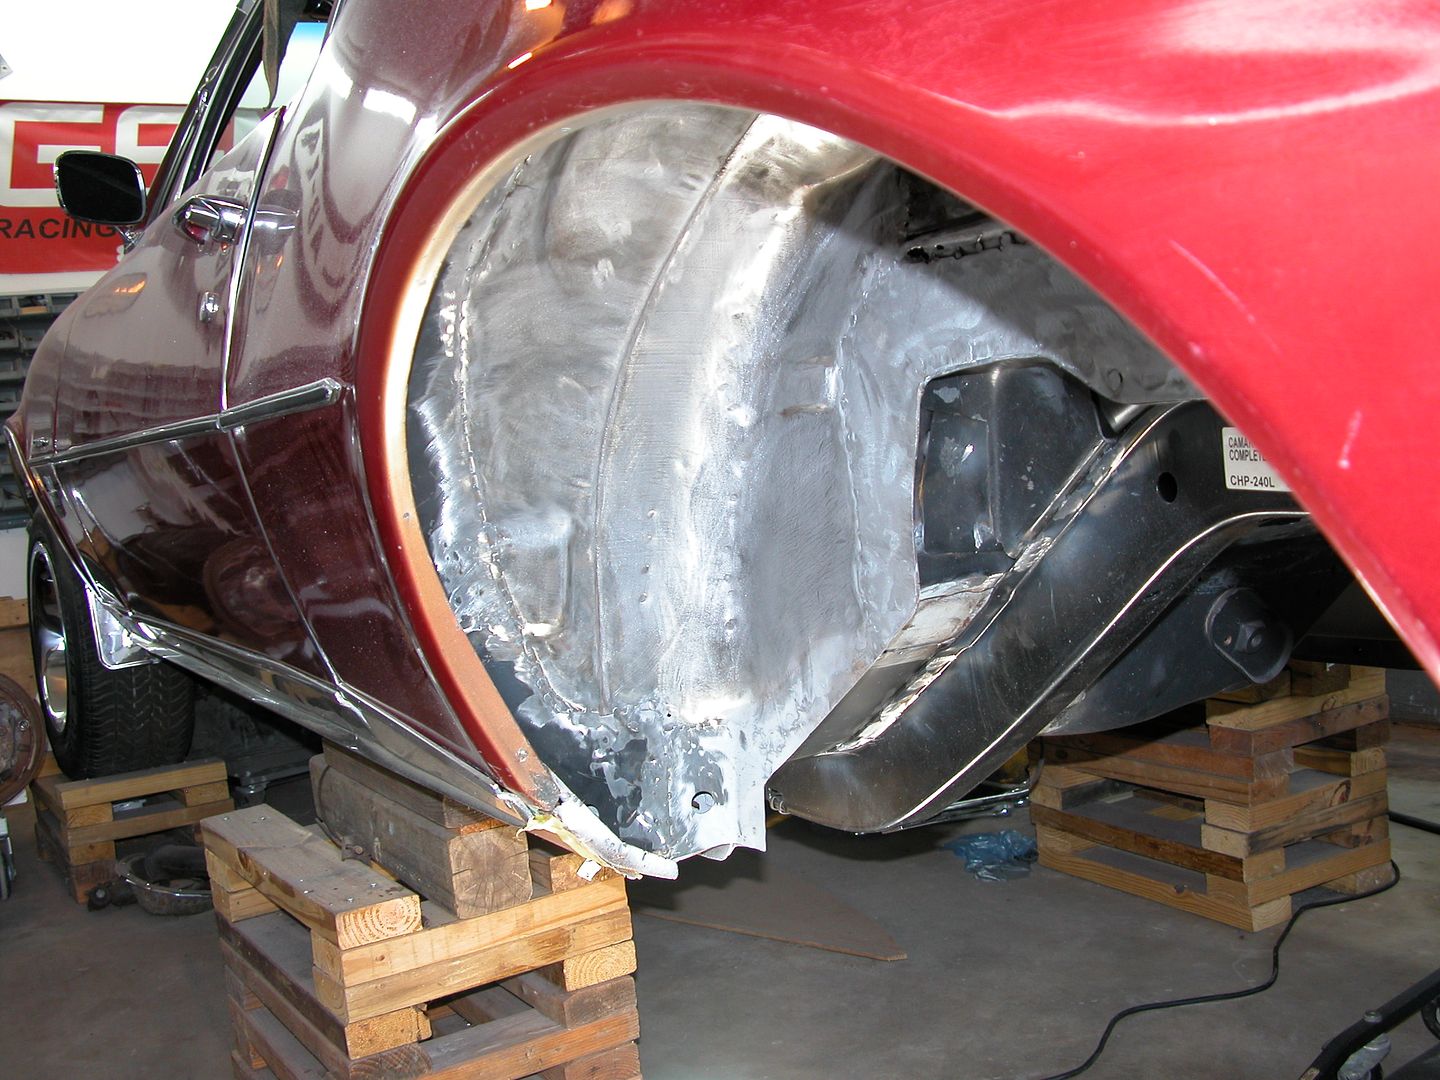
In the wheel well pic below you can see where I sectioned in the outer wheel well. "Sectioning" is a common practice used when only part of a panel needs to be replaced. Sometimes it's done by butt welding the pieces and sometimes they are overlapped. In this case the outer 4-5" of the outer wheel well was replaced using the overlap method. The pieces were screwed in place and plug welded on the overlap. The outer edge where the wheel well attaches to the fender were bonded with 3M structural adhesive where I wouldn't want to burn exterior paint welding and the section was welded to the trunk drop offs. The line of welds where the outer wheel well was sectioned in were ground down previously and then seam sealed along with everything else but the sealer was sanded down so the welds and seam are more smooth. You can still see where the piece was sectioned in but once undercoated it won't be obvious the section was installed. I could have butt welded it and made it "perfect" but lets face it, it's a wheel well and I've got enough work here I hadn't planned on already without spending even more time in the rabbit hole. 

[URL=https://app.photobucket.com/u/NOTATA/a/4084bbc8-1e50-4486-872e-fbce3ed87549/p/6501256d-9880-4d4b-ab7d-85c5e624fc08][/URL]

[URL=https://app.photobucket.com/u/NOTATA/a/4084bbc8-1e50-4486-872e-fbce3ed87549/p/86e35a0f-e6ad-4c5b-bc76-0042c2944dd2][/URL]

NOT A TA
NOT A TA SuperDork
12/19/20 11:04 a.m.

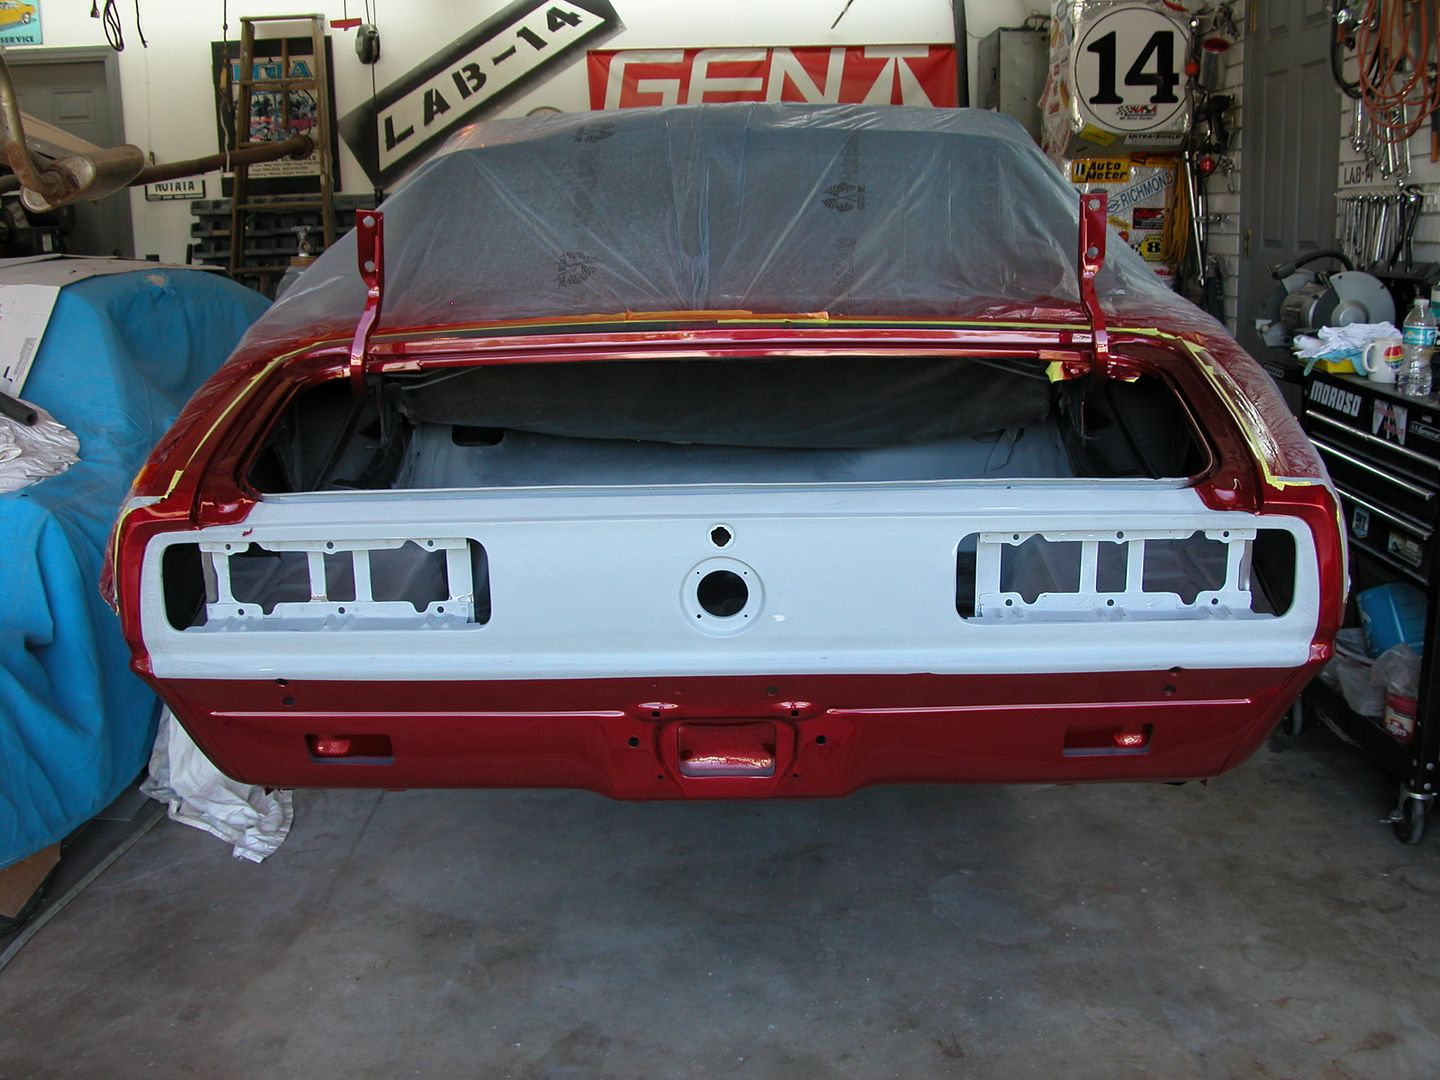
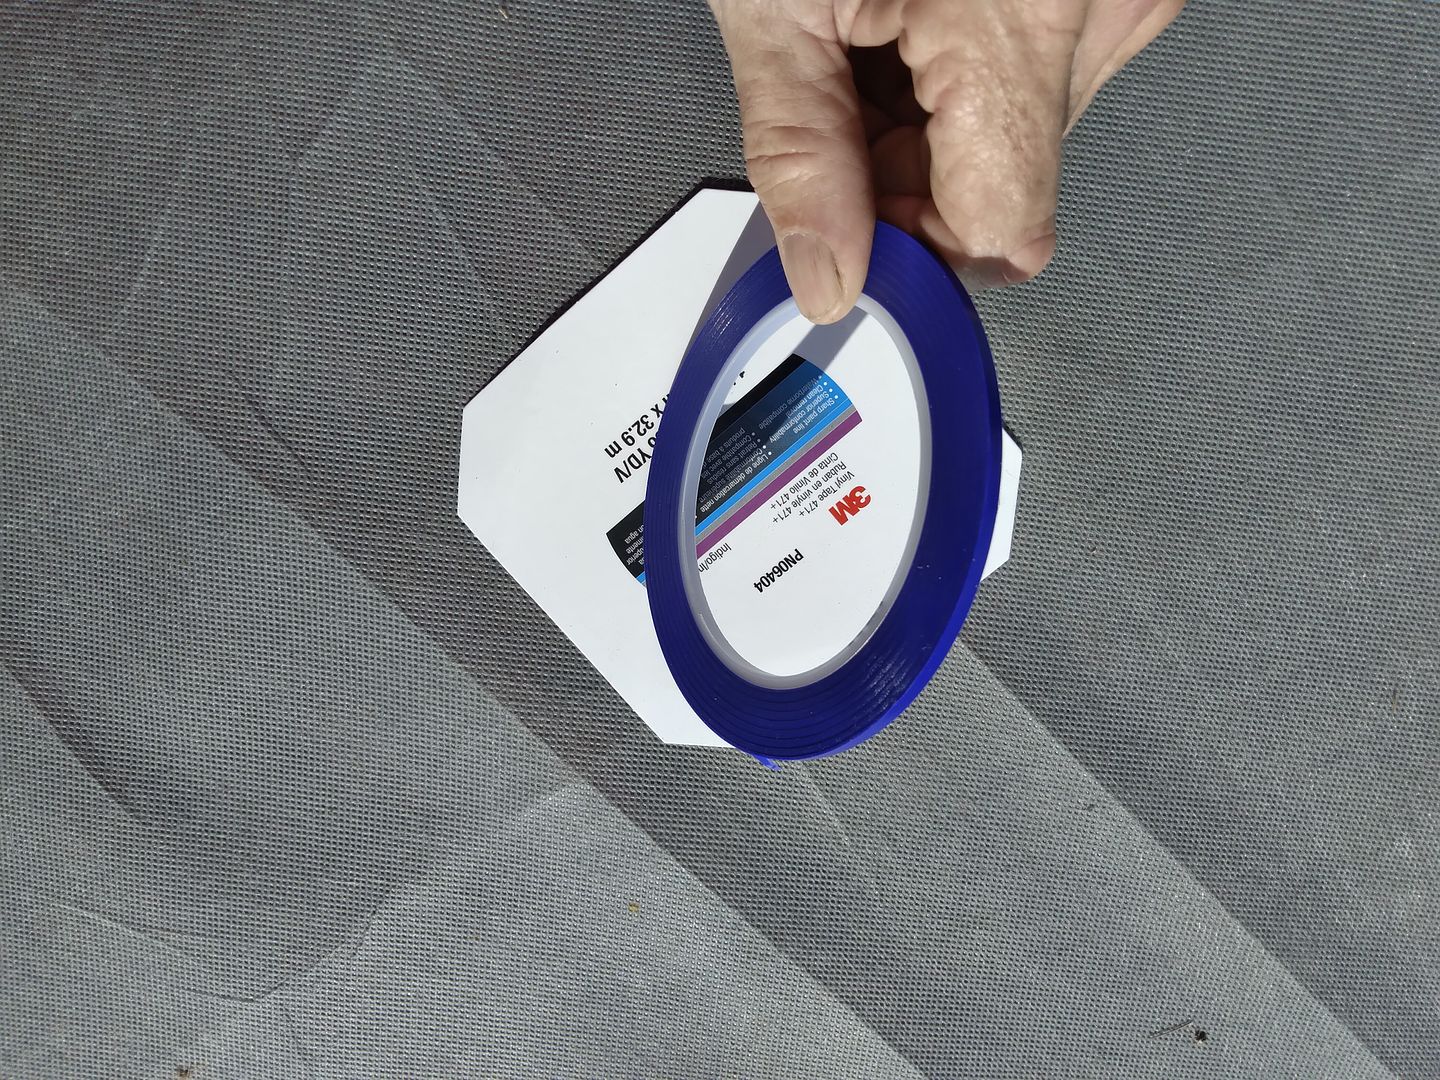
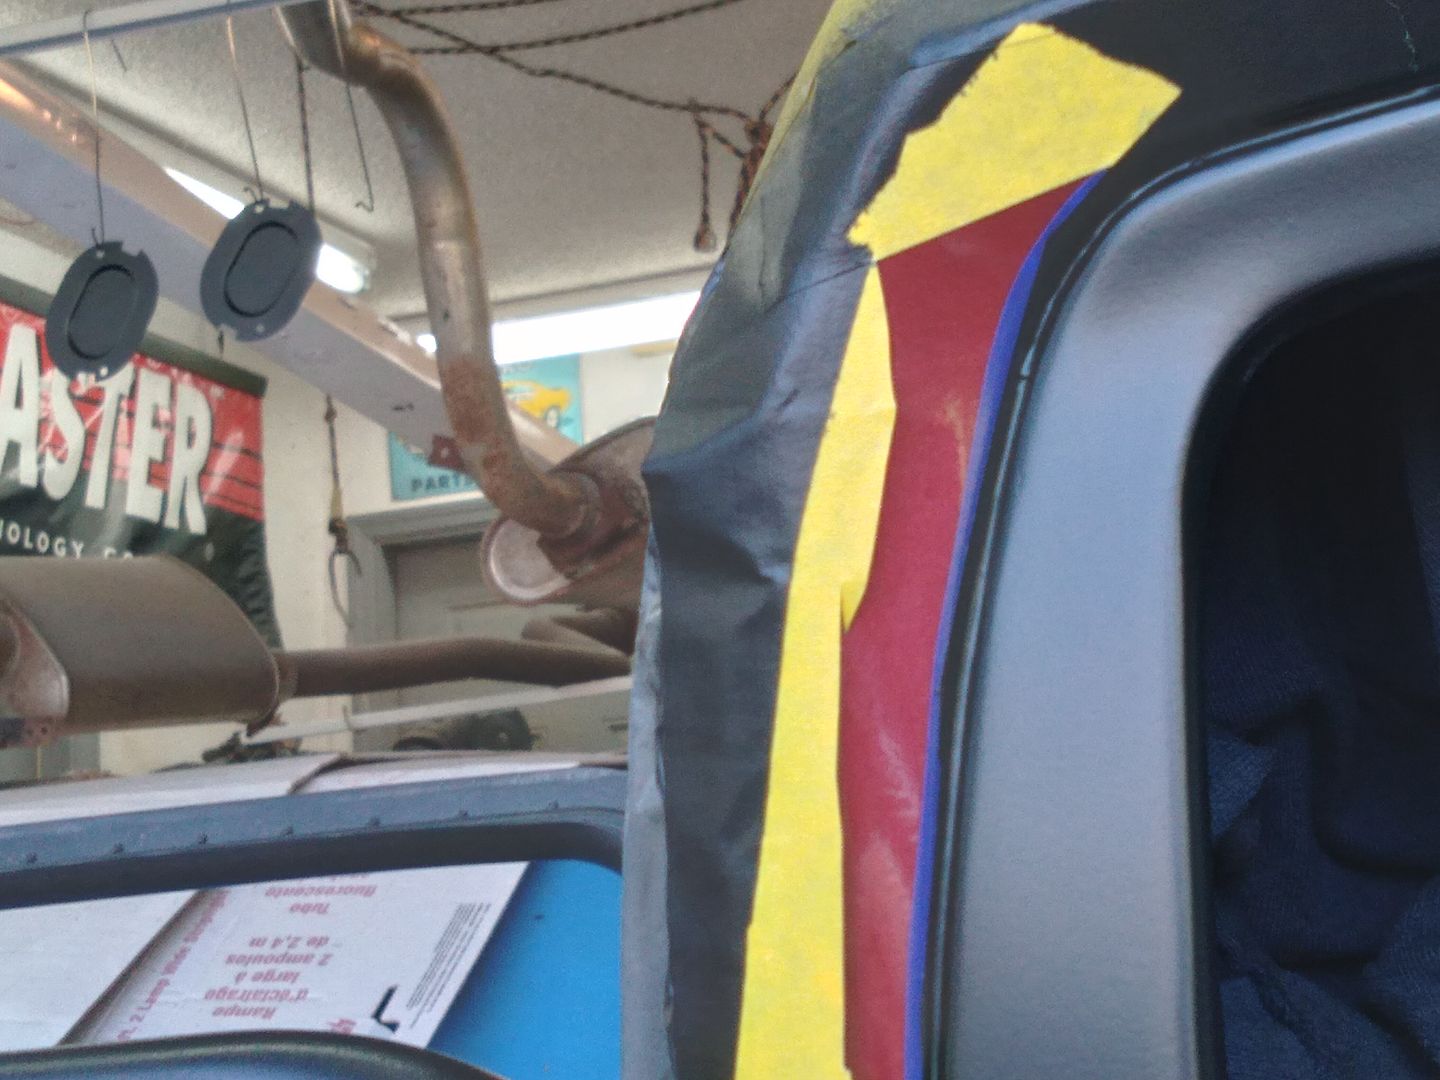
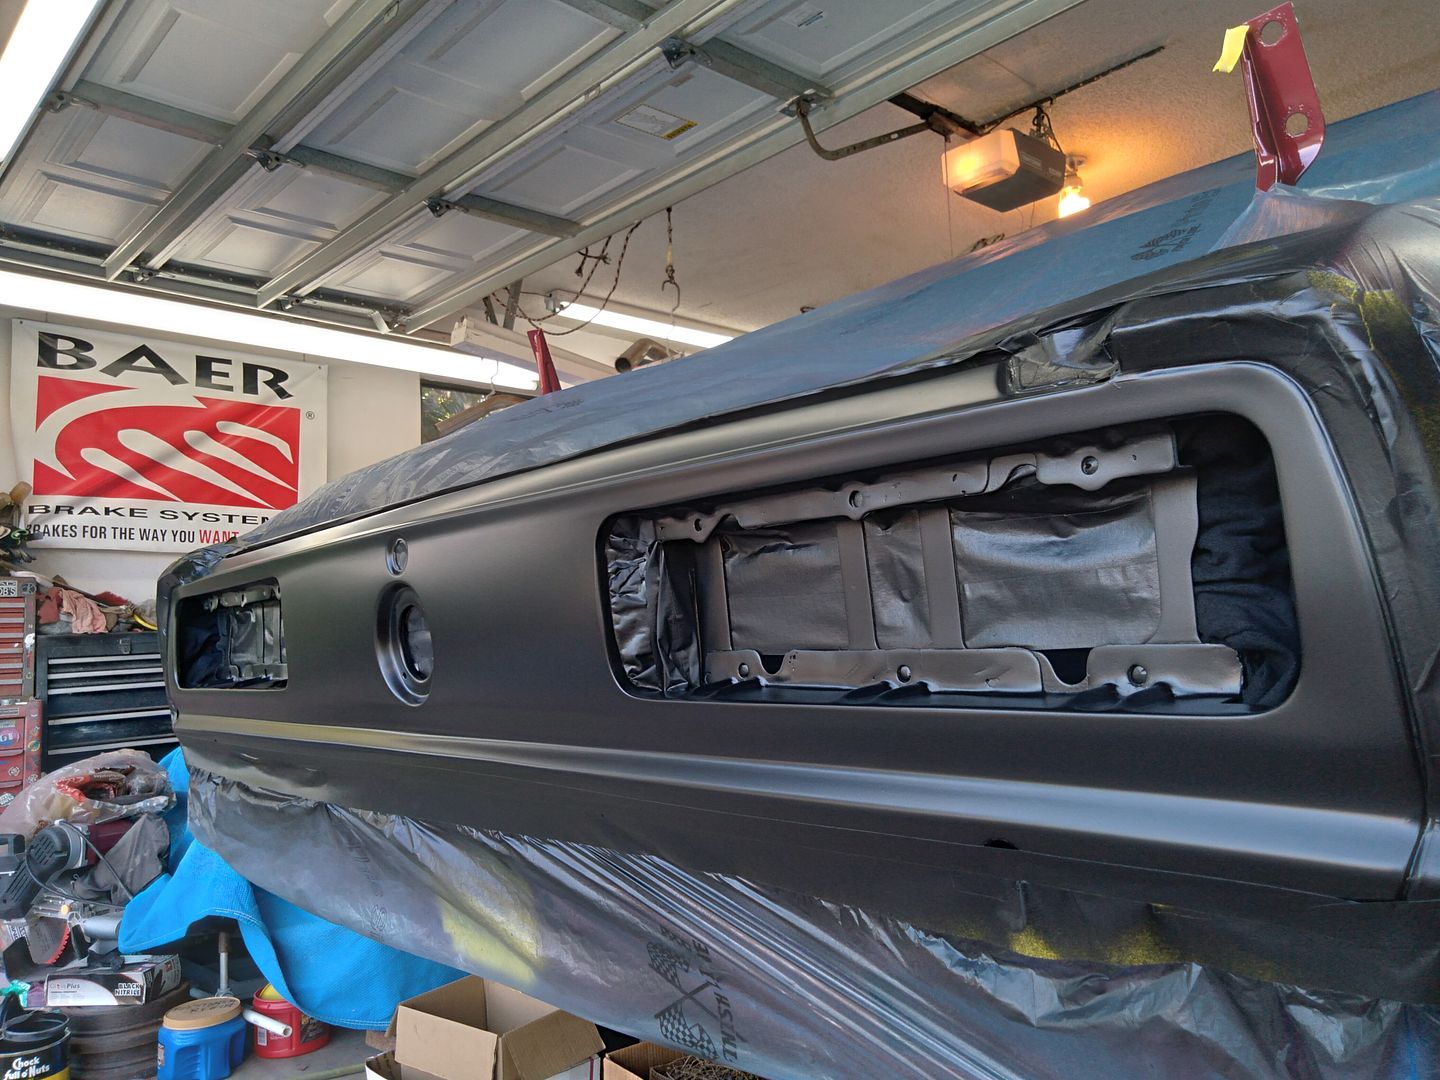
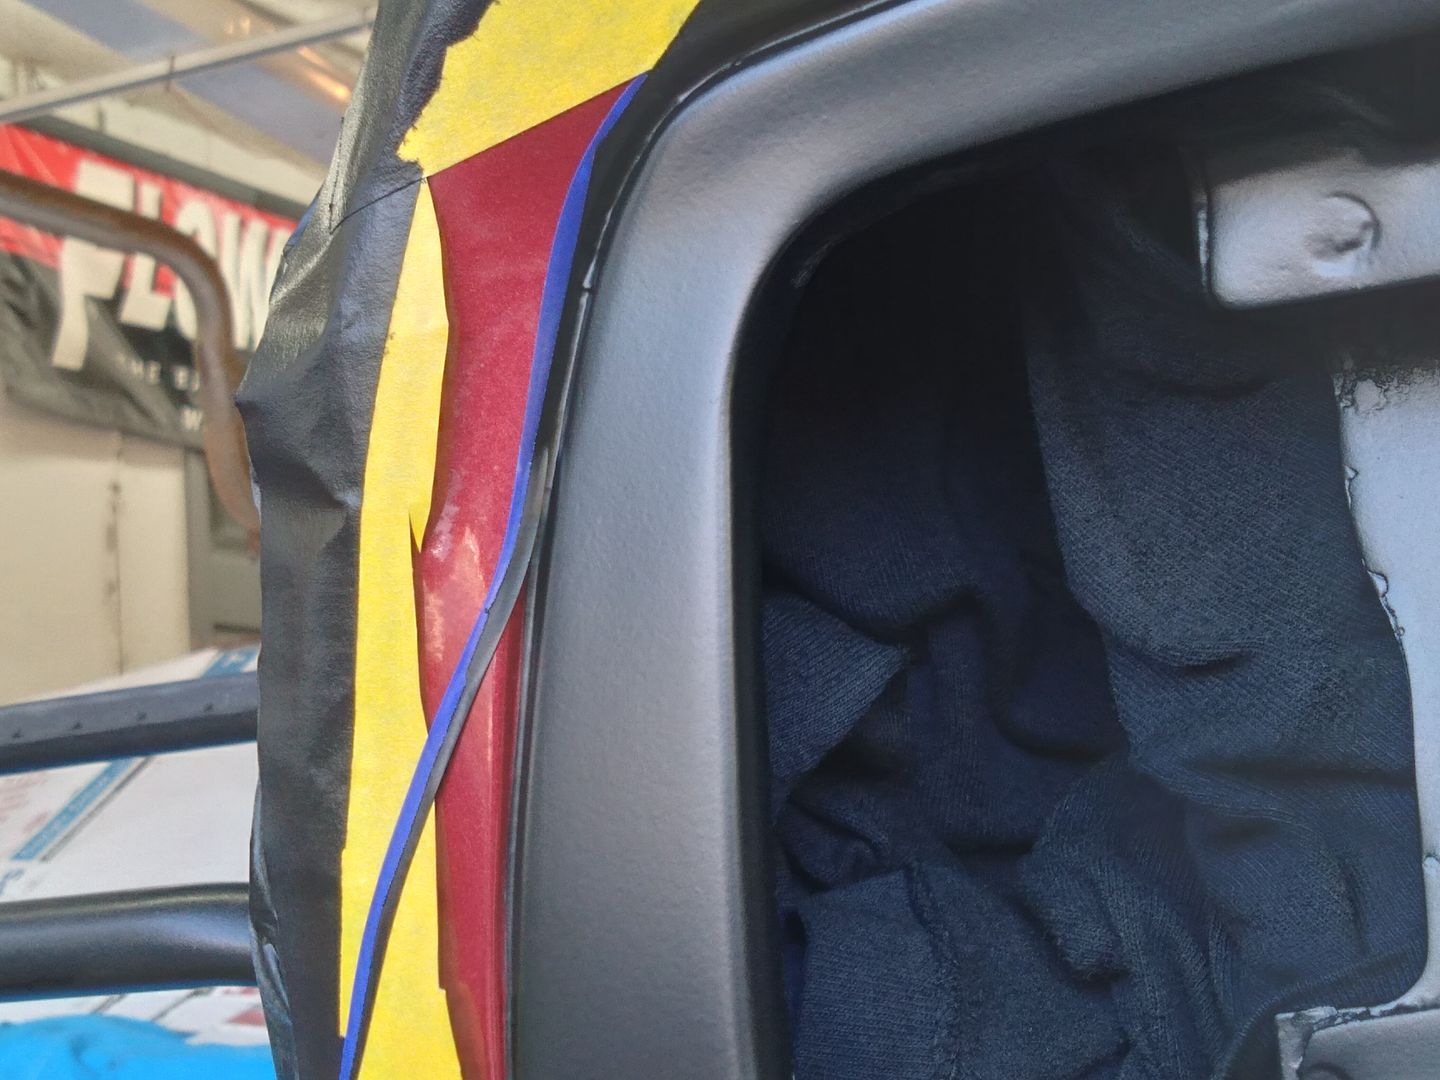
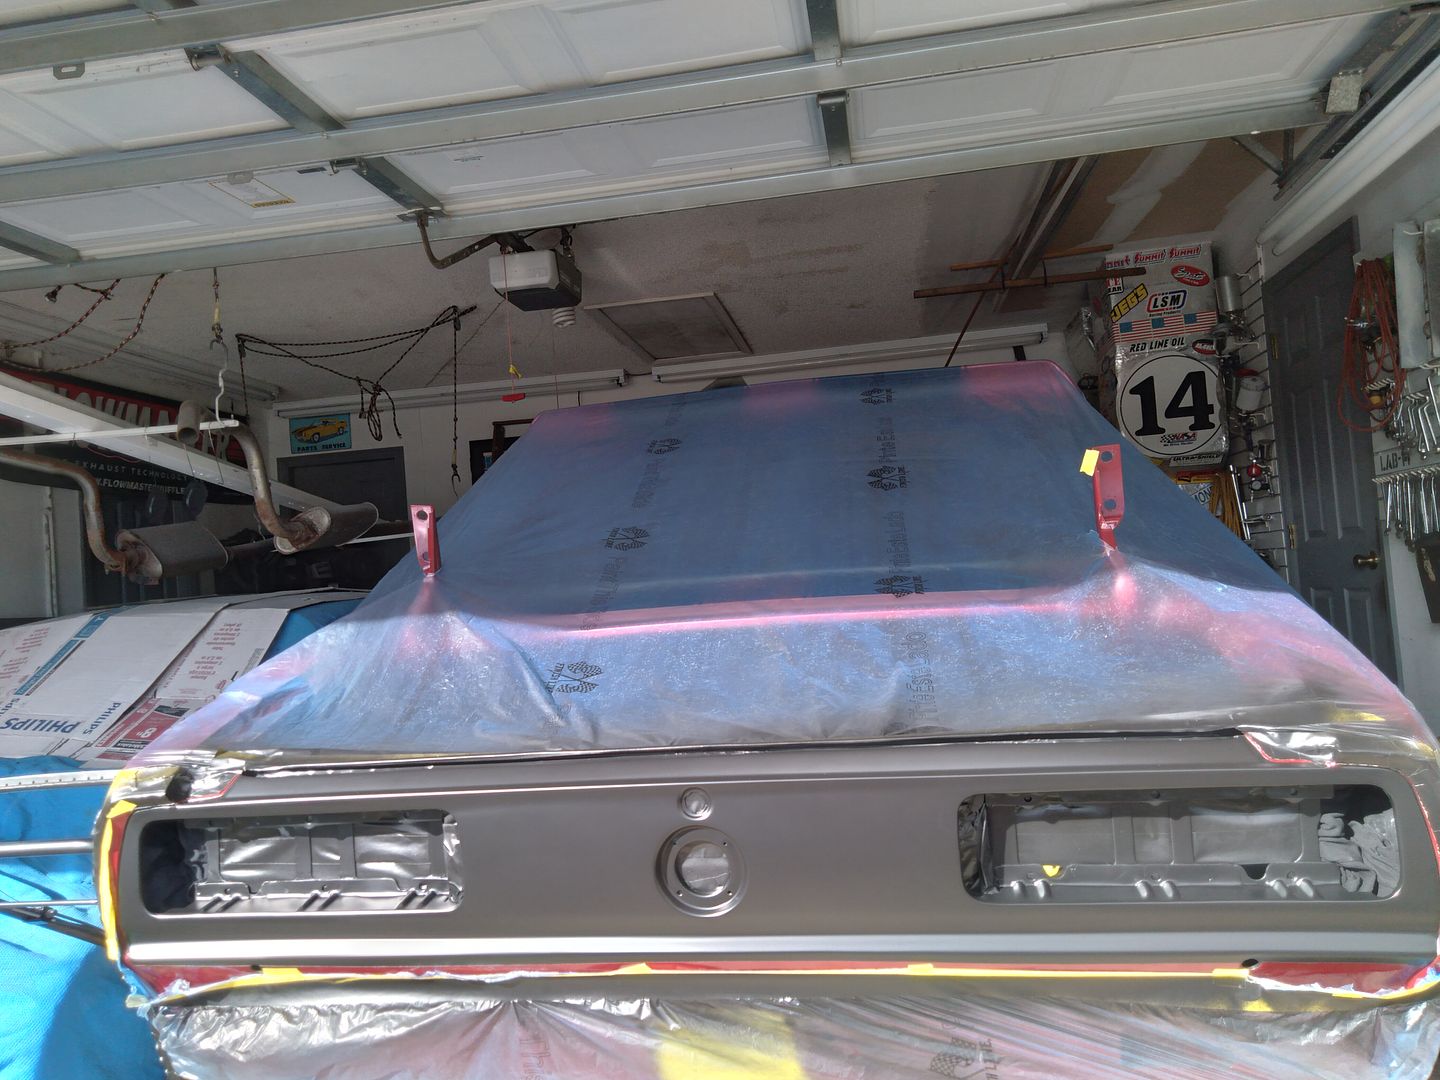
I'd held off painting the tail panel till I needed to cover the whole car again to spray the bottom in epoxy primer so with that done it was time. Cleaned with wax & grease remover, taped off the tail light pockets etc. and taped off the panel. I used 3M 6064 1/8" vinyl tape for the edge that will be seen where the black paint meets the red paint. The thin vinyl tape cuts a sharper line when you remove it than regular masking tape, curves easier, and doesn't allow bleeding like regular masking tape.

I'd purposely painted the (seam sealed) groove where the tail panel meets the quarter panel with red paint when I shot it so I scuffed the edge of the paint line with 320 sandpaper to feather the edge and then went over the whole panel with extra fine Scotch Brite. Cleaned the panel with air gun and then wax & grease remover before wiping it with a tack rag and then shooting it with SEM 39143 Trim Black using a spray can. The panel didn't need enough paint to justify buying a quart of Trim Black and shooting it with a gun so I just used a spray can.

I've used the Trim Black in spray cans many times in the past so I'm familiar with how to get nice even coverage on a panel like this one. Lightly spray the tail light pockets first and let the paint flash off. Next start on one end of the panel and work across the panel spraying a light to medium coat overlapping 50% with spray pattern on a 45 degree angle like this ////// and let flash off. Go right over the tail light pockets, gas filler, etc. without releasing the spray button. Then start at the opposite end repeat with a 45 degree pattern like this \\\\\\ and let flash off. Then shoot a medium coat using a horizontal pattern again going over lights ect. without releasing. Then a final medium/wet coat over the whole panel using a horizontal pattern. After the last coat flashes off remove the thin vinyl tape pulling it back toward itself and away from the fresh paint on an angle. DO NOT leave the thin tape in place for a long time.

Here's the pics!

[URL=https://app.photobucket.com/u/NOTATA/a/4084bbc8-1e50-4486-872e-fbce3ed87549/p/24269ba5-105a-47f5-9f4a-04ca134e8f66][/URL]

[URL=https://app.photobucket.com/u/NOTATA/a/4084bbc8-1e50-4486-872e-fbce3ed87549/p/aeddf890-b945-4015-8fce-49411b7135eb][/URL]

[URL=https://app.photobucket.com/u/NOTATA/a/4084bbc8-1e50-4486-872e-fbce3ed87549/p/4dc8754c-2da7-450d-be52-a764dc458b97][/URL]

[URL=https://app.photobucket.com/u/NOTATA/a/4084bbc8-1e50-4486-872e-fbce3ed87549/p/d453d32f-c7b4-4588-8ca2-785f172e7549][/URL]

[URL=https://app.photobucket.com/u/NOTATA/a/4084bbc8-1e50-4486-872e-fbce3ed87549/p/435e74bb-385e-4e31-95da-dfa146917a60][/URL]

Woody (Forum Supportum)
Woody (Forum Supportum) MegaDork
12/19/20 12:36 p.m.

Very nicely done, and I'm learning a lot here!

759NRNG (Forum Partidario)
759NRNG (Forum Partidario) UltraDork
12/19/20 3:39 p.m.

Dude!!! all this effort and she's outta here!?!?!?!??? holy crap......EXCELLENT WORK !!!......a shame you can't keep her......wait, maybe Guy Fieri from "Diners, Drive Ins, and Dives" might be interested .......wink

Gearheadotaku (Forum Supporter)
Gearheadotaku (Forum Supporter) UltimaDork
12/19/20 4:04 p.m.

Really nice work. I don't really care about "correct", "over restored", etc provided the quality is good. Paint and body is an artform, let the artist do as he pleases.

1 2 3

You'll need to log in to post.

Our Preferred Partners
PRI2L5CkMgUSpjmjVGAzo3i7EID3IeqlK96fkqX19715FAUjKd207IE2U07FUVTB