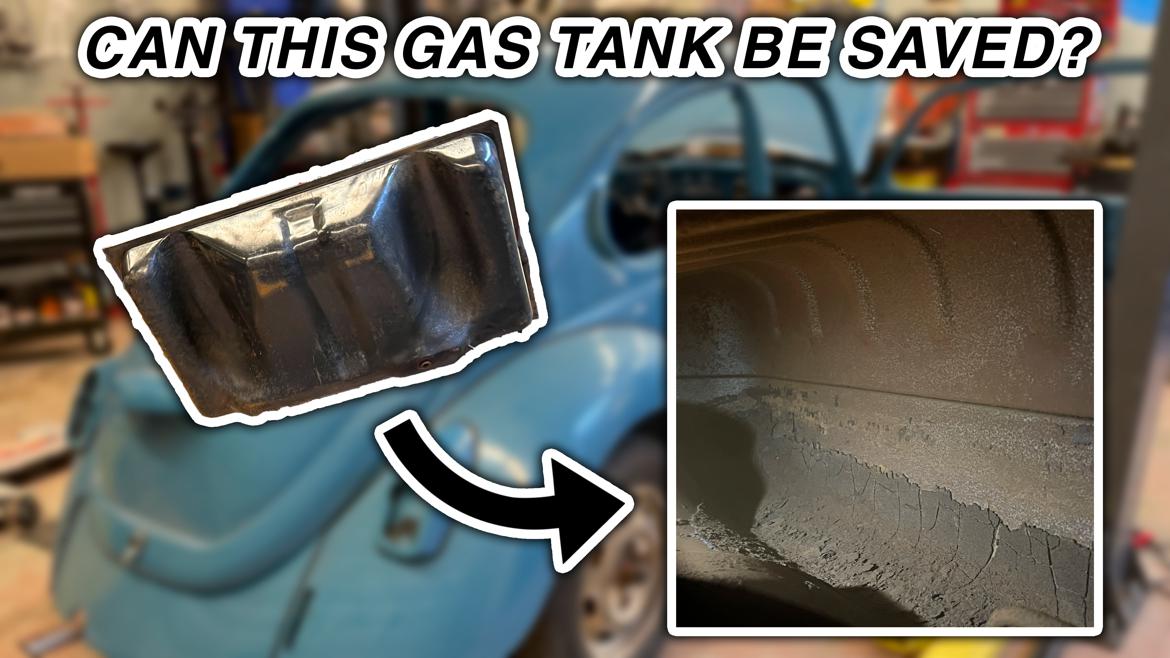
We thought that the gas tank from our Volkswagen Super Beetle was a lost cause. It didn’t sport any holes, but the tank had a lot of corrosion build-up inside; when we tipped over the tank, rust flakes poured out.


We had two solutions.
For $225.95 plus shipping, we could order a reproduction gas tank from JBugs.com.
Or for $70.95 and some sweat equity, we could reseal the tank with the Auto Fuel Tank Sealer Kit from KBS Coatings.
We tried the second option.
The includes everything needed to clean and coat up to a 25-gallon tank while also helping to prevent future rust.
But, you may be thinking, why not just buy the new tank? Parts for Beetles are easily available and usually not that expensive.
The price on the reproduction tank seems like a good deal, but at the same time, every penny adds up. We figured that saving the original tank put another $155 into the restoration budget. (And, we realize, not everyone has the luxury of being able to easily order a new gas tank.)
Step 1:

The instructions stated that the tank needed to be as clean as possible for the product to work best. So, we grabbed some old spare nuts and bolts and threw them in the tank and then shook it to knock loose the big stuff.
Step 2:
To make the tank watertight, we taped up all the vent holes and openings–well, except for one.
Step 3:

We poured in the 1:1 mixture of Auto Fuel Tank Sealer Kit and hot water.
Step 4:
Then we could seal up that last opening and start the first round of cleaning. Every few minutes, we would pick the tank up and shake the mixture to ensure it was evenly distributed throughout the tank.
Step 5:

After about an hour, we opened the tank and poured out the mixture to see what progress had been made.
Step 6:

The tank was looking better but we decided to do another round of cleaning to knock free any last bit of rust and crud.
Step 7:
After emptying the tank, we rinsed it out. Then we let the tank dry overnight.
Step 8:

The next day, after checking that the tank was dry, we poured in the KBS Coatings Rust Blaster. The directions say to let this product soak for 30 to 60 minutes. We decided to go for the full hour to make sure the tank was as clean as possible.
Step 9:
After the hour, it was time to drain the Rust Blaster and thoroughly rinse the tank one last time. Then we let the tank completely before starting the coating process.
Step 10:

Once the tank was completely dry, it was time to apply the Gold Standard Fuel Tank Sealer. The instructions say to pour the contents of the entire can into the tank before working the sealer around the inside of the tank for 30 minutes. Rolling the Beetle’s tank was probably the most difficult step in the entire process, but another set of hands would have helped.
Step 11:
Now we could drain any excess sealer and let the tank dry for a full 48 hours.
Step 12:

Now we could inspect our rejuvenated tank. Inside, it looks like new. We fully expected to have to replace the tank, but the KBS Coatings kit saved it. Other than the time needed for drying between the steps, this was a rather quick process.
Comments
I have used KBS exclusively for a number of years, I have not had any issues with the tanks I have sealed. The most important part of the process is the preparation! The cleaner the inside of the tank is the better the sealer will work, the tank must be clear of any loose debris. For larger tanks I have used an engine stand as a makeshift rotisserie to make it easier to distribute the sealer inside the tank. I also use a Metro blower (used for drying cars) to dry the inside of the tank before using the sealer, the inside of the tank must be clean and dry for the sealer to work properly. I normally let the sealer dry for a minimum of a week before reinstalling it.
Displaying 1-1 of 1 commentsView all comments on the CMS forums
You'll need to log in to post.


